

In Profit.co, you can create Workspaces and Boards within the Task module to logically organize tasks, group them under specific Objectives or Key Results, and control team visibility — keeping all your work structured and accessible.
Table of Contents
- What are Workspaces and Boards in Profit.co?
- What visibility options are available for a Workspace in Profit.co?
- How to create a Workspace in Profit.co?
- How to create and configure a Board in Profit.co?
- Workspaces and Boards Scenarios and Their Outcomes
- Best Practices for Managing Workspaces and Boards
- Related Questions
- Frequently Asked Questions
What are Workspaces and Boards in Profit.co?
A Workspace in Profit.co is a high-level organizational container that groups related Boards, tasks, and notes together under a common purpose — such as a team, department, or project.
A Board lives inside a Workspace and is where individual tasks are created, managed, and tracked. Each Board can be configured with custom stages and checklists to match your team's workflow.
What visibility options are available for a Workspace in Profit.co?
When creating a Workspace, you can control who has access to it using the following visibility settings:
| Visibility Option | Description |
|---|---|
| Public | The Workspace is visible to all users in the organization |
| Access List | The Workspace is restricted to specific members you add to the access list |
How to create a Workspace in Profit.co?
Follow these steps to create a new Workspace in Profit.co:
Step 1
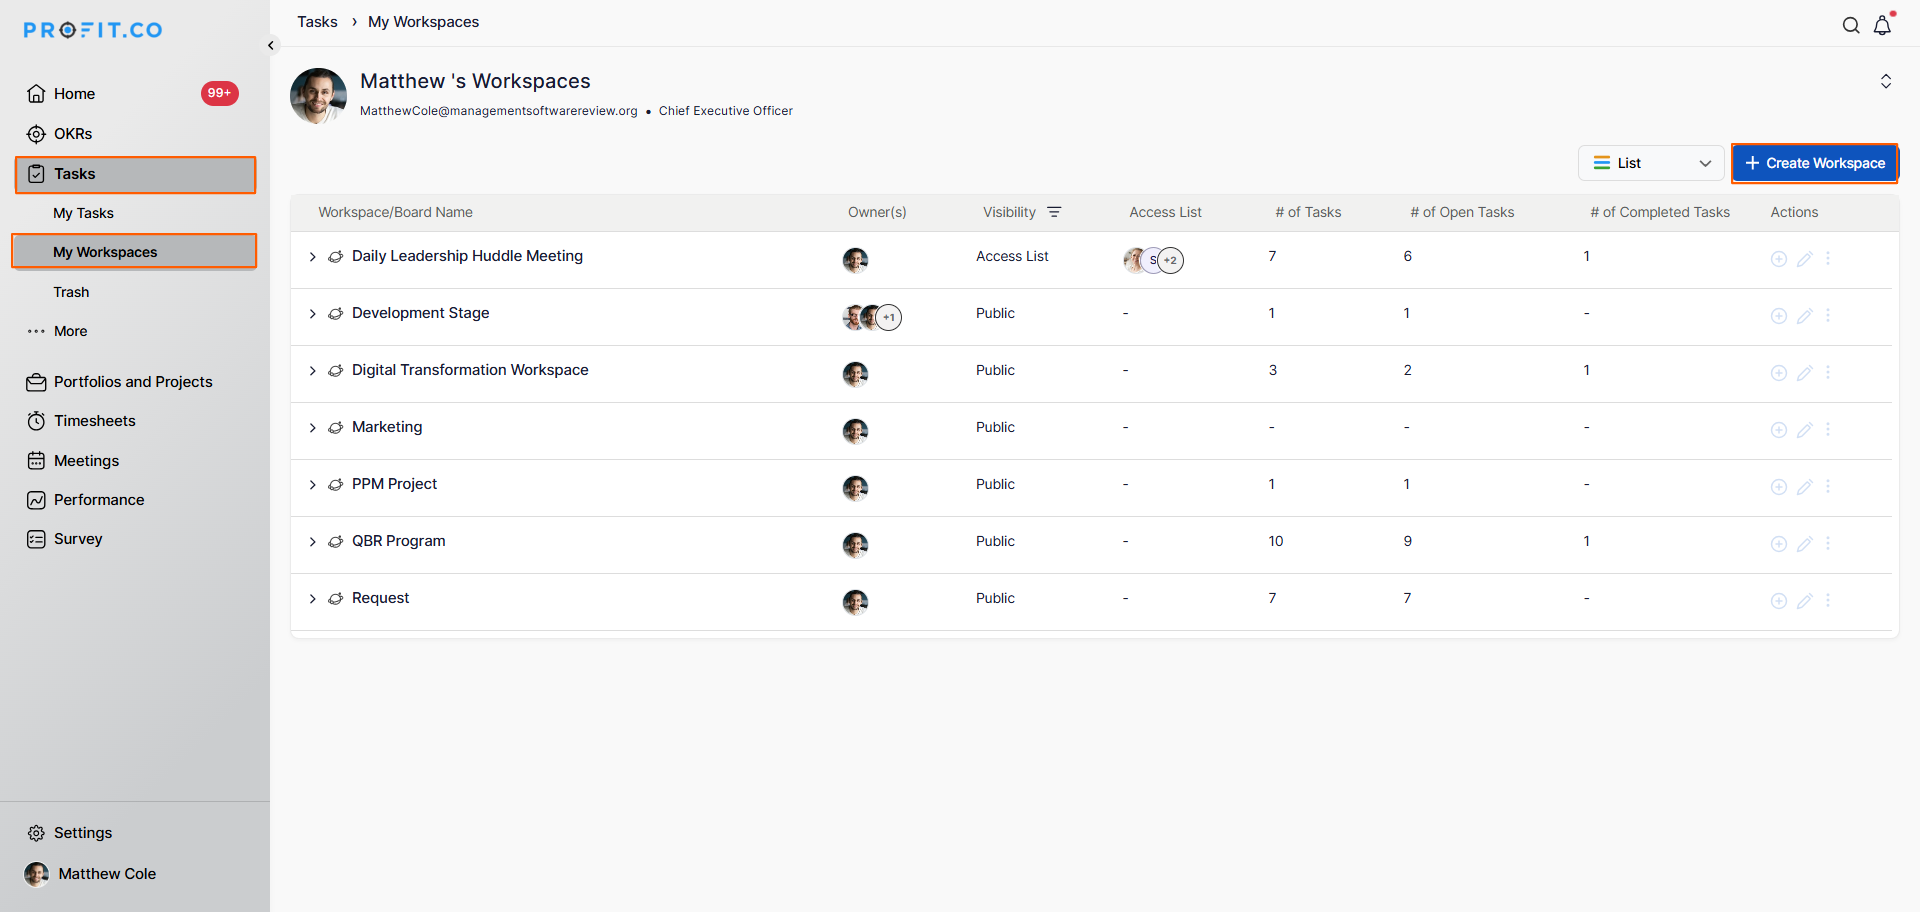
- Go to Task → My Workspaces from the left navigation panel.
- Click the + Create Workspace button.
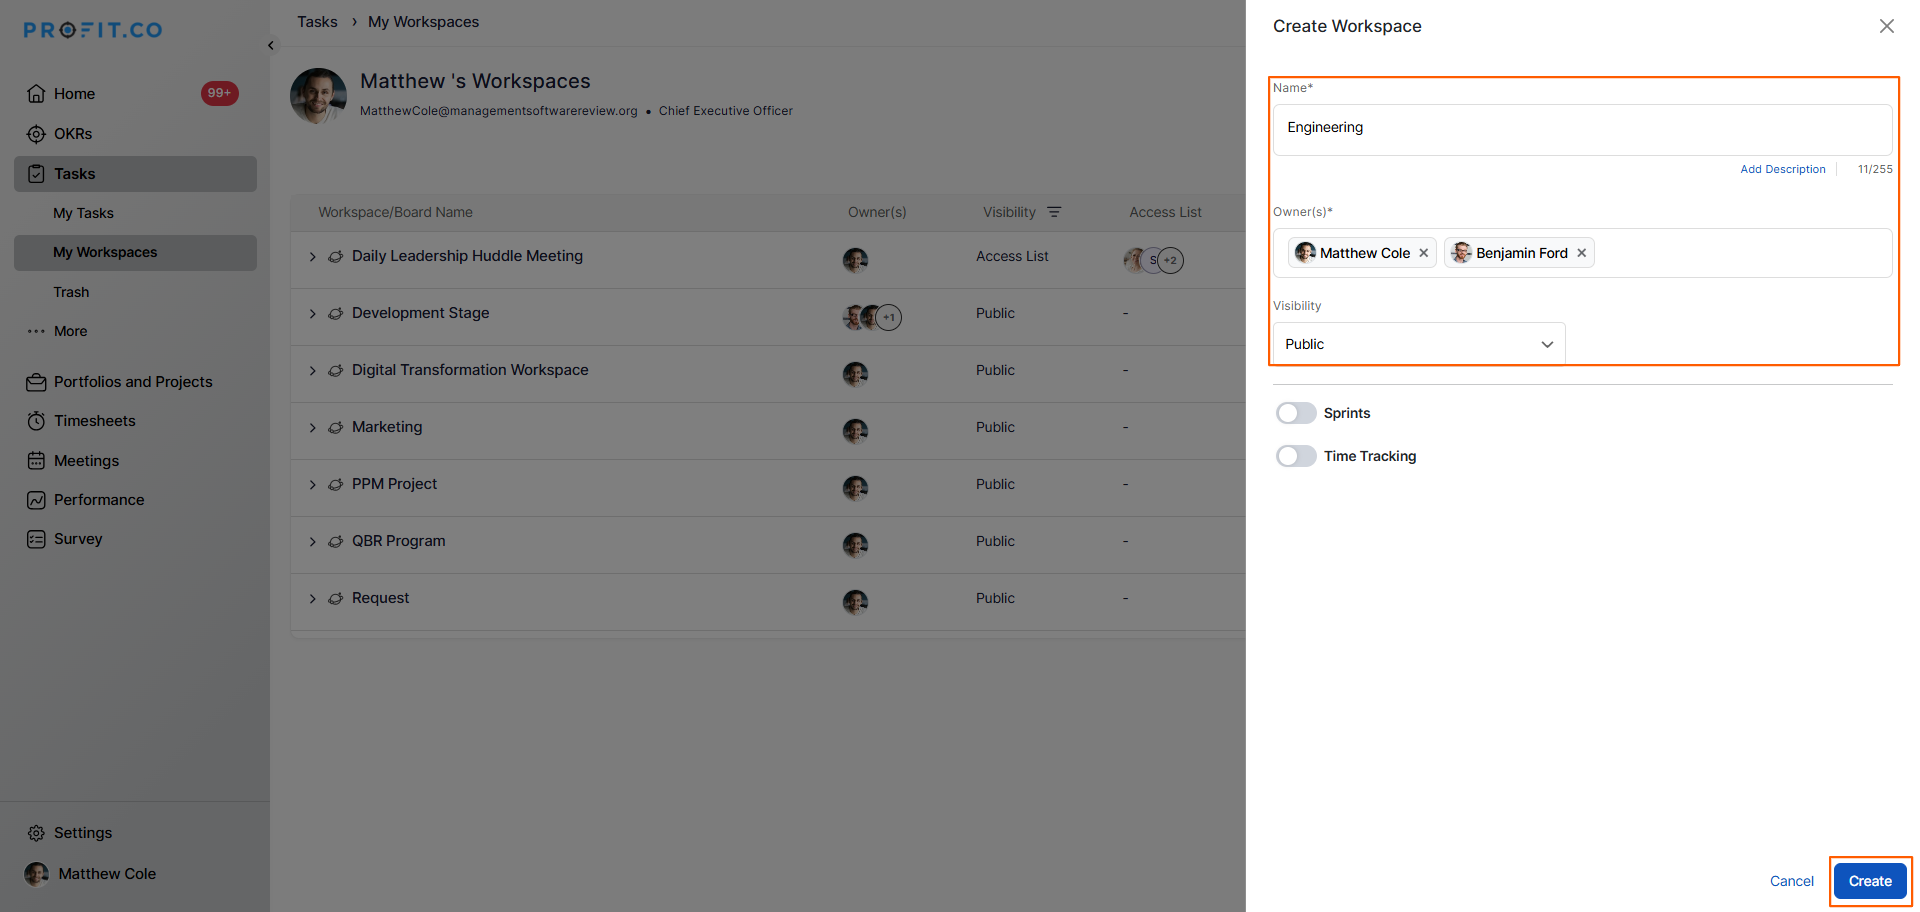
- Enter the Workspace Name and an optional Description.
- Set the Owner for the Workspace.
- Choose the visibility; set it to Public or Access List.
- If Access List is selected, add the specific members who should have access.
- Click Create to save.
Your new Workspace will now appear in the left navigation panel under Tasks.
Note
Once a workspace is created, a default board is automatically created inside it.
How to create and configure a Board in Profit.co?
Once a Workspace is created, a default Board is generated automatically. You can configure this Board or create additional Boards as needed.
Step 1
- Click on the Default Board inside your Workspace to open it.
- On the Edit Board page, enable Stages to define workflow steps such as Backlog, In Progress, In Review, and Done.
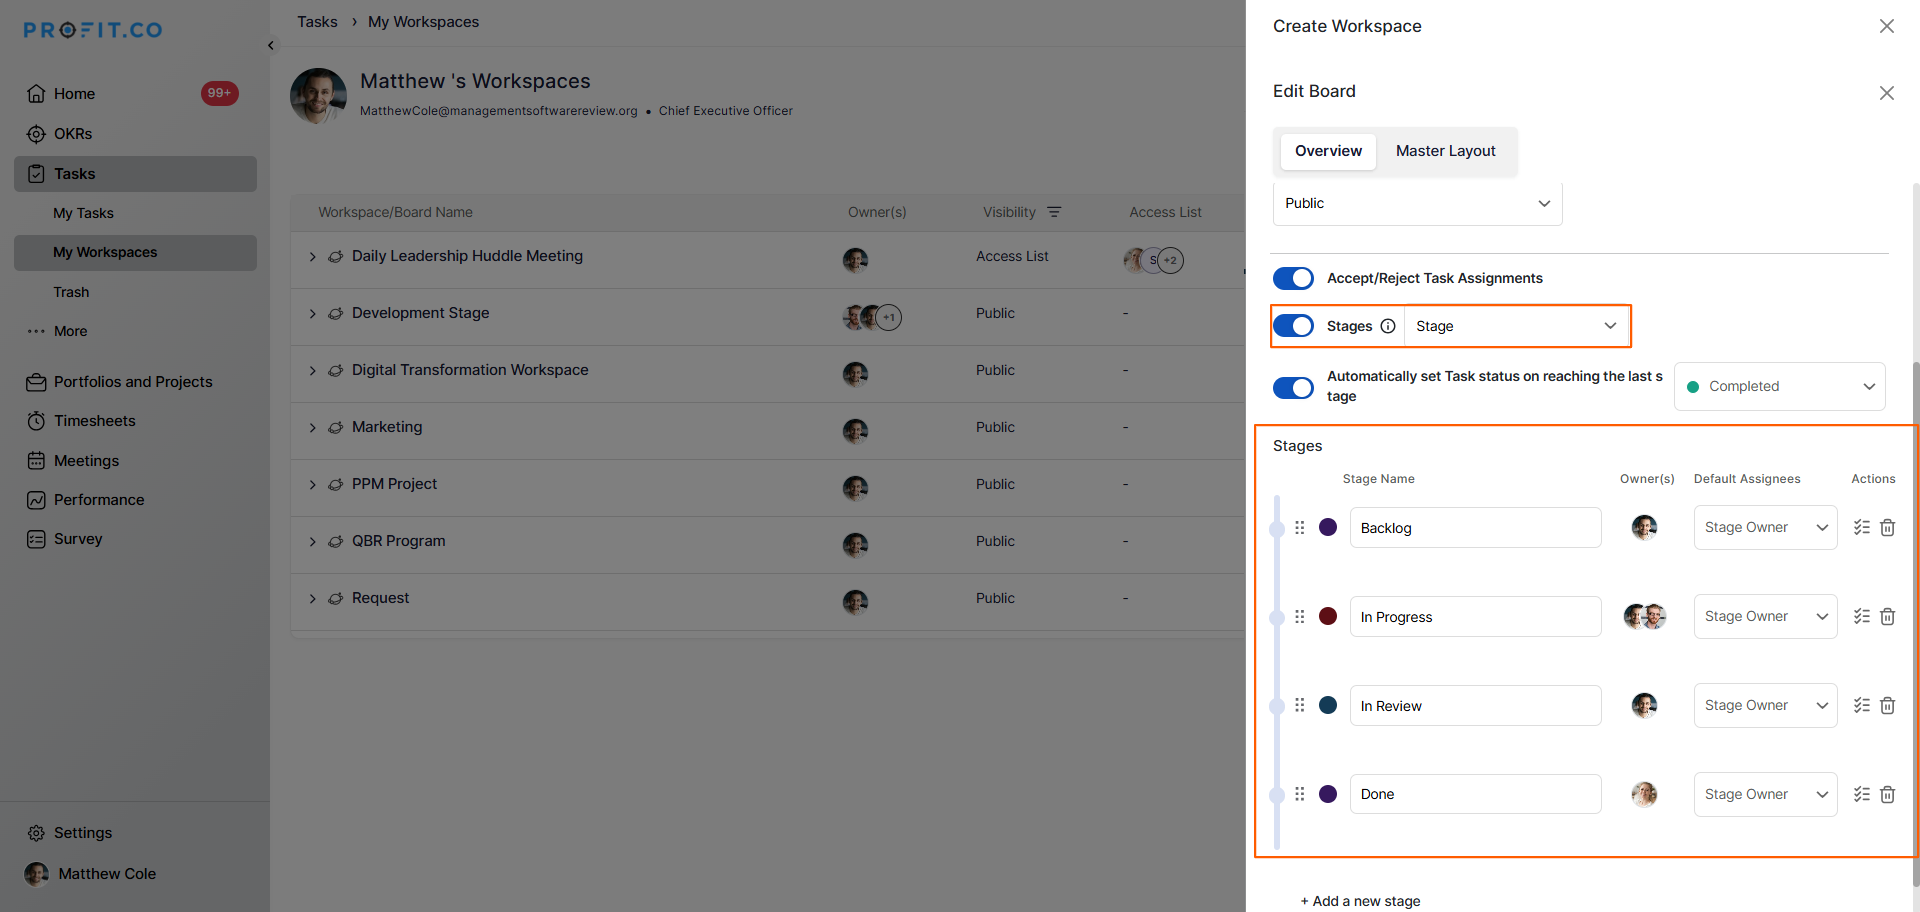
Create a checklist within the Board if needed to track task completion criteria.
Note
You can create any number of Boards within a single Workspace to organize different types of work or team workflows.
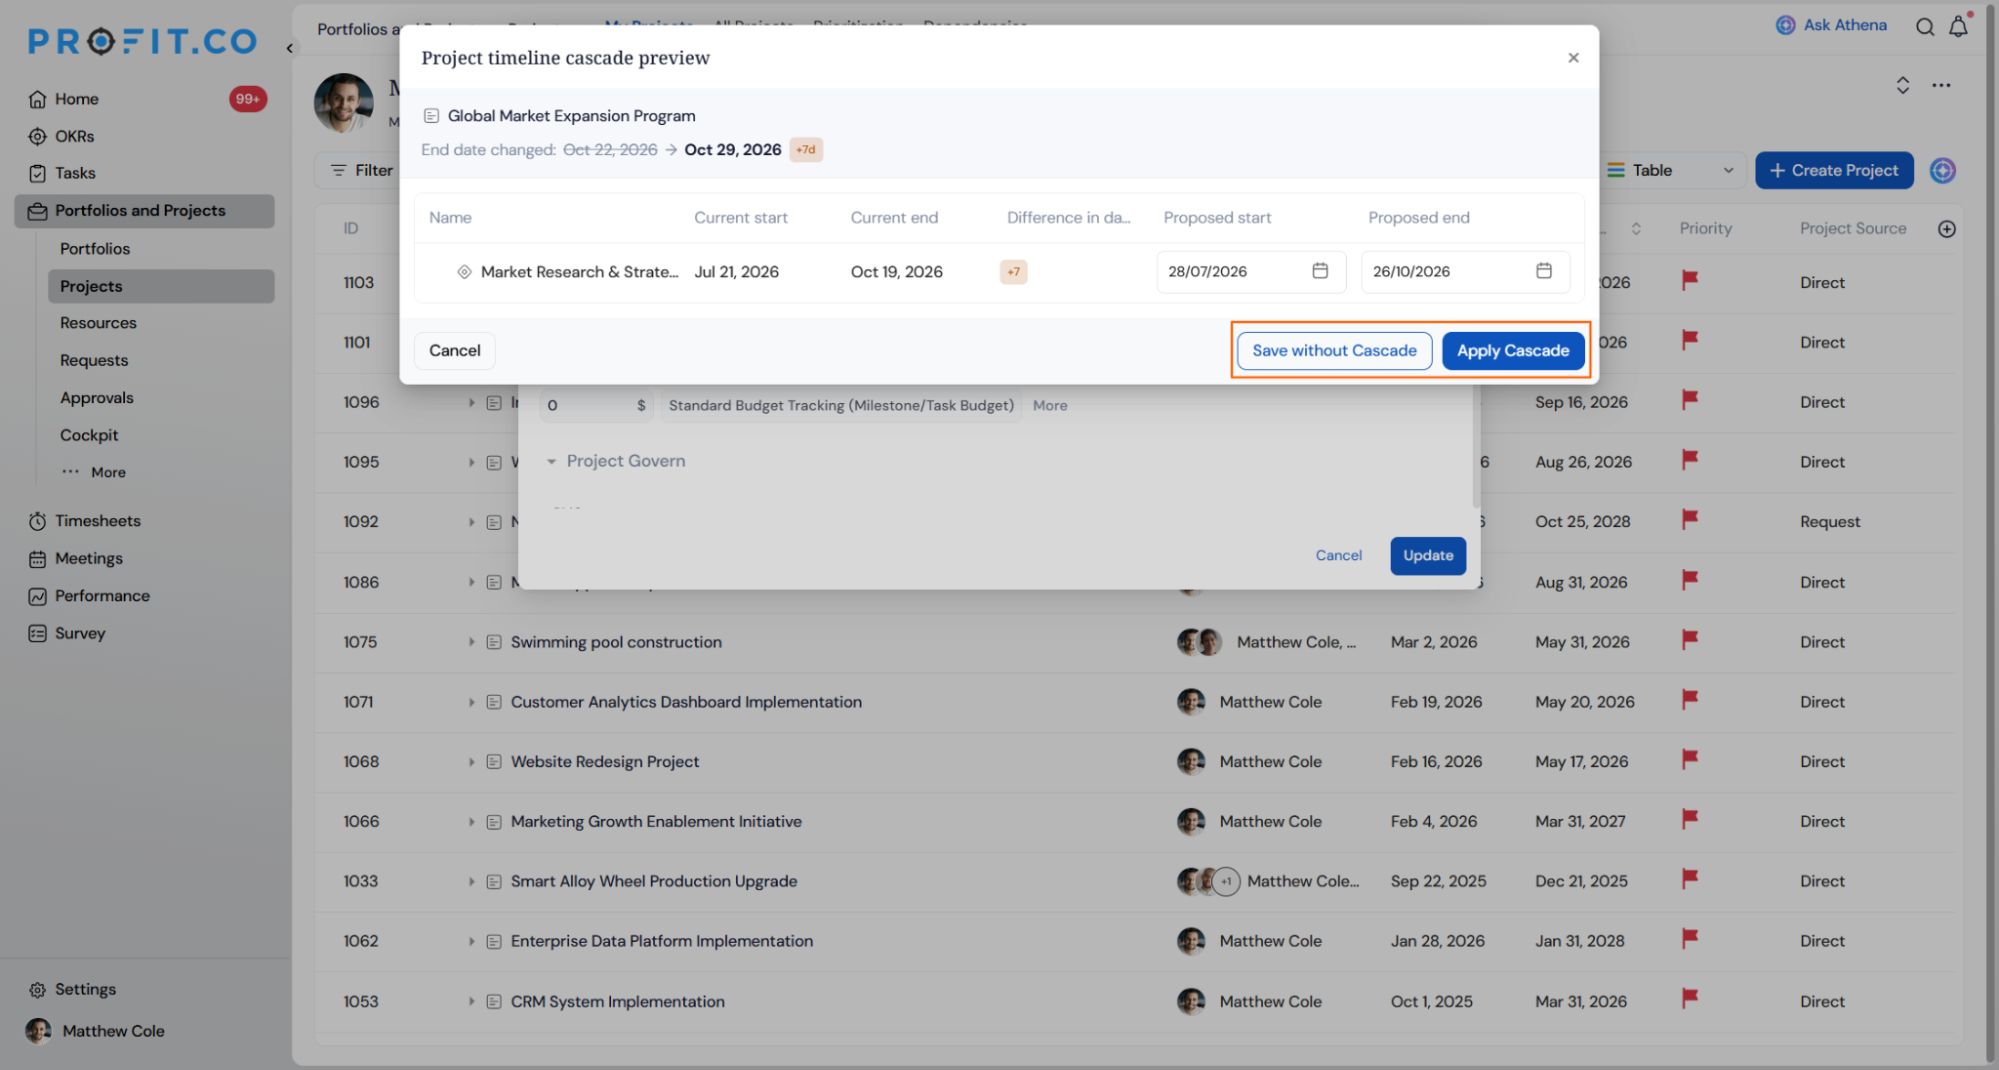
If the person you add is not already part of the parent workspace, choose Cancel to add them as a board owner only, or Add to workspace also to grant them workspace owner access.
Workspaces and Boards Scenarios and Their Outcomes
Creating a Workspace and assigning board owners each trigger specific, confirmed results. The table below covers what happens in each case.
| Scenario | What Happens |
|---|---|
| You create a new Workspace. | Profit.co automatically creates a default Board inside it, so you have a Board ready before adding tasks. |
| You add someone as a board owner who is already an owner at the workspace level. | Profit.co doesn't display a confirmation prompt, since workspace owners are automatically treated as board owners by default across every board in that workspace. |
| You add someone as a board owner who isn't part of the parent workspace and choose Cancel. | Profit.co adds the person as a board owner only, without granting workspace owner access. |
| You add someone as a board owner who isn't part of the parent workspace and choose Add to workspace. | Profit.co adds the person as both a board owner and a workspace owner, granting access to all boards in that workspace. |
| You dismiss the board owner confirmation prompt without choosing an option. | Profit.co discards the action, and the person is not added as a board owner or a workspace owner. |
| You complete either path on the board owner confirmation prompt. | Profit.co does not send a notification to the added person, regardless of which option is chosen. |
Best Practices for Managing Workspaces and Boards
- Create one Workspace per team, department, or major project to keep tasks logically separated.
- Use the Access List visibility option for Workspaces that contain sensitive or team-specific work.
- Configure Board stages that reflect your actual workflow to make task tracking more meaningful.
- Use the Notes feature within each Workspace to document decisions, meeting outcomes, and key context alongside the tasks.
- Create multiple Boards within a Workspace to separate different workstreams — for example, one Board for ongoing tasks and another for sprint-based work.
Related Questions
Frequently Asked Questions
Navigate to Task → Workspaces from the left navigation panel, click + Create Workspace, fill in the name, description, owner, and visibility settings, then click Create.
Yes. Profit.co automatically creates a default Board inside every new Workspace. You can configure it or create additional Boards as needed.
Yes. When creating a Workspace, set the visibility to Access List and add only the specific members who should have access to it.
Execute your strategy with confidence
Connect OKRs, tasks, and teams in one place with Profit.co
