

Profit.co lets users create a project within the Project Portfolio Management (PPM) module to define objectives, structure tasks, and monitor progress. Project creation now also includes governance and value-scoring fields, an approval step, and a way to save any project or portfolio as a reusable template.
Table of Contents
- Why This Feature?
- What Details Are Required to Create a Project in Profit.co?
- What Are Milestones and Tasks in a Project?
- How to Create a Project in the PPM Module
- How to Save a Portfolio or Project as a Template
- Project Creation and Template Scenarios and Their Outcomes
- Best Practices for Creating Projects in the PPM Module
- Related Questions
- Frequently Asked Questions
Why This Feature?
Creating projects within the PPM module helps streamline project setup and execution by:
- Defining clear objectives, timelines, and milestones to keep teams aligned.
- Breaking down large initiatives into manageable tasks for easier tracking.
- Assigning ownership and setting accountability for each stage of the project.
This structured approach enables efficient collaboration, progress visibility, and on-time delivery of outcomes.
What Details Are Required to Create a Project in Profit.co?
When creating a project, you specify the core scope fields below, along with governance and value-scoring fields introduced in the latest release.
| Field | Description |
|---|---|
| Project Name | Title or name of the project. |
| Project Code | A unique identifier for the project. |
| Portfolio | The parent portfolio under which the project is managed. |
| Timeline | Start and end dates of the project. |
| Priority | Urgency flag for the project, such as High. |
| Tags | Labels used to categorize and filter the project. |
| Project Lifecycle Tollgate | The tollgate stage the project is linked to for governance tracking. |
| PMO (Project Govern) | The PMO group responsible for governing the project. |
| Value Dimensions | Ratings for expected financial impact, strategic importance, and customer value. |
| Complexity Dimensions | Ratings for technical challenge, resource level, and risk of timeline delays. |
| Billing Type | Choose between Billable or Non-billable. |
| Budget | Specify the total estimated cost for the project. |
| Closure Information | Define criteria or notes for project completion. |
Note
Only Super Users and PPM Admin can create or manage projects in the PPM module.
What Are Milestones and Tasks in a Project?
- Milestones are significant checkpoints representing major deliverables or goals within a project.
- Tasks are smaller, actionable steps required to achieve milestones.
- Each task can be assigned an owner, status, and progress percentage, which automatically updates the overall milestone completion rate.
Example: For a "Product Launch" project, milestones may include Design Completion, Testing Phase, and Launch Execution. Each milestone can contain tasks like UI Design, QA Testing, or Marketing Campaign Setup.
How to Create a Project in the PPM Module
Follow the steps below to create a project and organize milestones and tasks.
Step 1
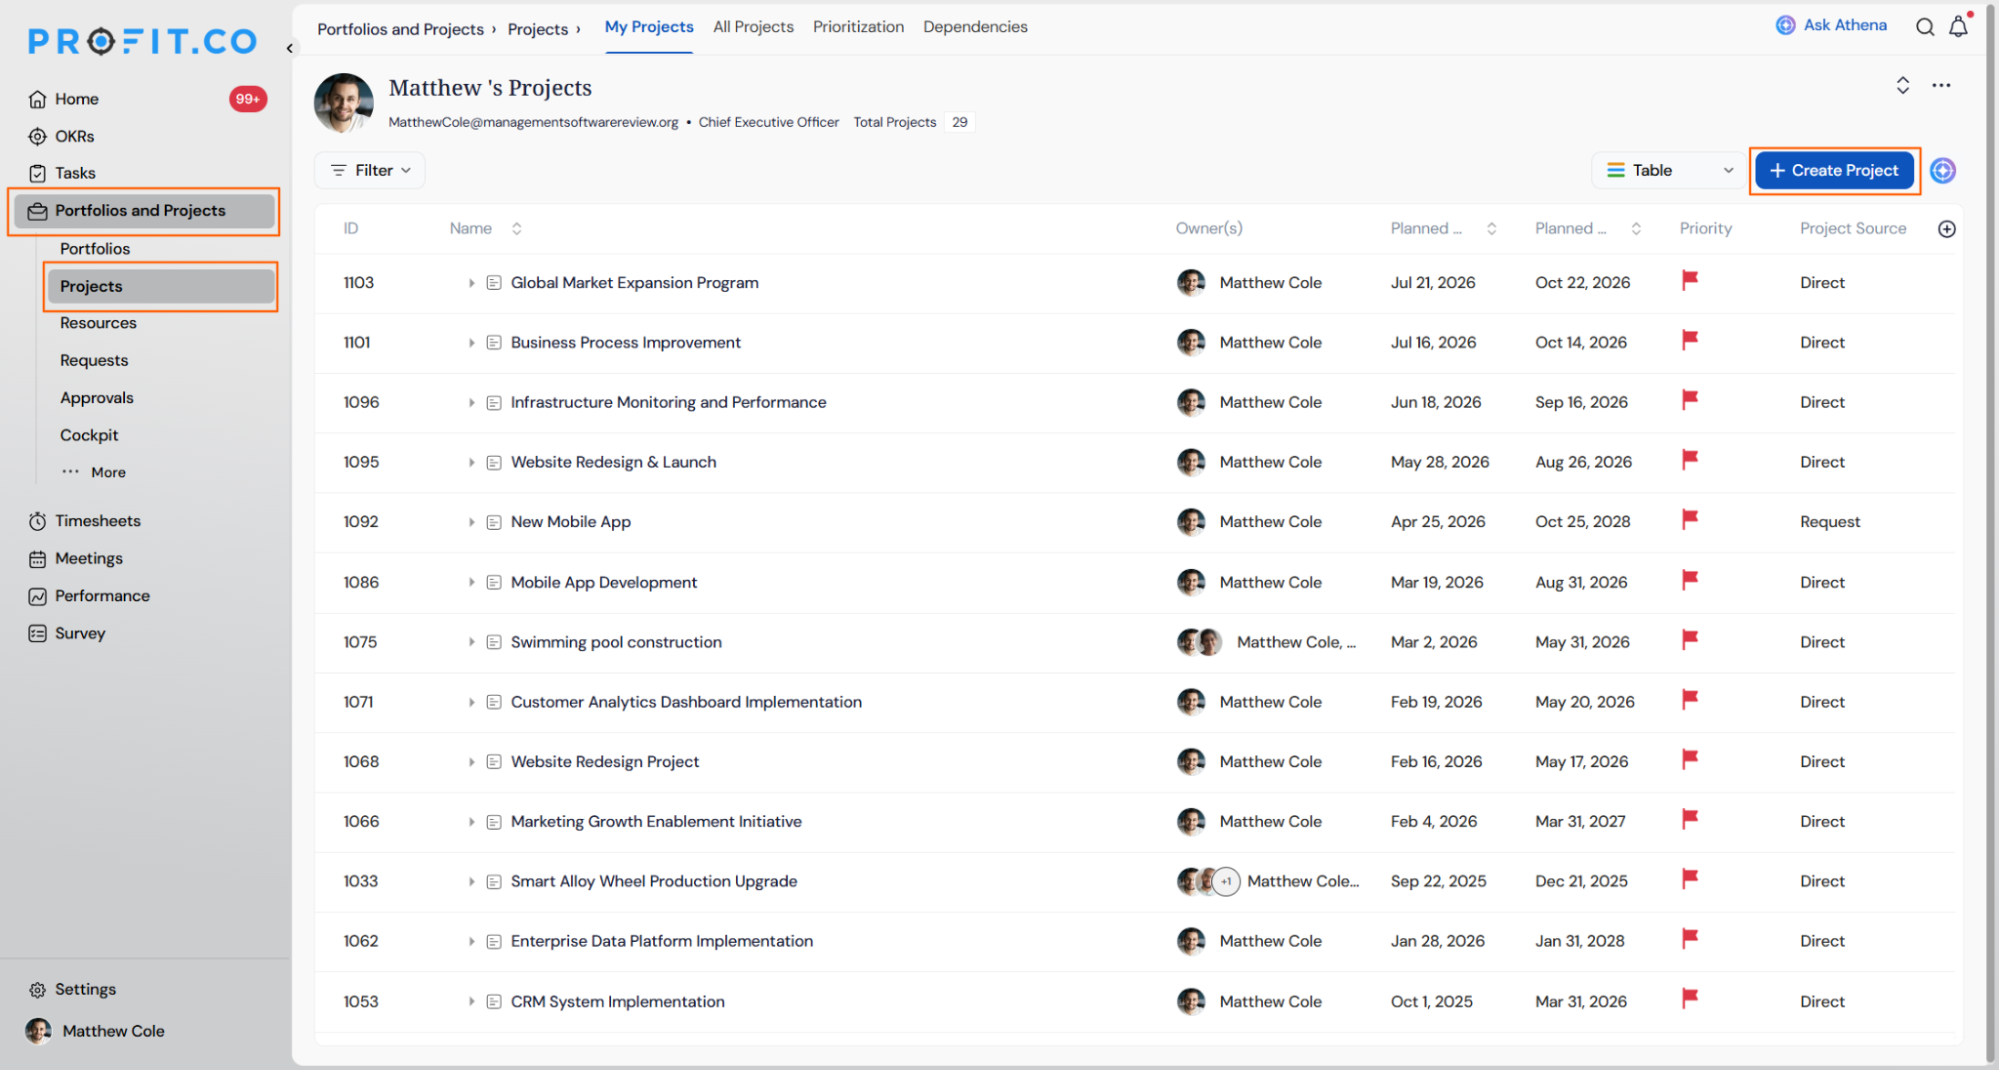
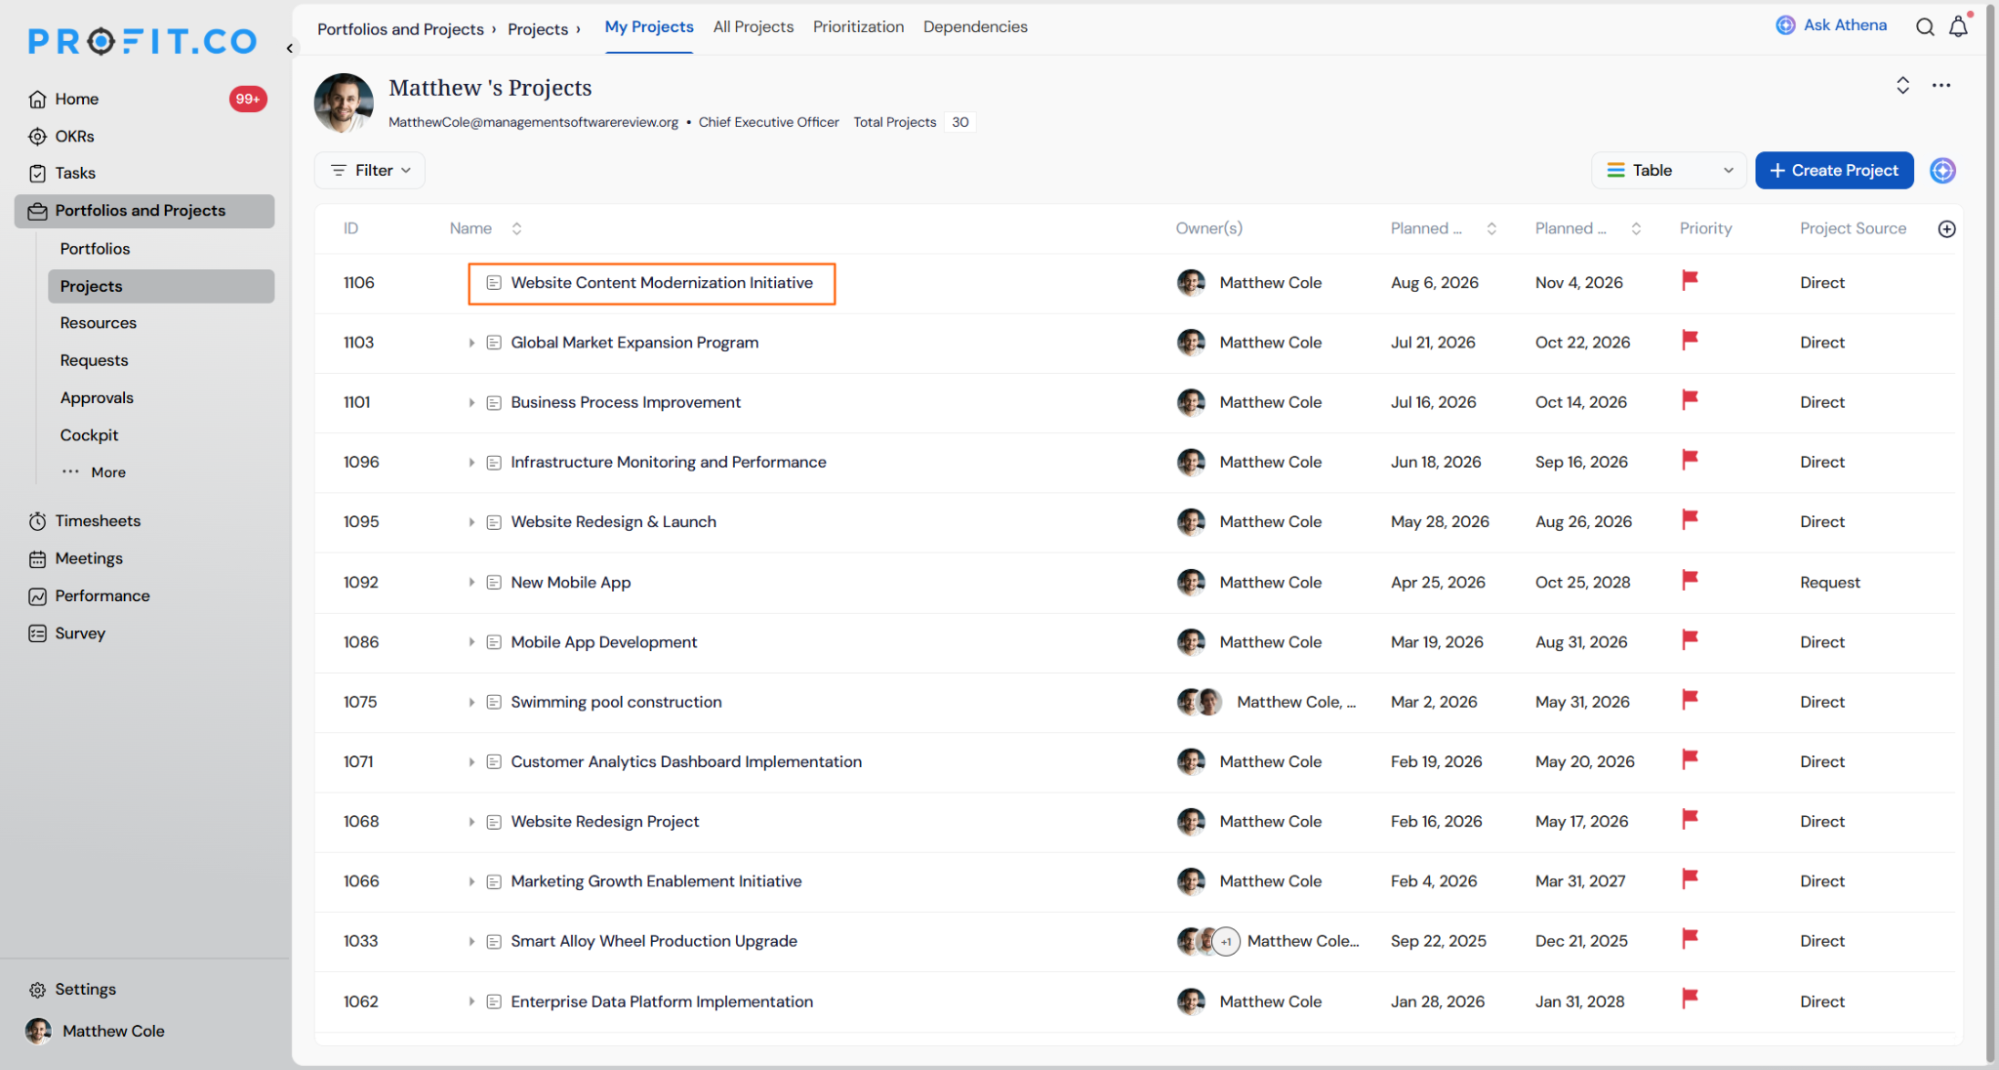
- Navigate to Portfolios and Projects → All Projects from the left navigation panel.
- Click the + Create Project button.
This step involves defining your project's objectives, scope, timelines, and milestones. It formalizes your plan and ensures alignment among stakeholders.
Step 2
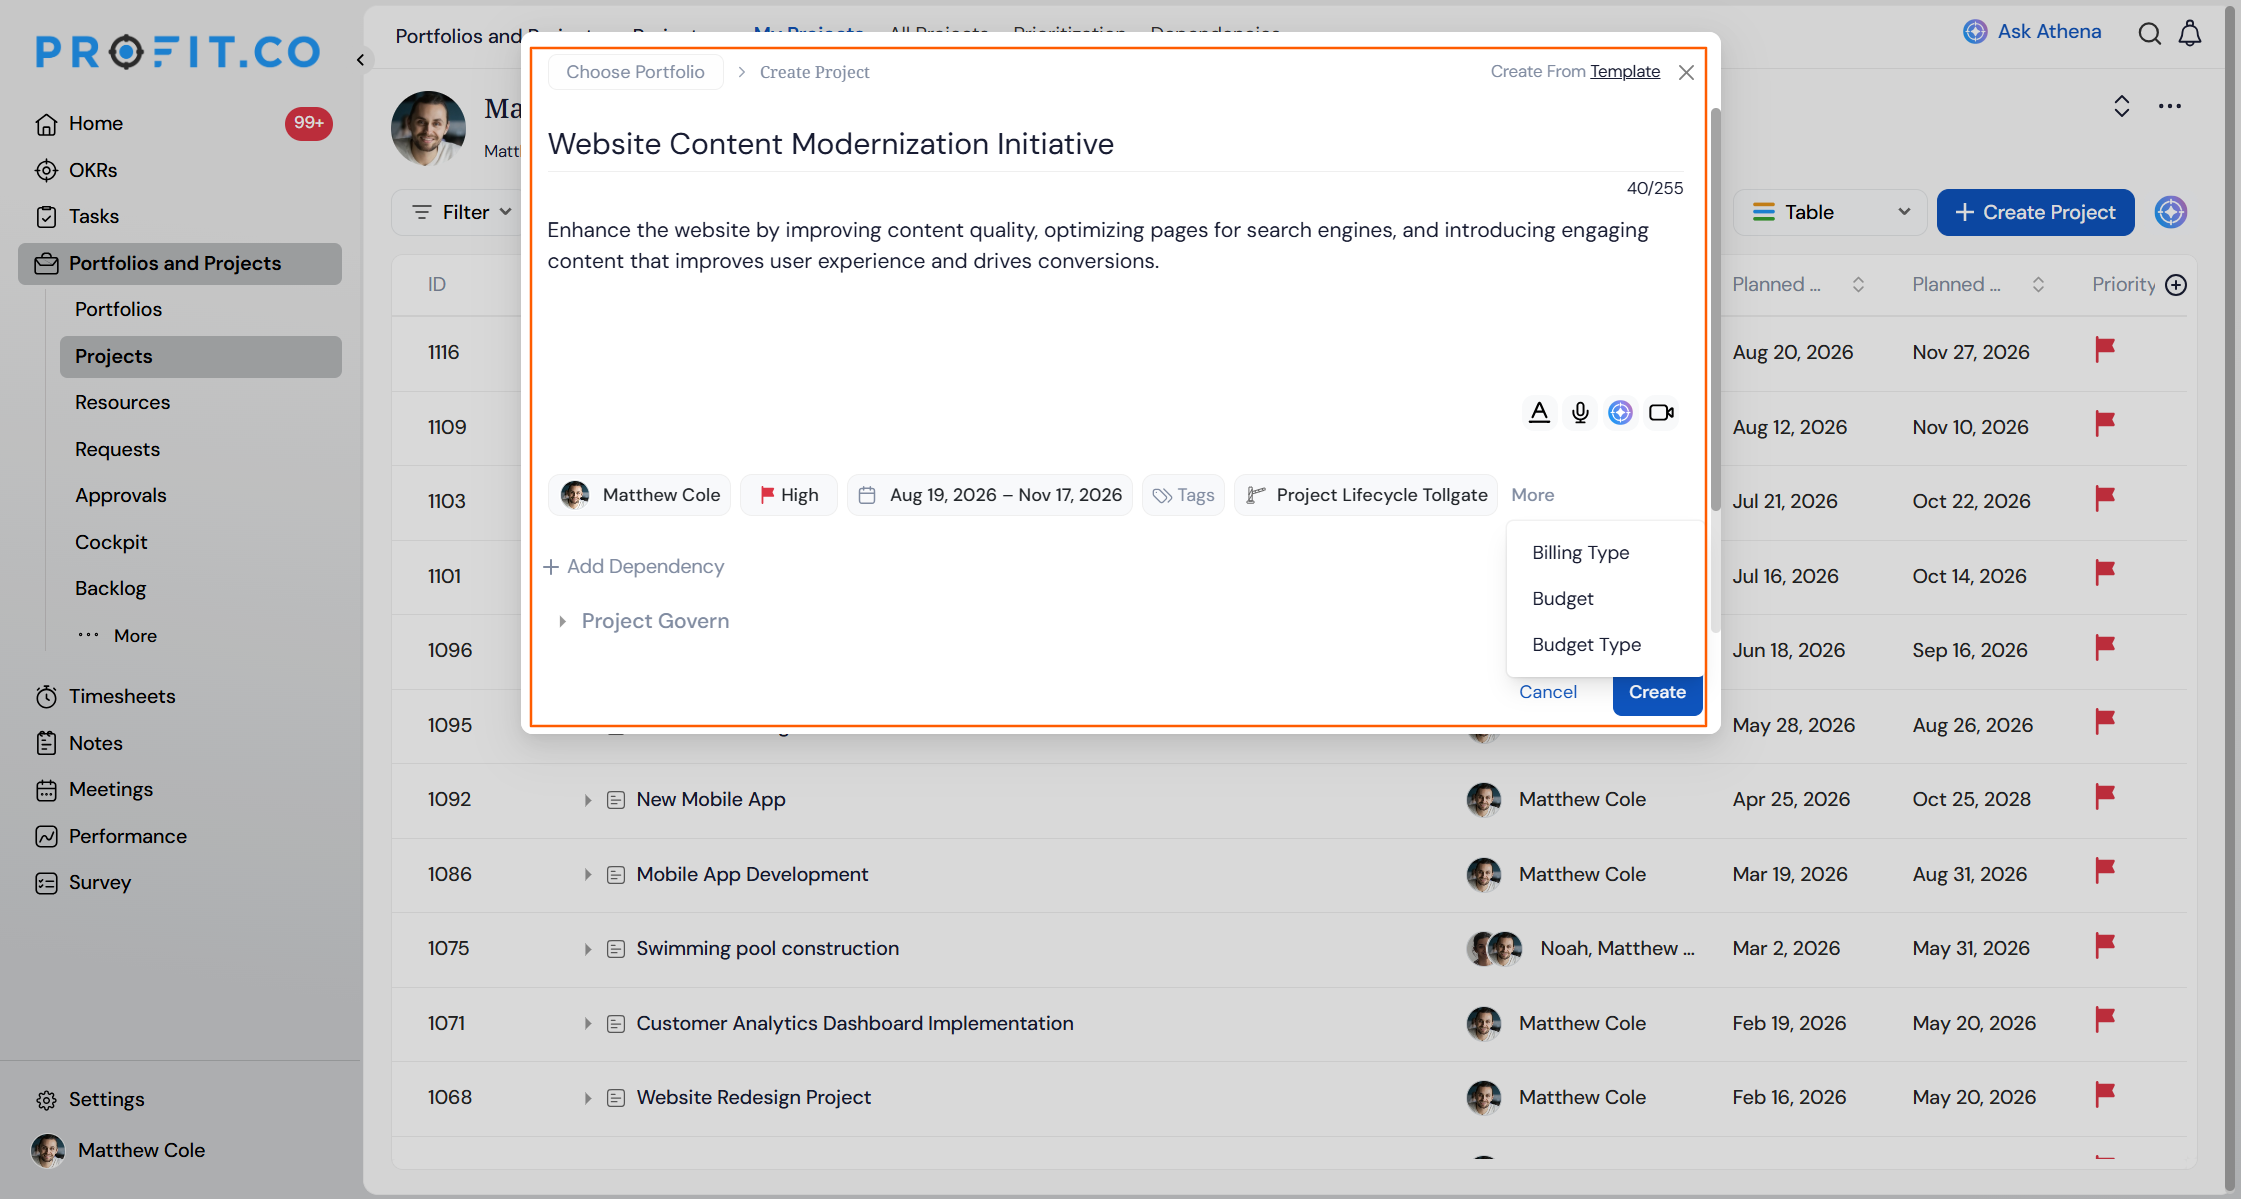
- In the Create Project panel, enter the Project Name and add a Description.
- Set the Owner, Priority, Timeline, Tags, and the Project Lifecycle Tollgate.
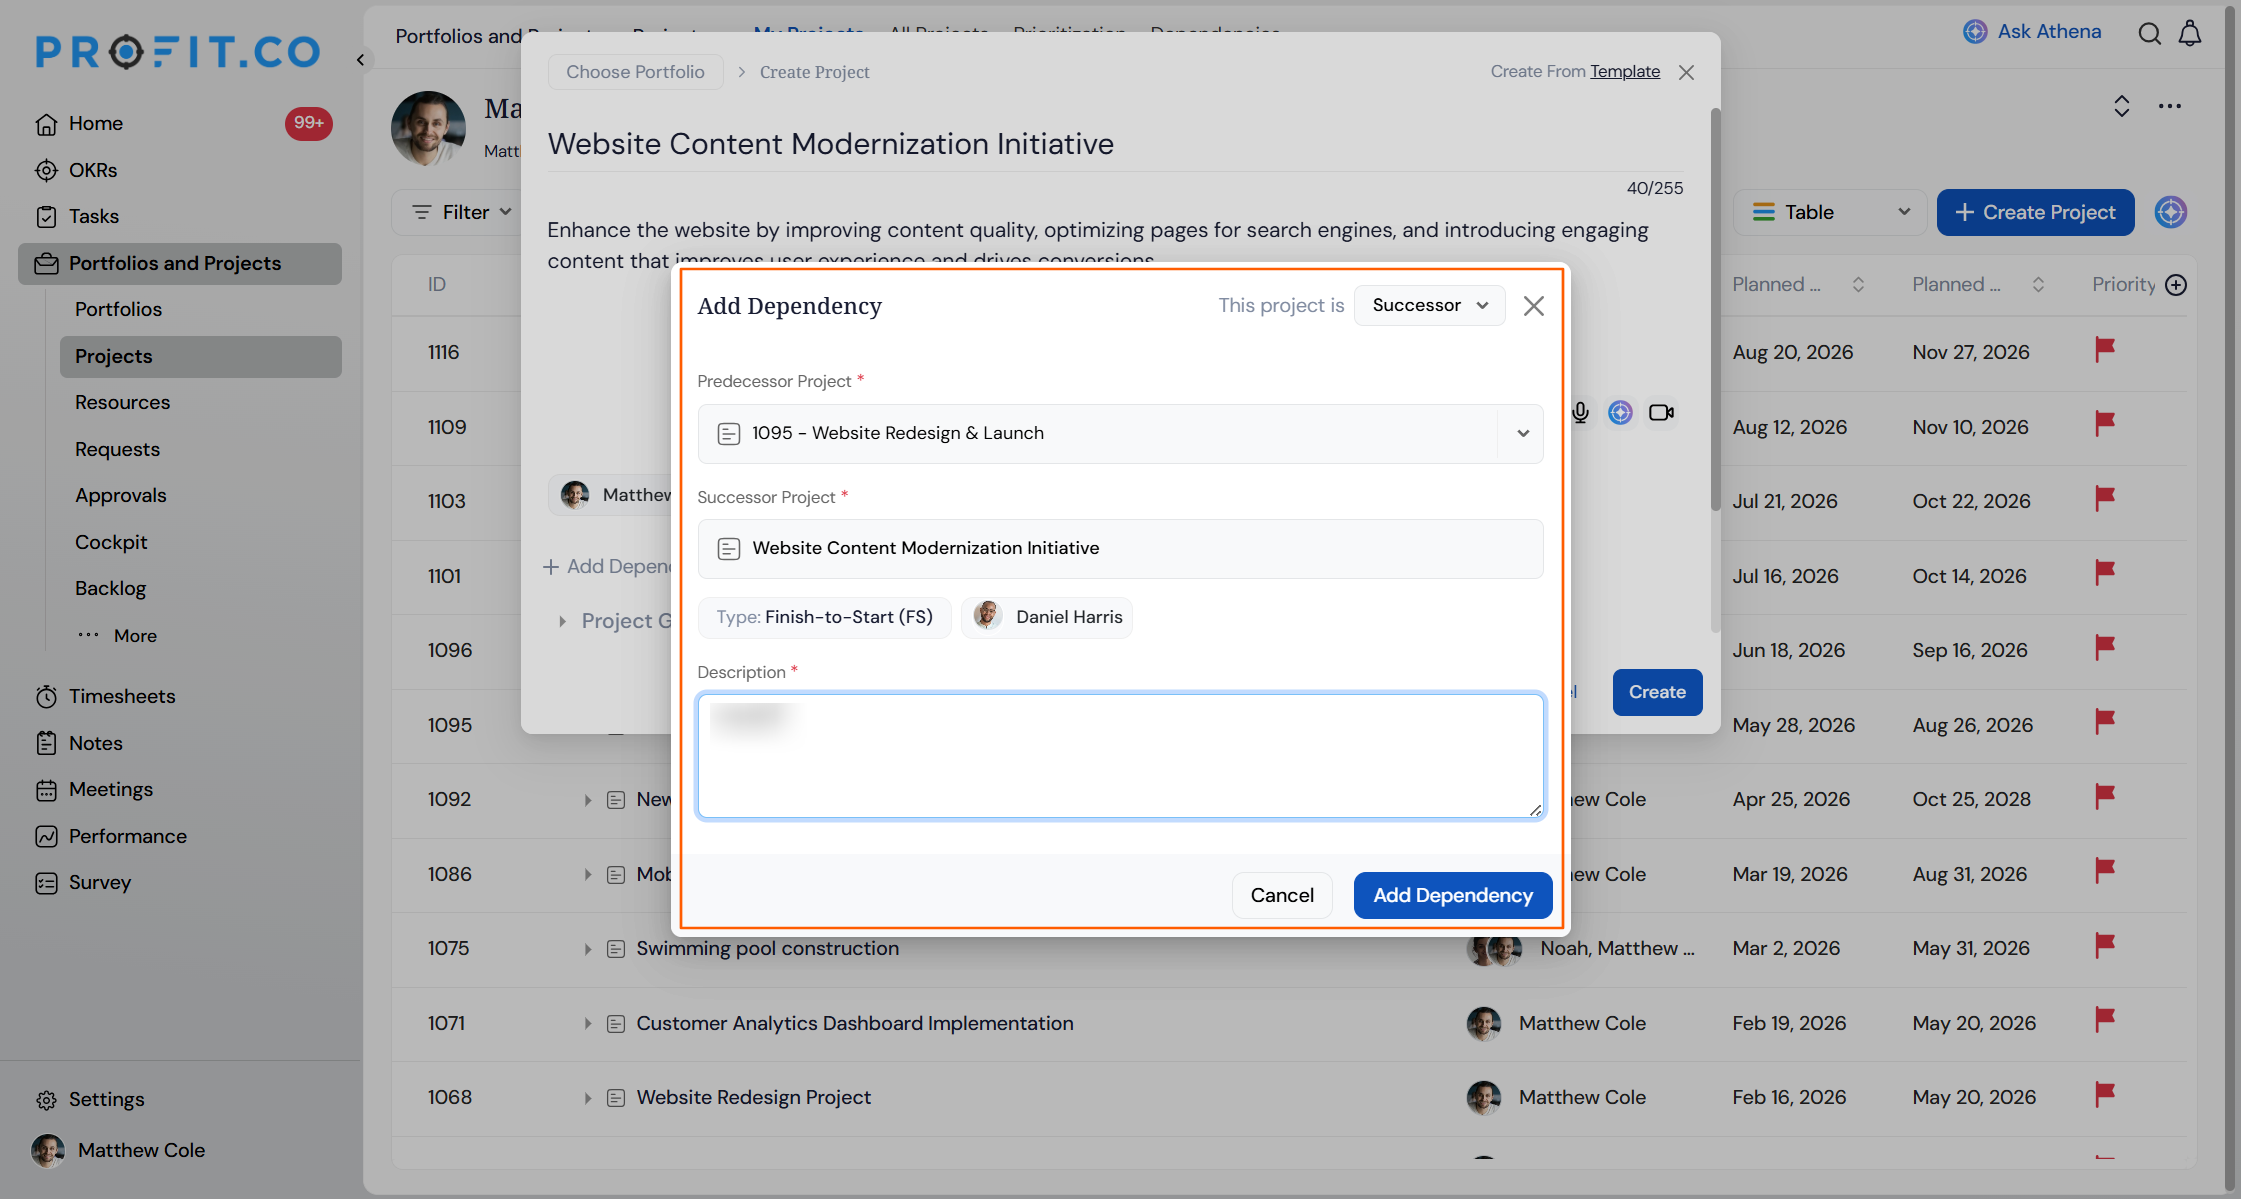
- Under Project Dependencies, choose the Predecessor Project and Successor Project, and add the Project Type, Owner, and Description.
.png "Add_dependency.png")
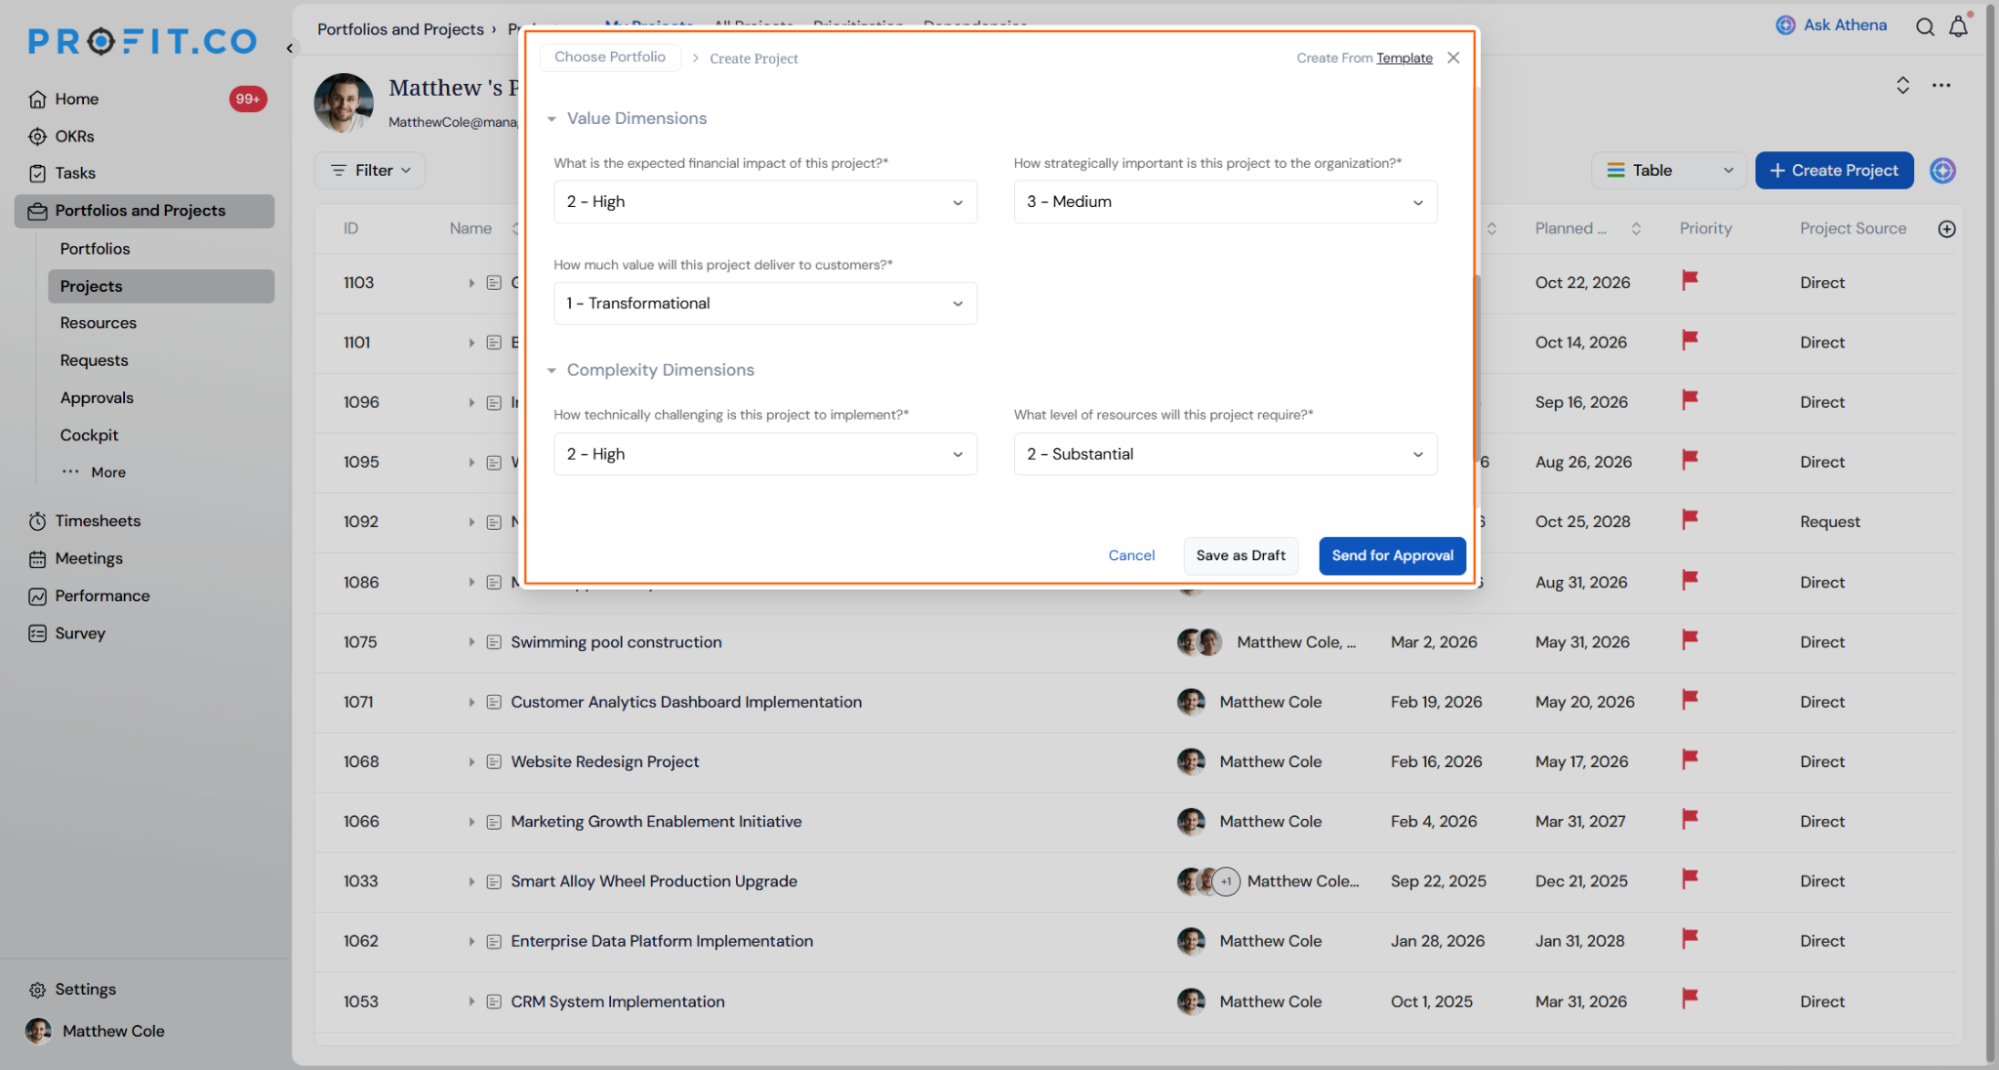
- Under Value Dimensions, rate the expected financial impact, strategic importance, and customer value.
- Under Complexity Dimensions, rate the technical challenge, resource level, and risk of timeline delays.
- Choose the Billing Type, set the Project Budget.
Tip
Click Create From Template at the top of the panel to start the project from a saved template instead of a blank form.
Once every required field is complete, submit the project using Save as Draft to hold it without submitting, or Send for Approval to route it for review.
Note
Users can now reorder the information sections on the project Overview page using drag-and-drop. The selected order is saved and applied consistently across all project overview pages.
Step 3
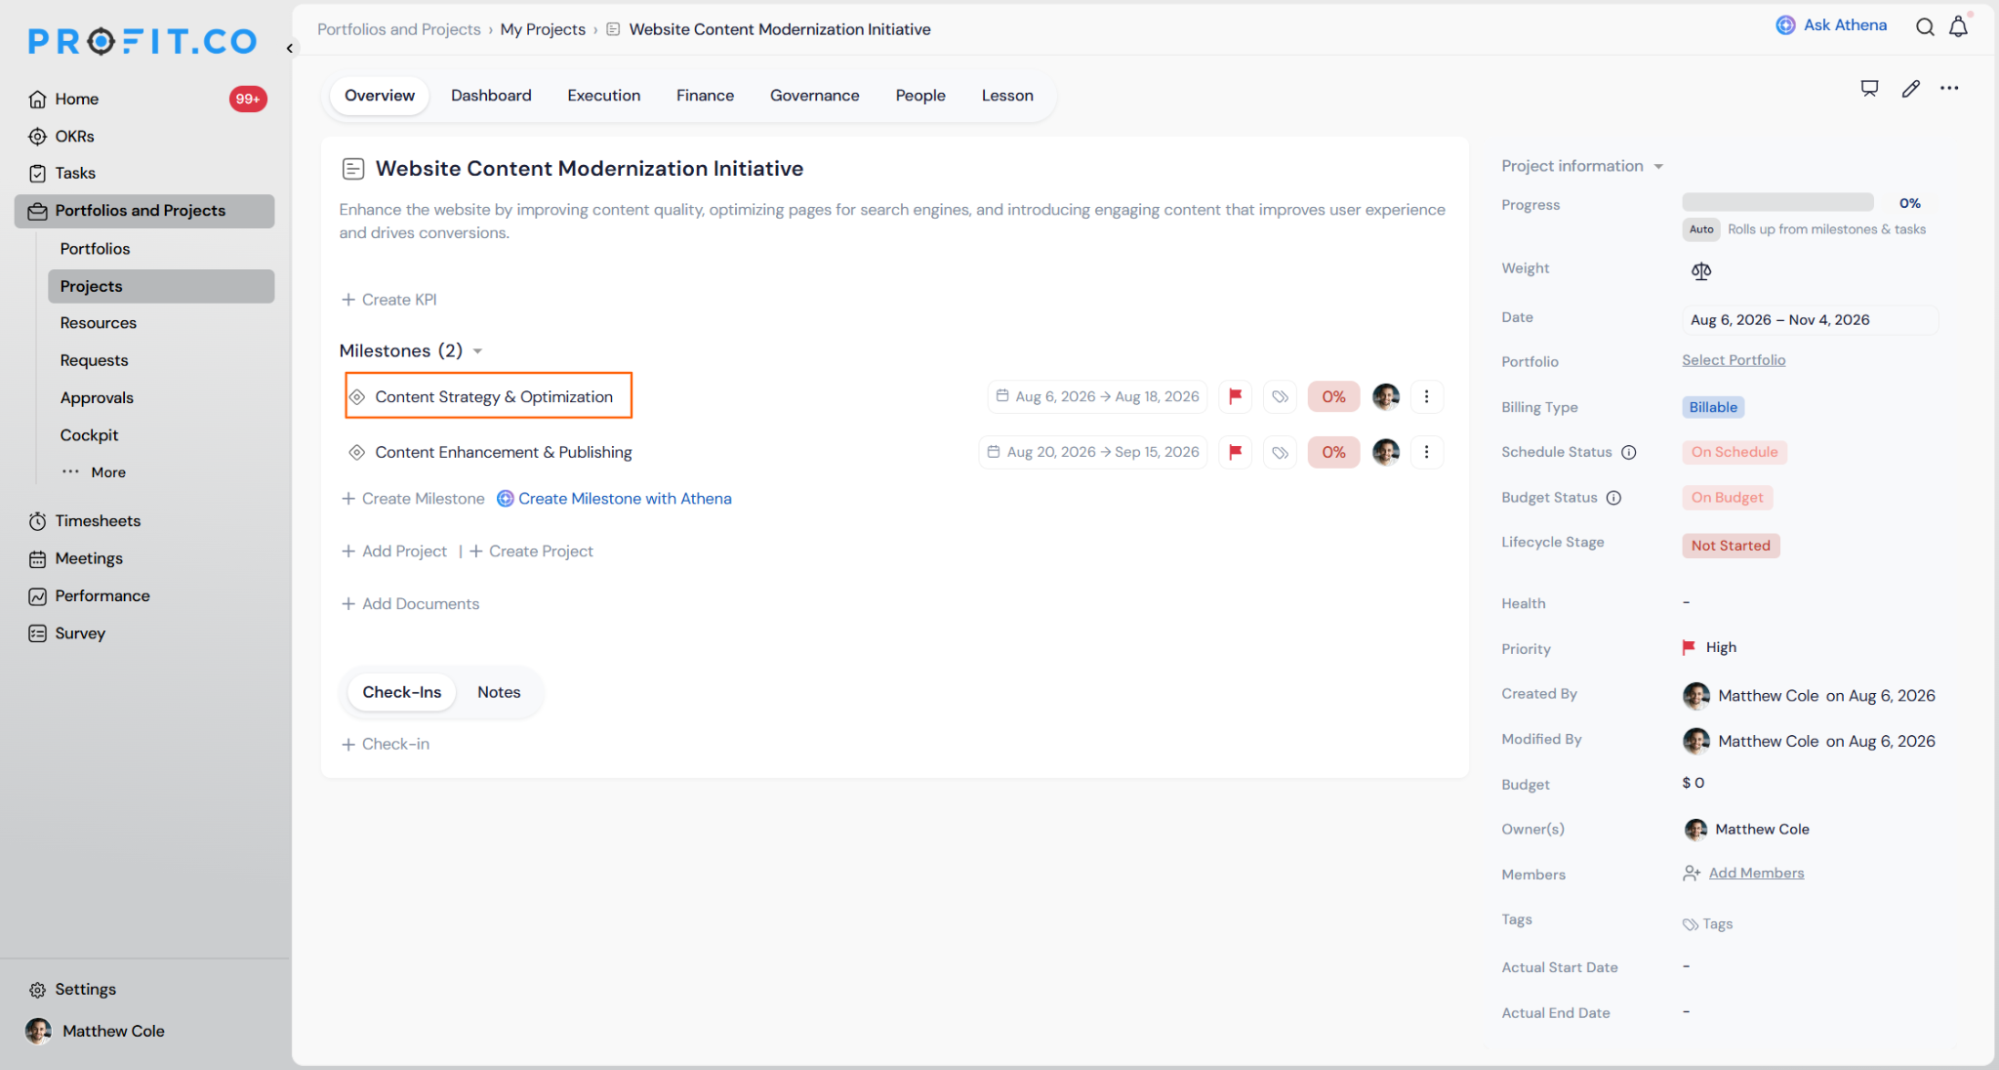
- Click on the project you just created.
- Scroll down to the Milestones section and click + Create.
Fill in the Milestone Name, Milestone Code, Owner, Description, and Start and End Dates, then click Create to save the milestone.
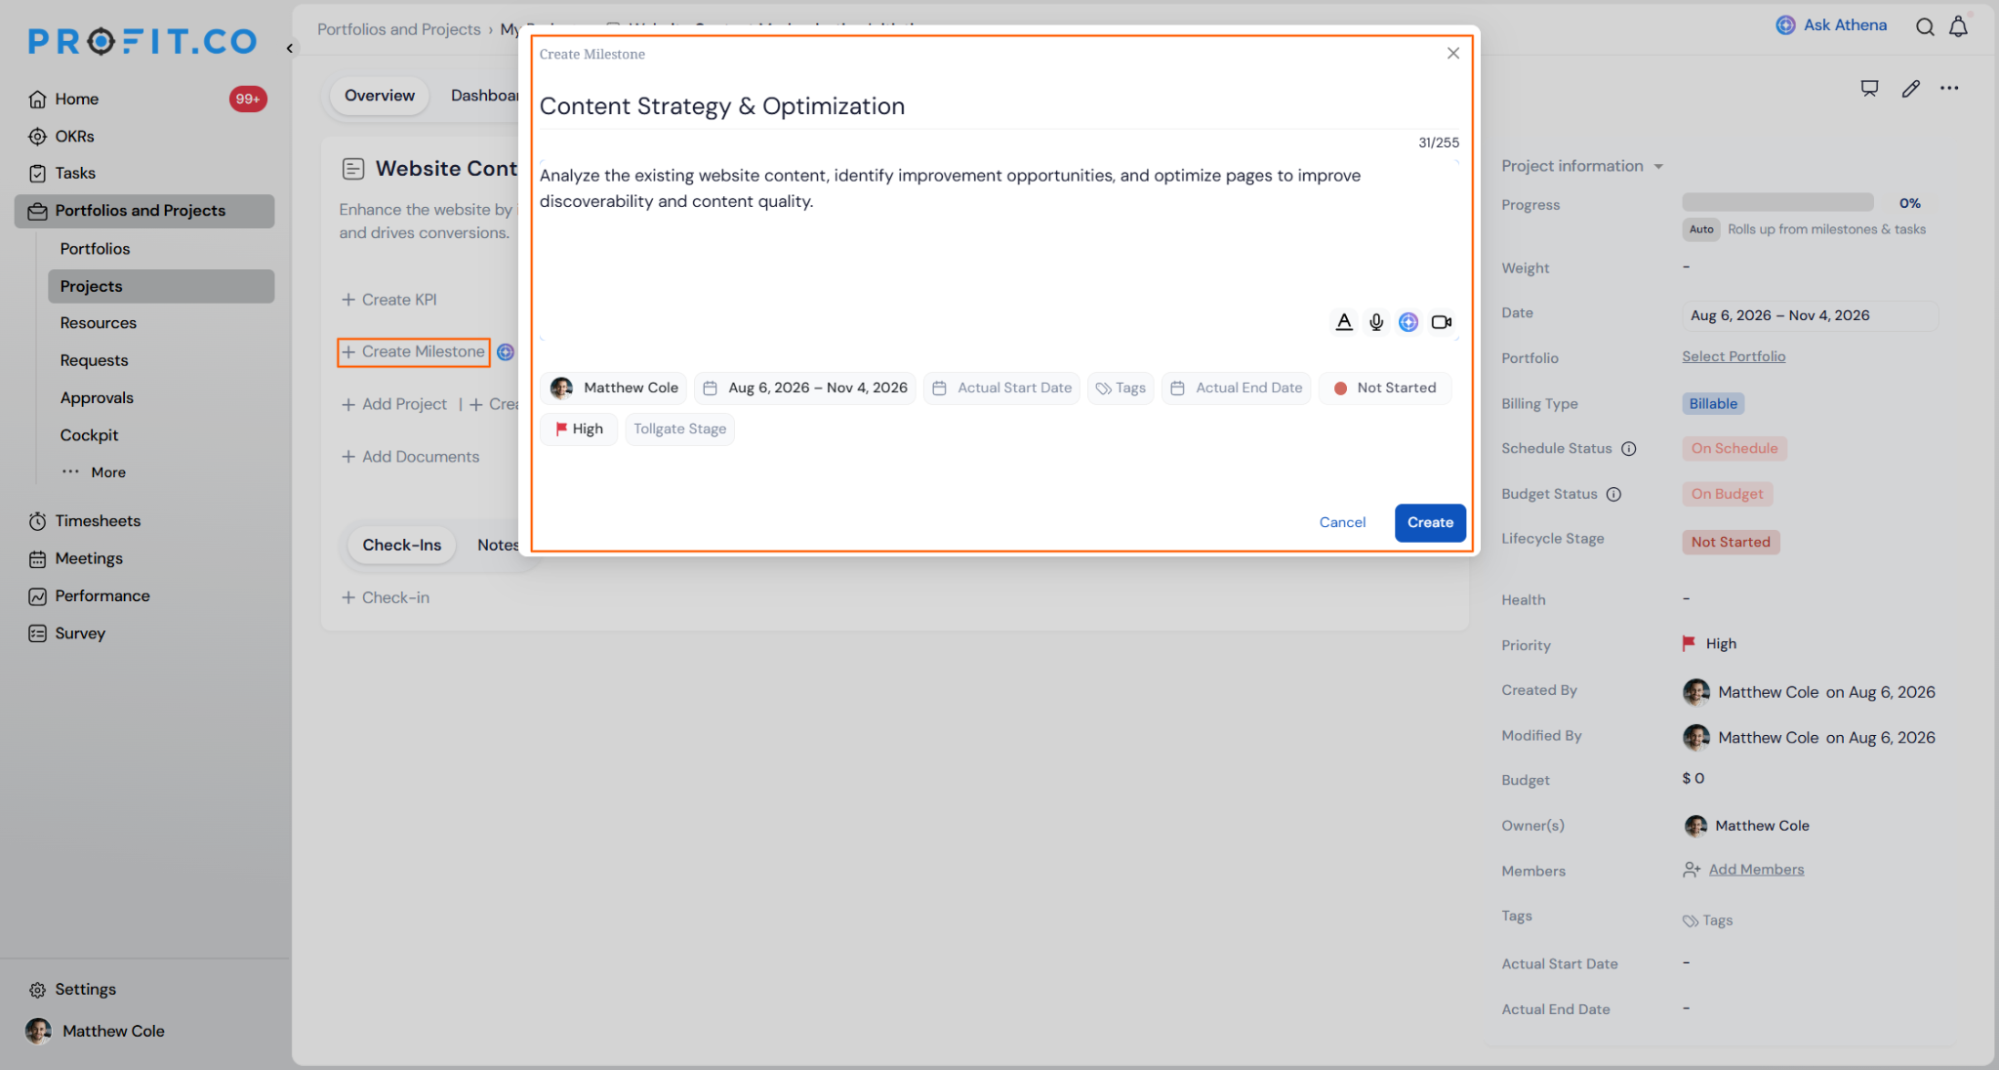
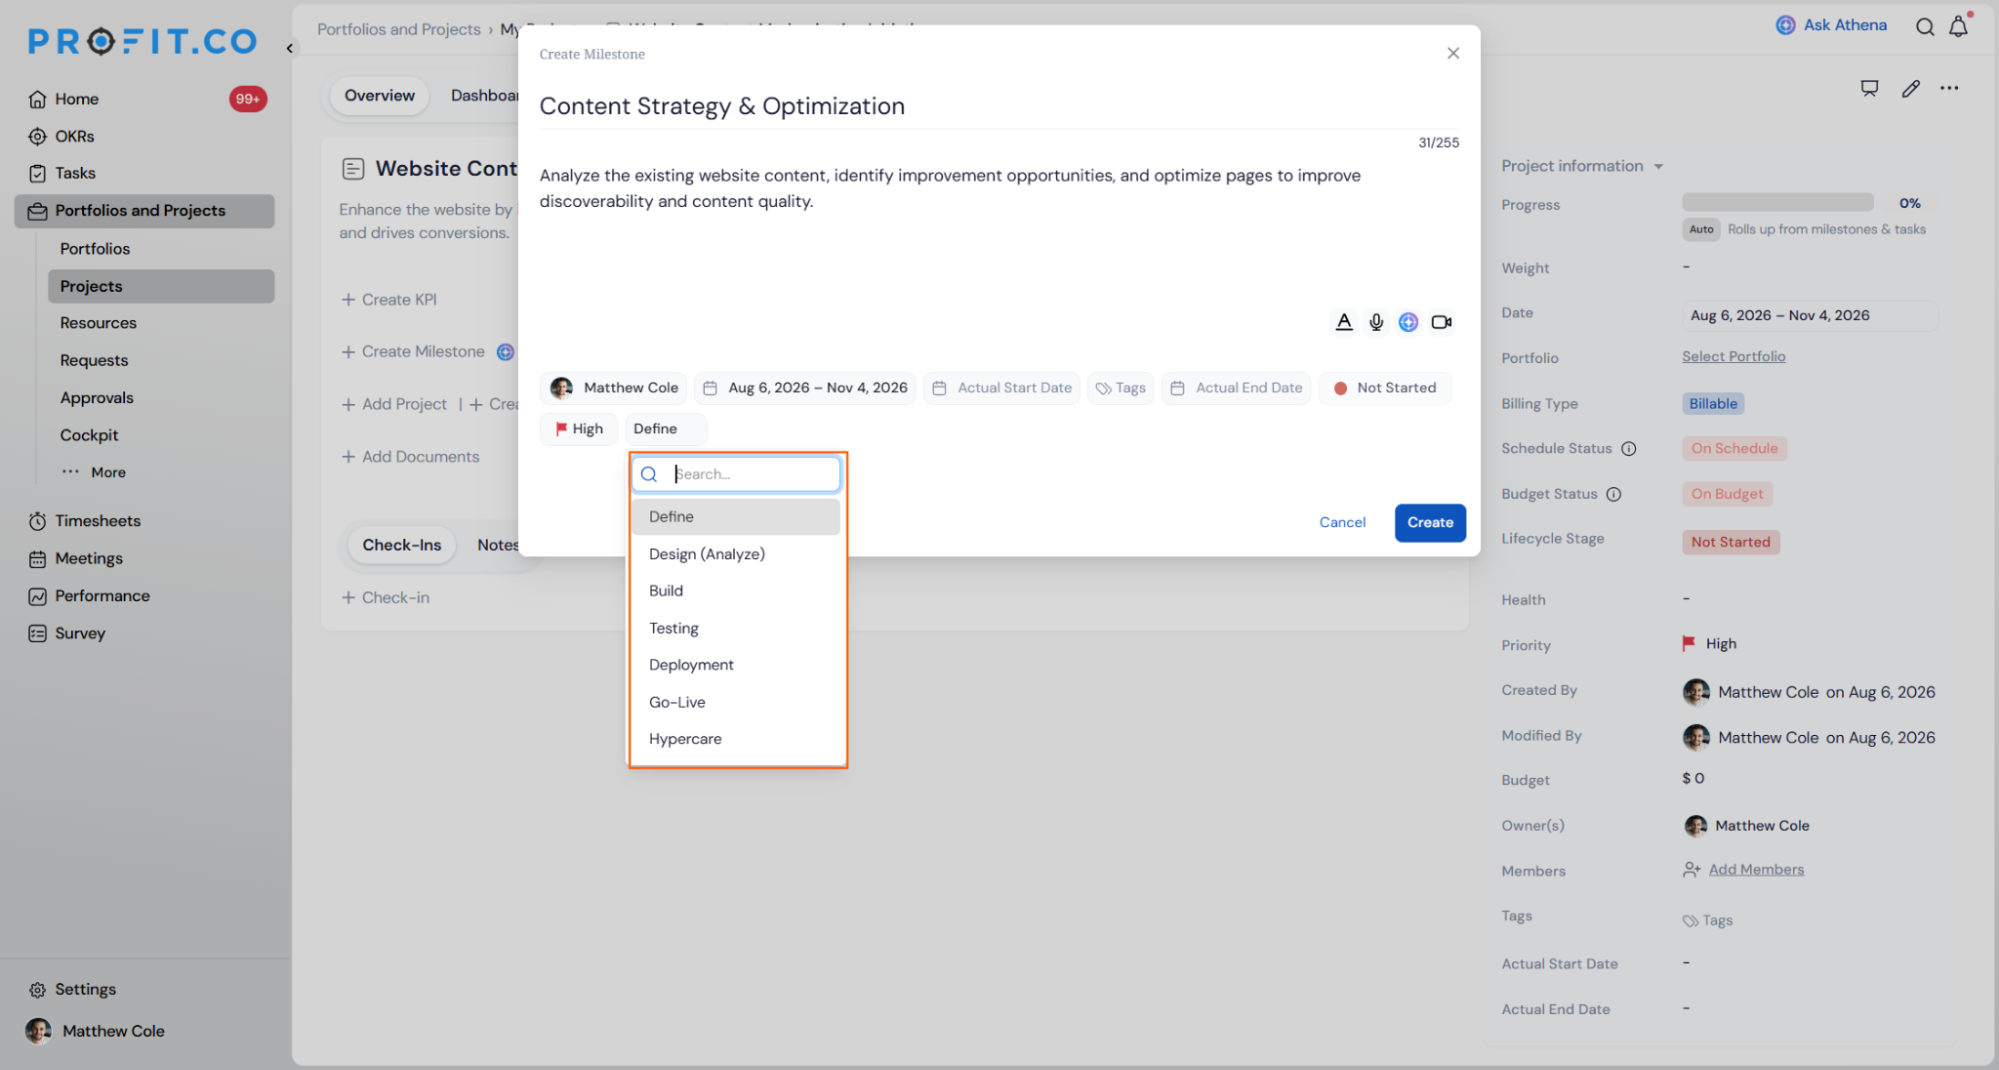
While creating a milestone, you can link it to a Tollgate for better alignment, or add milestones directly from the Tollgate section.
A Project Source indicator now shows whether a project was created directly or from a request, improving traceability.
Step 4
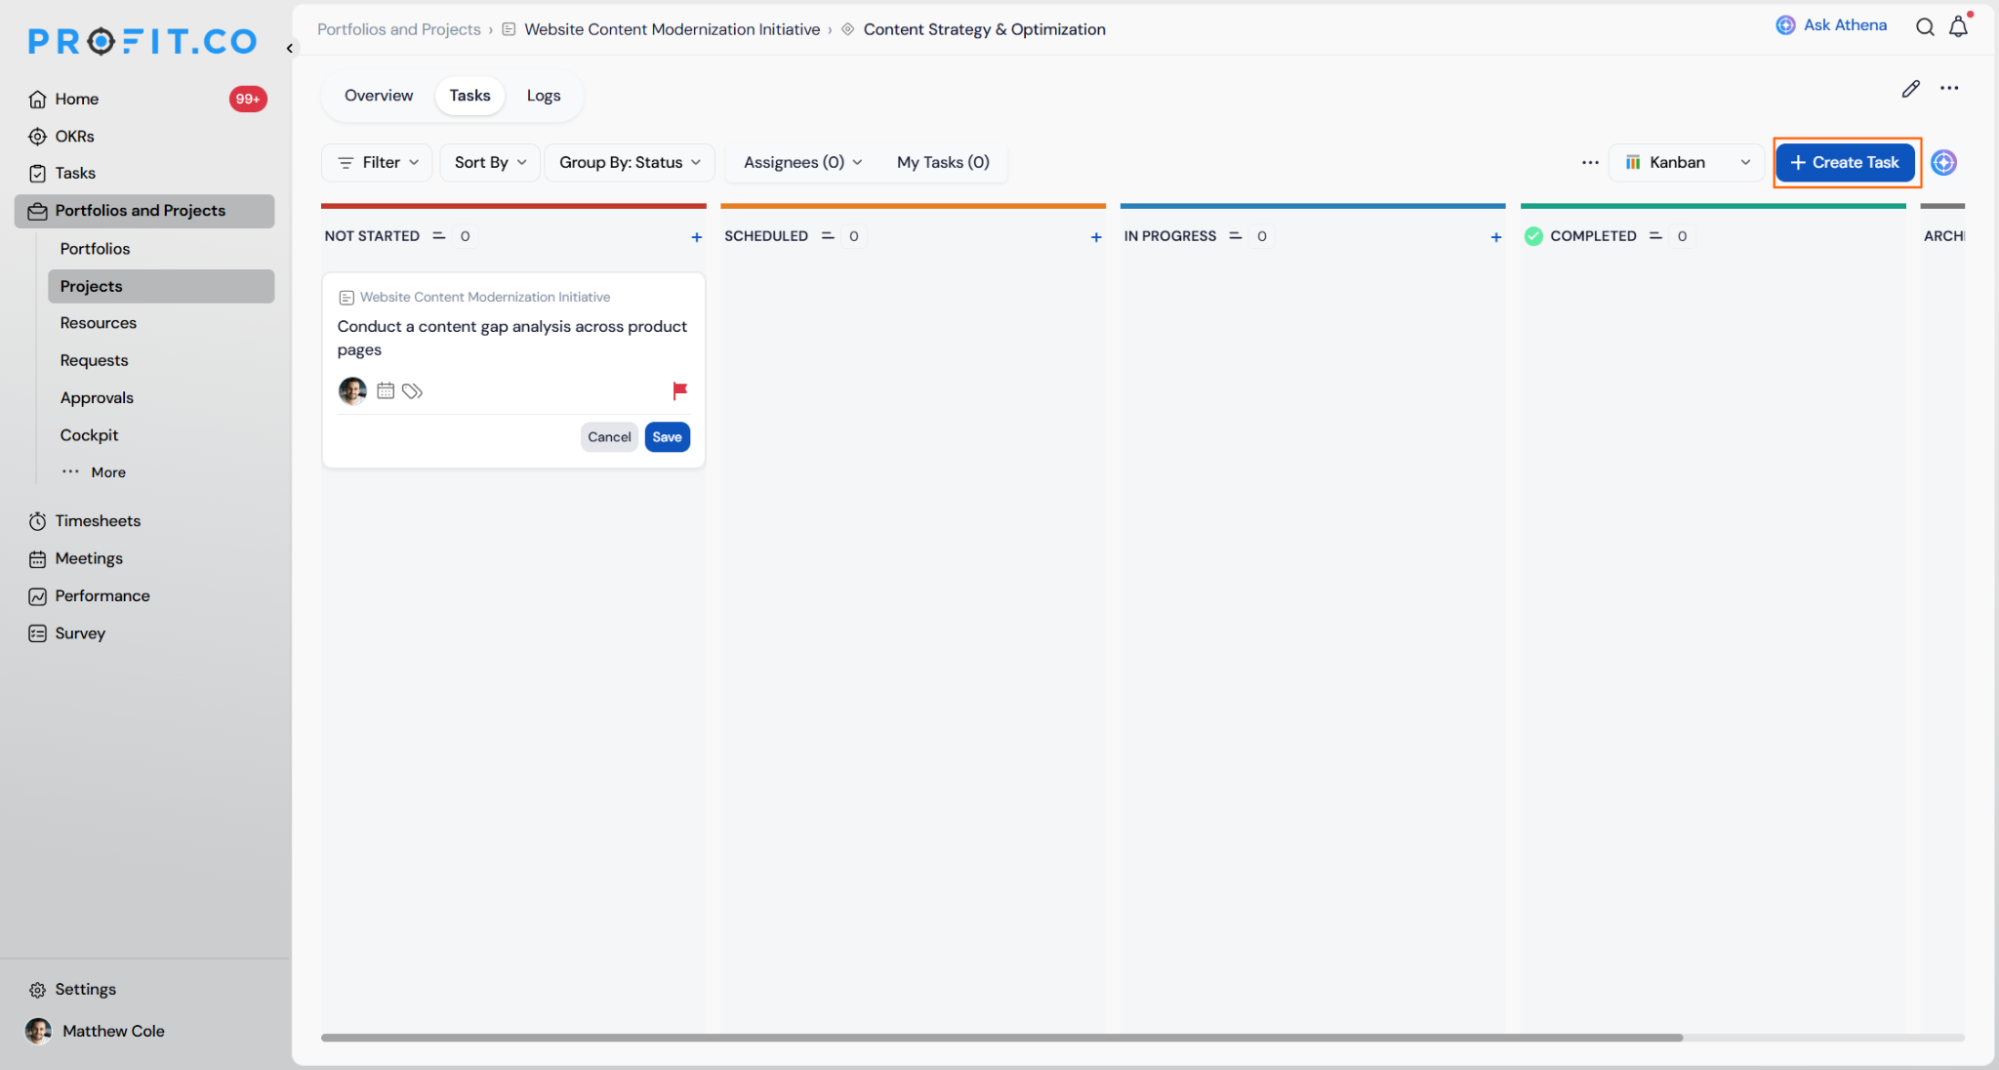
- Select the Milestone you just created.
- Click the + Create Task button.
- Enter the Task Name, set the Owner, define Start/End Dates, add Tags, select Status, and click Save.
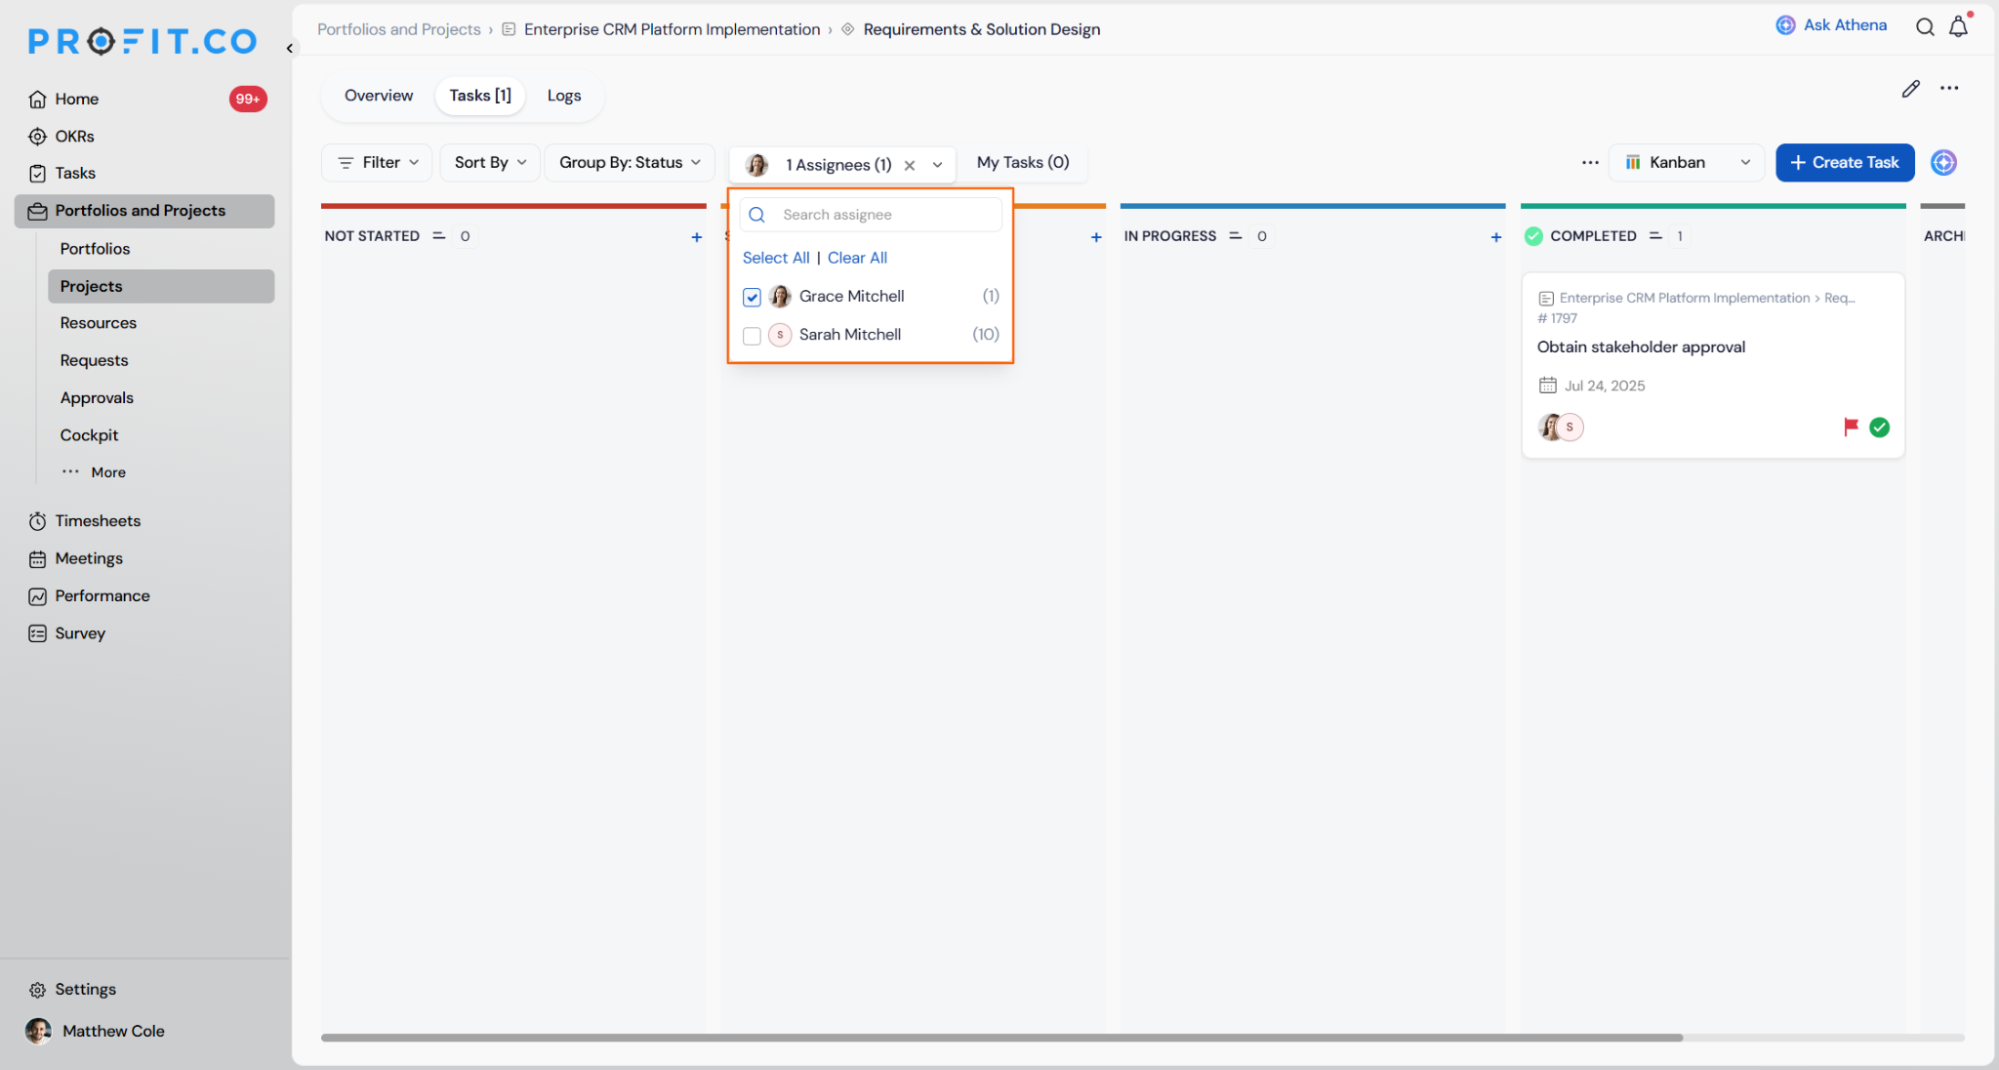
Use the Assignee filter to view tasks by team member, see task counts, select one or multiple assignees, and filter using search, Select All, or Clear All.
Note
Milestone progress will automatically update based on task statuses.
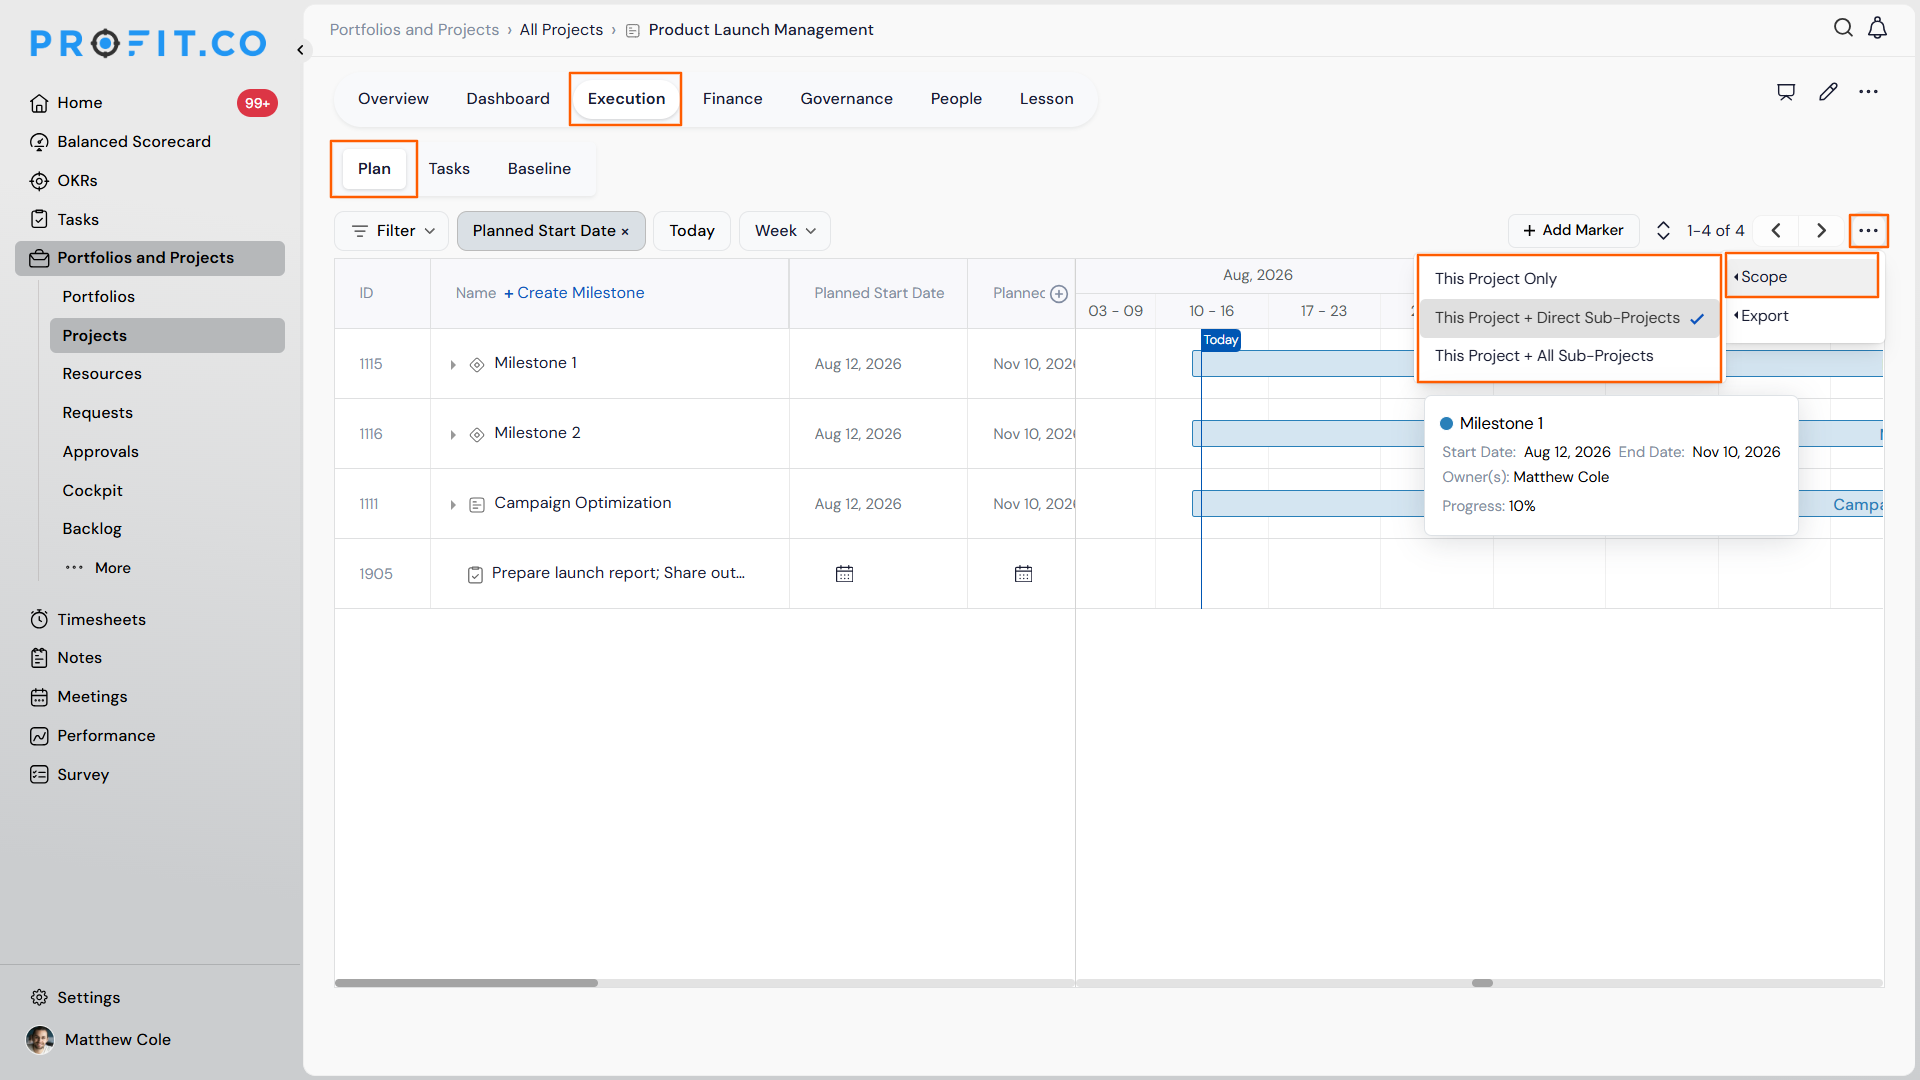
The project's Execution → Plan tab shows sub-projects as top-level rows in the same Gantt, with their milestones and tasks nested beneath.
Click the More Options and choose a Scope, either This Project + Direct Sub-Projects or This Project + All Sub-Projects, to consolidate the full hierarchy.
Note
Use + Create Milestone from that view to add work to the parent or any in-scope sub-project without leaving the page. Existing project access is respected, so you only see and can target sub-projects you're permitted to.
Step 5
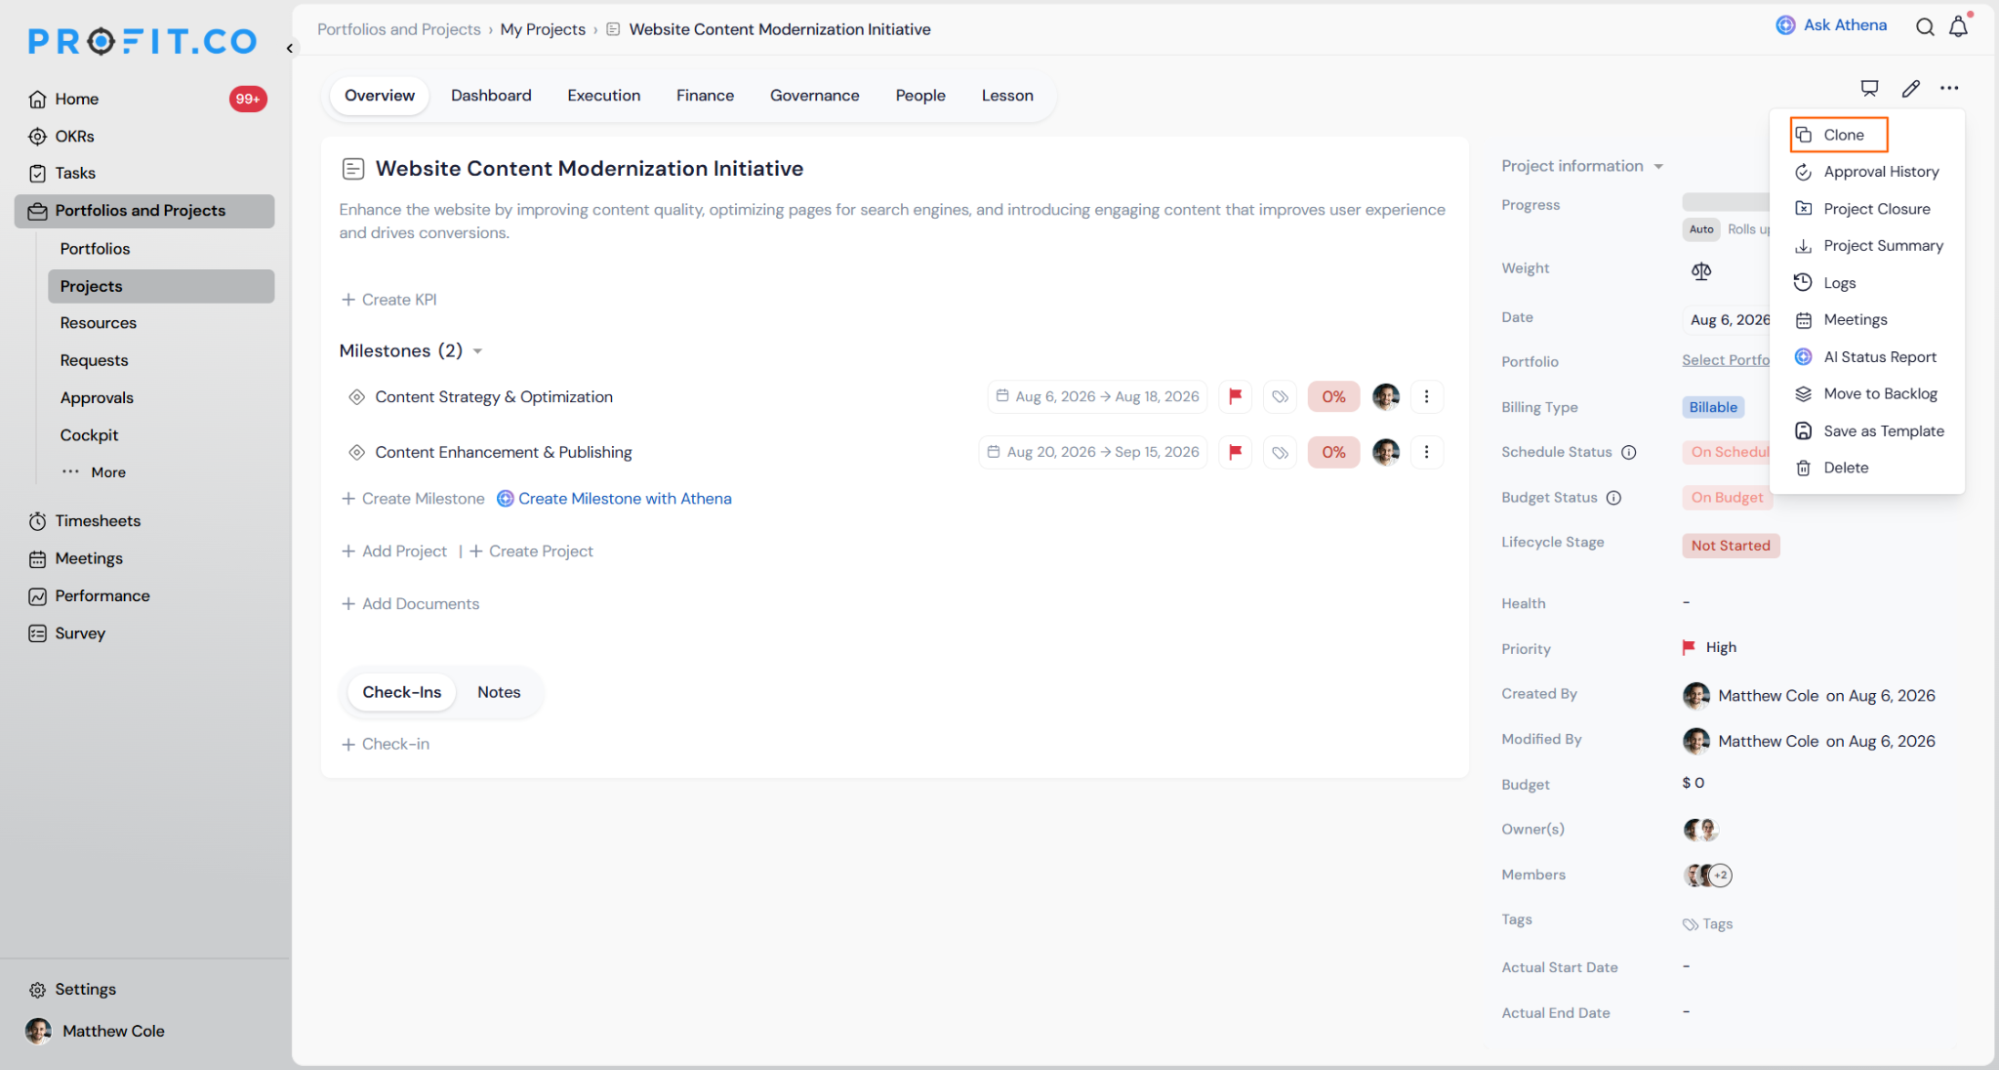
Use the Clone option to quickly duplicate existing projects. Attributes automatically adjust based on the project type, whether it's a BOQ or a Standard Project, so relevant configurations carry over.
Note
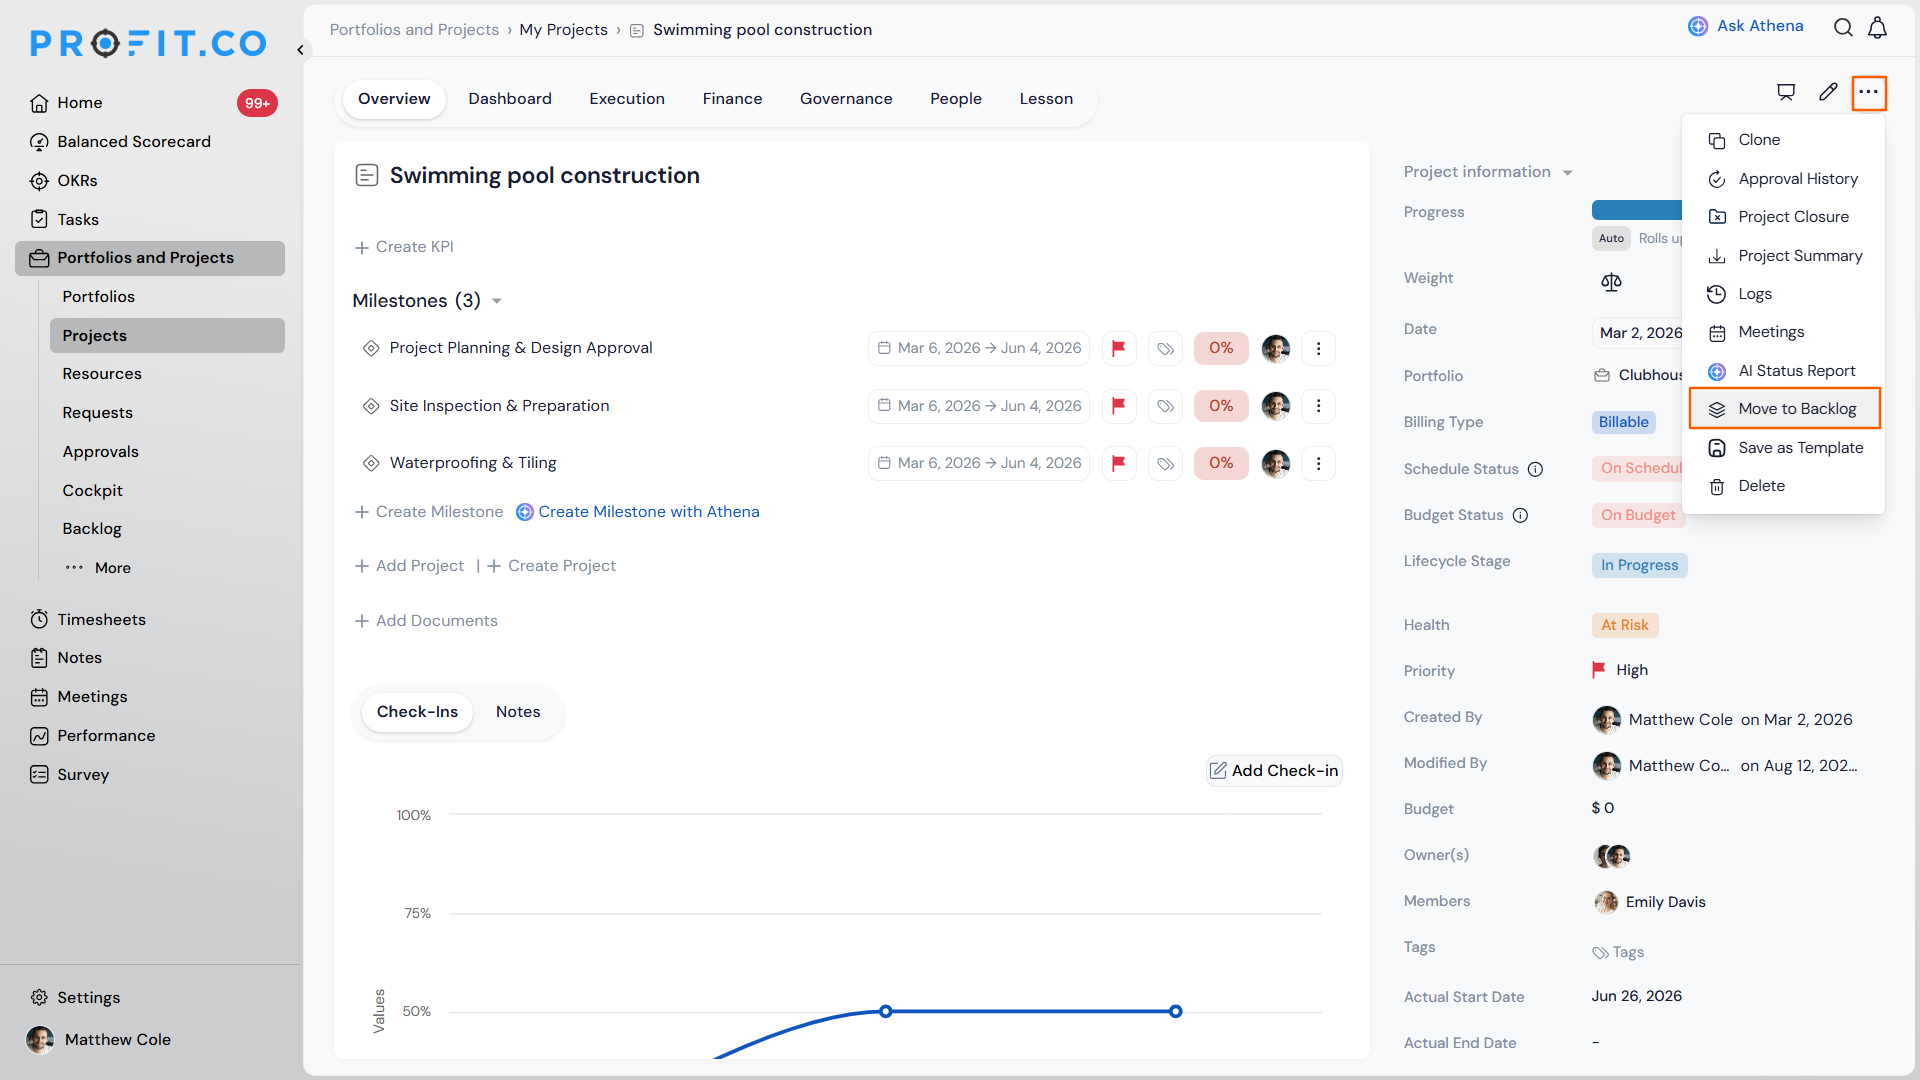
Need to set work aside without losing progress? Use Move to Backlog from the row Actions menu (⋮) to park a Project, Milestone, or Task, then restore it anytime with its data and rollups intact.
How to Save a Portfolio or Project as a Template
You can save any existing portfolio or project as a reusable template directly from the list view, without building a template from scratch in Settings. When saving, you choose which attributes carry over into the template.
Step 1
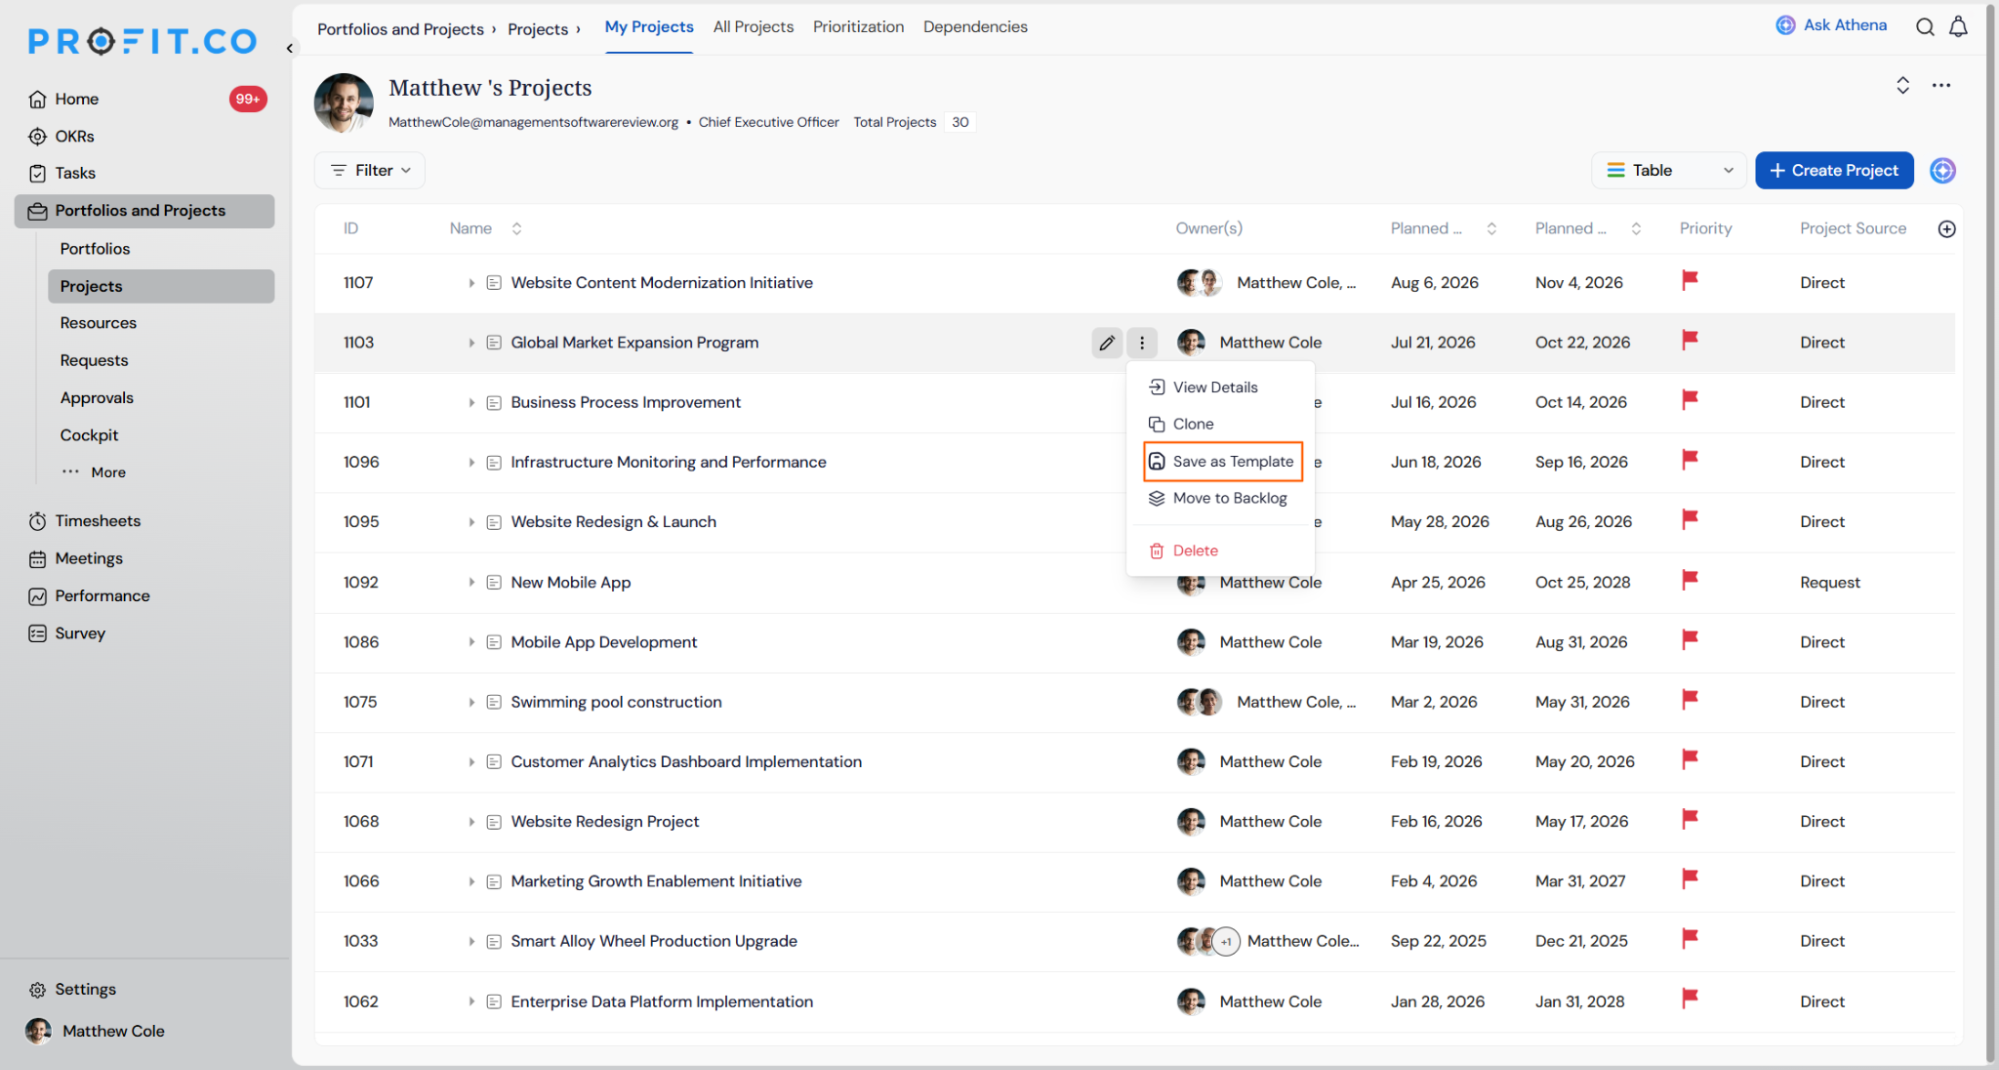
- Navigate to Portfolios and Projects → Portfolios or Projects.
- Hover over any portfolio or project row and click the three-dot menu.
- Select Save as Template from the dropdown.
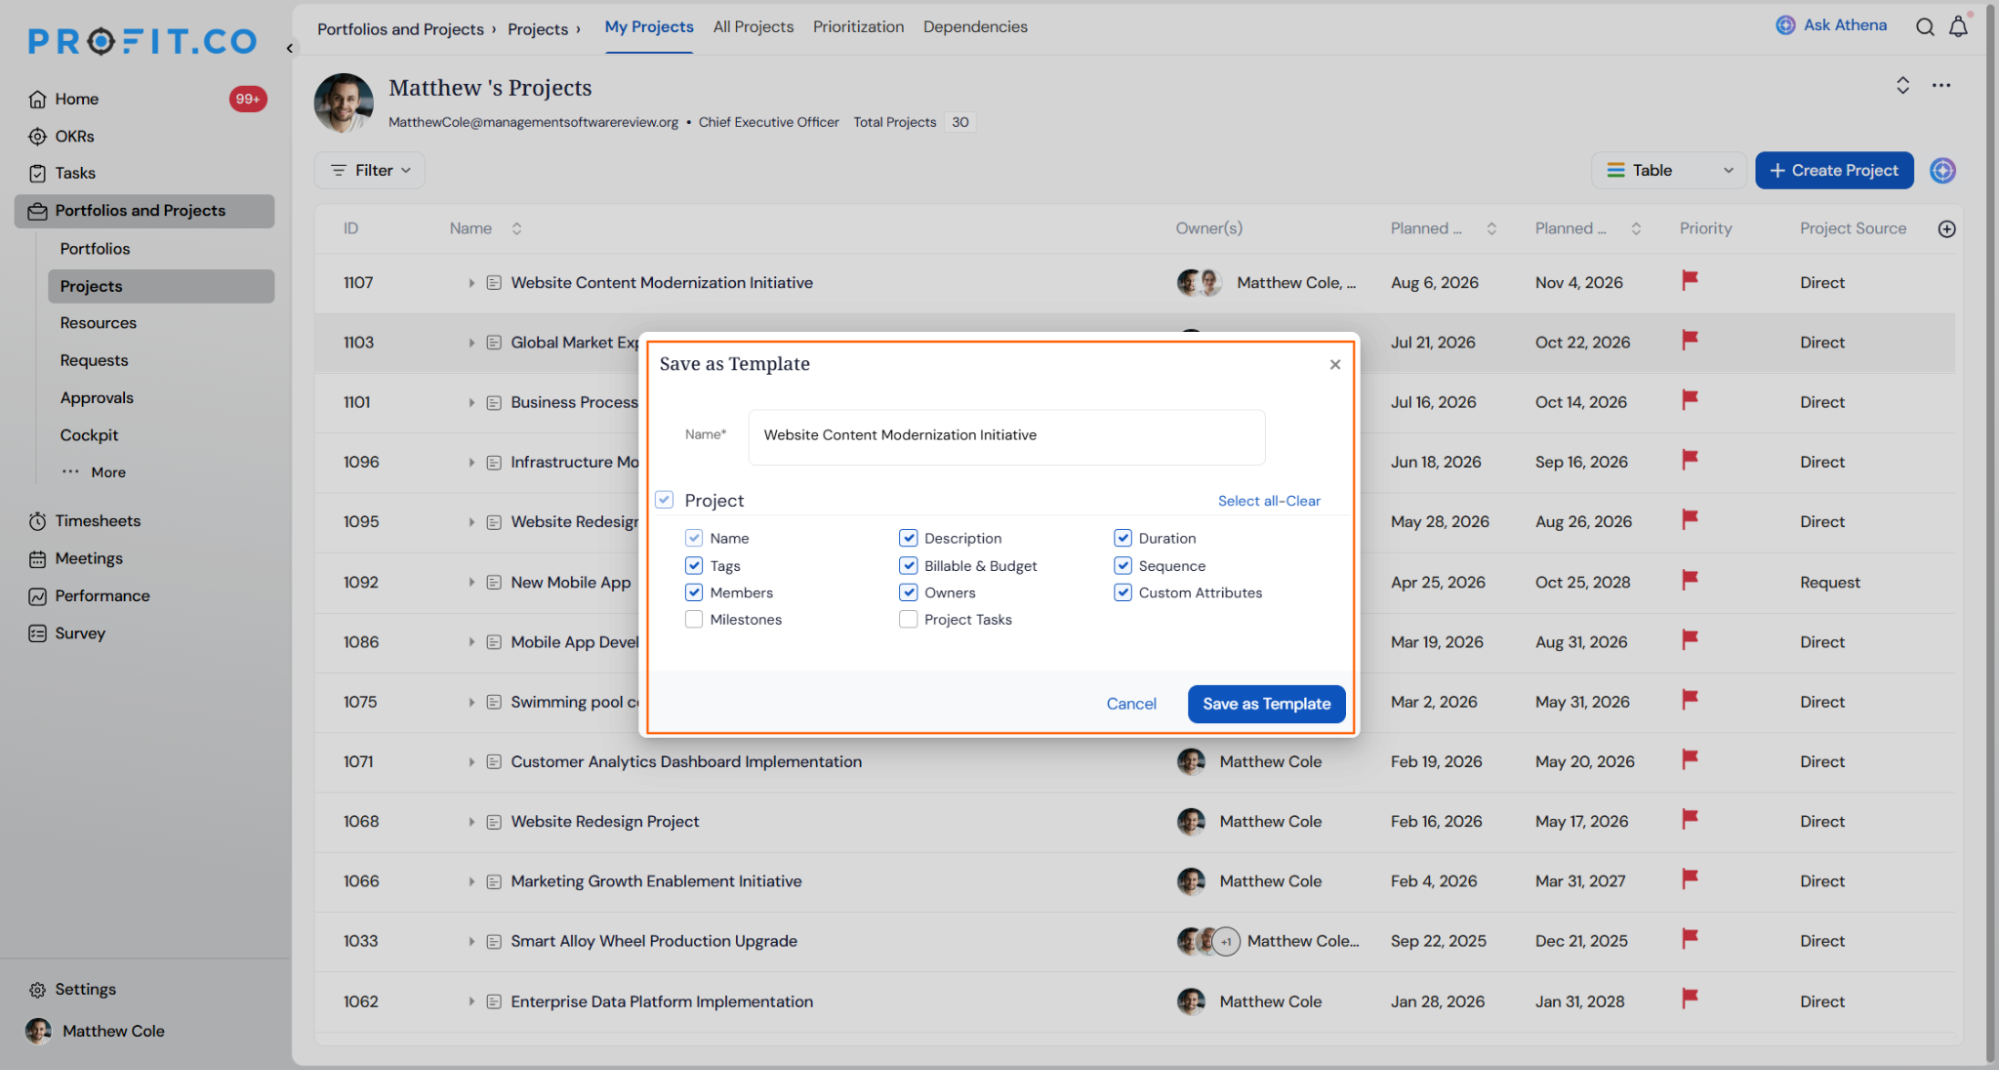
- In the Save as Template dialog, enter a name for the template.
- Select the attributes to include using the checkboxes: Description, Owner, Access List, Visibility, Custom Attributes, Status, Priority, and Tags.
- Use Select all to include every attribute, or clear individual checkboxes to exclude specific fields.
- Click Save as Template to confirm. The template is now available when creating new portfolios or projects.
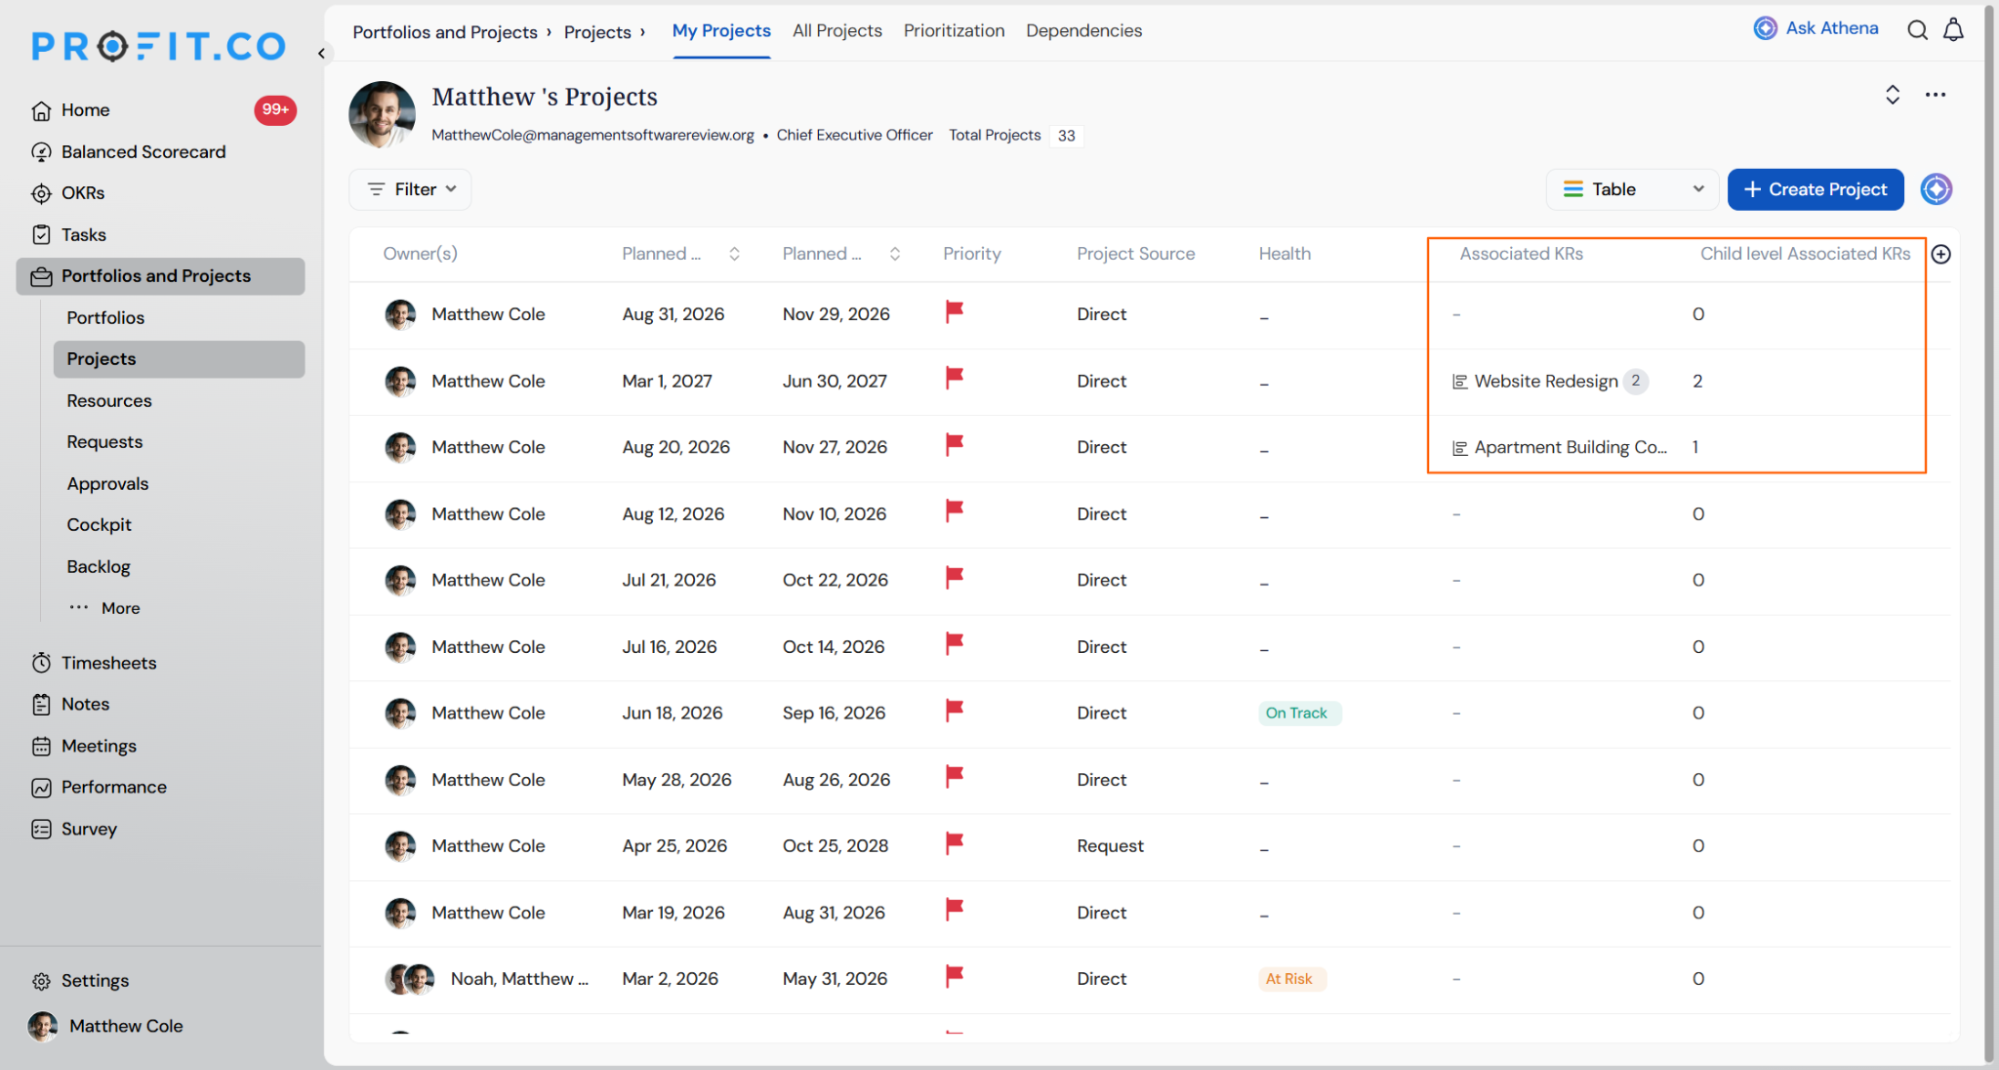
How Do I View Associated KR Roll-Up Counts on List Views?
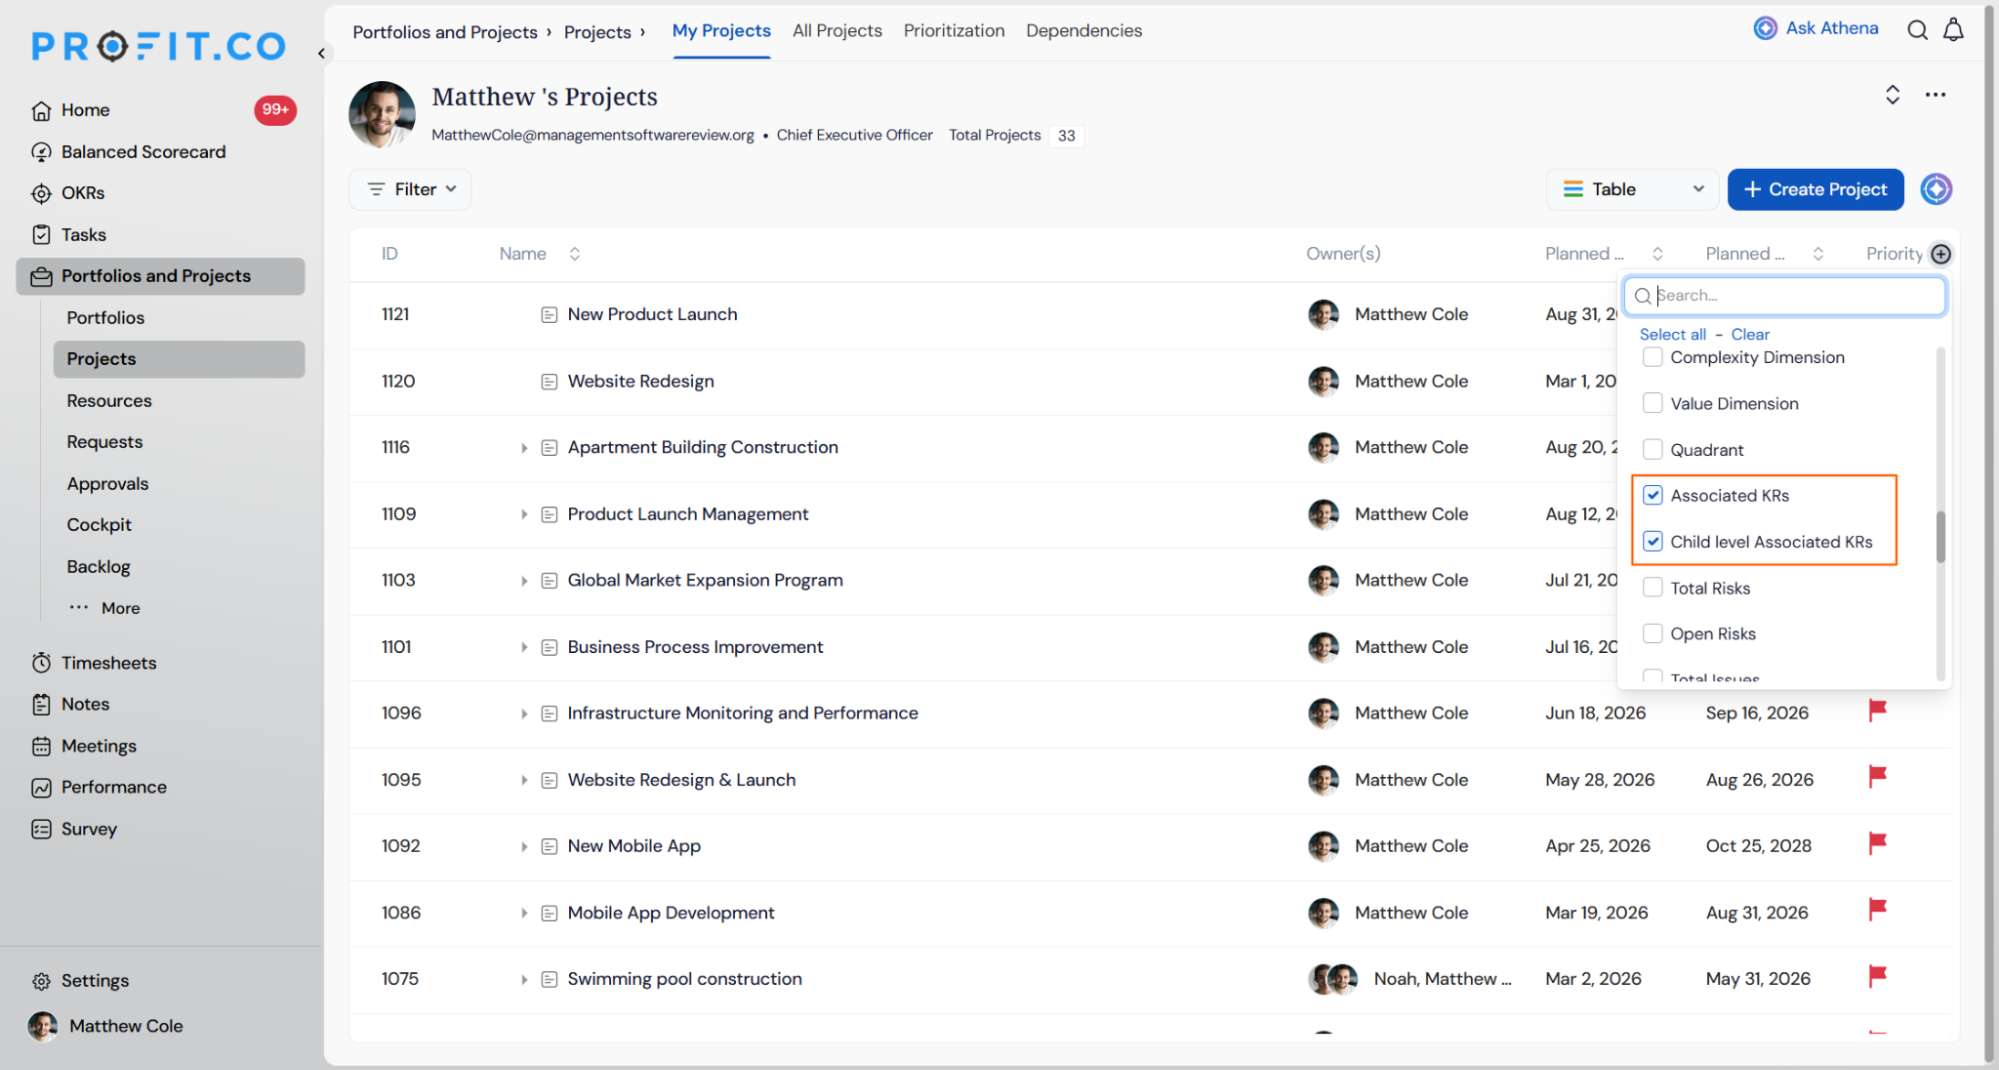
Project and portfolio list views can show OKR alignment for each row without opening individual items, using two optional columns.
Click the + icon at the end of the column header row to open the column picker. Enable Associated KRs to show the Key Result(s) linked directly to a row, with a +1 style indicator if there's more than one. Enable Child-level Associated KRs to show a running total of all KR alignment beneath that row, at any depth. Click the count to open a drill-down of exactly which items and KRs make it up.
Note
Rows with no KR alignment show a dash and aren't clickable.
Project Creation and Template Scenarios and Their Outcomes
The table below covers what actually happens once you act on a template attribute or an approval decision, not the click-by-click mechanics already covered above.
| Scenario | What Happens |
|---|---|
| You leave an attribute checkbox, such as Owner, unchecked when saving a template. | Profit.co excludes that field from the template, so every new portfolio or project created from it starts with that field blank. |
| You select Select All before saving a template. | Profit.co carries every listed attribute, including Description, Owner, Access List, Visibility, Custom Attributes, Status, Priority, and Tags, into the template. |
| You save a portfolio or project as a template. | Profit.co creates a separate template record, and the original portfolio or project remains unchanged. |
| You click Send for Approval on a new project. | Profit.co routes the project to the approver for review and notifies the approver of the pending request. |
| You submit a project and the approver approves it. | Profit.co creates the project and notifies you that it has been approved. |
| You submit a project and the approver rejects it. | Profit.co keeps the project as an editable draft and notifies you so you can revise and resubmit. |
Best Practices for Creating Projects in the PPM Module
- Define your scope, budget, and objectives clearly before creation.
- Use milestones to divide projects into measurable stages.
- Regularly review task progress and update owners.
- Save a well-structured project as a template when you expect to run similar projects again, and clear attributes like Owner so each new instance starts fresh.
- Align projects with OKRs to connect execution with strategic goals.
Related Questions
Frequently Asked Questions
Yes. You can edit project information such as timelines, owners, and budget anytime from the Project Overview page.
Each project belongs to one primary portfolio, but you can track and manage multiple portfolios simultaneously through the All Projects view.
The cloned project inherits all configurations and details from the original, except for unique identifiers like project name and code.
Yes. Save as Template is available for both portfolios and projects from their respective list views.
Execute your strategy with confidence
Connect OKRs, tasks, and teams in one place with Profit.co
