

Profit.co project templates let you capture a preconfigured structure of milestones, tasks, subtasks, owners, and a custom field layout that can be reused whenever new projects are created. Existing templates can also be cloned to speed up setup even further.
Table of Contents
- What is a Project Template in Profit.co?
- Who Can Create a Project Template?
- How to Create a New Template for Projects
- How to Customize a Template's Field Layout
- How to Clone an Existing Template
- How to Use the Newly Created Template?
- Project Template Scenarios and Their Outcomes
- Best Practices for Project Templates
- Related Questions
- Frequently Asked Questions
What is a Project Template in Profit.co?
A project template is a reusable project framework that captures predefined milestones, tasks, subtasks, owners, and timelines, along with a custom field layout you design for the type of work it supports. It lets teams create new, fully structured projects without rebuilding the setup from scratch, and existing templates can be cloned to create independent variations.
The field layout supports Text, Link, Date, Number, Currency, Textarea, Function, Select, Radio, Toggle, Multiselect, Star, Slider, Matrix Radio, Search, and more attribute types, arranged in One Column or Two Column sections on a visual layout canvas.
Who Can Create a Project Template?
Only Super Users or users with appropriate portfolio-level permissions can create and edit project templates, including customizing field layouts, assigning template owners, and cloning templates, under Settings → Portfolios and Projects → Projects.
How to Create a New Template for Projects
Step 1
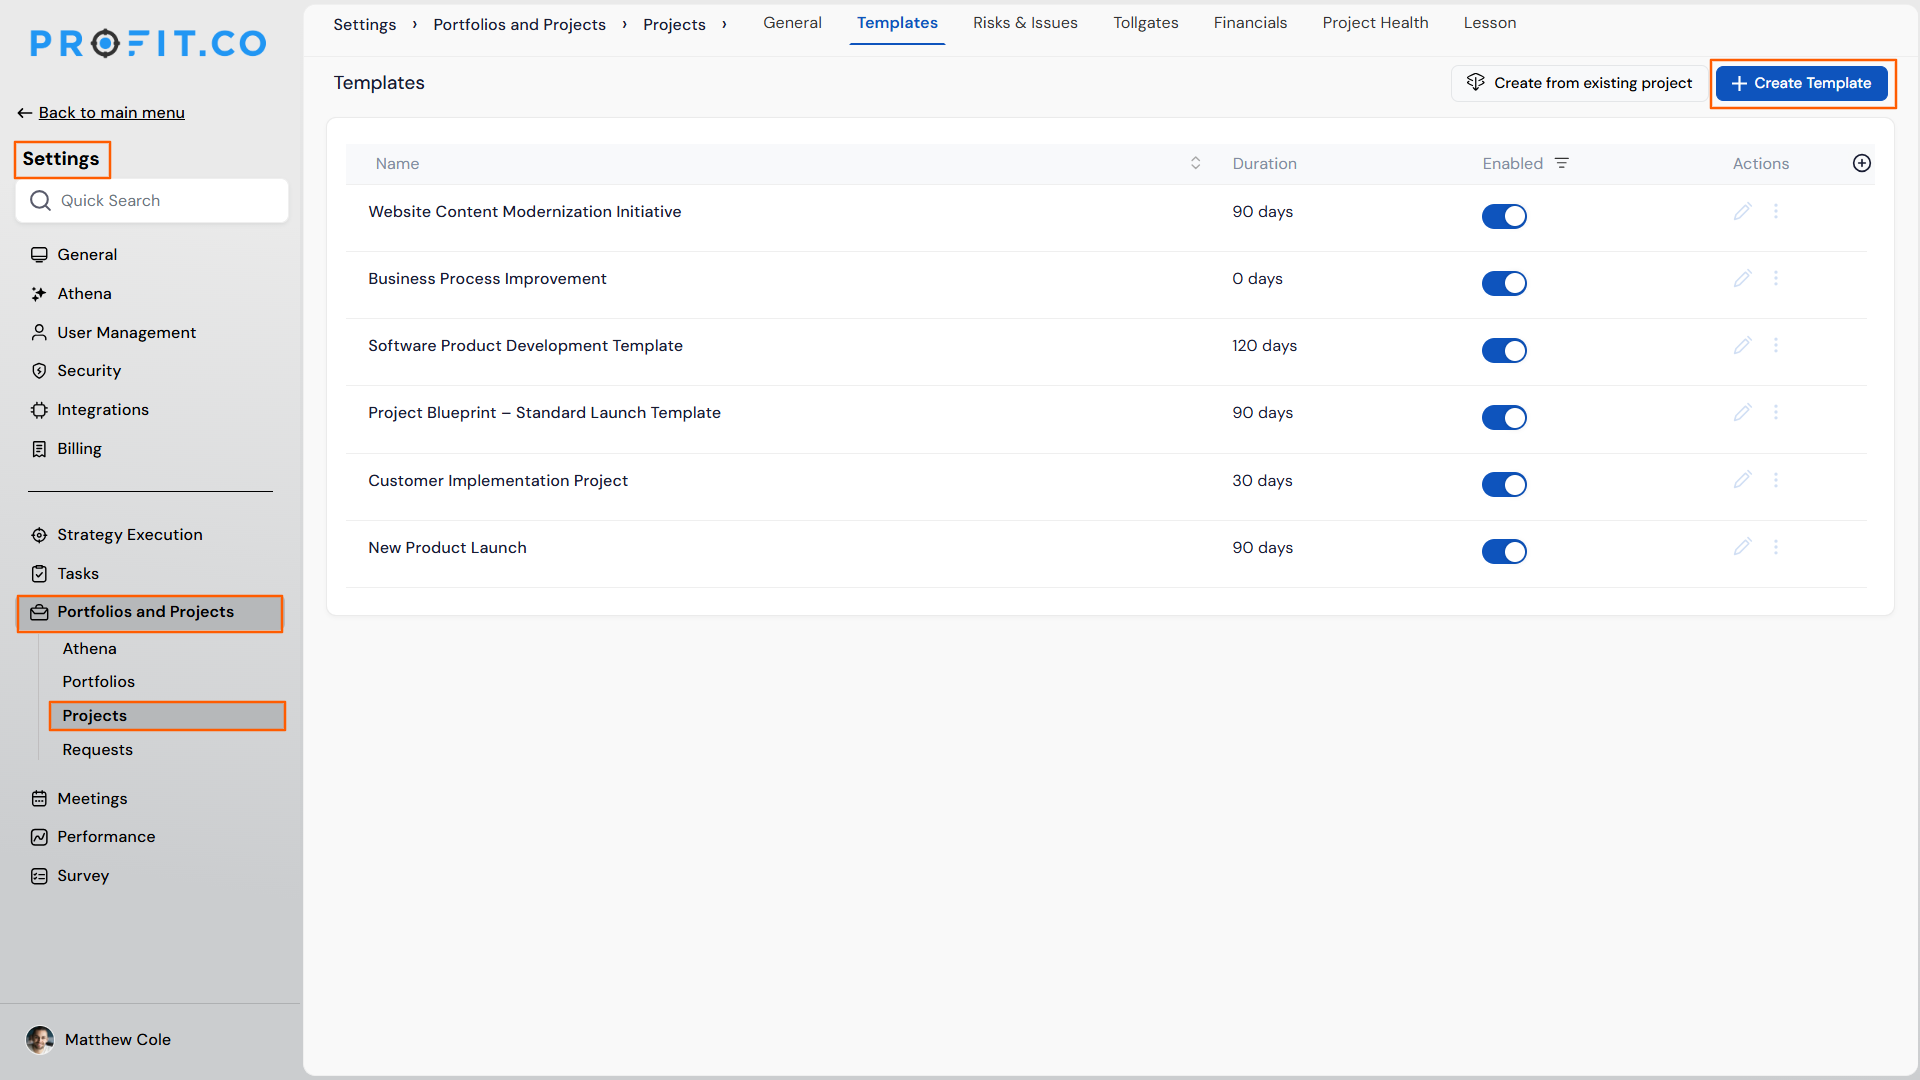
- Go to Settings → Portfolios and Projects → Projects from the left navigation panel.
- Switch to the Templates tab.
- Click + Create Template to start building a new template.
Step 2
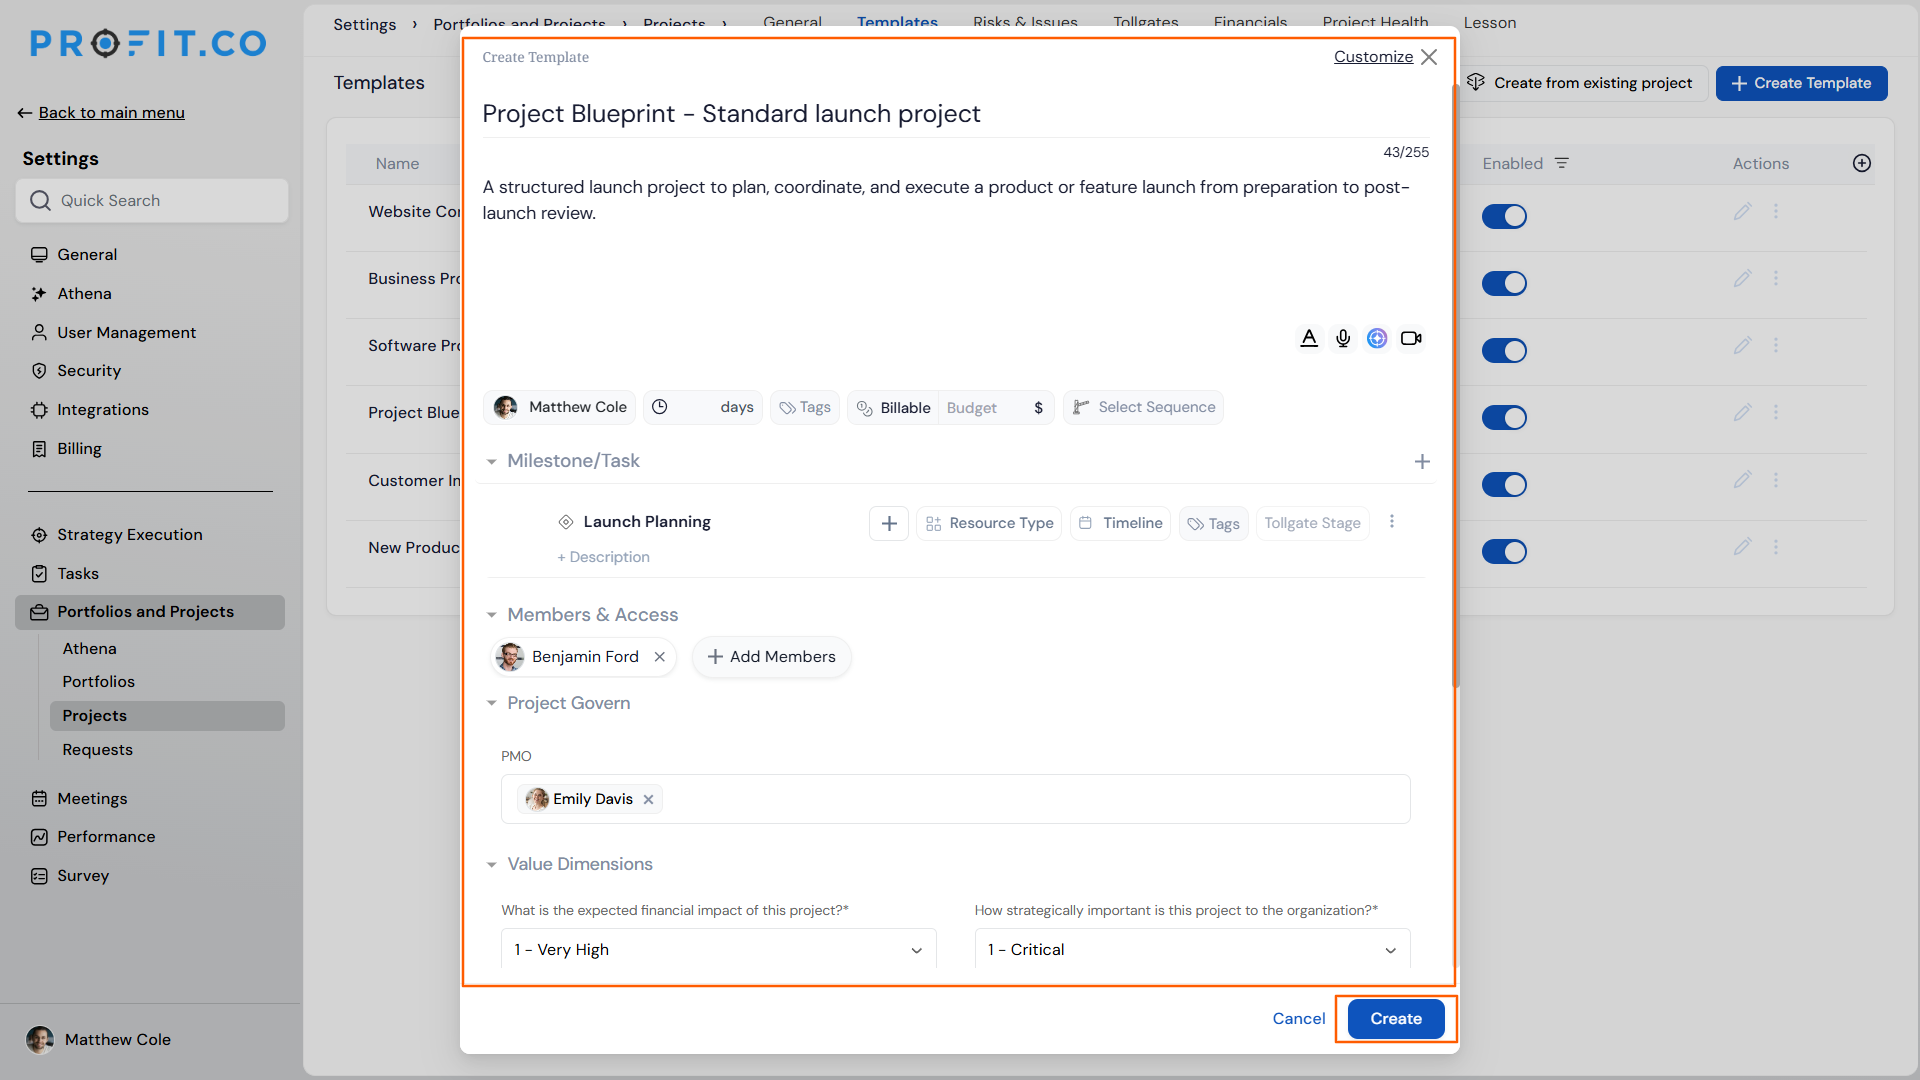
- On the Create Template side panel, enter the Template Name and Description.
- In the chip row, use the Owner(s) field to select one or more template owners; Owner(s) is optional and separate from Add Members, so choosing an owner here doesn't add them to Members & Access.
- Use Select Sequence in the same chip row to choose a Tollgate Sequence for the template.
- Set the Status and Visibility (for example, Public), then click Next.
Add Milestones
- Click + Create under Milestones.
- Enter the Milestone Name, assign Owners, and set Start and Due Dates using relative durations.
- Set the milestone's Tags and Tollgate Stage via the inline chips, then click Save.
Add Tasks and Subtasks
- Click the + icon under a milestone to add a task, enter the Task Name, assign Owners, set Start/Due Dates, and click Save.
- Under any task, click the + (Add subtask) action to add a subtask beneath it; repeat on a subtask to nest further levels.
- Set each task's or subtask's Resource Type and Timeline via its inline chips, then click Next.
You can define task dependencies directly within a project template after it's created. For example, if Task B should start after Task A is completed, you can establish this dependency. These links automatically carry over when a project is created using the template.
Add Members
- Click + Add Members to assign users or teams to the project template.
- Confirm tollgate coverage: if any milestone is missing a Tollgate Stage, Profit.co flags it here so you can complete the mapping before saving.
- After adding members, click Create Template.
Your new template will now appear on the Templates page for future use.
How to Customize a Template's Field Layout
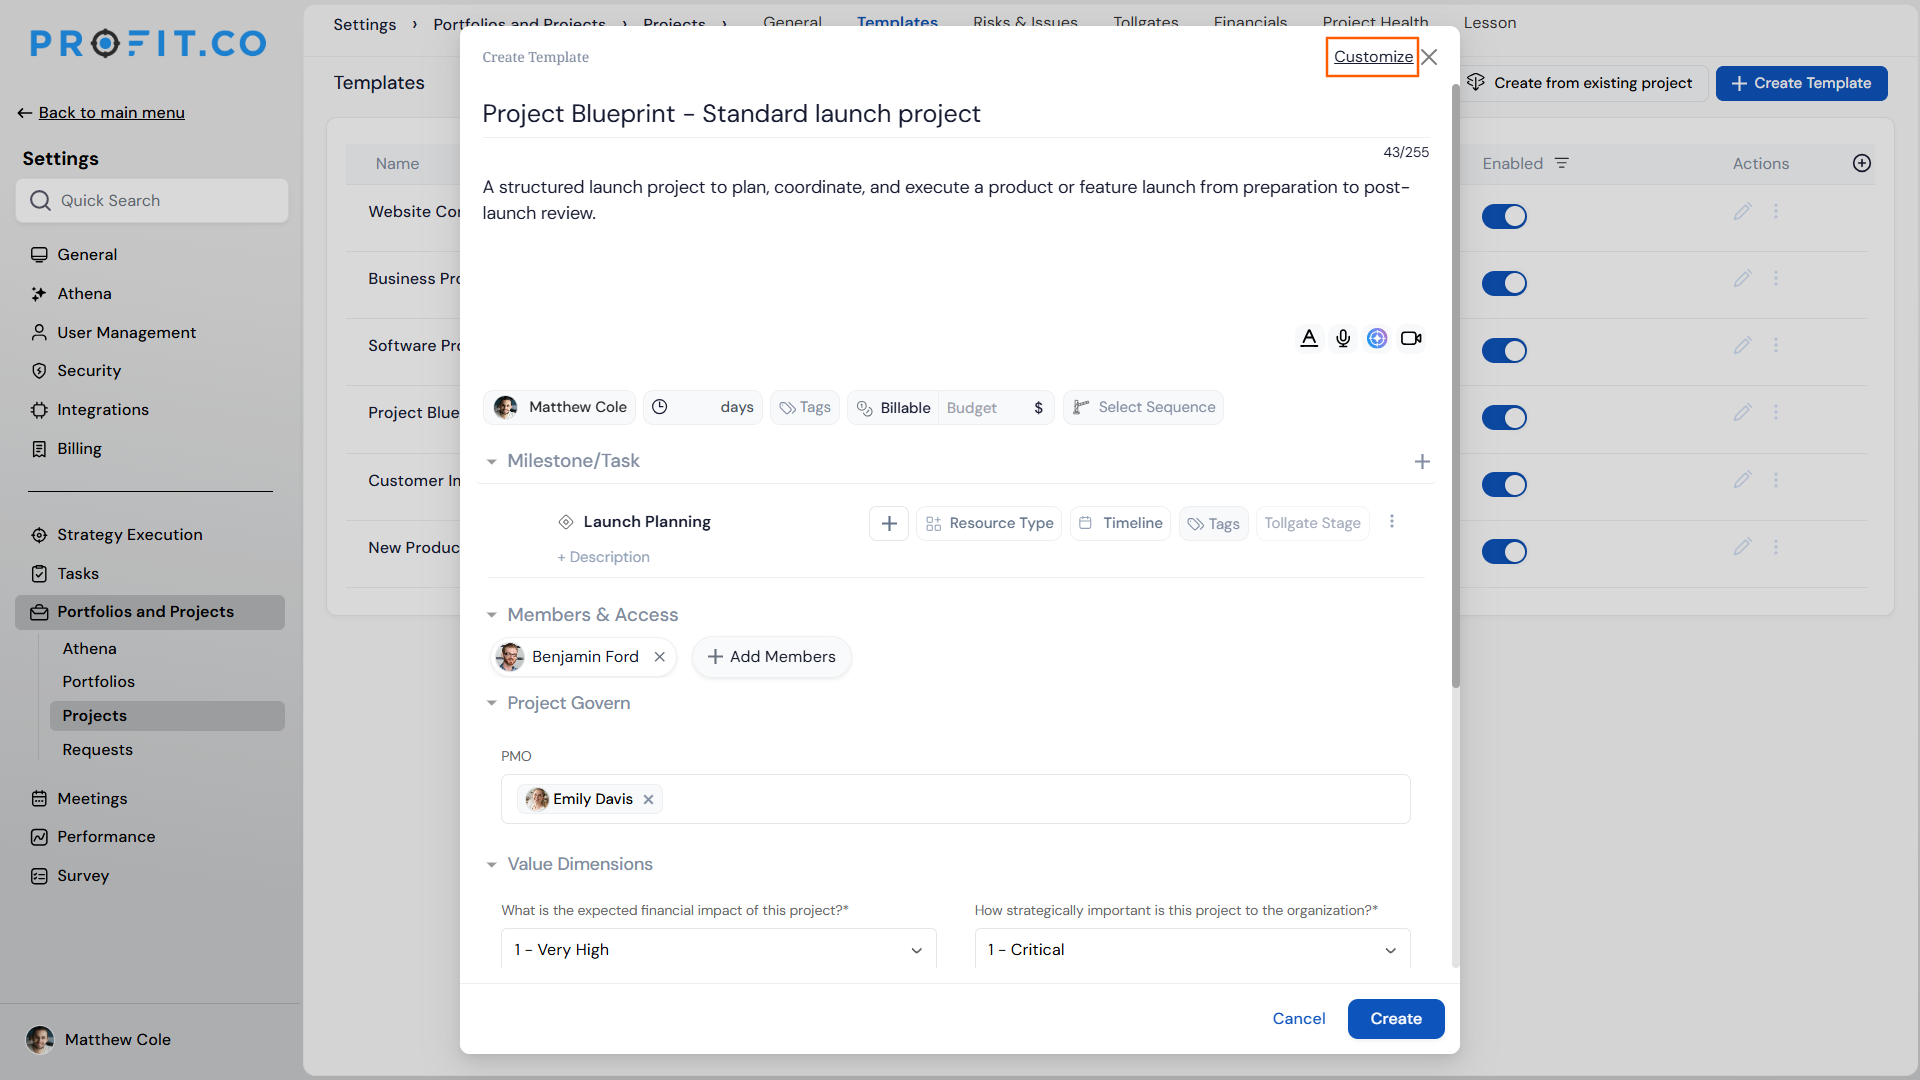
- Open the Layout Builder: On the template, click Customize to open the Customize — Template layout builder.
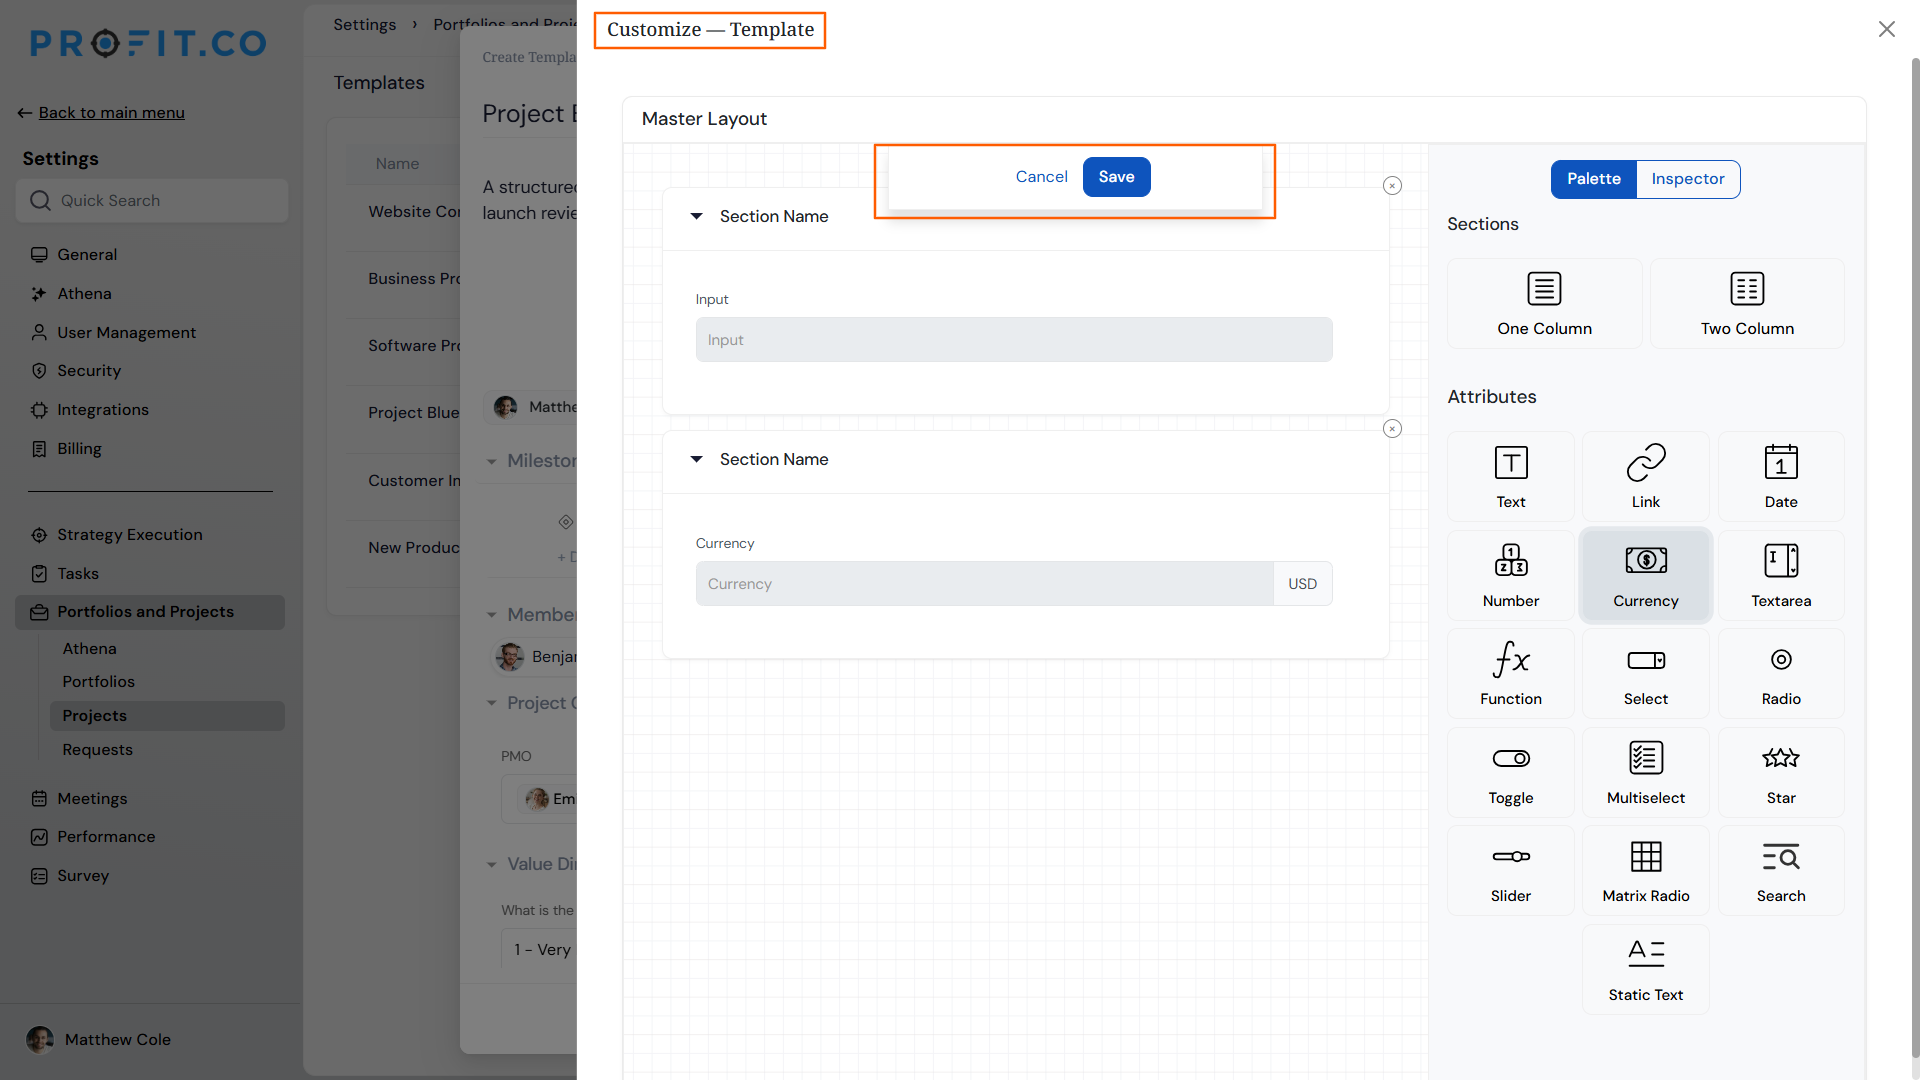
- Add a Section: From the Palette, drag a Section, One Column or Two Column, onto the Master Layout canvas.
- Add Attributes: Drag Attributes into the section from the Palette to build the field set.
- Configure Each Field: Select a component on the canvas and use the Inspector to configure its properties.
- Save and Enable: Save the template, then turn on its Enabled toggle in the Templates list to make it available for use.
Note
This layout builder is also available for Portfolio templates via Settings → Portfolios and Projects → Portfolios → Templates, not only Projects templates.
How to Clone an Existing Template
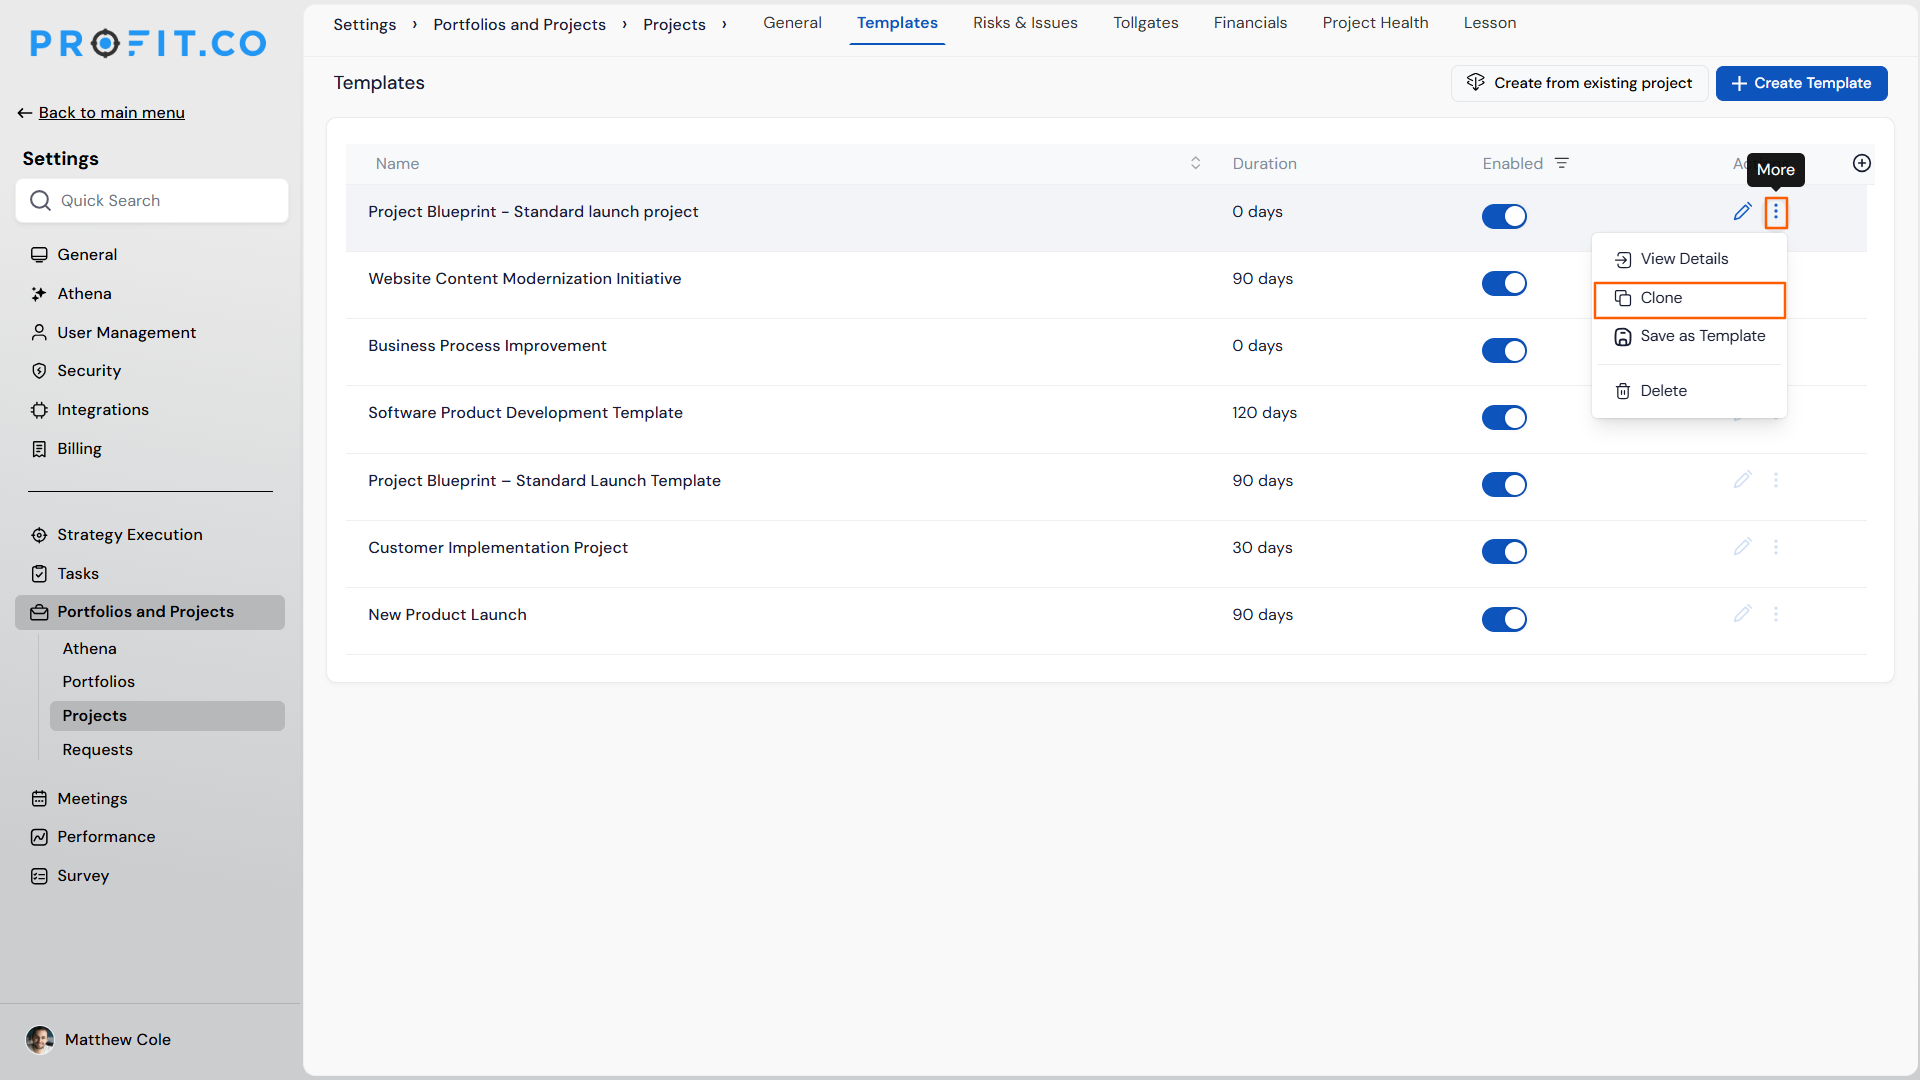
- Open the Clone Action: On the Templates list, open the row Actions menu (⋮) for the template you want to duplicate and select Clone.
- Name the Copy: Update the pre-filled name, shown by default as " (Copy)," if you want something different.
- Choose What Carries Over: Under the Template, Milestones, and Tasks groups, tick the attributes to copy, or use Select all / Clear per group.
- Create the Clone: Click Clone. The new, independent template appears in the Templates list, ready to edit.
How to Use the Newly Created Template?
When creating a new project, you can select an existing template to apply its predefined milestones, tasks, subtasks, and members. The project's Owner(s) field pre-fills with the template's owners plus you, the creating user, deduplicated; you can add or remove owners before creating the project.
Project Template Scenarios and Their Outcomes
| Scenario | What Happens |
|---|---|
| You assign owners on a template but don't add them under Add Members. | Profit.co keeps Owner(s) and Members & Access fully separate, so the owners you select are not added as project members, and members you add are not made owners. |
| You create a project from a template that has owners assigned. | Profit.co pre-fills the project's Owner(s) field with the template's owners plus you, the creating user, deduplicated, so you can adjust the list before creating the project instead of starting from a blank field. |
| You clone an existing template. | Profit.co creates a fully independent copy with no link back to the source, so later edits to either one do not affect the other. |
| You clone a template without changing its Enabled state. | Profit.co carries over the source template's Enabled state onto the copy, so an enabled source produces an enabled copy and a disabled source produces a disabled copy. |
| You clear every attribute in a Clone group before creating the copy. | Profit.co still copies each item's Name, since Name is not a selectable attribute, so only the additional details you leave unchecked are omitted. |
| You create a project from a template that includes milestones, tasks, and subtasks. | Profit.co generates the full milestone, task, and subtask hierarchy automatically on the new project, so the new project's breakdown matches the template exactly. |
Best Practices for Project Templates
Tip
Group related attributes into the same layout Section, for example all budget fields together, so a template stays easy to scan as it grows more complex.
- Create templates for frequently used project types.
- Use relative durations to maintain flexibility in schedules.
- Add dependencies to ensure logical sequencing.
- Keep templates updated with the latest task structures.
- Limit editing permissions to Super Users to ensure standardization.
- Set template owners deliberately, since the project pre-fill only adds the creating user on top of them, it won't add your standard reviewer or stakeholder group automatically.
- Check a cloned template's Enabled toggle before rolling it out, since Clone carries over the source template's status rather than resetting it.
Related Questions
Frequently Asked Questions
Yes. You can edit existing templates anytime by opening them under the Templates tab and updating milestones, tasks, subtasks, owners, or the field layout.
Yes. Use the Clone action from the row Actions menu on the Templates list to create an independent copy, then choose exactly which details carry over under Template, Milestones, and Tasks.
Yes. Any dependencies defined in the original template are automatically carried over when you create a project from that template.
Execute your strategy with confidence
Connect OKRs, tasks, and teams in one place with Profit.co
