

Time-Based Triggers let admins schedule automatic checks on task due dates and send reminder or escalation emails to the right people without manual follow-up.
Table of Contents
What are Time-Based Triggers?
A Time-Based Trigger is a scheduled workflow that checks task due dates on a set cadence and sends notifications when tasks match defined conditions. Every trigger is built from three parts: a Trigger, a Condition, and an Action.
| Part | What It Defines |
|---|---|
| Trigger | Runs on a schedule against an entity such as Tasks, with a One Time or Recurring execution frequency (daily or by day of week, at a set time) |
| Condition | The rules a task must match, built in the Check If builder using attributes, operators, and values grouped into sets and groups |
| Action | The Send Notification action, which emails matching tasks to chosen recipients using a subject, message, and built-in task-list table |
Every trigger appears in the Time-Based list with its configured frequency and an Enabled toggle you can turn on or off at any time.
Note
Time-Based Triggers only send notifications. They do not change task status, due dates, or any other task data.
Why Time-Based Triggers Matter
Before Time-Based Triggers, reminding owners before a deadline or alerting a manager after one passed meant checking task lists manually or building ad hoc reminders. A trigger runs that check on a schedule and sends the alert automatically, so nothing depends on someone remembering to look.
Because Send Notification rolls matching tasks into a single message with a built-in task-list table, a recipient gets one consolidated email instead of a separate alert per task, and the same escalation path runs consistently every time the schedule fires.
How It Works
Step 1
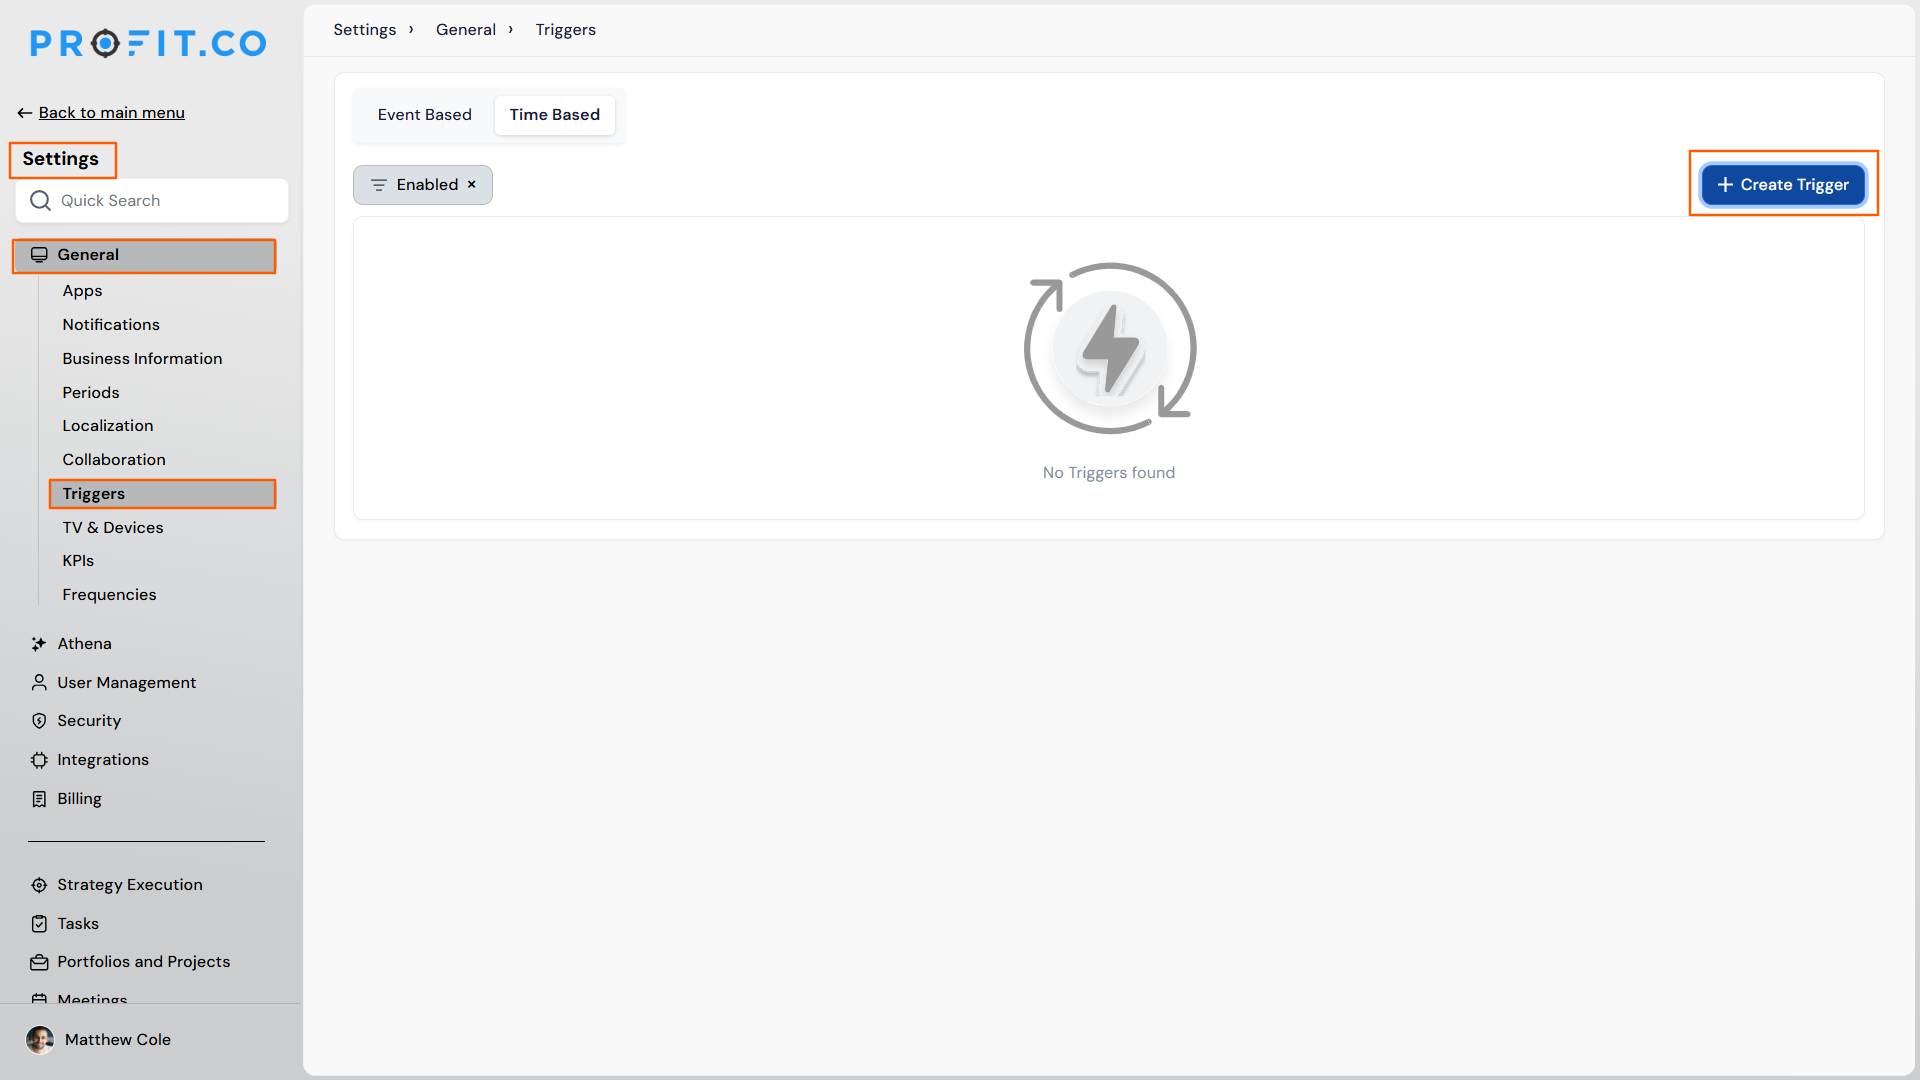
- Navigate to Settings → General → Triggers → Time-Based.
- Click + Create Trigger, or open an existing trigger to edit it.
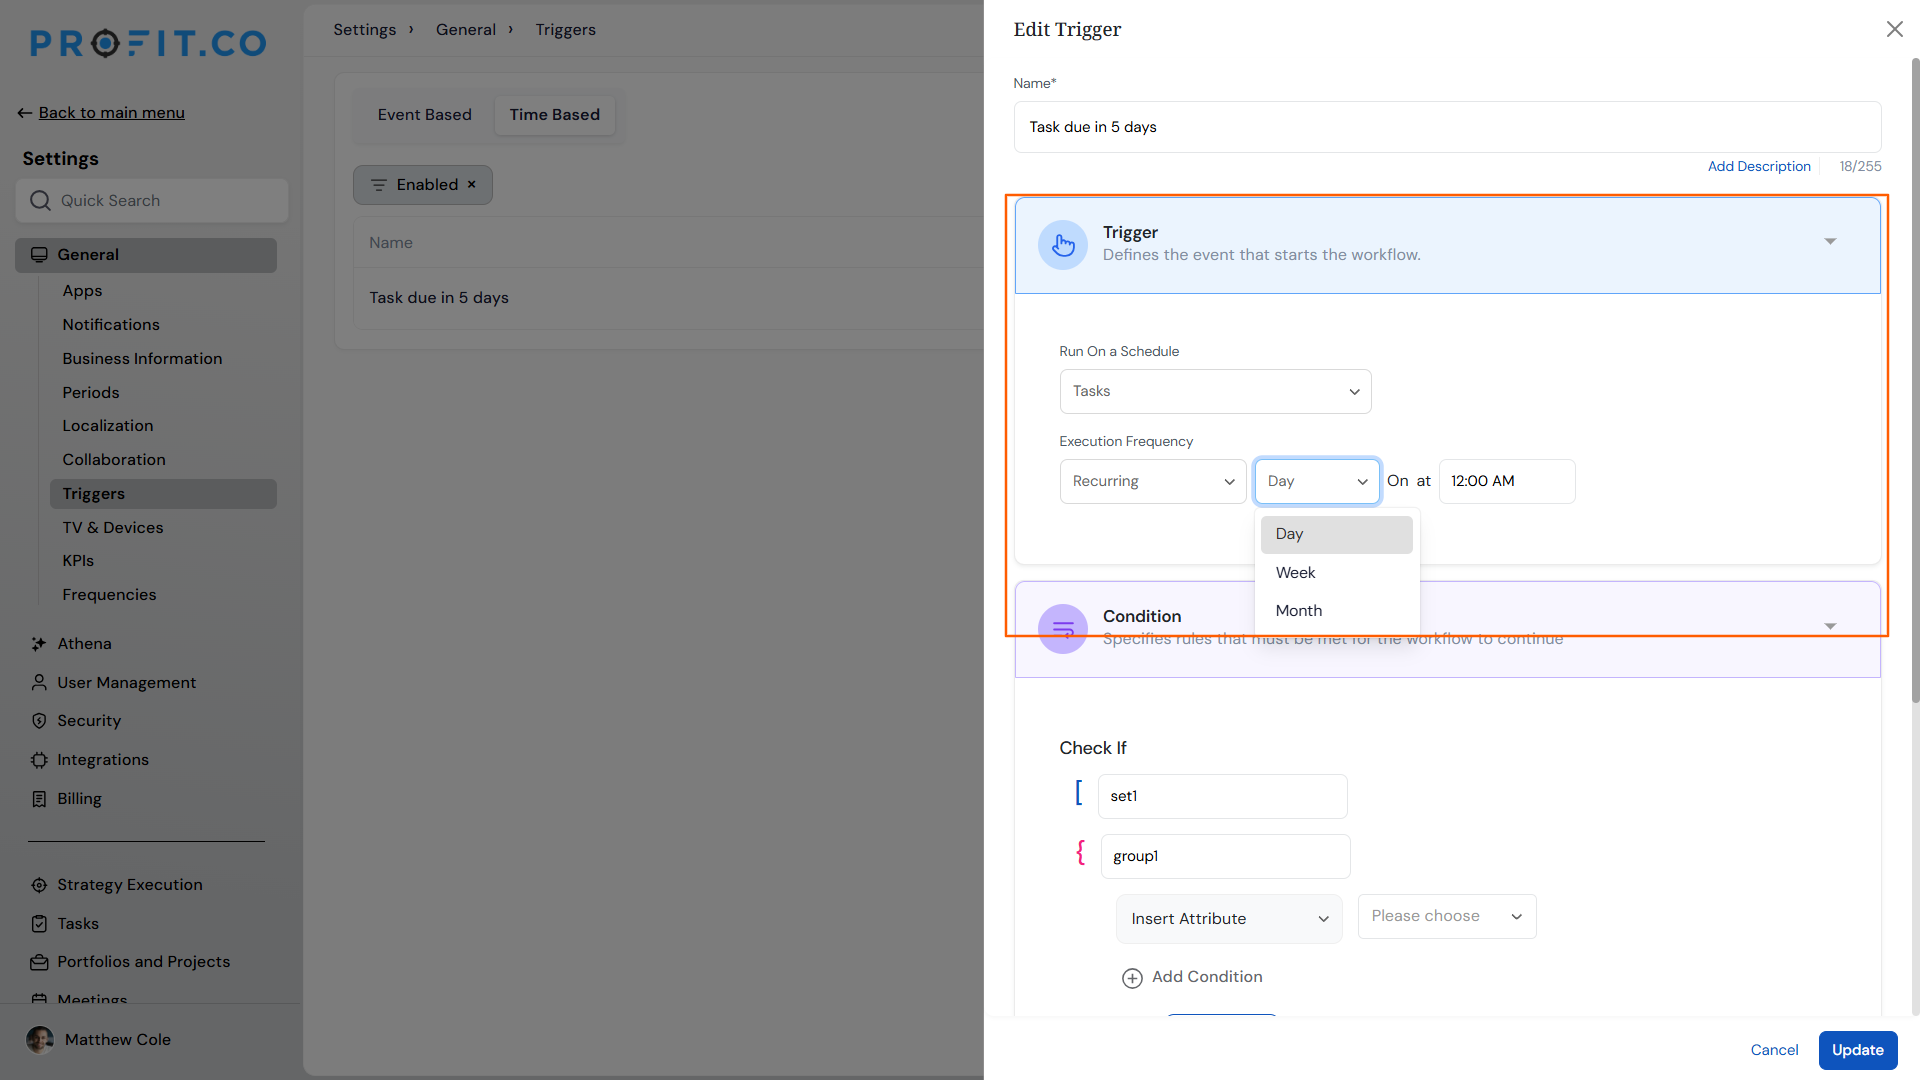
- Name the trigger.
- Under Trigger, set Run On a Schedule to Tasks.
- Choose the Execution Frequency: One Time, or Recurring (daily or by day of week) at a set time.
Step 2
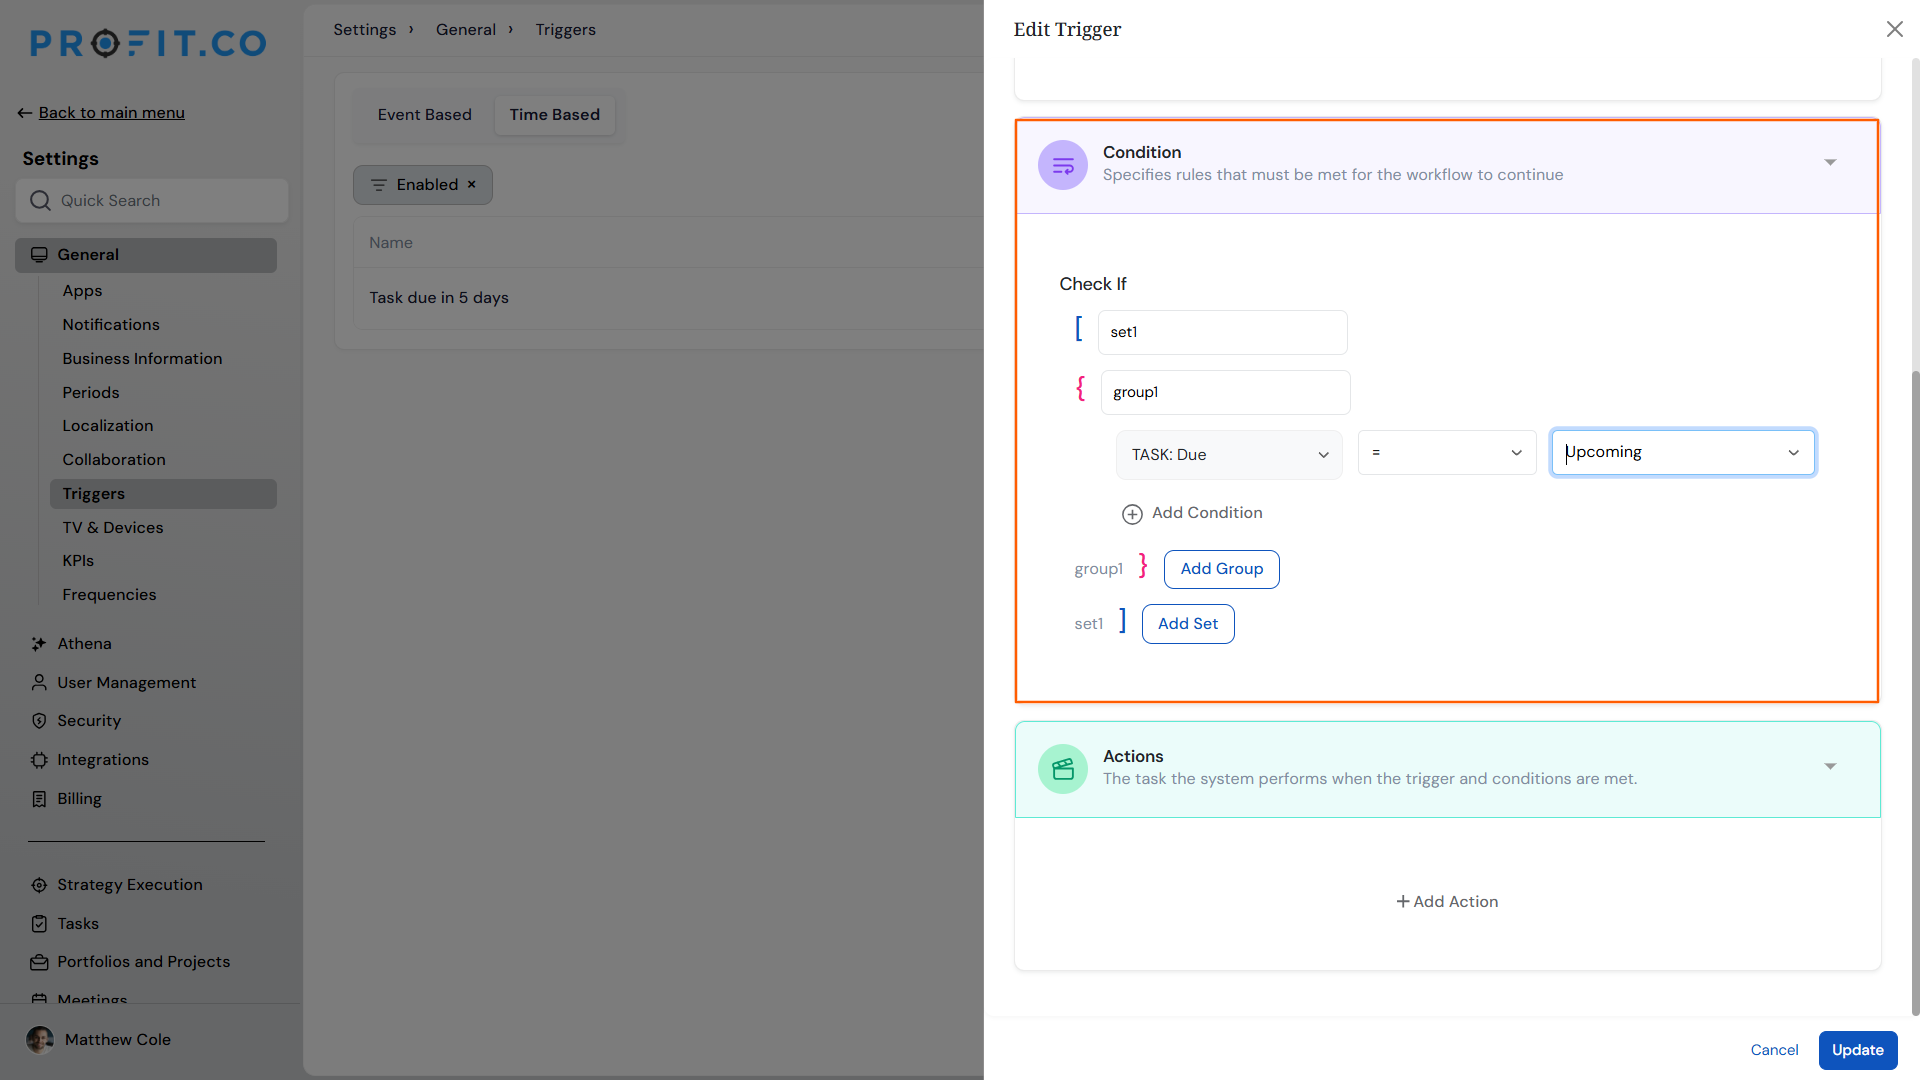
- Under Condition, open Check If.
- Use Insert Attribute, an operator, and a value to build a rule, for example tasks approaching or past their due date.
- Add more conditions, groups, or sets as needed.
Step 3
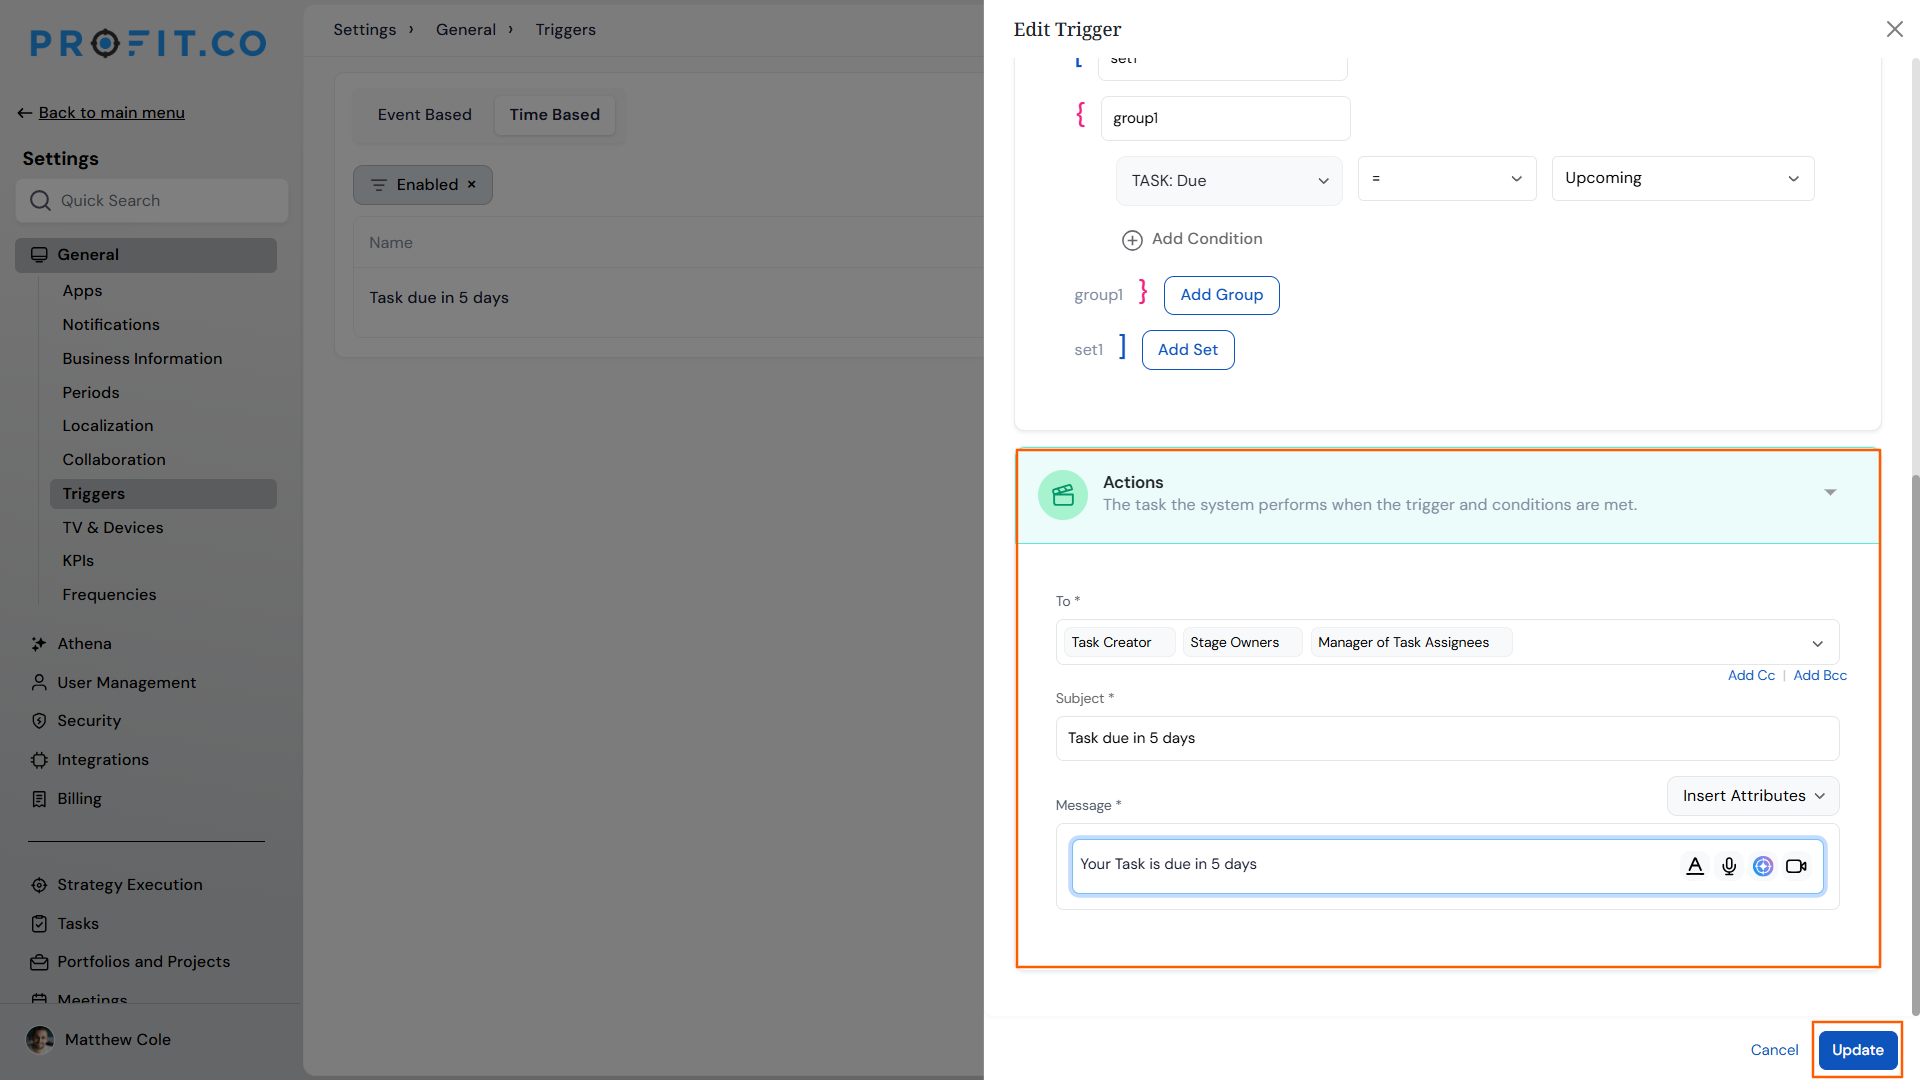
- Under Actions, click + Add Action → Send Notification.
- Choose recipients: To defaults to Task Assignees, CC defaults to Manager of Task Assignees, and you can add your own To, CC, or Bcc.
- Write the subject and message, and insert the task-list table (Task Name, Assignee, Planned Start/Due Date, Status) using Insert Attributes.
- Click Create, or Update if editing an existing trigger.
The trigger runs on its schedule and notifies matching recipients automatically.
Time-Based Trigger Scenarios and Their Outcomes
These outcomes cover what happens when a trigger runs, not the steps used to configure it.
| Scenario | What Happens |
|---|---|
| You leave a Recurring trigger running and a task still matches its condition on the next scheduled run. | Profit.co sends another notification, and it does this every time the task matches, not only the first time. |
| You turn off a trigger's Enabled toggle. | Profit.co stops the trigger immediately, and it does not run again on its next scheduled time. |
| You let a trigger run against tasks that match its Condition. | Profit.co emails Task Assignees by default, and it copies the Manager of Task Assignees along with any additional recipients you have added to To, CC, or Bcc. |
| You let a trigger run when no tasks match its Condition. | Profit.co sends no notification, and it waits until a task actually matches the Condition before sending one. |
Best Practices for Time-Based Triggers
- Keep Recurring trigger conditions specific, for example days overdue rather than any overdue task, since a Recurring trigger emails matching tasks every time it runs, not just once.
- Route escalations to the Manager of Task Assignees in CC rather than To, so assignees stay the primary owner of the follow-up while managers stay informed.
- Use the built-in task-list table in the notification message instead of separate triggers per task, since Send Notification already consolidates matching tasks into one message.
- Turn off a trigger's Enabled toggle as soon as an escalation path is no longer needed, since disabling it stops runs immediately rather than waiting for the schedule to lapse.
- Test a new Condition with a narrow rule first, since Check If matches broadly against the entity you choose, and a loose rule can pull in more tasks than intended.
Related Articles
Frequently Asked Questions
This guide covers Tasks as the entity. Check the Run On a Schedule entity list in your account for the full set of supported entities.
Yes. The task-list table inserted into the notification message lists the tasks that matched the trigger's Condition on that run, along with their Task Name, Assignee, Planned Start/Due Date, and Status.
Yes. Beyond the default To (Task Assignees) and CC (Manager of Task Assignees), you can add any additional recipients to To, CC, or Bcc when configuring the Send Notification action.
Execute your strategy with confidence
Connect OKRs, tasks, and teams in one place with Profit.co
