

Profit.co's Milestone Check-in lets you record progress, set health status, and capture actual stage dates from a single check-in panel. Progress rolls up automatically from the tasks within the milestone, and Athena AI can generate check-in comments based on task-level updates beneath it.
⚡ Quick Answer
To perform a Milestone Check-in, go to the milestone's Overview tab and click + Add Check-in. Set the Stage, review the auto-calculated Progress, add a comment manually or with Athena AI, then click Update to save.
Table of Contents
- What is a Milestone Check-in?
- How do I configure Milestone Stage Propagation?
- How do I configure Health Status and Velocity Bands?
- How do I perform a Milestone Check-in?
- How does Athena AI assist with check-ins?
- What is the difference between Automatic and Manual progress?
- Related Questions
- Frequently Asked Questions
What is a Milestone Check-in?
A Milestone Check-in is a periodic progress update recorded against a milestone within a project. Each check-in captures:
- The current Stage of the milestone (e.g., Not Started, In Progress, Completed)
- The Health Status, either set automatically based on progress or entered manually
- The Actual Start Date and Actual End Date, captured automatically when the milestone moves to the configured stage
- A Comment describing progress, risks, or next steps. Write it manually or let Athena AI generate it
Milestone progress is calculated automatically from the tasks within it. As tasks are completed, milestone progress rolls up in real time.
How do I configure Milestone Stage Propagation?
Before performing a check-in, confirm your milestone stage propagation settings are correct.
Step 1: Navigate to Milestone Stage Propagation Settings
- Go to Settings → Portfolios and Projects → Projects from the left navigation panel
- On the Projects settings page, click the Project Health tab
- Scroll down to find the Milestone Stage Propagation section
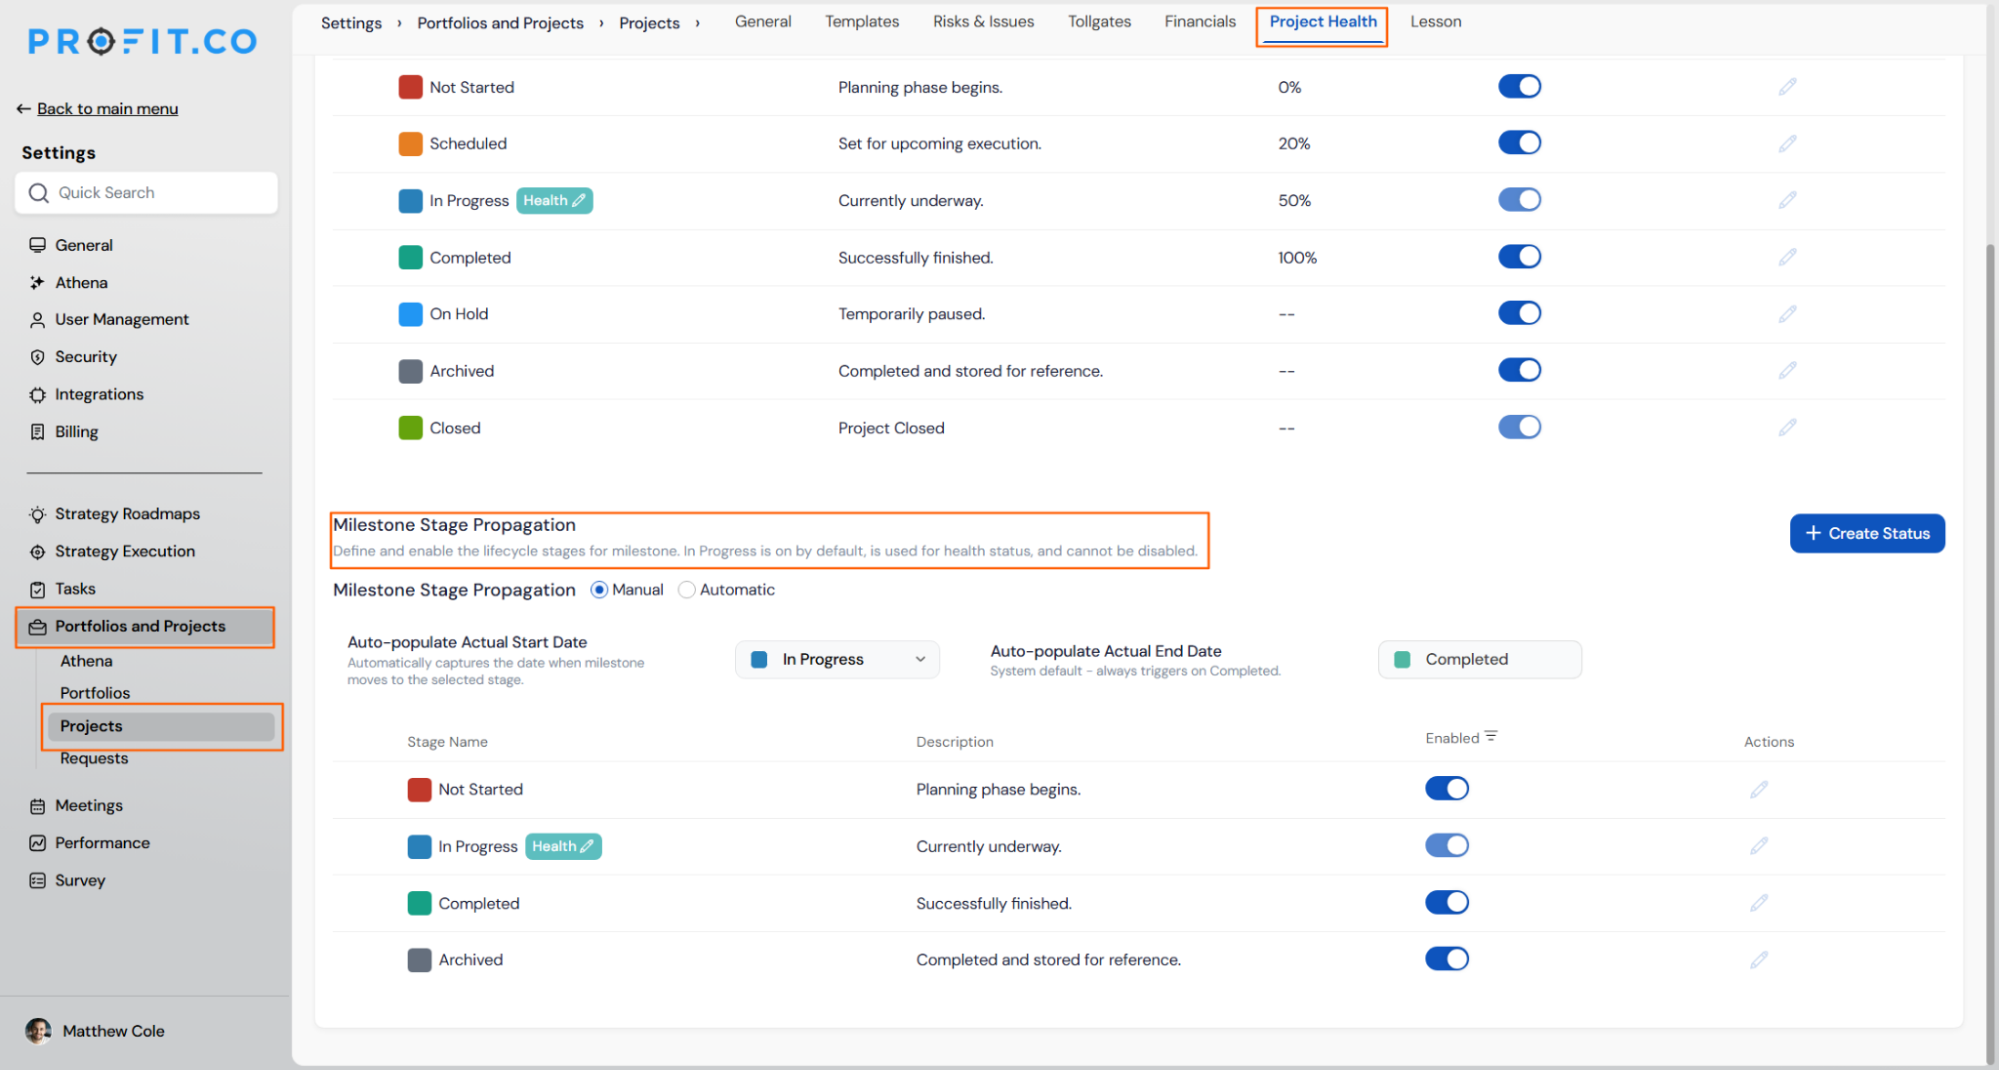
Step 2: Enable Automatic Stage Propagation
By default, milestone stages are set to Manual mode, which requires someone to update the stage at each check-in.
To switch to automatic:
- Click the Automatic radio button
- A confirmation pop-up will appear: "Are you sure you want to switch the milestone stage propagation from manual to automatic?"
- Review the changes listed in the pop-up:
- The current stage will remain as-is
- Future stage updates will happen automatically
- The stage will no longer auto-update based on progress changes once switched back to manual
- Click Proceed to confirm
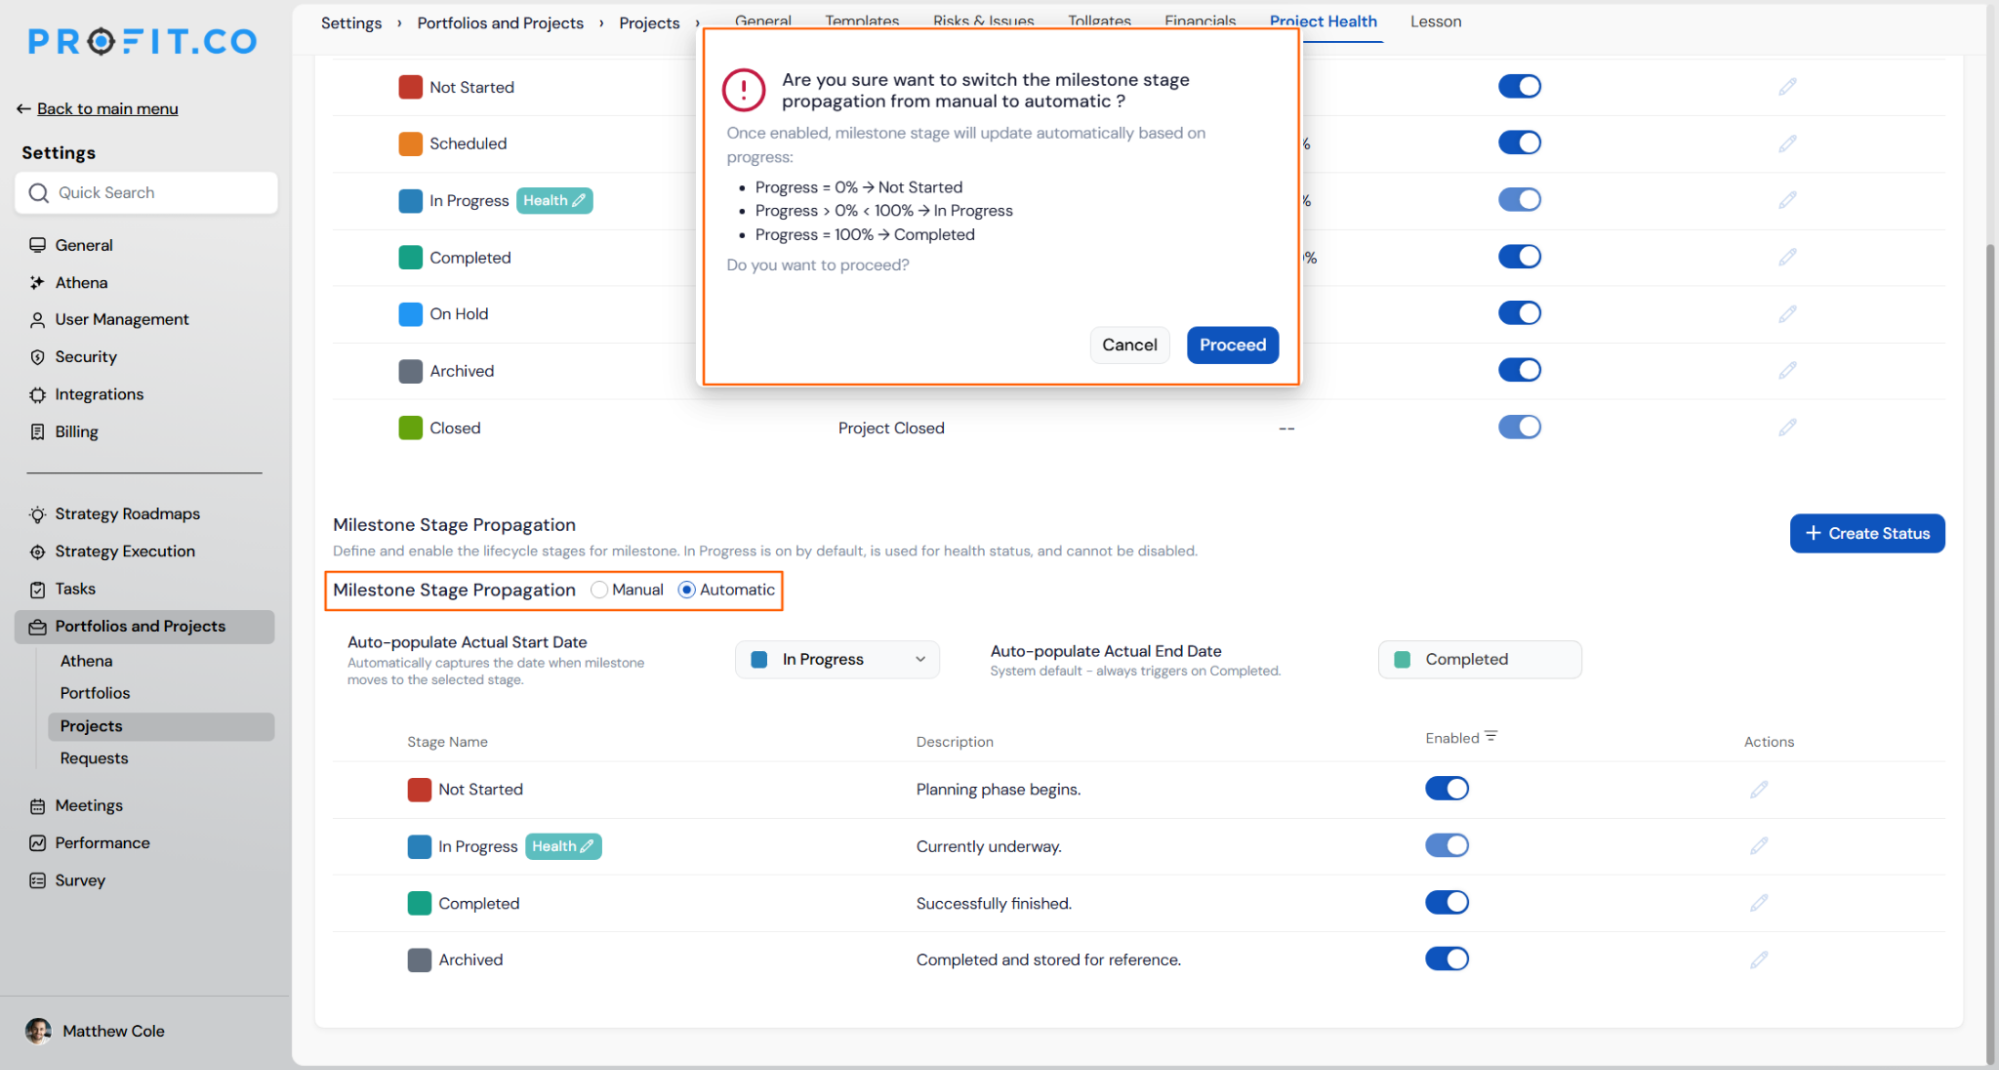
Step 3: Understand Automatic Stage Rules
Once automatic propagation is enabled, milestone stages update in real time based on task progress:
| Progress | Stage |
|---|---|
| 0% | Not Started |
| 1% to 99% | In Progress |
| 100% | Completed |
Example: A milestone with 6 tasks where 5 are complete shows 83% progress. The stage automatically shows In Progress.
Tollgate Validation
When automatic stage propagation is enabled, you can turn on an additional control: Mark the milestone as completed only after validating the tollgate, if it is linked.
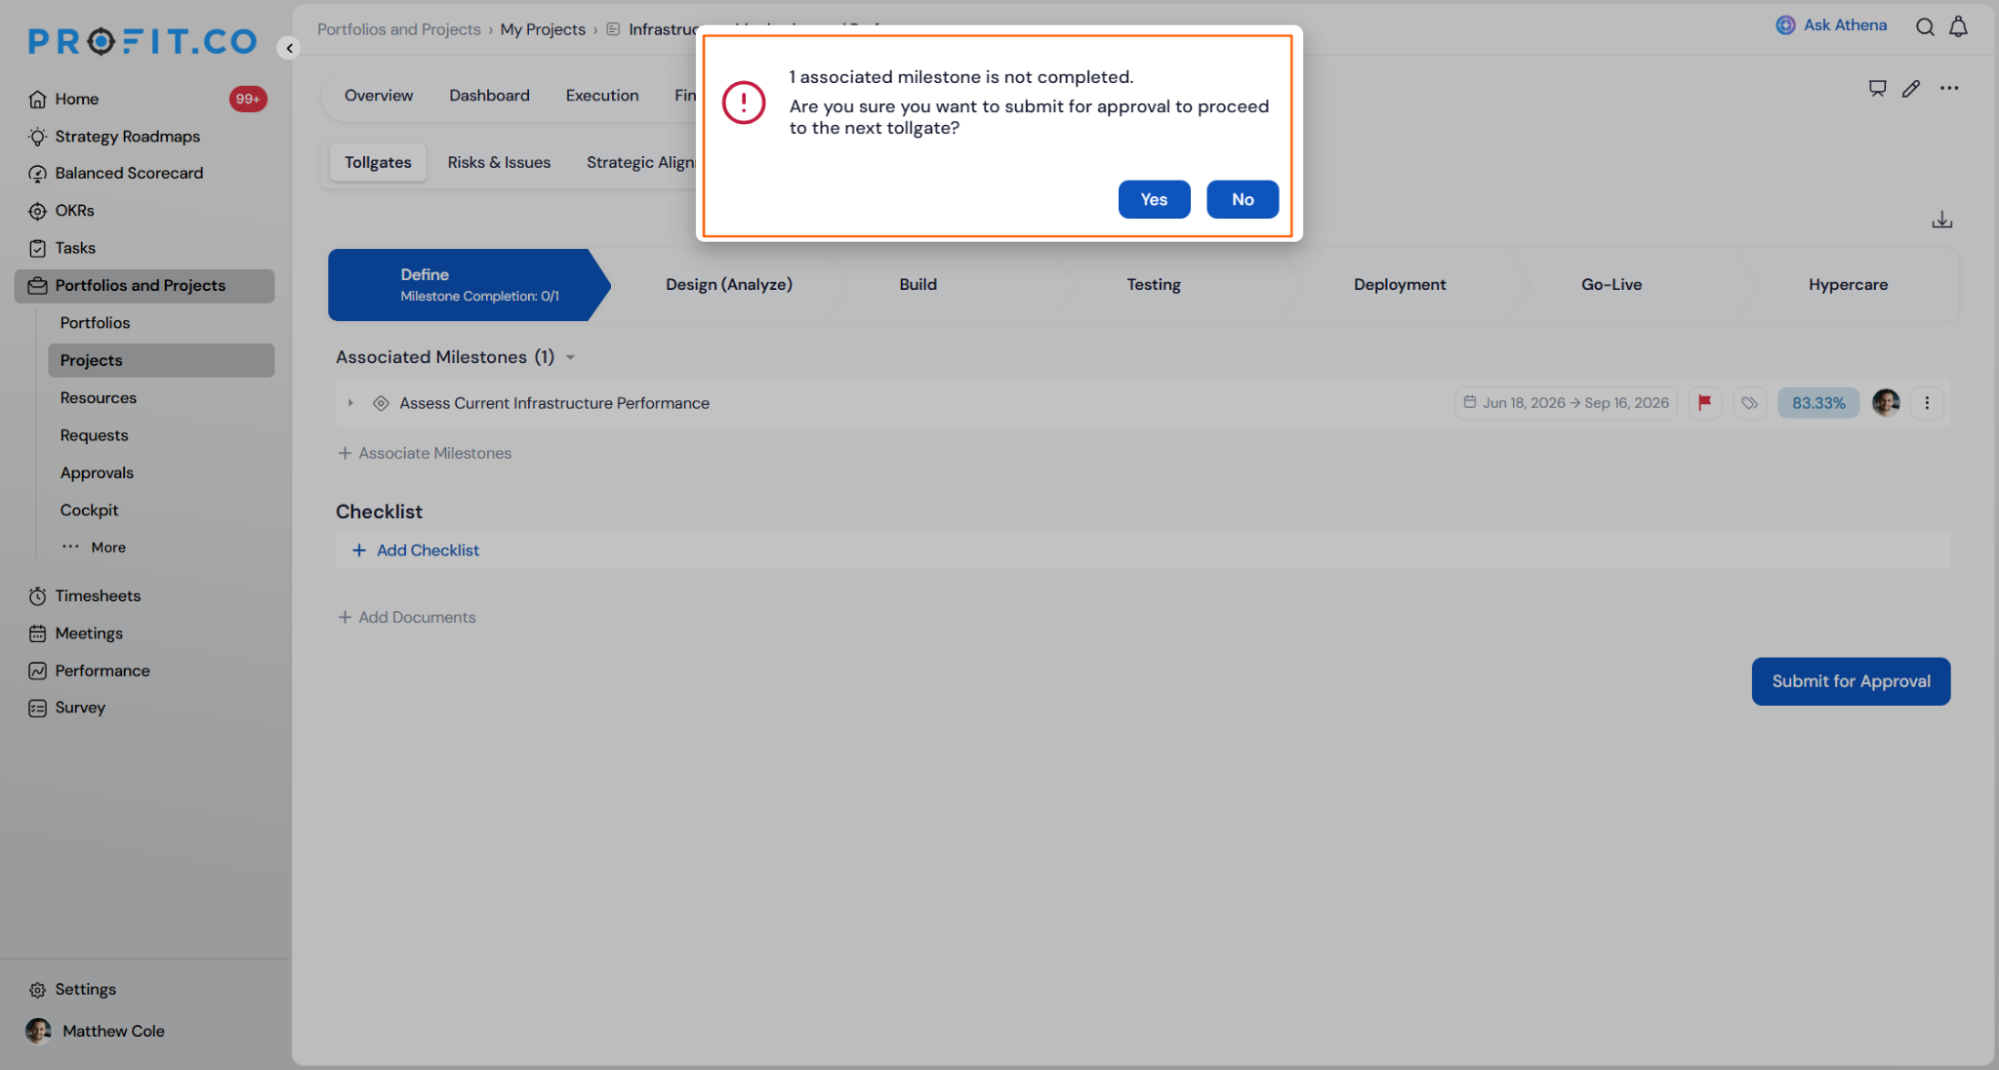
When this toggle is on and a milestone is linked to a tollgate:
- If you attempt to move the tollgate to the next stage before the milestone is complete, a pop-up appears: "1 associated milestone is not completed. Are you sure you want to proceed to the next tollgate?"
- If you click Yes to proceed anyway, the tollgate moves to the next stage but the milestone completion count for that stage remains at 0 because the milestone itself has not been completed
This ensures delivery gates are respected before a milestone closes.
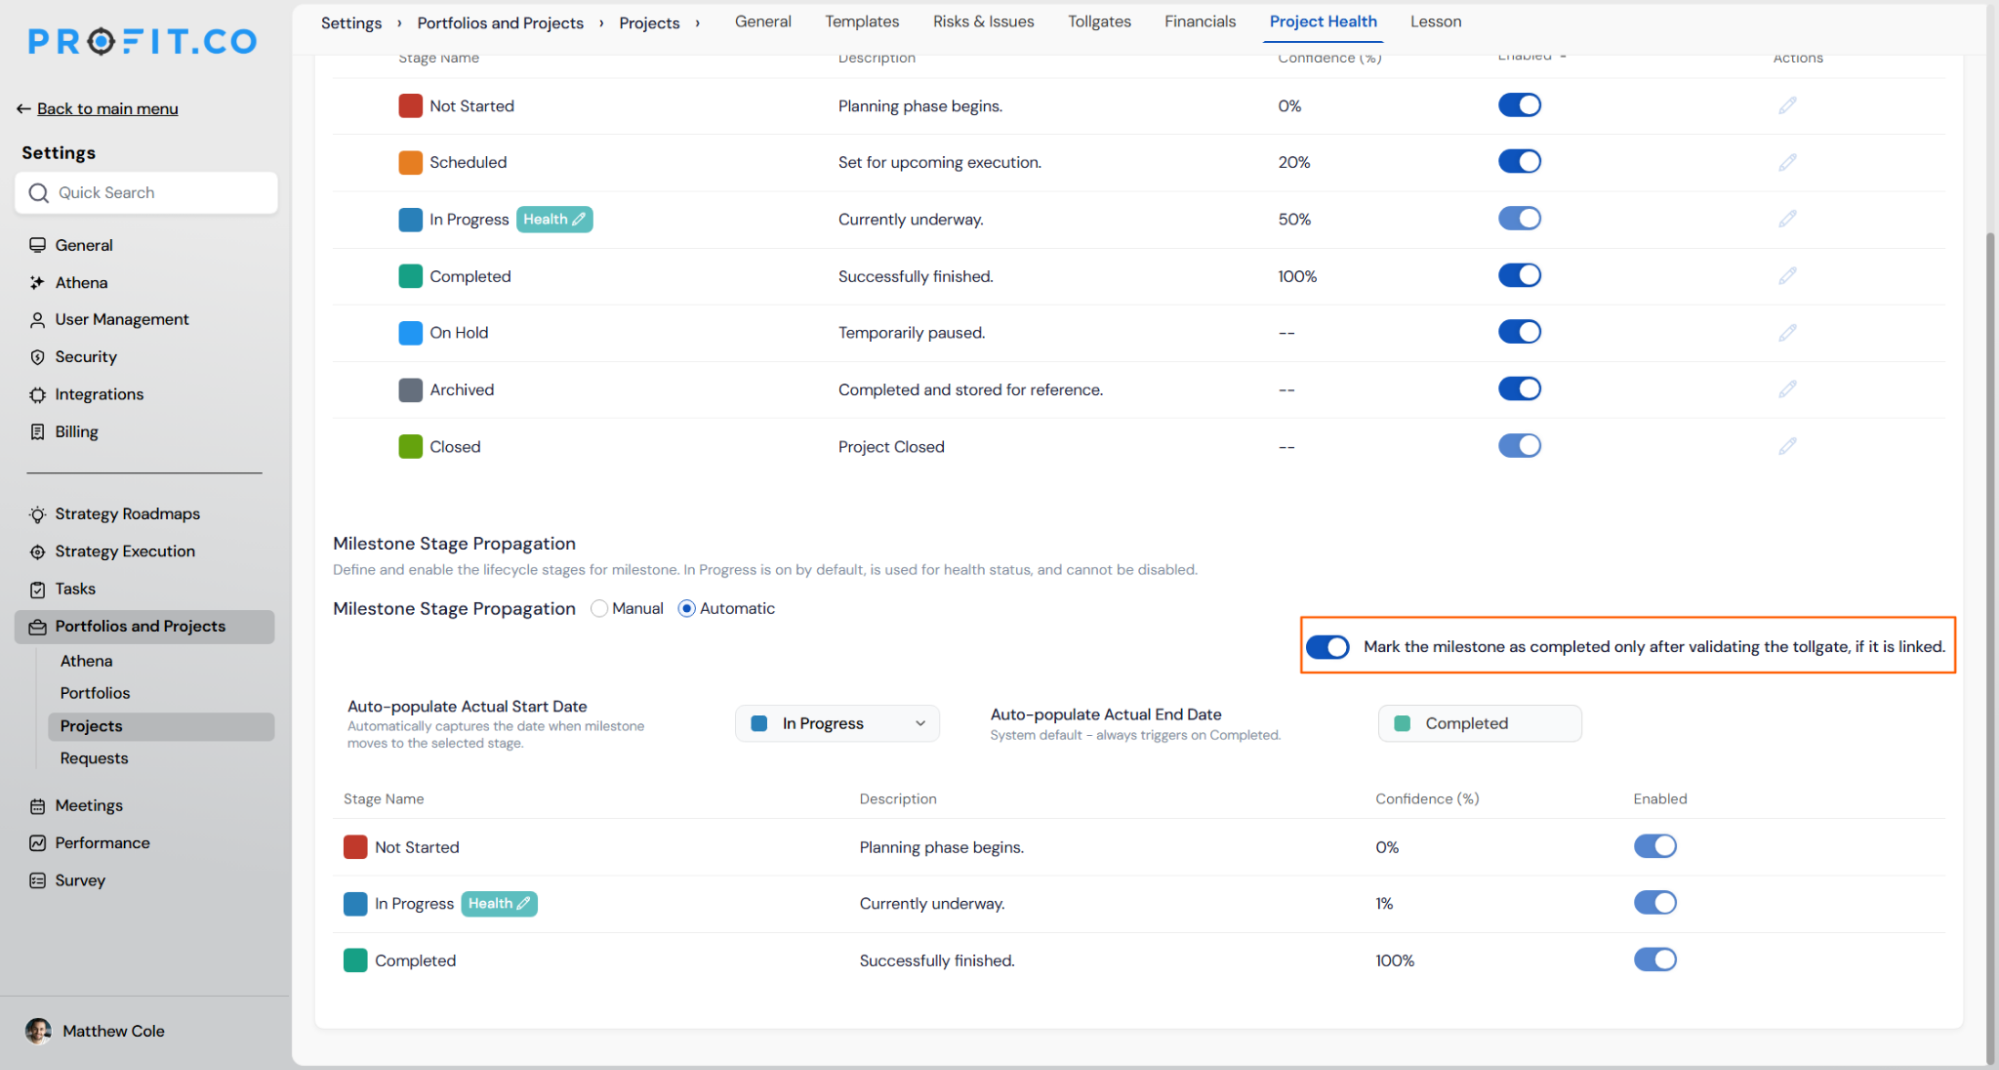
Auto-populate Actual Dates
At the top of the Milestone Stage Propagation section, two date settings control when actual dates are recorded:
- Auto-populate Actual Start Date: Captures the date when the milestone moves to the selected stage. Default trigger stage is In Progress. This is configurable.
- Auto-populate Actual End Date: System default. Always triggers when the milestone moves to Completed. This is not configurable.
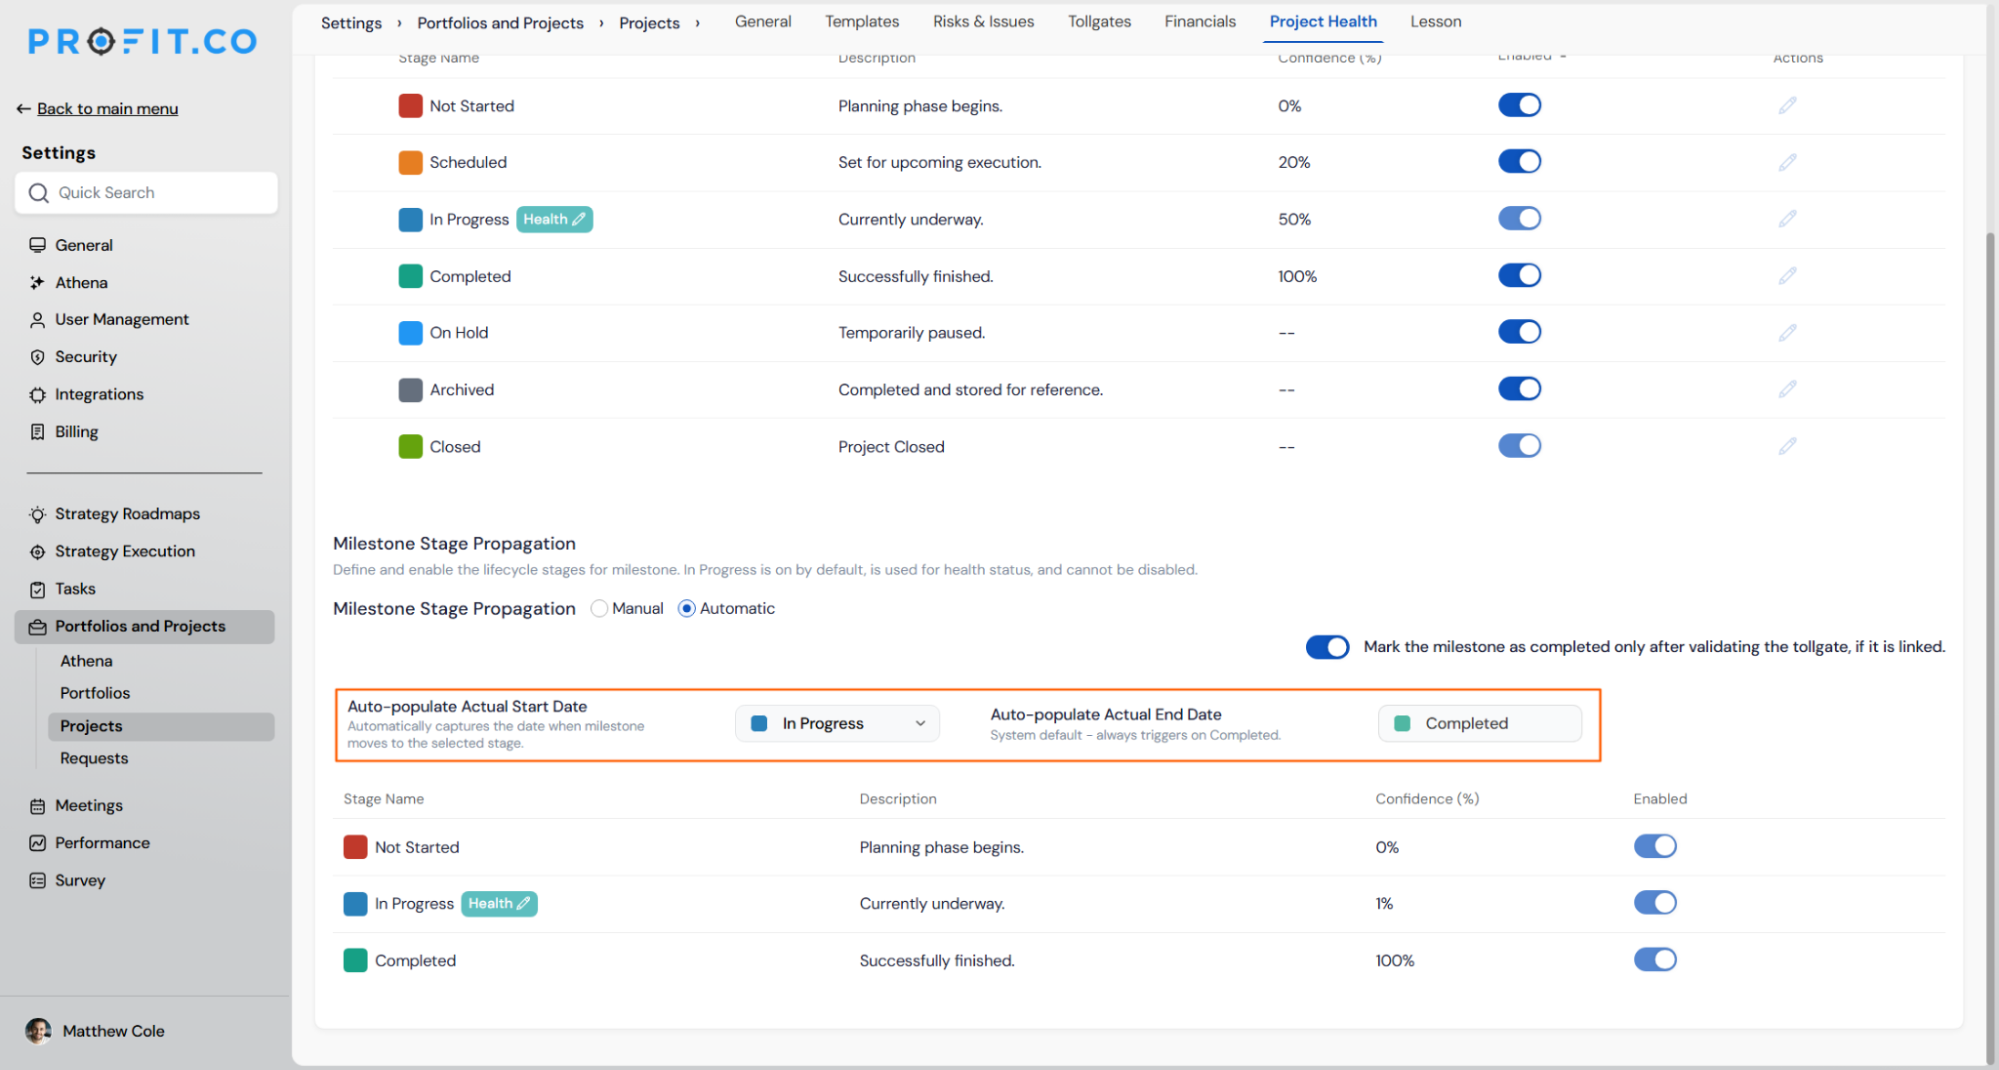
These settings mean you never need to manually log when a milestone started or finished.
How do I configure Health Status and Velocity Bands?
Health status applies to milestones in the In Progress stage. You can configure how health is assigned and what thresholds define each state.
Step 1: Open Health Status Configuration
- On the Project Health tab, click the Health icon next to the In Progress milestone stage to open the Health Status Configuration panel.
- Toggle on Enable Automatic Health Status to let Profit.co assign health automatically during check-ins.
The formula used is:
Actual Progress ÷ Planned Progress × 100
The resulting percentage is matched against your configured Velocity Bands to determine the health status.
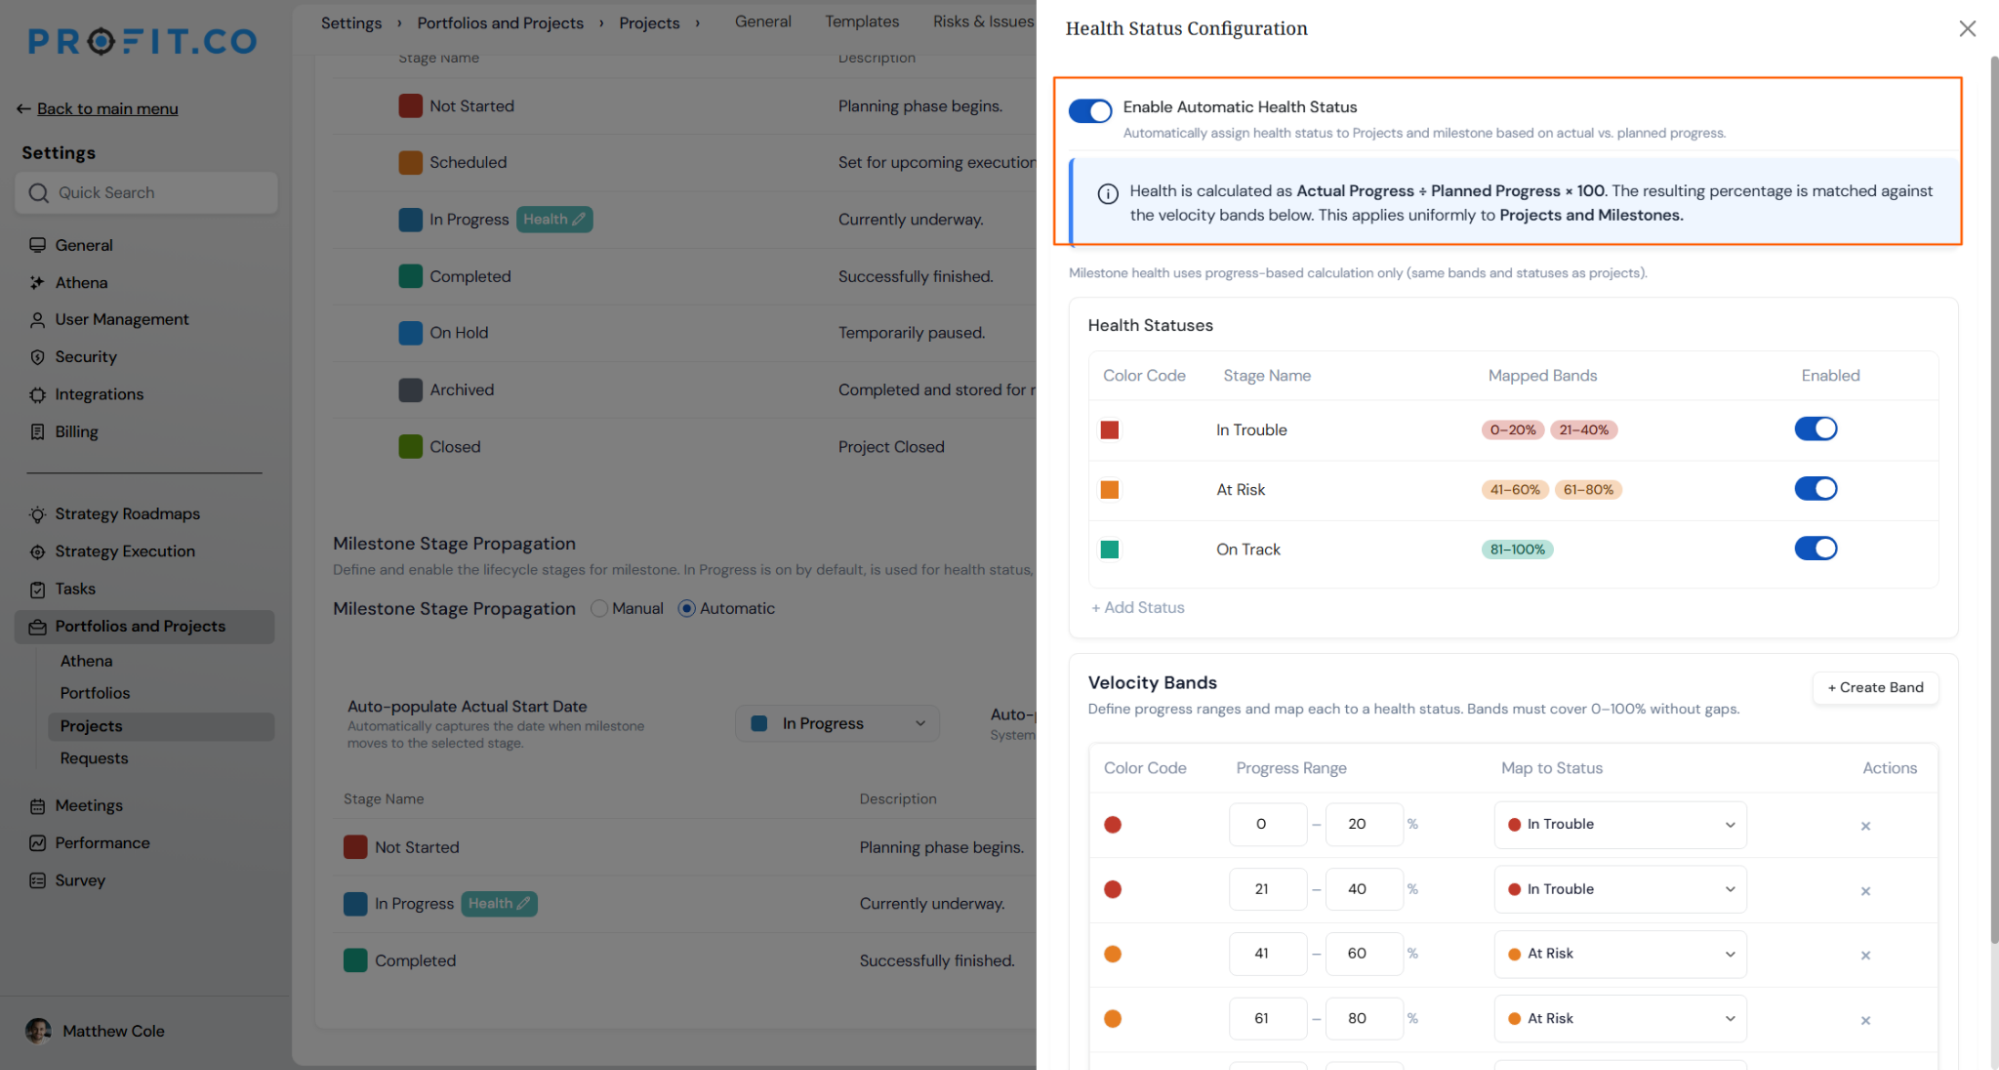
Note: If you prefer manual control, leave this toggle off. You can set health status manually during each check-in.
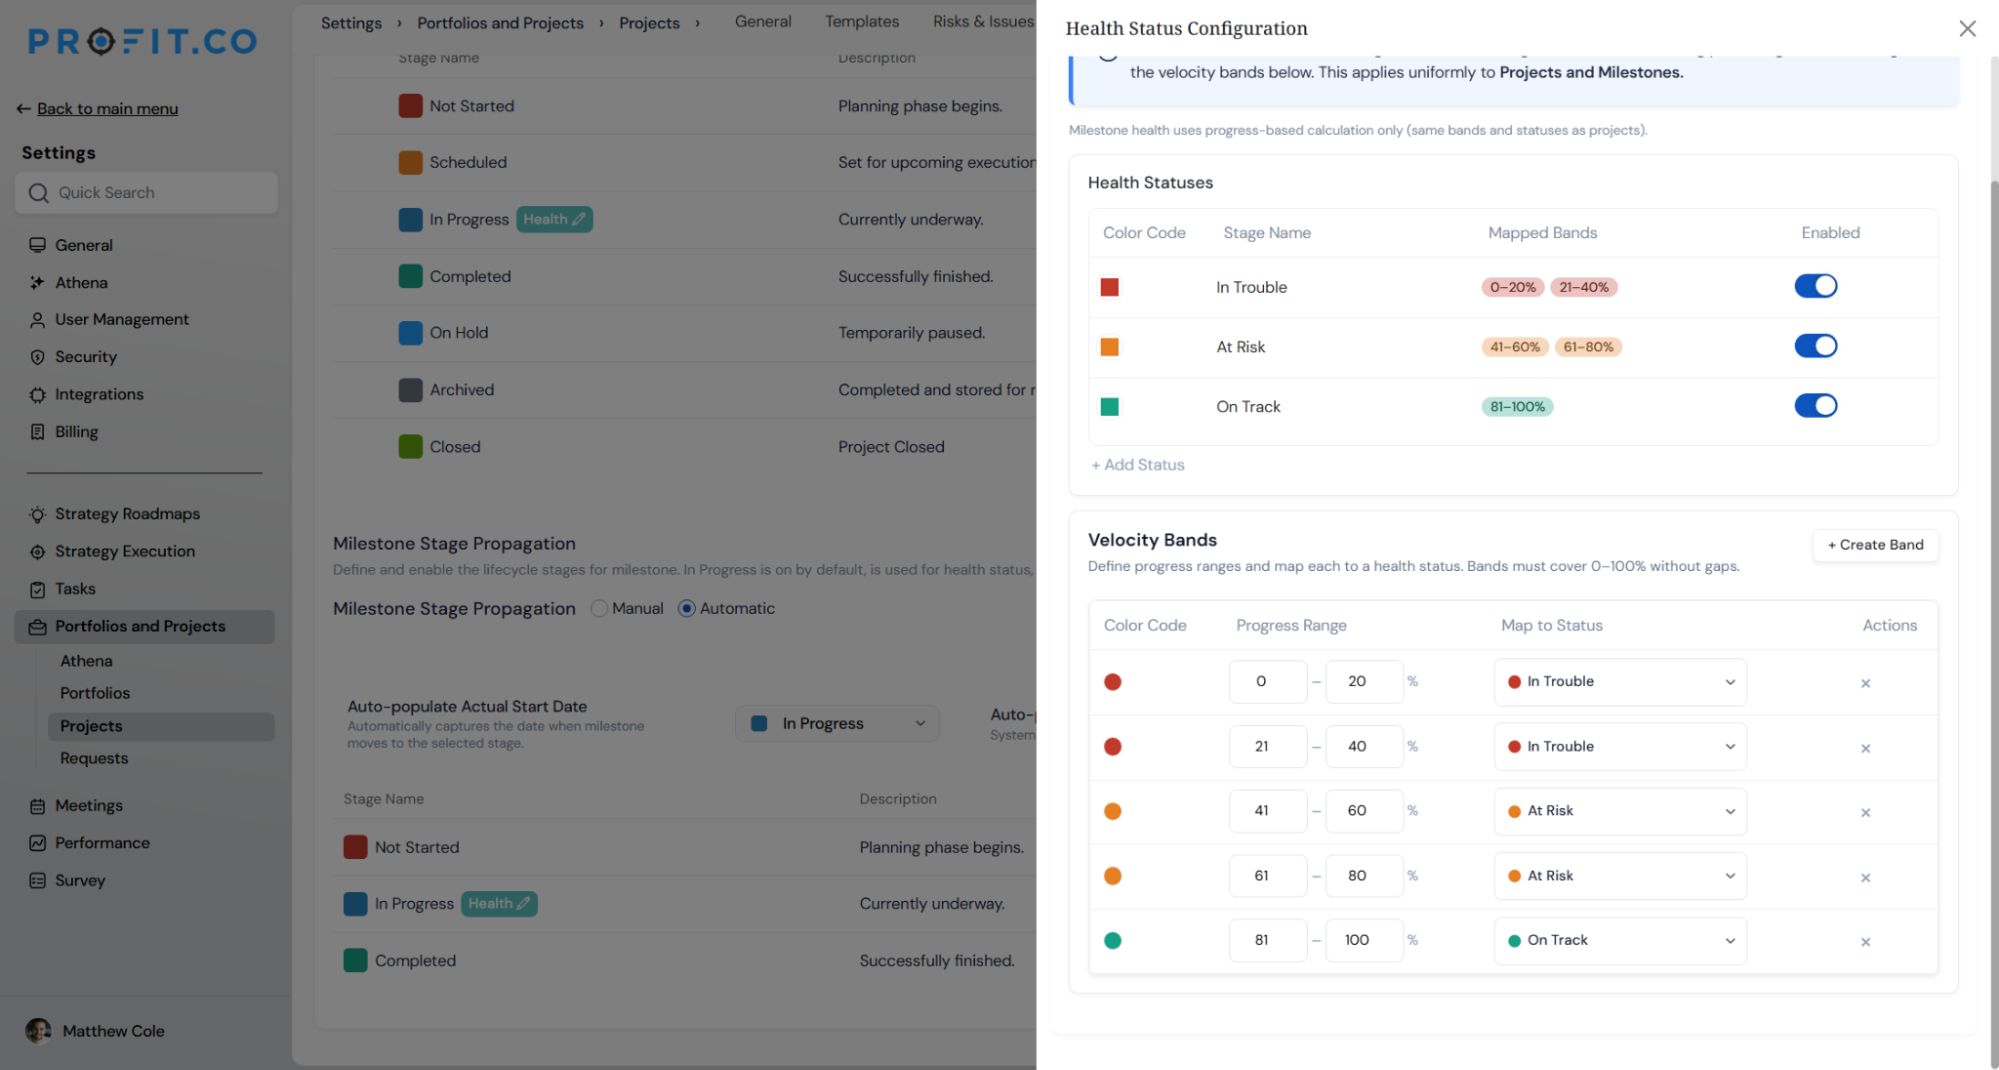
Step 2: Configure Velocity Bands
Velocity Bands define the progress percentage ranges that map to each health status. Bands must cover the full 0–100% range without gaps.
To add a new band, click + Create Band and set:
- Color Code
- Progress Range (e.g., 0 to 20%)
- Map to Status (e.g., In Trouble)
How do I perform a Milestone Check-in?
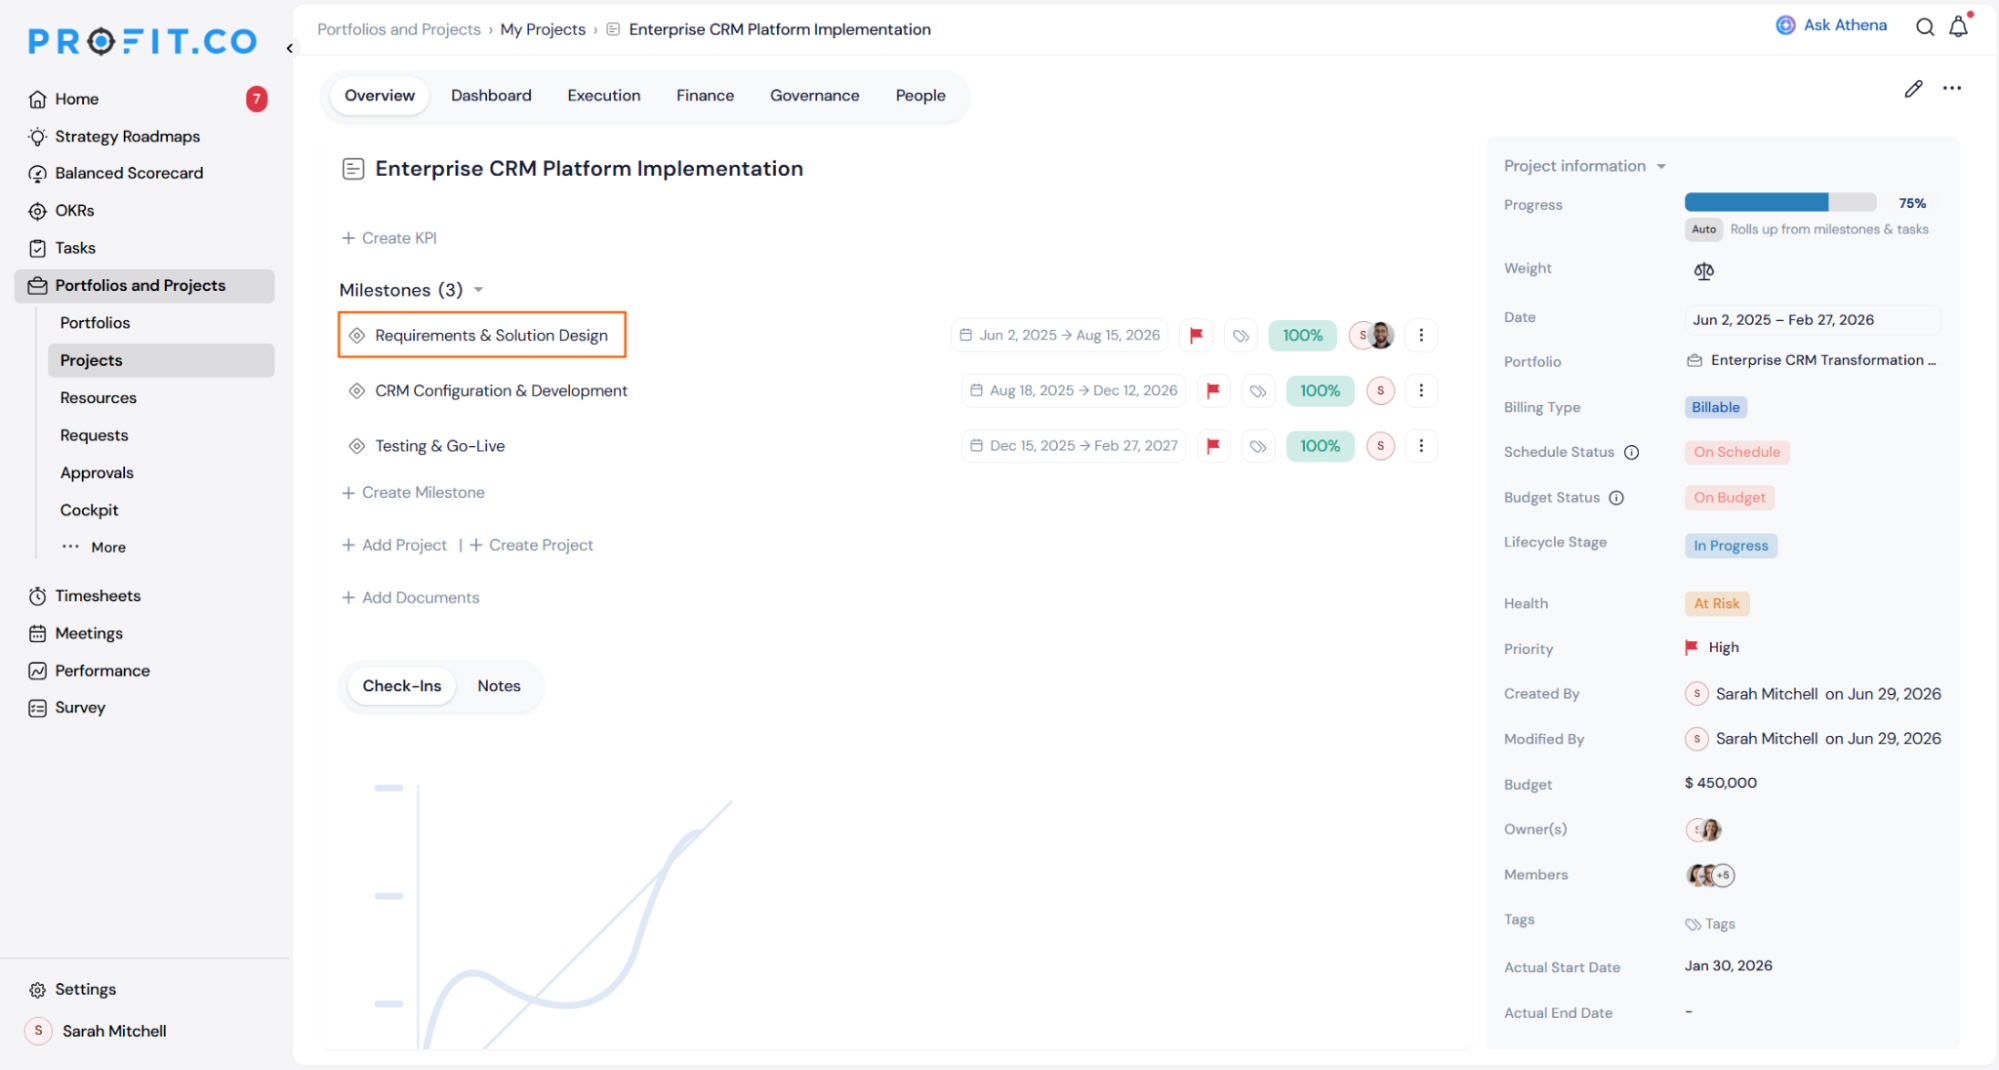
Step 1: Navigate to the Milestone
- Go to Portfolios and Projects → Projects from the left navigation panel
- Select the project that contains the milestone
- On the project page, find the milestone you want to check in on and click its name
- You will be redirected to the milestone detail page
Step 2: Open the Check-in Panel
On the milestone overview page:
- Click on the Overview tab if not already selected
- Click + Add Check-in
The check-in panel opens on the right side of the screen.
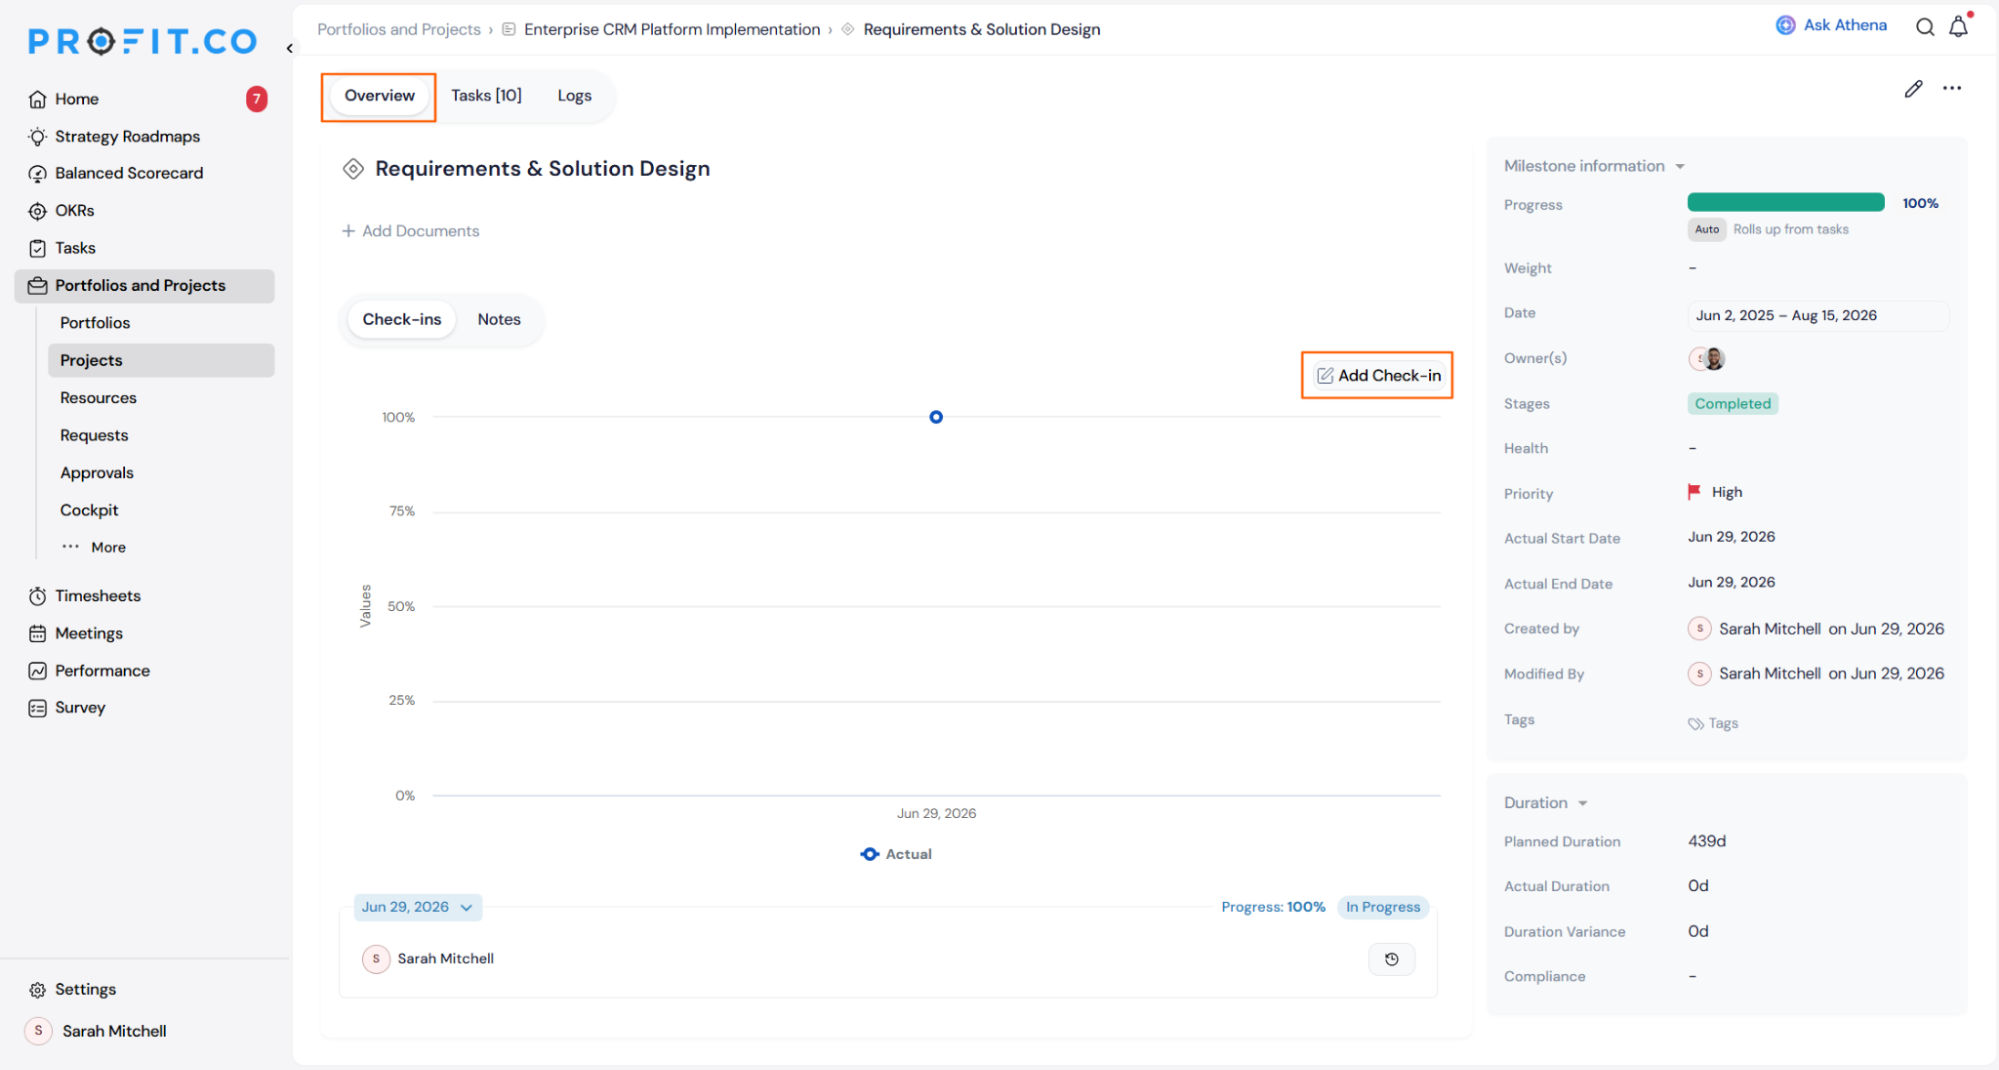
Note: Health status is only available when the milestone stage is set to In Progress. If you have enabled Automatic Health Status, the health status updates automatically based on actual vs. planned progress. You can still change it manually at any time.
Step 3: Set the Stage and Review Progress
In the check-in panel:
- Select the current Stage from the Stage dropdown
- When the stage changes, Profit.co automatically records the actual date based on your auto-populate settings
- The Progress field shows the current milestone progress, calculated automatically from task completion
- Enter your check-in comment in the Comment field. You can write it manually or use Athena AI to generate it (see next section)
- Once the stage, progress, and comment are complete, click Update to save the check-in
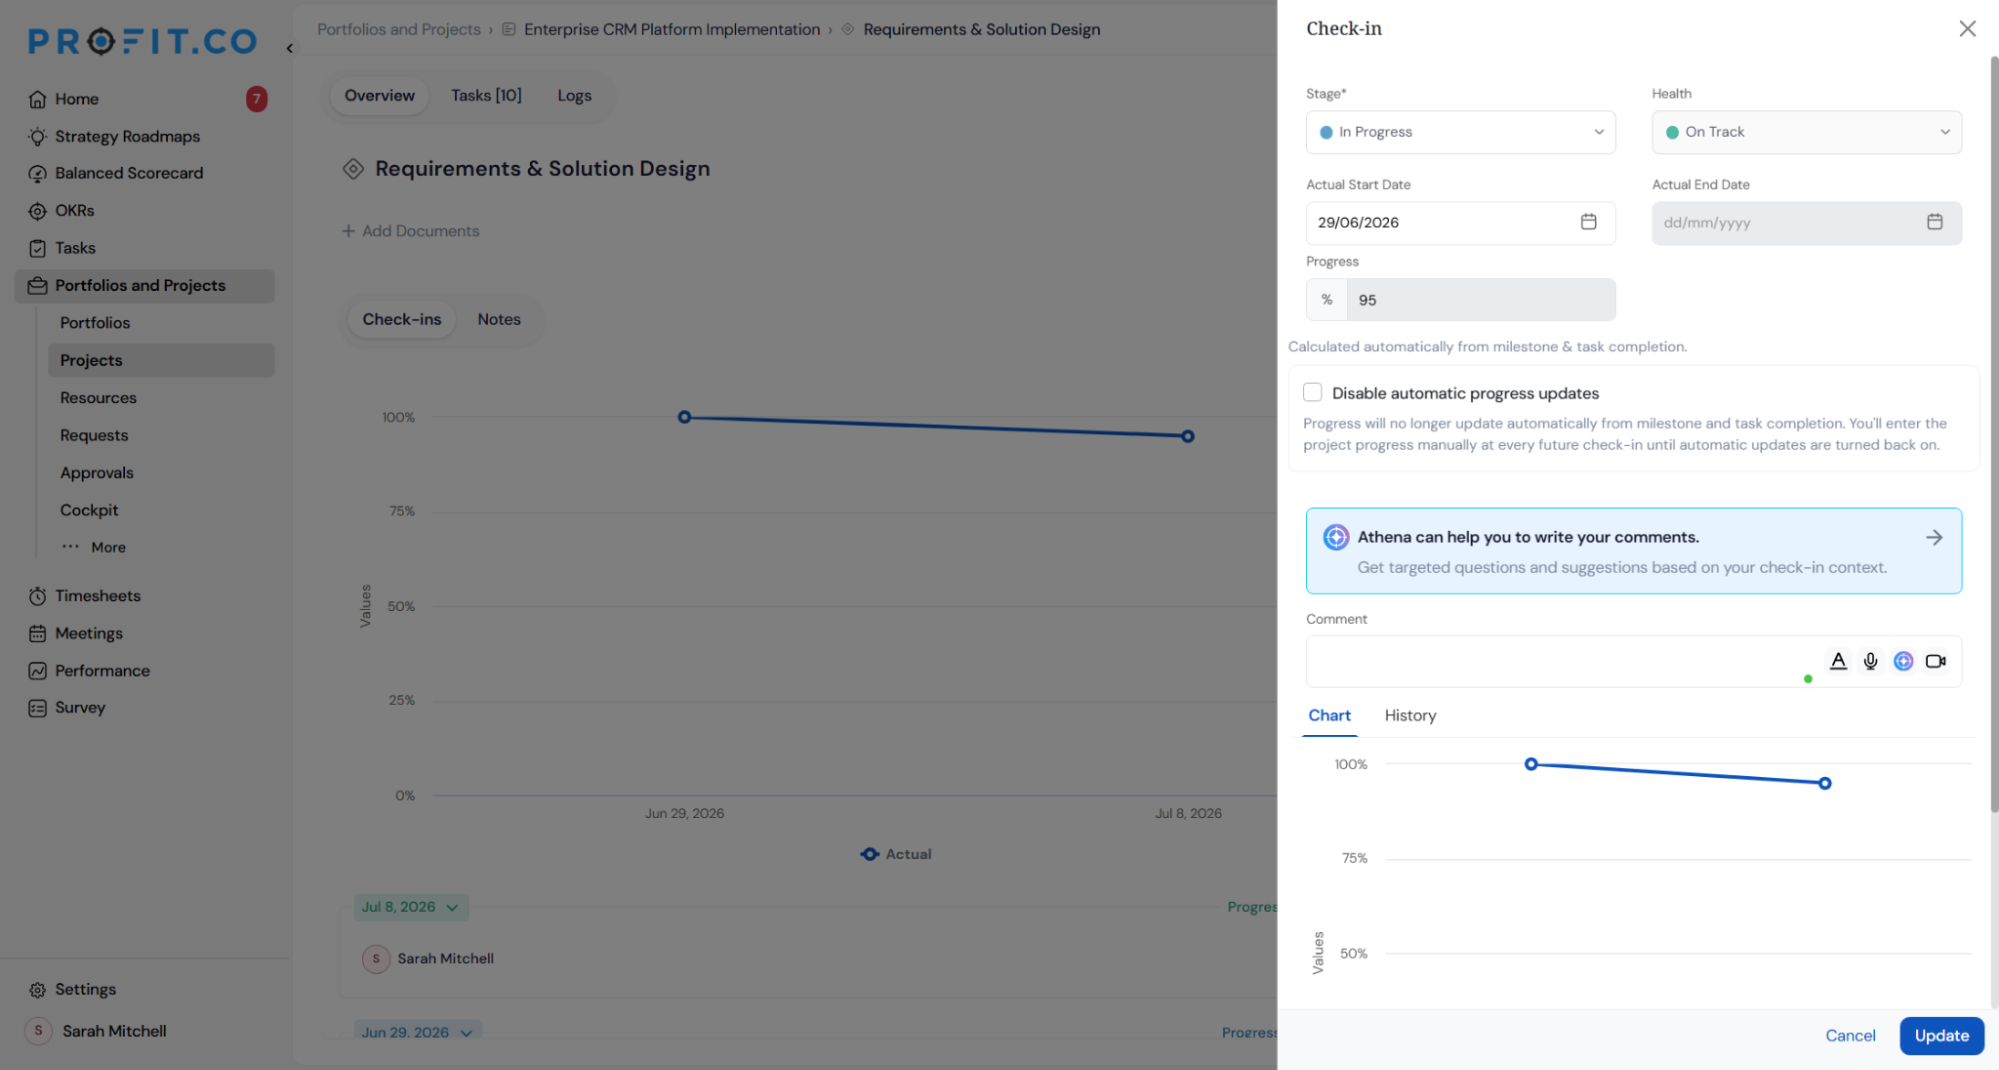
Note: Athena AI can generate your check-in comment based on task-level updates beneath the milestone. Click the "Athena can help you to write your comments" banner in the check-in panel. Athena pulls in comments and progress updates from all tasks within the milestone, giving you a consolidated summary without reviewing each task manually.
Related Questions
- How do I perform a Portfolio Check-in in Profit.co?
- How do I perform a Project Check-in in Profit.co?
Frequently Asked Questions
Profit.co records the Actual Start Date the moment the milestone moves to the stage configured under Auto-populate Actual Start Date in Settings. The default trigger stage is In Progress. You can change this to any stage that fits your workflow.
Yes. In the Health Status Configuration panel, click + Add Status to create additional health states. Each new state can have its own color code and mapped velocity bands.
Progress will no longer roll up from task completion. You will enter the milestone progress value manually at every future check-in. Automatic updates resume as soon as you uncheck the Disable automatic progress updates option in a subsequent check-in.
Execute your strategy with confidence
Connect OKRs, tasks, and teams in one place with Profit.co
