


Microsoft Excel is a spreadsheet software that allows users to format, organize, and compute data. It features cells arranged in rows and columns, aiding data analysts in presenting information clearly.
What you can do with MS Excel and Profit.co Integration?
Profit.co enables users to integrate Excel online with their accounts and automate their key results progress update.
Once you do so, your key results can be connected to Excel online in your Google account and you can auto-update your progress.
Configure Excel online in Profit.co?
Note: To perform this task, you must have Microsoft administrator email credentials. The same email id should be used to sign-up into Profit.co. Step 1: Note: Only the Superusers can integrate Excel Online with Profit.co account.Navigate to Settings from the left navigation panel. Click on Integrations, select the User Level tab, and click the Excel online Manage Button.
 Step 2:
After enabling it, navigate to Preferences from the left navigation panel.
On the Preferences page, Select the Integrations tab, click on the Excel online Manage button.
 Step 3:
On the Integrations page, click on the Manage button of Excel Online
Click on Sign in to Excel Online. Step 4:
Enter your Microsoft email address and click Next.
Enter your password and click Next.
Consent Step
If you are not an administrator in Microsoft Excel Online, you will see the screen below. Please contact your Microsoft Excel Online administrator to complete the first-time setup and grant consent.

If you’re a Microsoft Excel Online administrator, you can grant consent to the application.
Select ‘Consent on behalf of your organization’ to grant access for all users in your organization.
Step 5
Click on the Sign in to Microsoft Excel Online button.

Sign in to the Microsoft Excel Online Account and provide access.
Note: Once consent is granted, other users won’t need to give consent and will be able to connect to Microsoft Excel Online. From this point on, users can create Microsoft Excel Online-linked Key Results without further admin intervention.
After getting connected,
 Step 6:
Create Key Result Using Form Option. Enter the Key Result name, and choose the required Key Result type and KPI.
Select the Automate Check-in and choose Excel Online from the Connection dropdown.
Note:Google Sheets supports Increase KPI, Decrease KPI, and Control KPI types.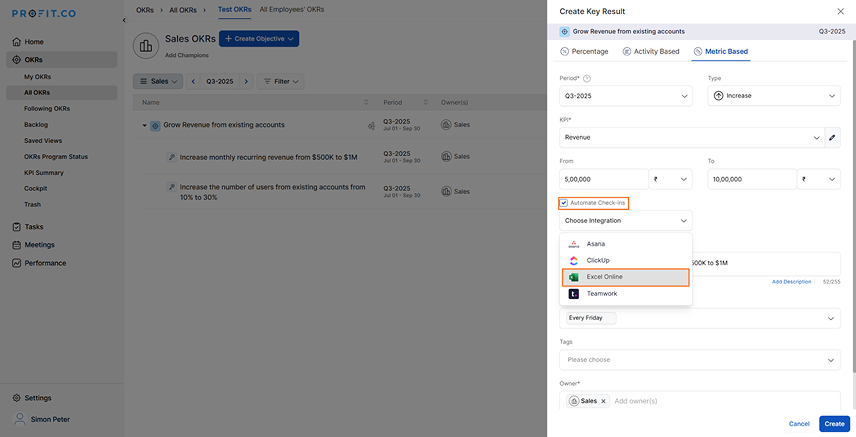
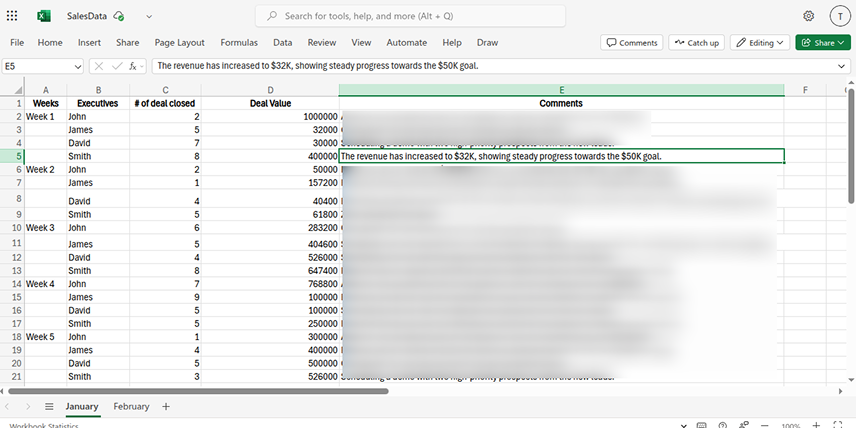
While connecting to Excel Online, the email ID will be present by default. Enter the spreadsheet name, then choose your sheet, column, and row from the selected spreadsheet. After making your selection, the current value will be displayed.
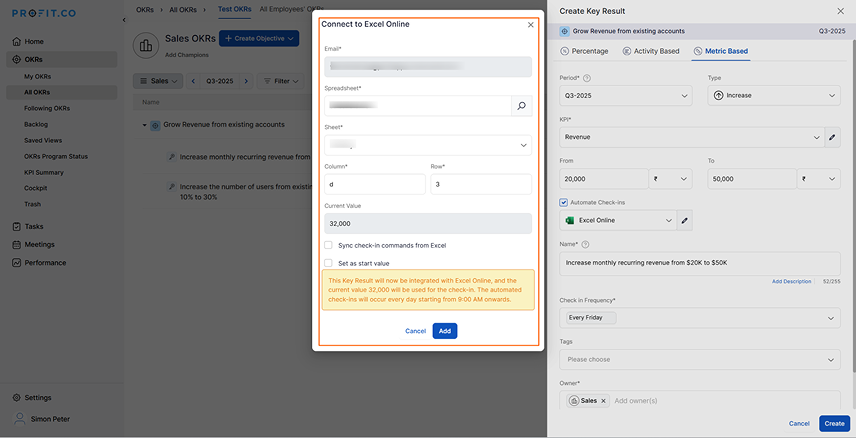
If you want to add the Excel input to your check-in comment, click the checkbox. Once selected, choose the row and column to insert the check-in comment.

Select the sheet name.
Then, click Add.

Note: The following Excel information has been selected for this KR to perform the check-in update.
Once the Key Result is successfully created, click the Check-in button and complete the check-in to update the status value along with the comment in the Key Result.


Note: The automatic check-in will happen every day at 09.00 AM based on the user region.