


JQL – Jira Query Language. Jira allows you to link your data from Jira and automatically update your key result progress using the JQL query.
What you can do with Jira JQL and Profit.co Integration?
Profit.co integration with Jira allows you to link your data from Jira and automatically update your key result progress using the JQL query. You can use Jira integration to track the progress of issues and projects. Whenever you check in your key result, it fetches the data from Jira and also automatically synchronizes the data every 24 hours.
Integrating Jira with your Profit Account
- Integrating Jira Cloud with your Profit Account
- Integrating Jira Data Center with your Profit Account
Integrating Jira Cloud with your Profit Account
Note: Only Super Users can be able to configure the Profit.co <> Jira JQL Integrations.
Step 1:
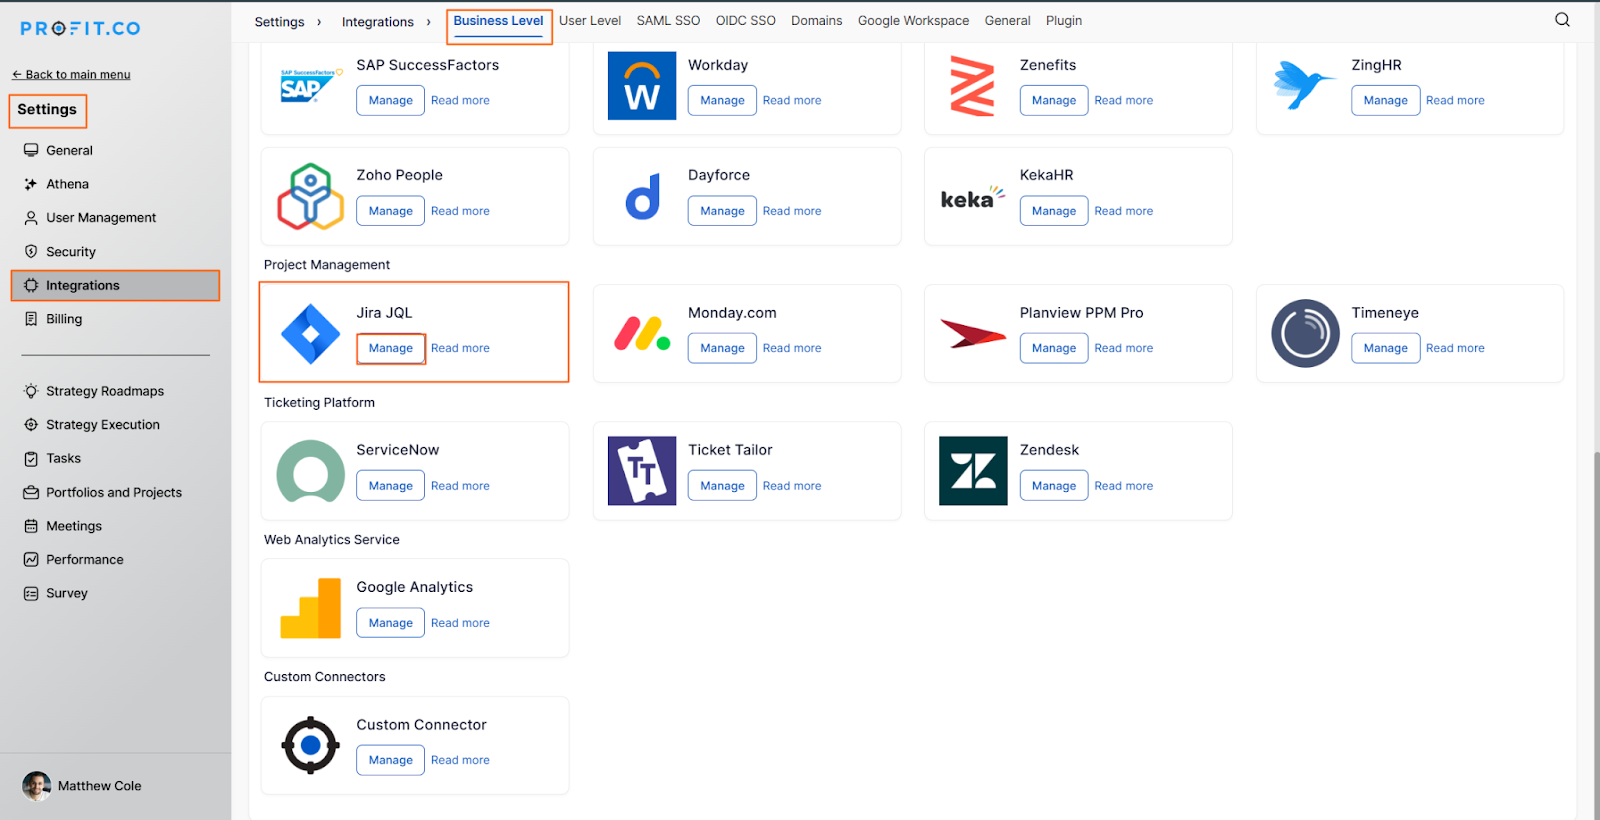
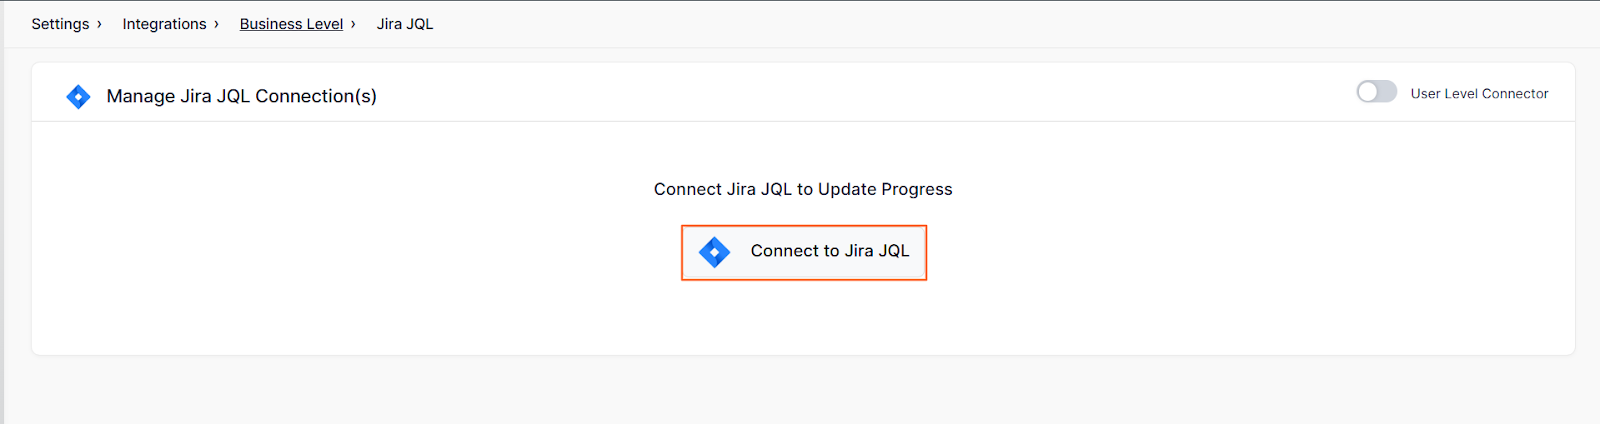
Navigate to Settings from the left navigation panel.
Click Integrations, select the Business Level tab, and click the Jira JQL Manage button.

Step 2:
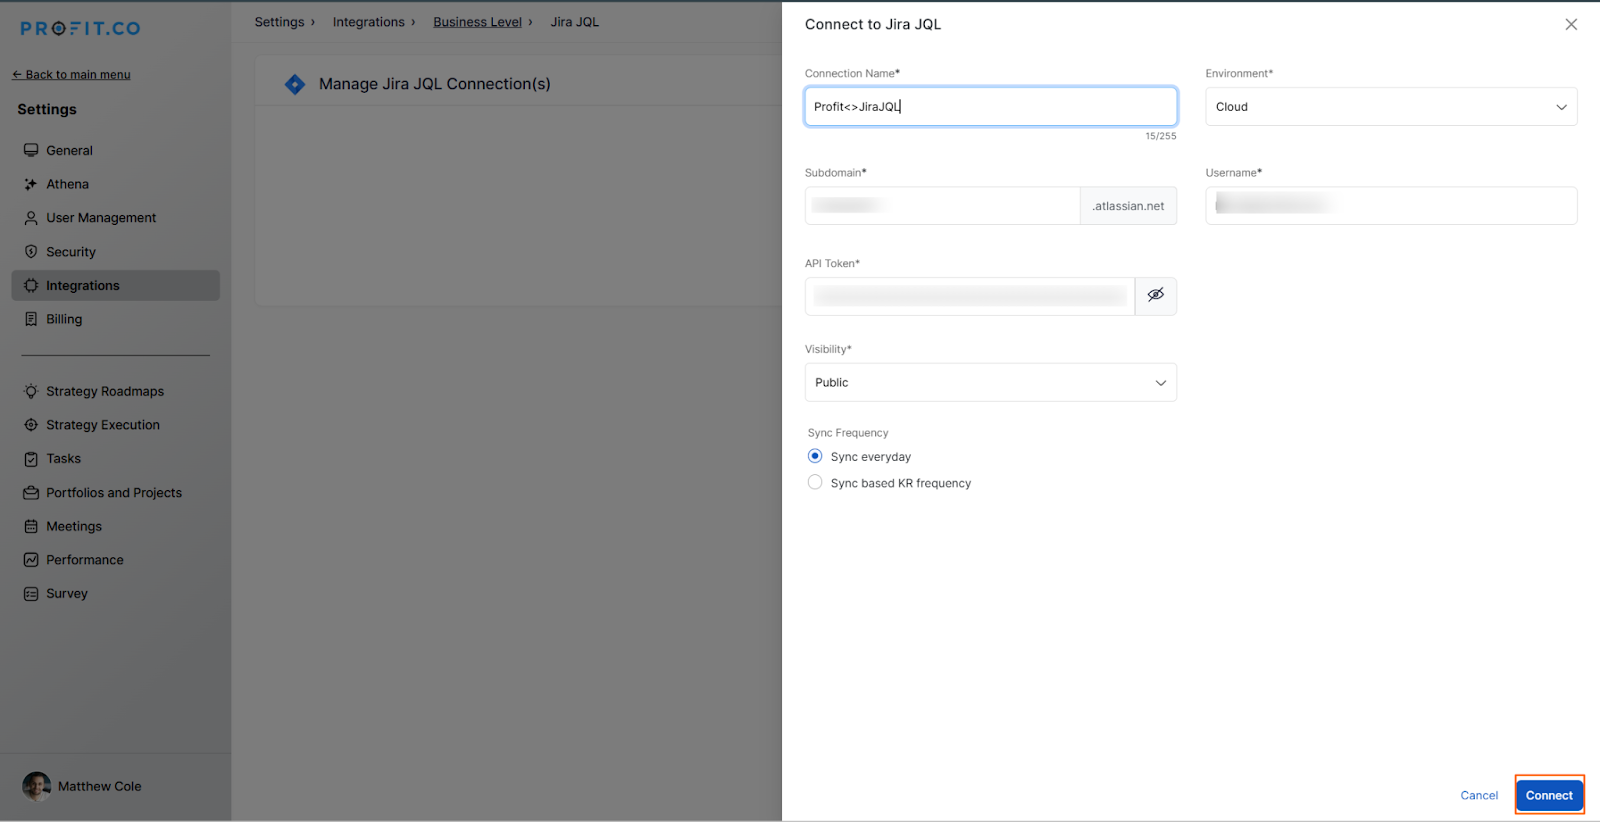
Click Connect to Jira JQL. In the pop-up, enter the Connection Name and choose the Environment Type as Cloud. Enter the Subdomain, then provide your Username and API Token, and click Connect.

Step 3:
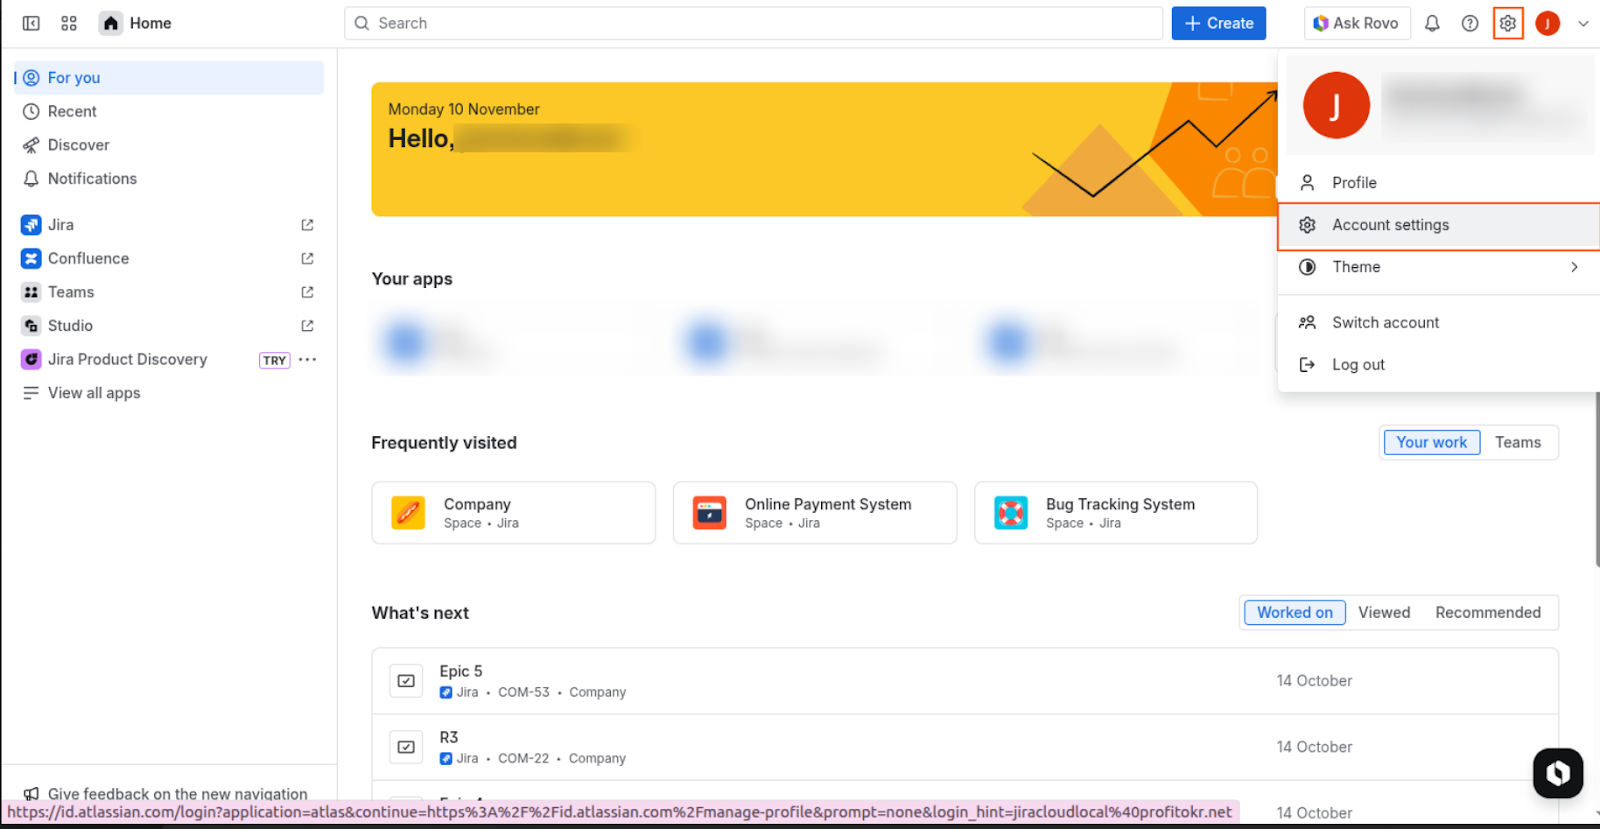
To get the API token, log in to your Jira account. Click on the Settings icon in the top-right corner and select Atlassian Account Settings.
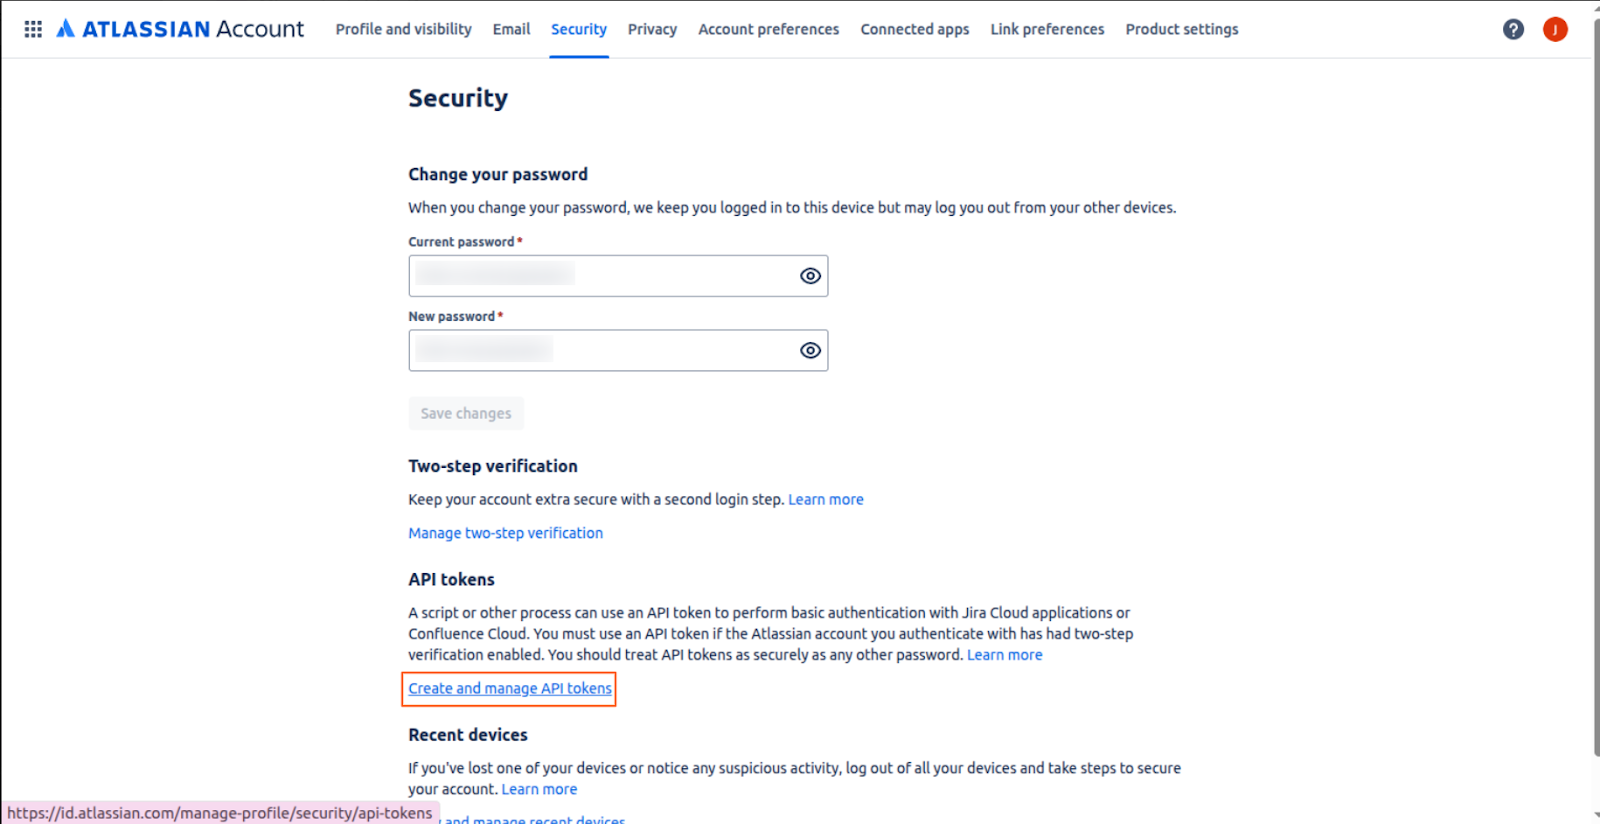
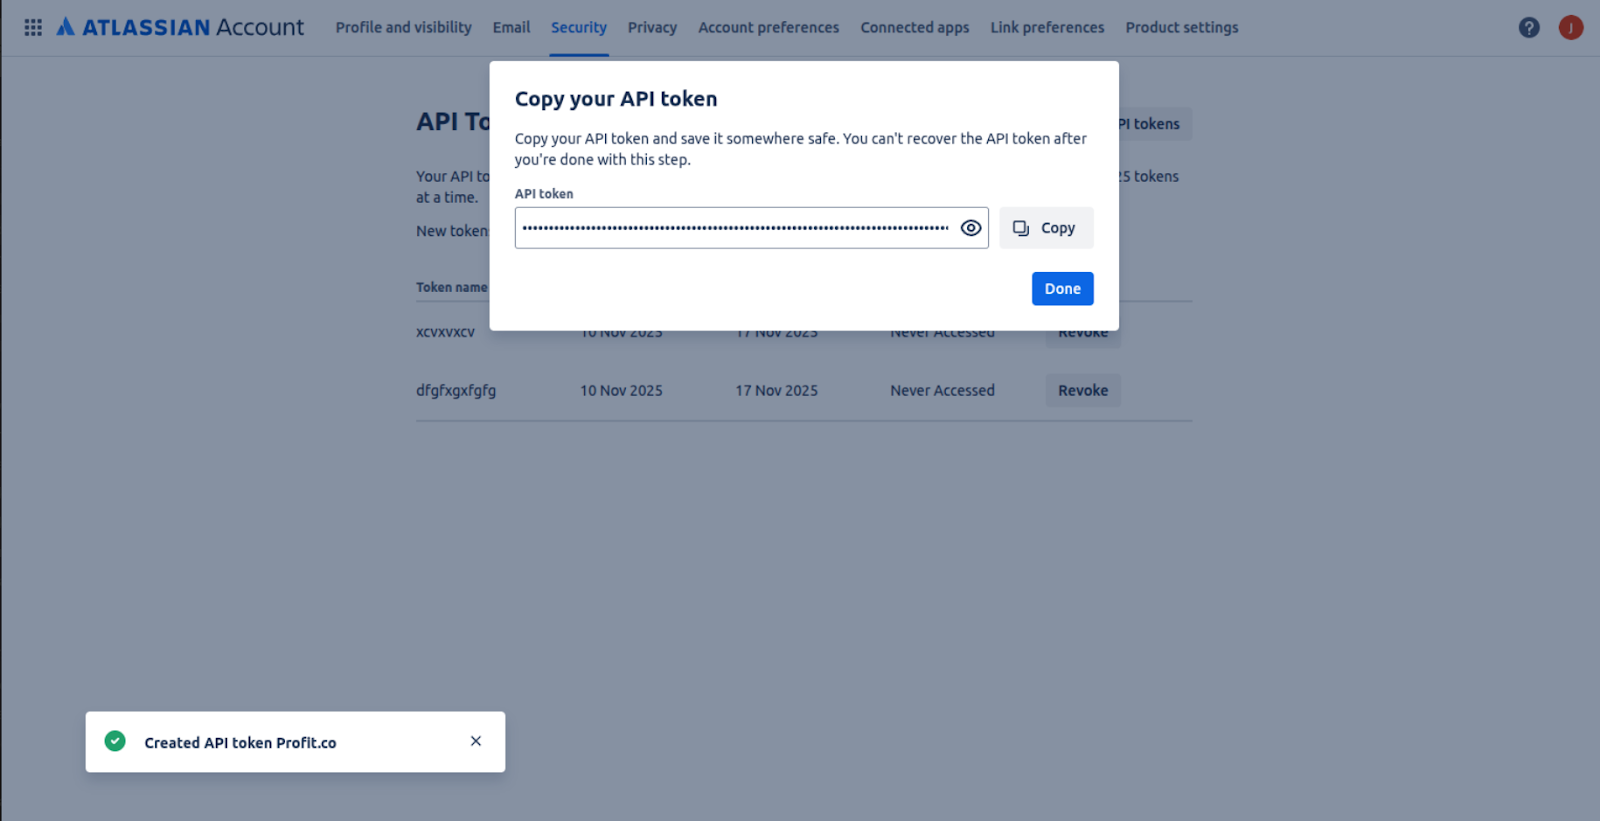
You will be redirected to the settings page. In the Security tab, click Create and Manage API Tokens, then copy the API token you created.
Step 4:
Paste the API token into Profit.co and click Connect.
This will establish a connection between your Jira and Profit.co accounts.

Now, create a key result using the Form in Profit.co where you want to integrate the Jira JQL in a key result.
Automating Key Results with Jira using JQL
Automating KPI-Type Key Results (Increase, Decrease, and Control KPIs)
Step 1
- Enter the Key Result name.
- Choose the desired Key Result type and KPI.
- Select Automate Check-ins and choose Jira JQL from the connection dropdown.
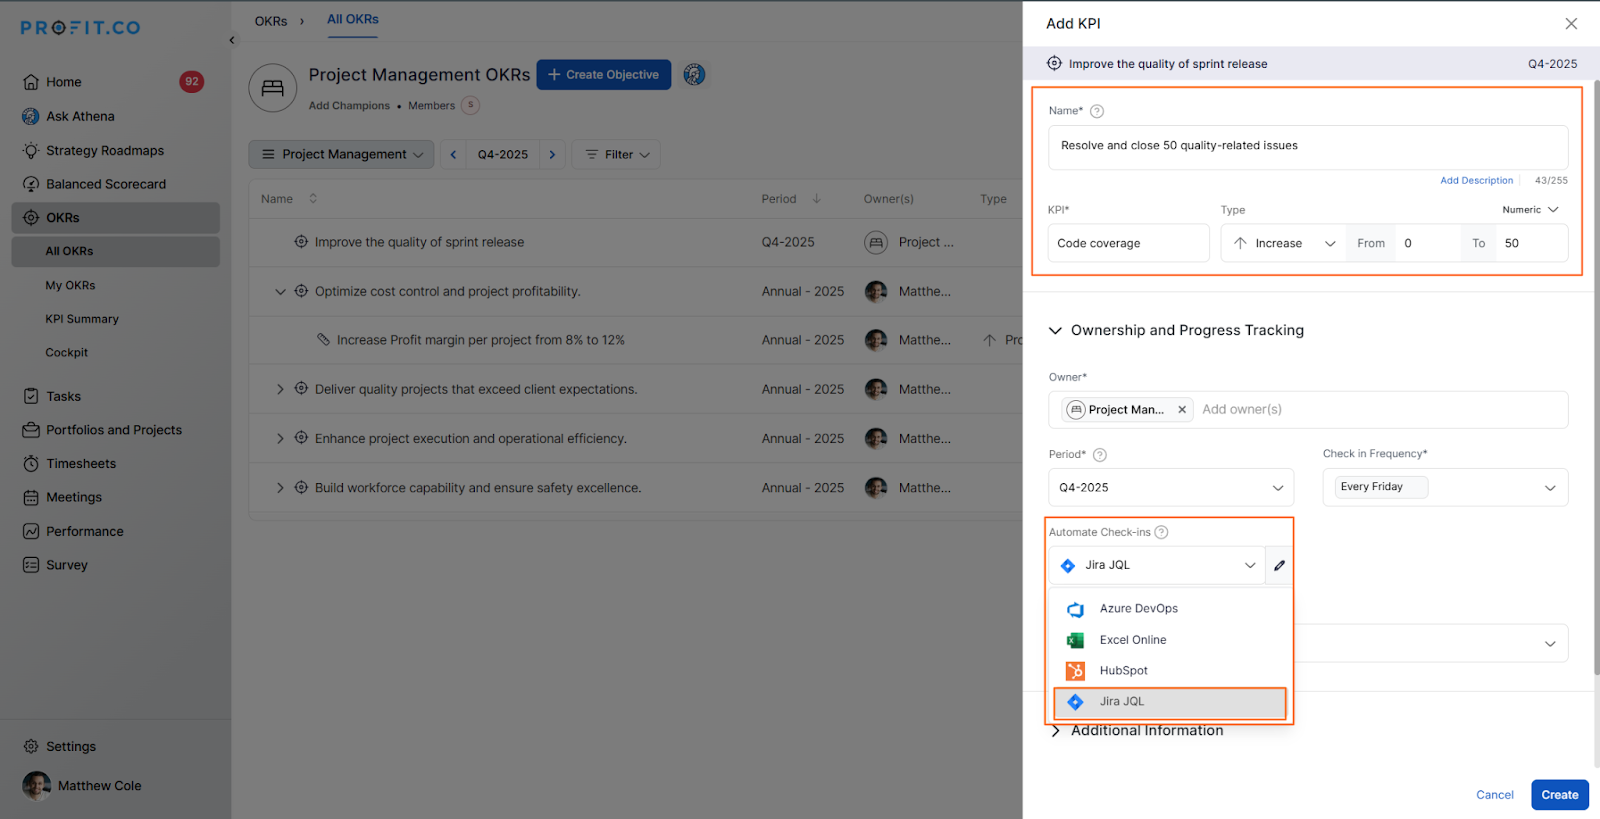
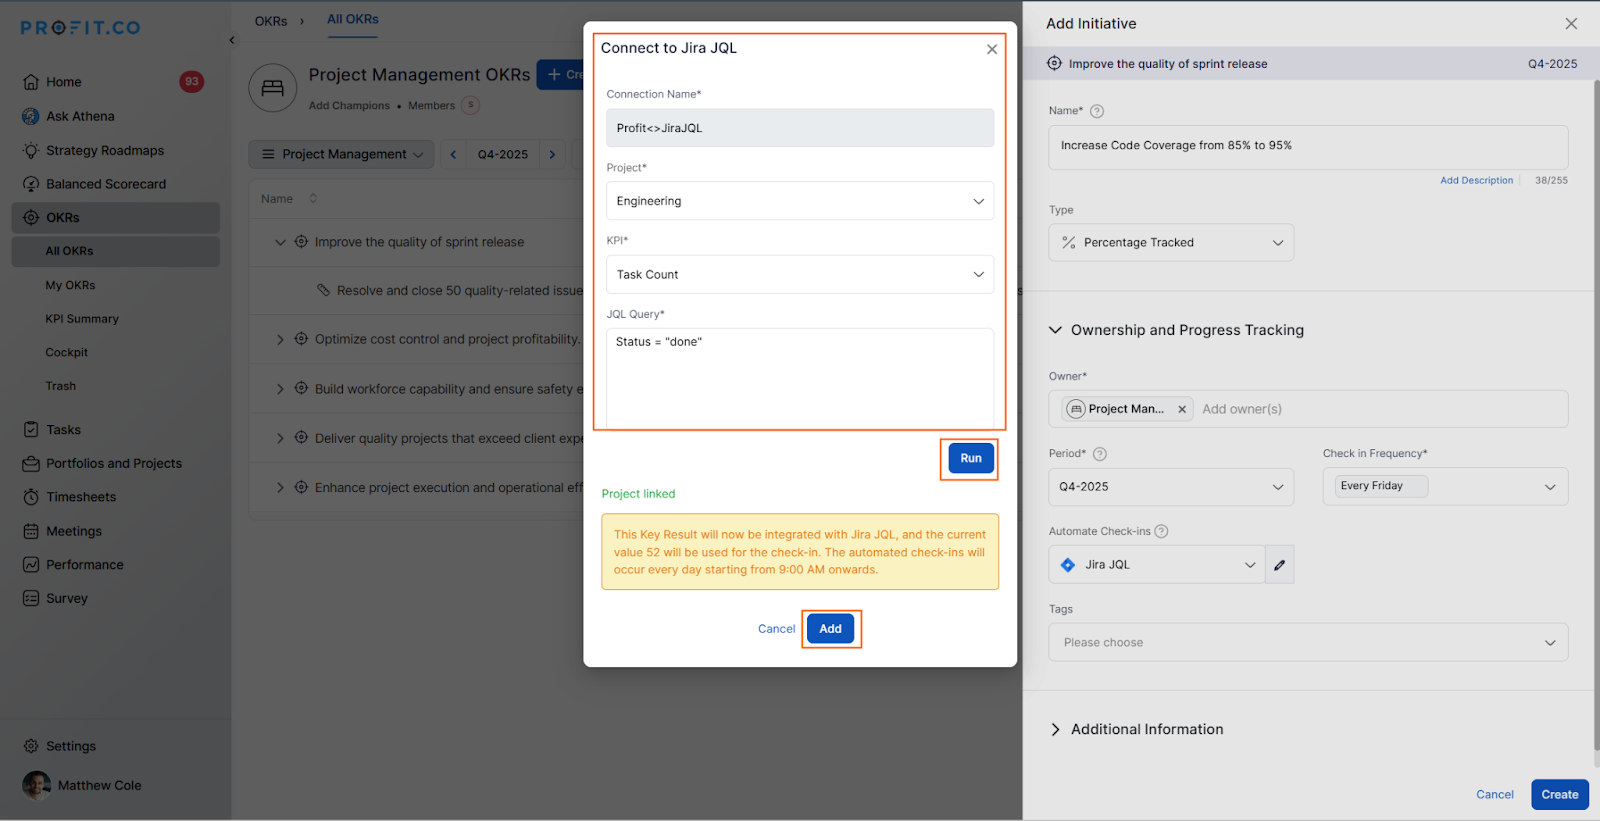
In the Connect to Jira tab, choose the required connection, write your JQL query, and click Run to check the current value.

Click Update and save your key result.

Step 2
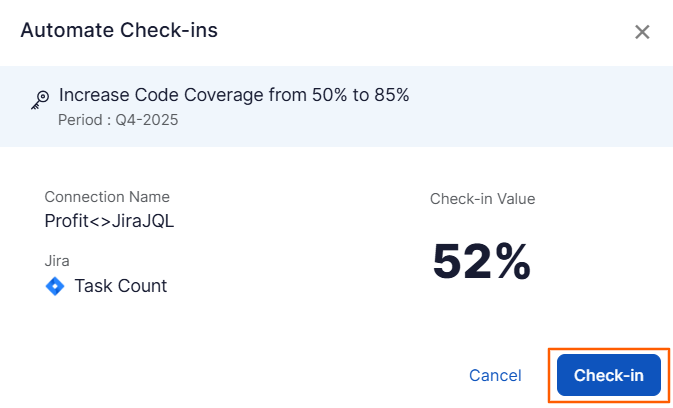
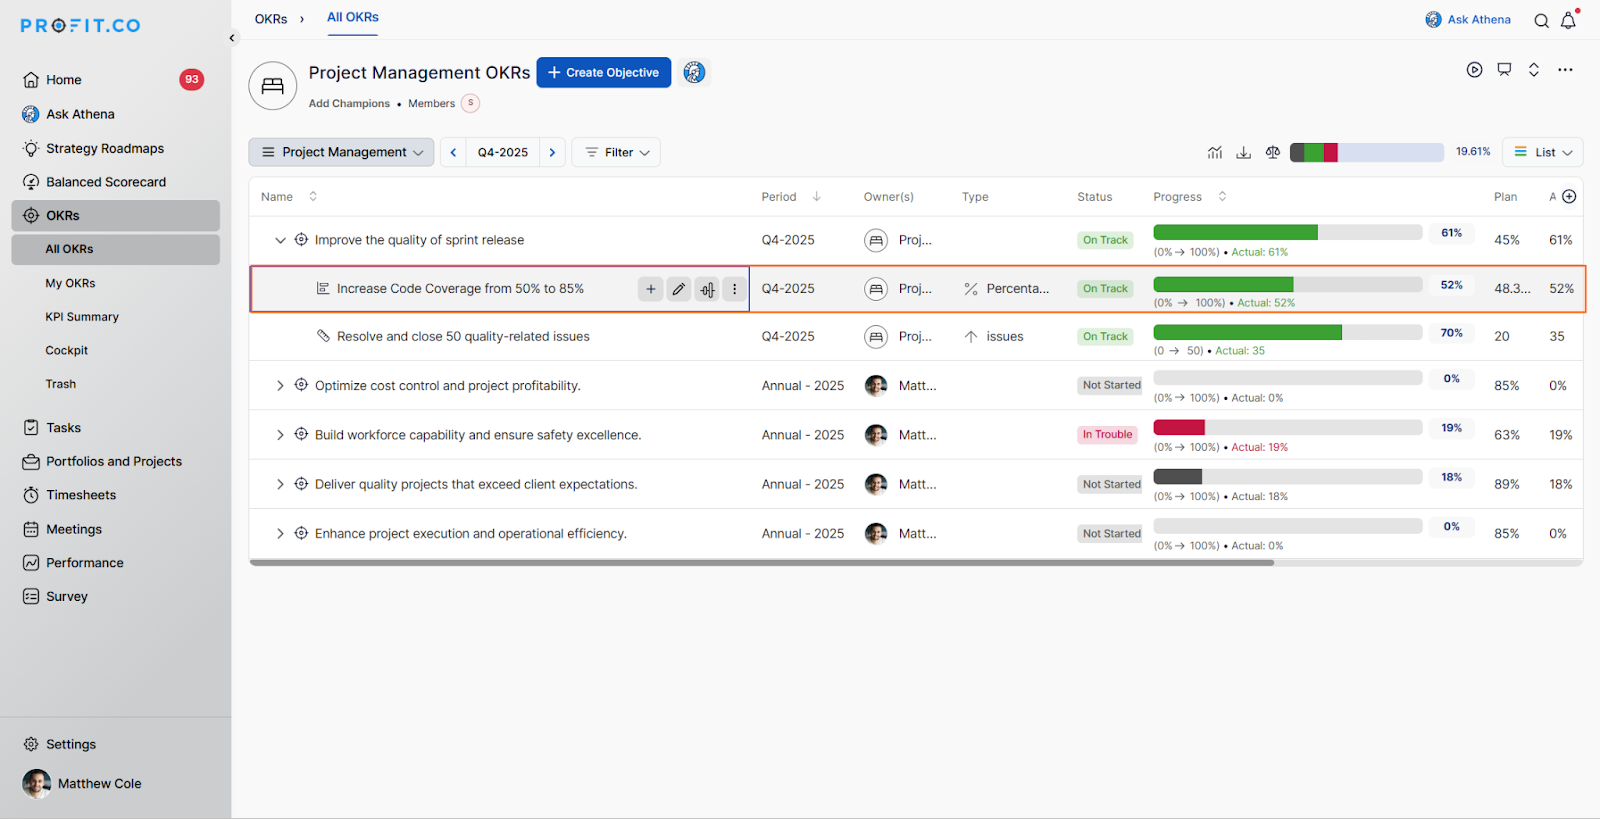
Once the key result is created, click Check-in to update its status value.


You’ll be redirected to the review page. Update it to make progress toward your key result.


Automating Percentage-Tracked Key Results
Step 1:
Click Create Key Result and select +Add Initiative.
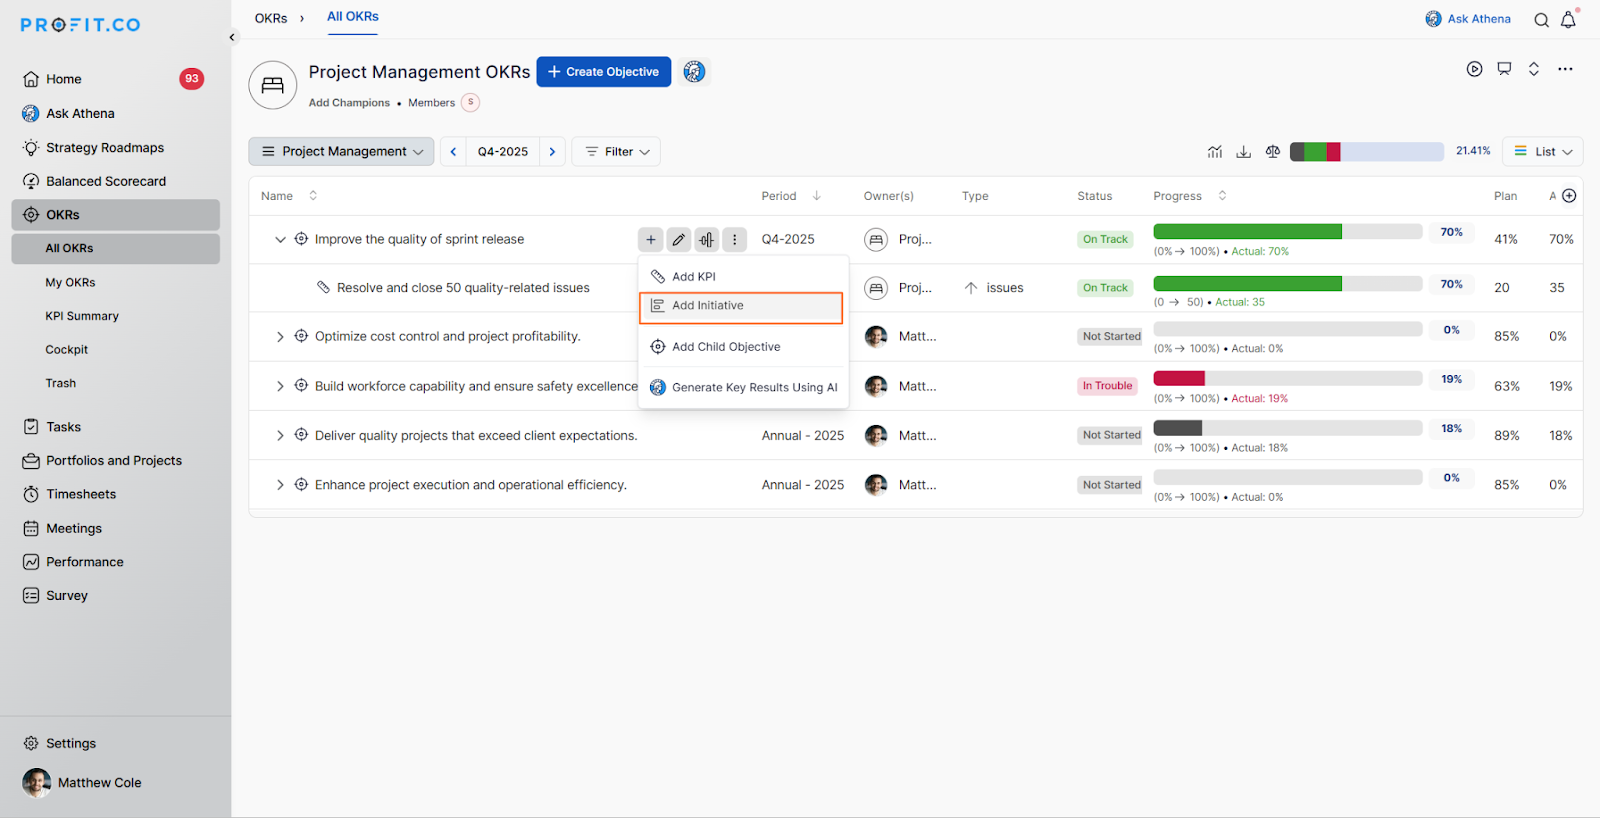
Enter the Key Result name. Select Automate Check-ins and choose Jira JQL from the connection dropdown
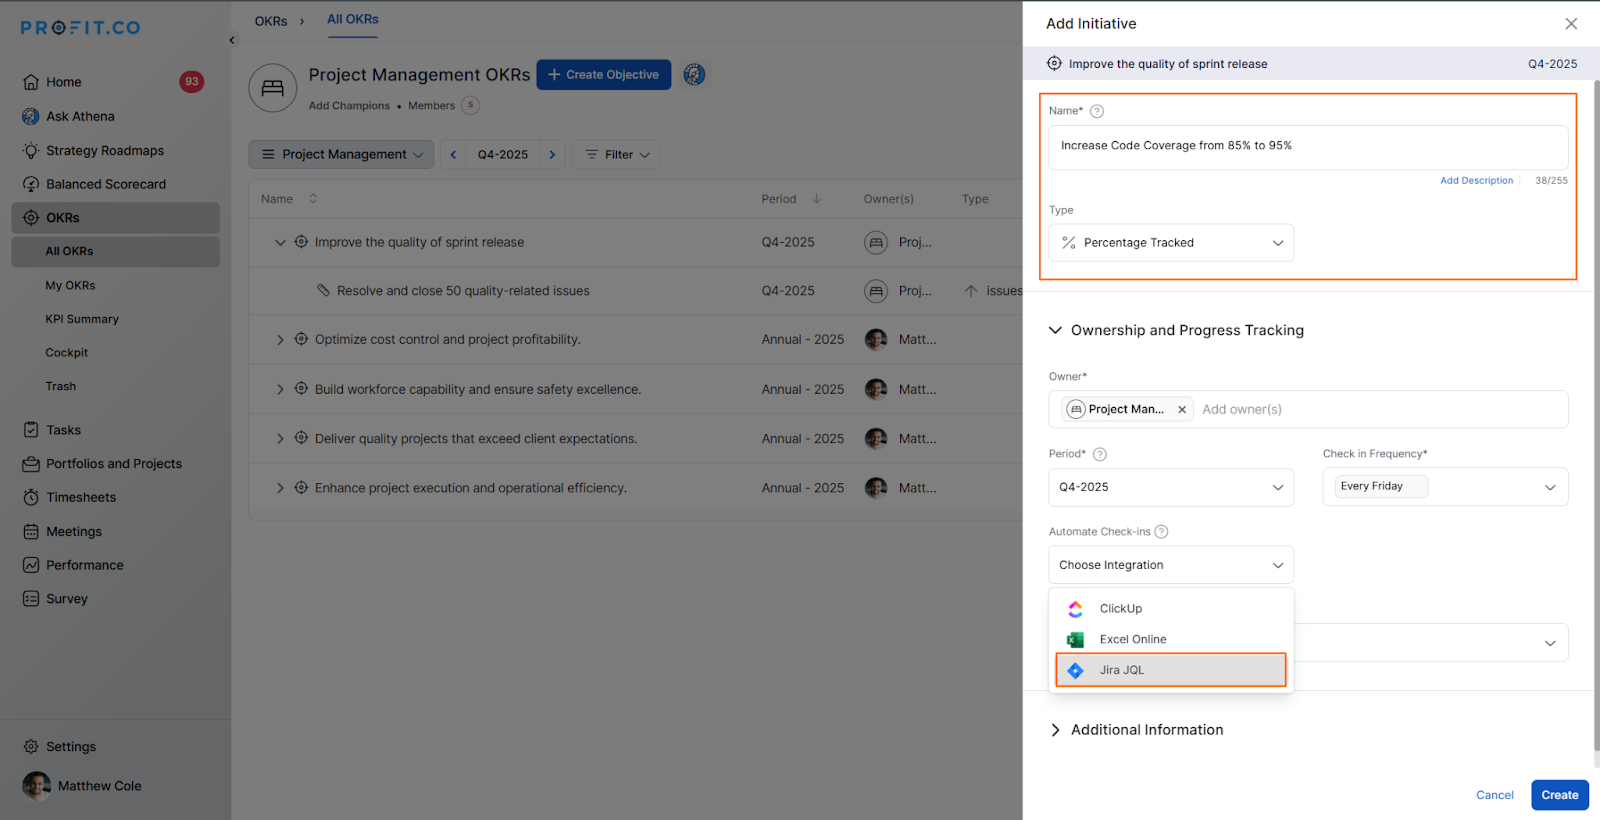
In the Connect to Jira tab, choose the required connection, select the Project and KPI, write your JQL query, and click Run to check the current value.
Percentage Tracked KR — Current Value Calculation
The current value is calculated using the following formula:
Current Value = (Filtered Issue Count ÷ Total Issues in the Jira Project) × 100
Where:
- Filtered Issue Count = Number of Jira issues returned by your JQL query.
- Total Issues in the Jira Project = Total number of issues in the selected Jira project.
This calculated percentage is used as the current progress value of the Key Result.
Click Update and save your key result.

Step 2
Once the key result is created, click Check-in to update the status value.

You’ll be redirected to the review page. Update it to make progress toward your key result.
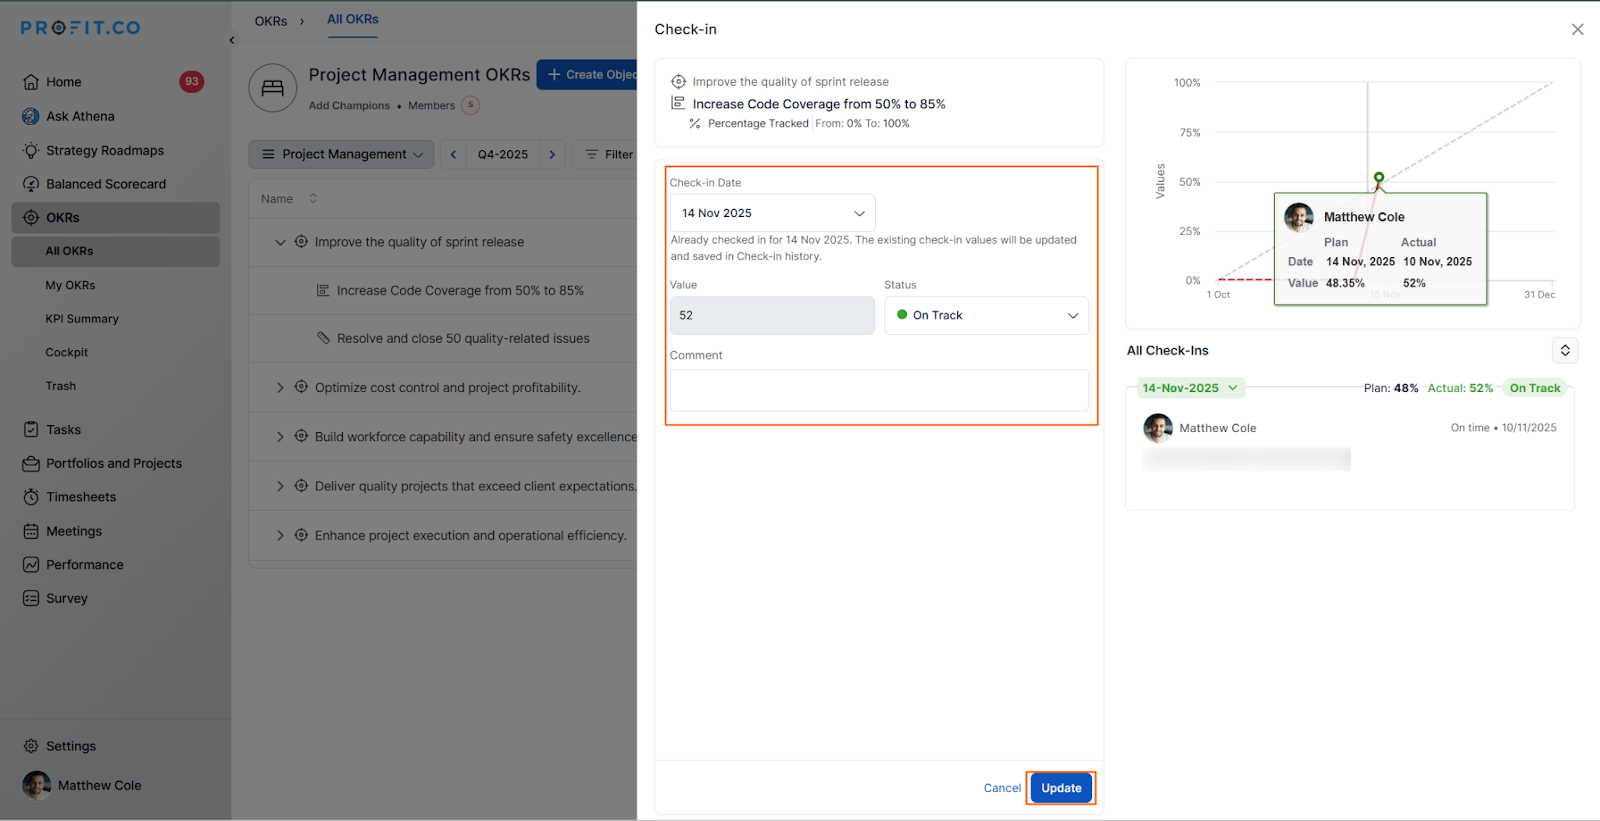
Note: The key result progress is automated. The system automatically fetches and updates Jira data every 9 hours based on the user’s region.
The JIRA JQL-supported KPIs are below, and you can choose which is required
| Jira JQL KPI | Description |
|---|---|
| Description Fields |
Tracks the values of customized fields configured in the Jira instance. This allows users to monitor specific attributes
(e.g., Assignee, Priority, Component) defined in the JQL query. Note: When you choose the Description Fields KPI, you can track values as Sum, Count, or Average depending on the custom field type and reporting needs. |
| Task Count | Track the number of Tasks available in the given JQL query. |
| Story Points | Track the total sum of Story Points available in the given JQL query. |
| Progress | The Progress (%) is calculated based on the number of completed Tasks in the given JQL compared to the total Tasks in the query. |
| Time Spent | Track the Sum of Time Spent on tasks available in the given JQL query. |
| Time Original Estimate | Track the Sum of Original Estimated Time on tasks available in the given JQL query. |
| Story Point Estimate | Track the Sum of Story Point Estimate available in the given JQL query. |
| Story Point % | Story Point % is calculated based on the Story Points of completed tasks vs. the total Story Points in the given JQL. |
| Remaining Time | Track the Sum of Remaining Time available in the given JQL query. |
| Progress % by Task Hours | Track the percentage of logged time of completed tasks compared to the estimated time of those tasks in a given JQL query. |
Notes: Time-related KPIs will display values only when time-based KPIs are selected in Profit.co
Integrating Jira Data Center with your Profit Account
Step 1
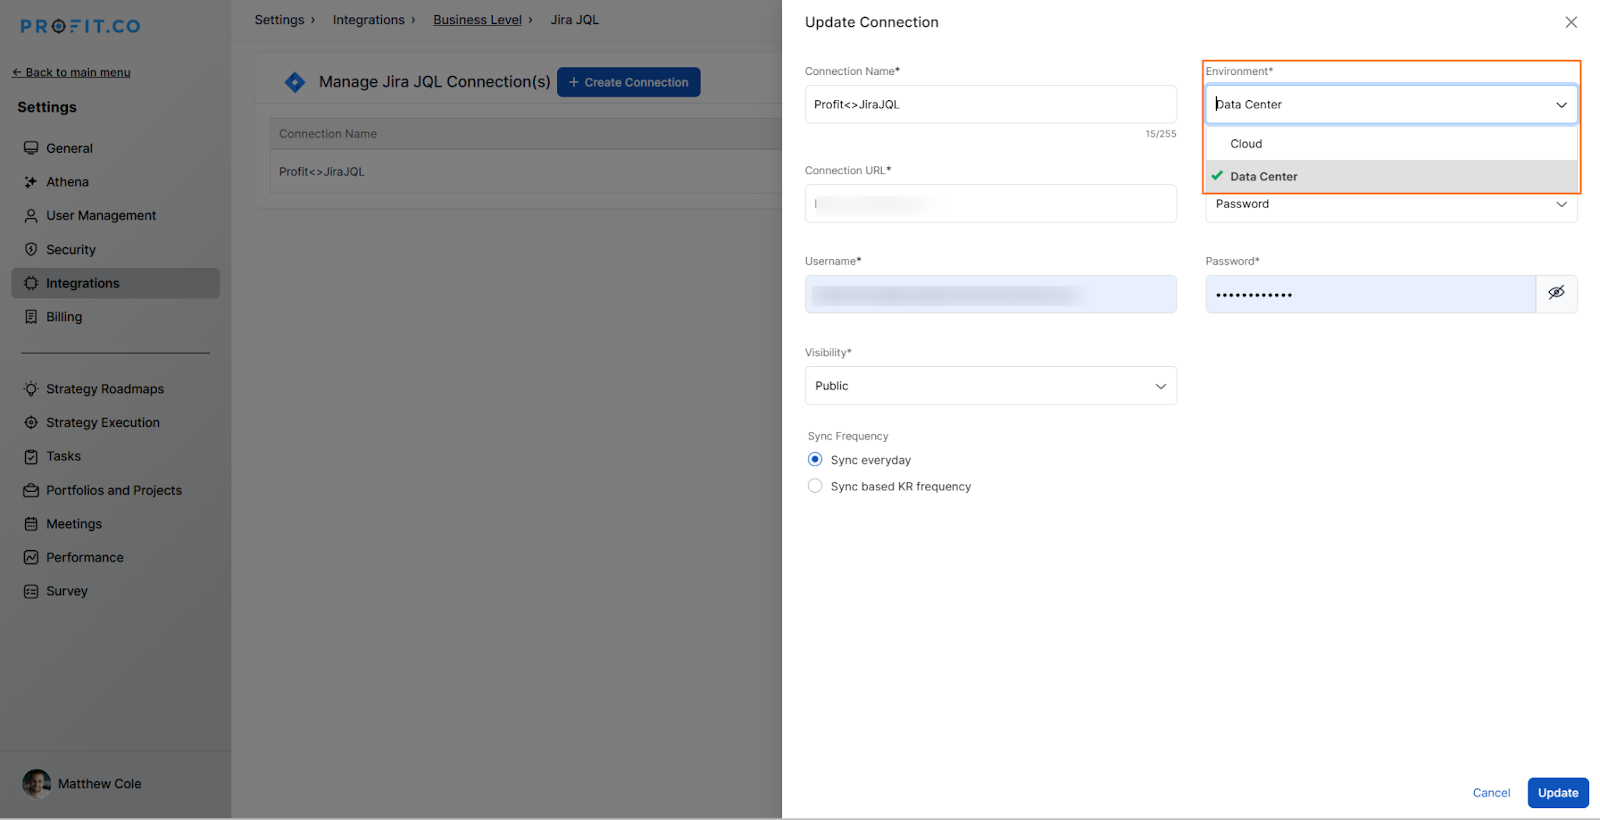
Navigate to Settings from the left navigation panel. Click on Integrations, select the Business Level tab, and click the Jira JQL Manage Button.
Step 2
Click on the Connect to Jira JQL button and in the pop-up, enter the Connection Name and choose the connection type in the Environment, select the Data Center.
Enter the Connection URL.
On the Authentication Type, choose either Password or Token. Finally, enter the Username and Password or Token and click Connect.
The connection will be established between your Jira and Profit.co accounts.

Follow the same steps in Step 5 and Step 6 to automate the key results.
Welcome to Profit.co 👋
How can I help you today?