You can now integrate an Azure DevOps account with your Profit.co and can fully access your Profit.co app through the DevOps account. DevOps and Profit.co will automatically sync for automated key result progress updates. This integration eliminates the need to switch between the platforms and keeps the team moving forward.
Profit.co enables you to integrate, install and connect your Azure Devops to create key results without switching between platforms.
- Installing the profit.co application in Azure DevOps account
- Configuring Profit.co in DevOps after installation
- Automate and Monitor your OKR Progress from Azure DevOps
Installing the profit.co application in Azure DevOps account:
Step 1
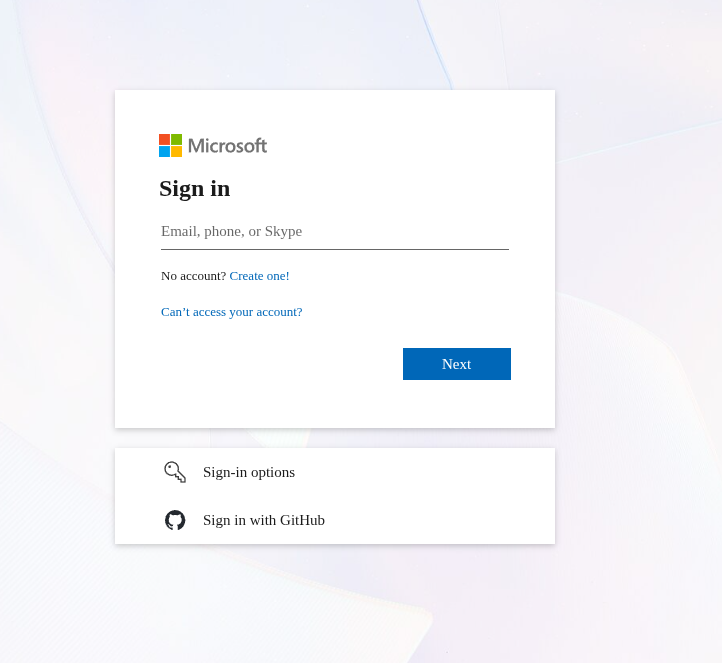
Sign in to Microsoft Azure DevOps.
Step 2
Login with your valid Azure account credentials.
Step 3
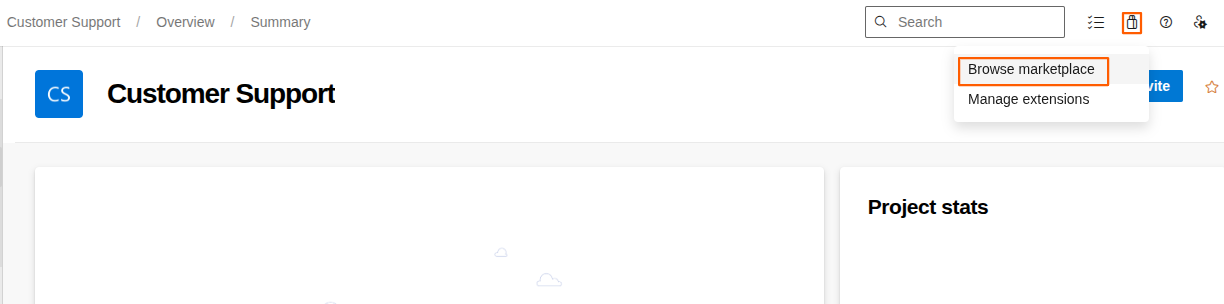
Once logged in, click on the bag icon in the top-right corner and browse the Marketplace.
Step 4
Now search for the Profit.co application.
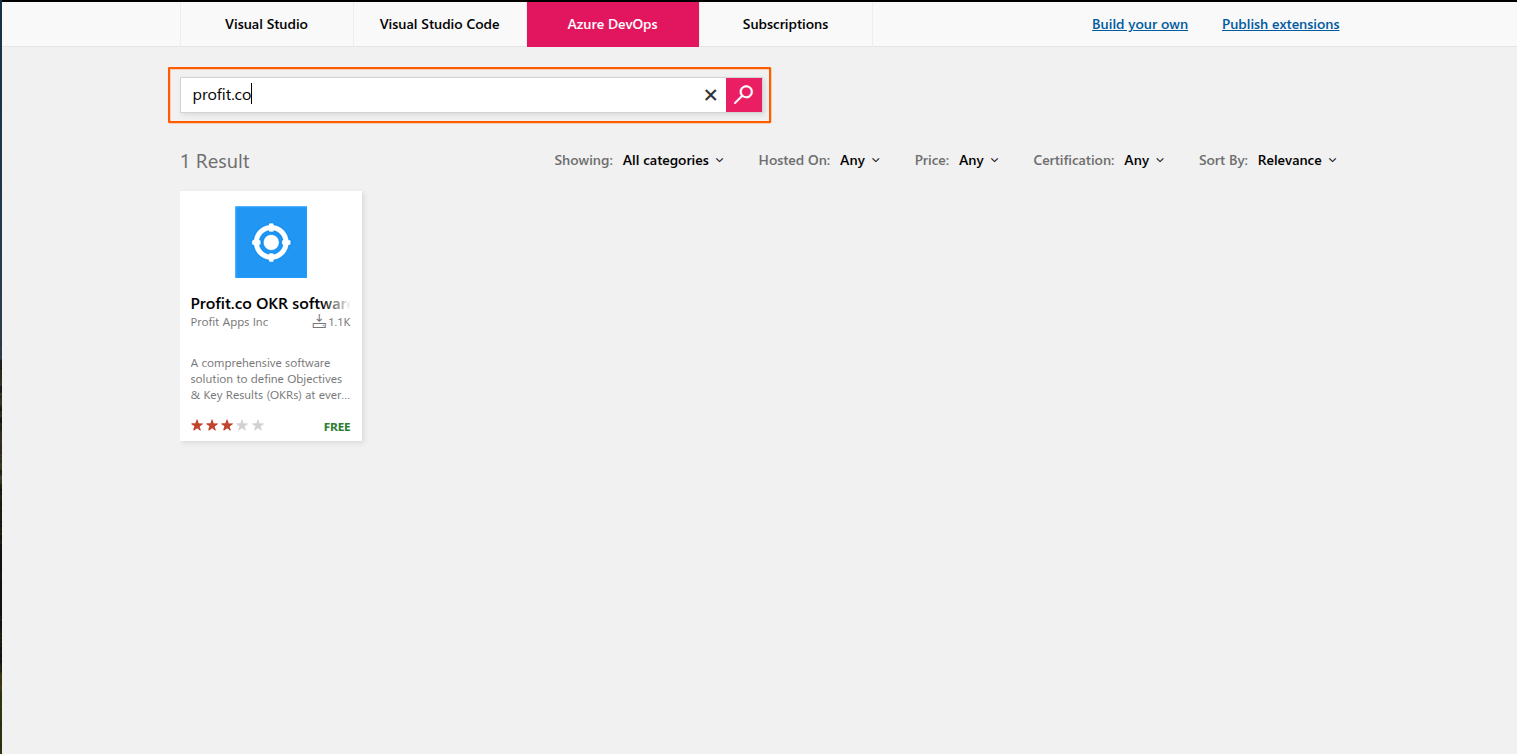
Step 5
Click on the name and install the application by the admin. Once you install the Profit.co application, it will be seen in the left menu.
Configuring Profit.co in DevOps after installation:
Note: The Profit.co extension can also be installed by an Azure DevOps user.
Step 1
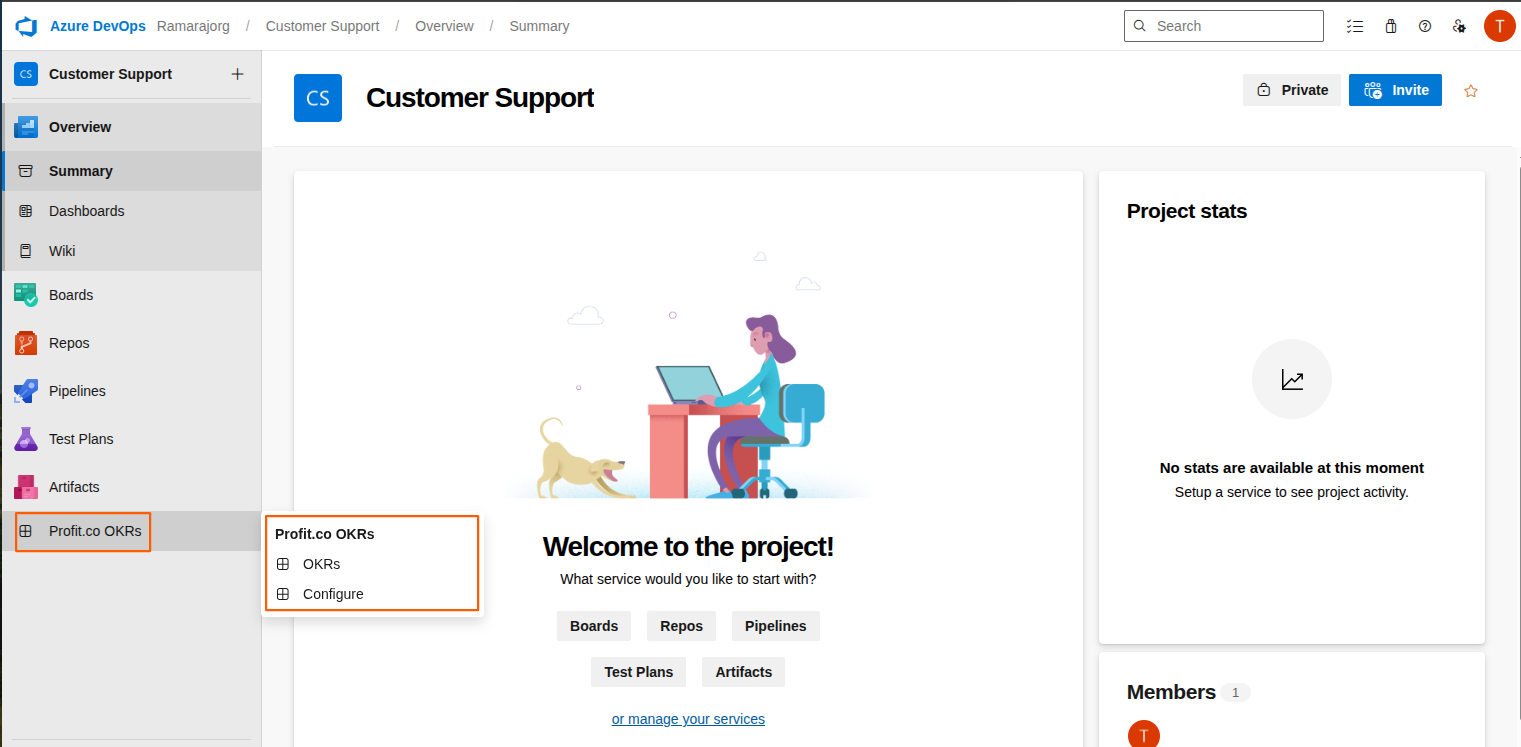
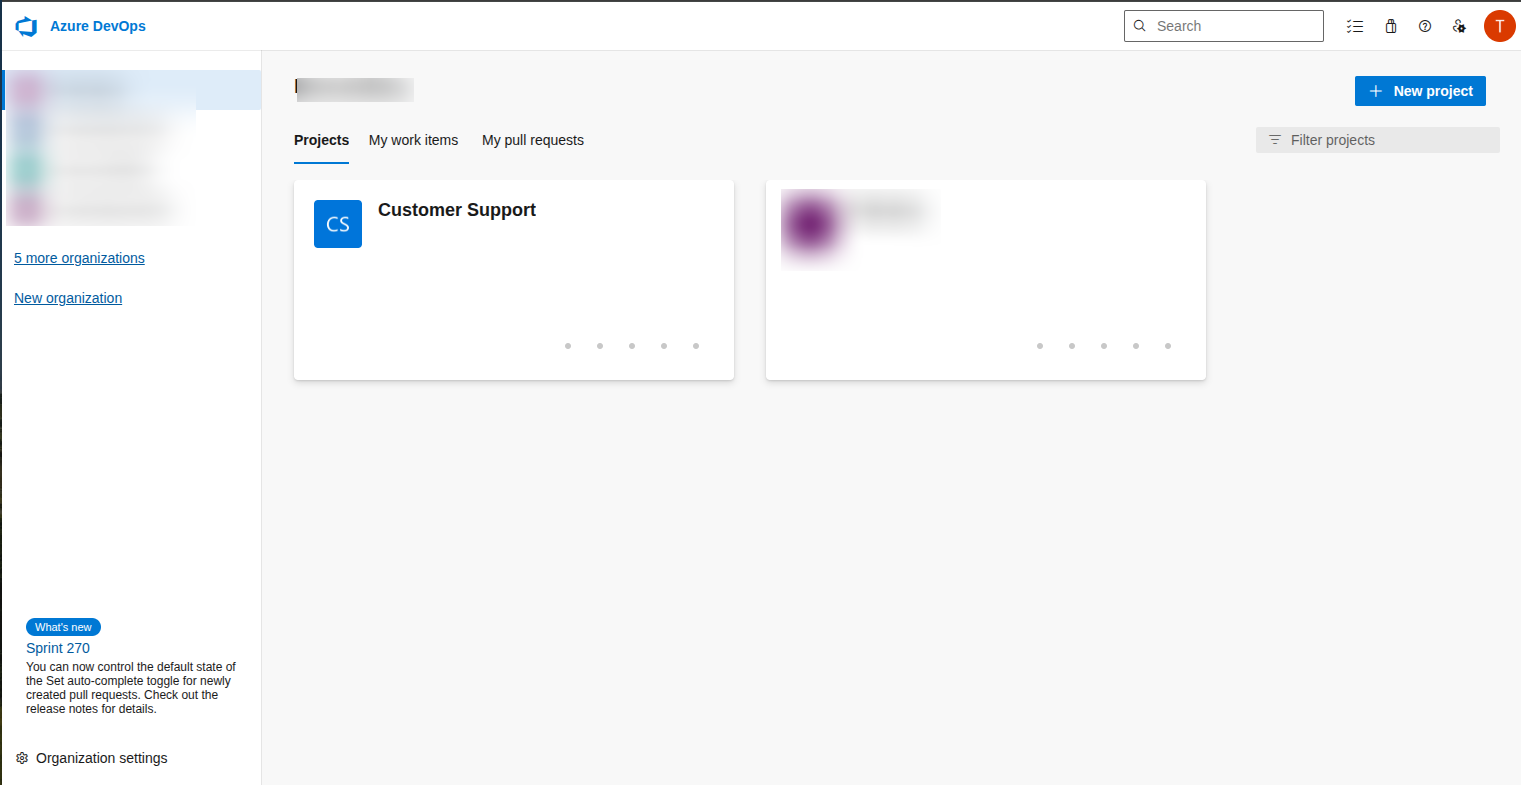
After logging in, you will see a list of projects. Select a project to configure the Profit.co application.
Step 2
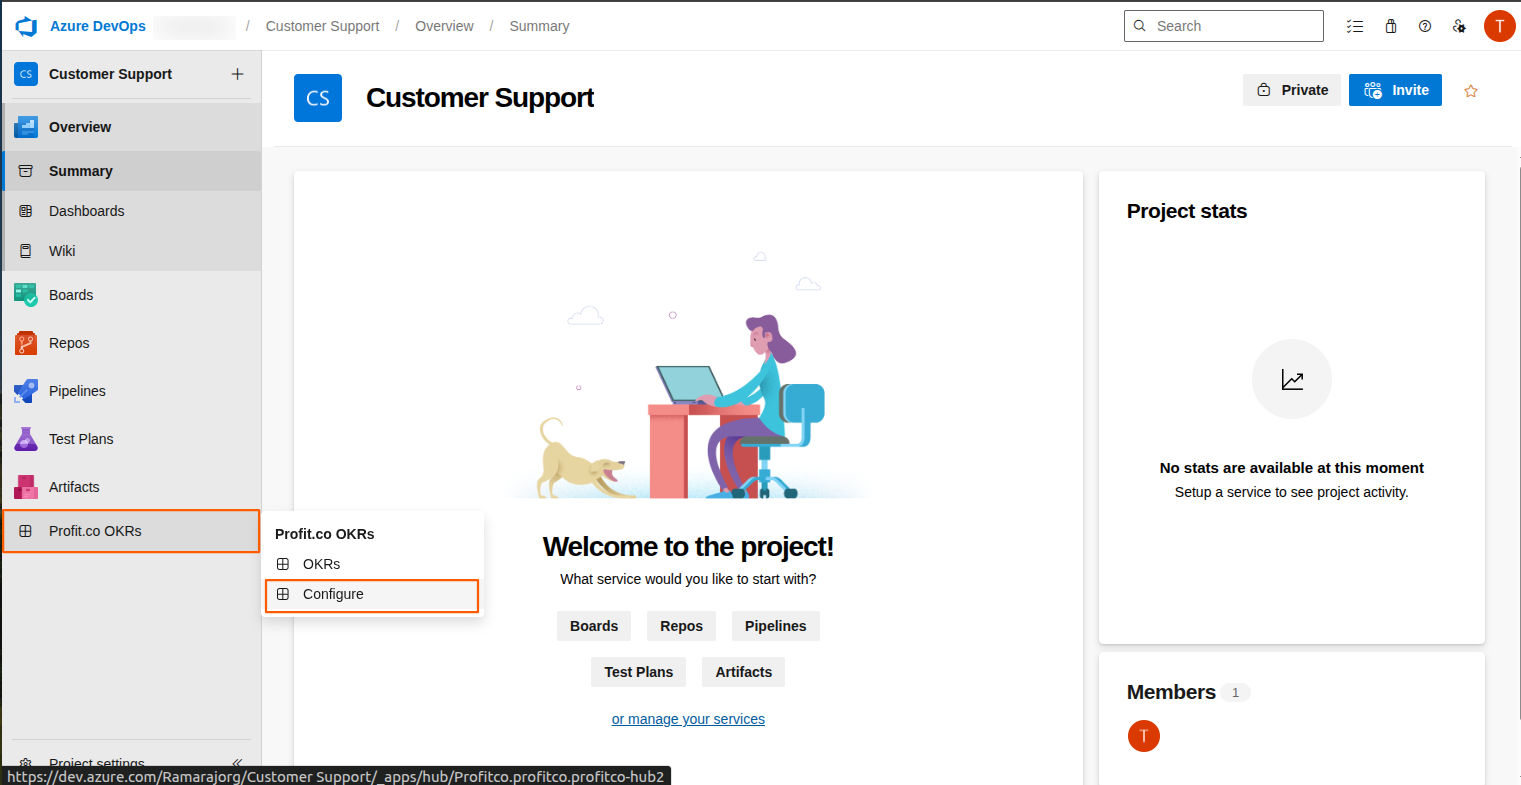
In the bottom left corner, you will see Profit.co is listed in the installed applications.
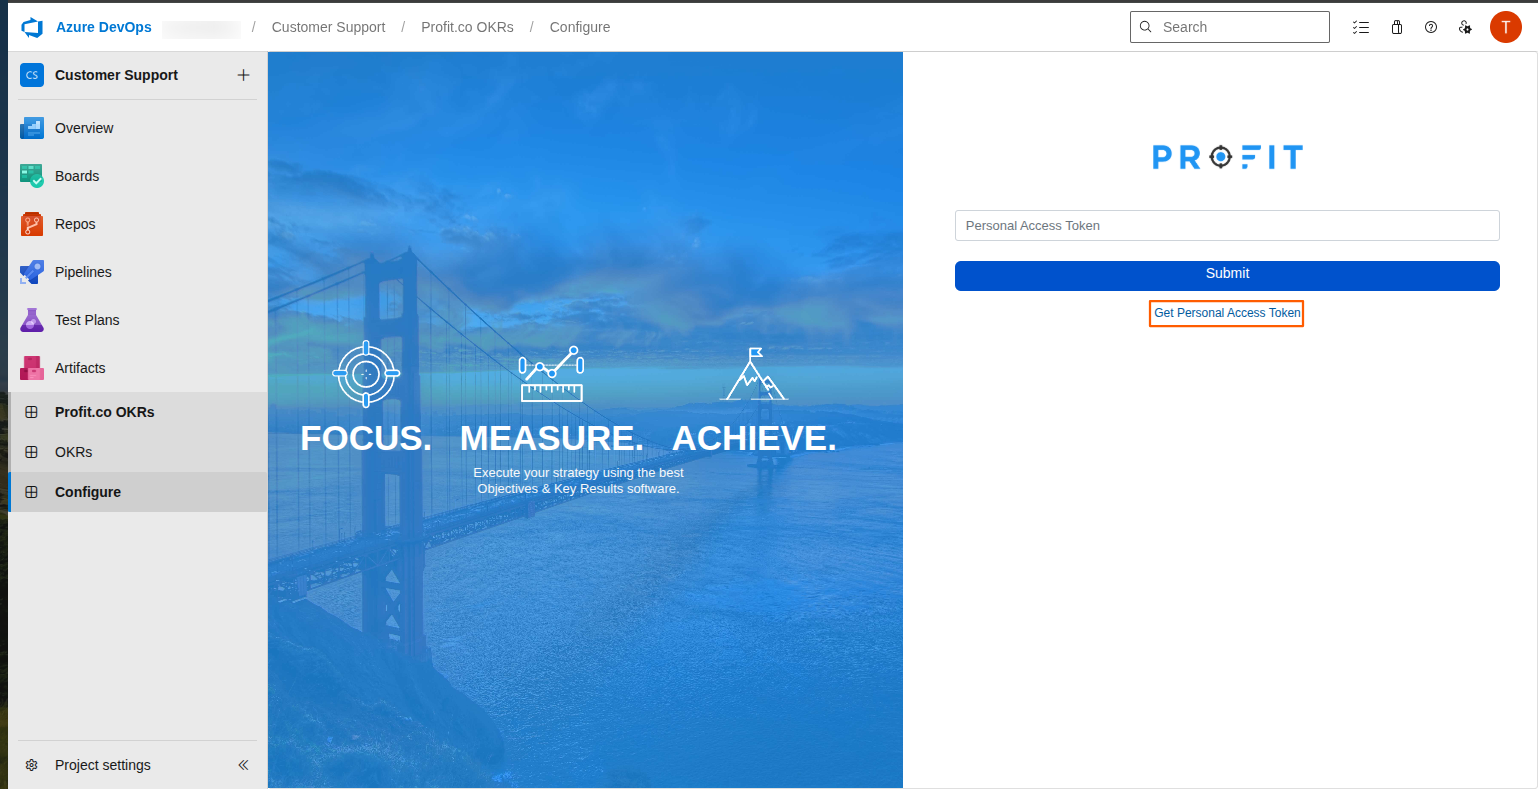
Click on the Configure option.
Step 3
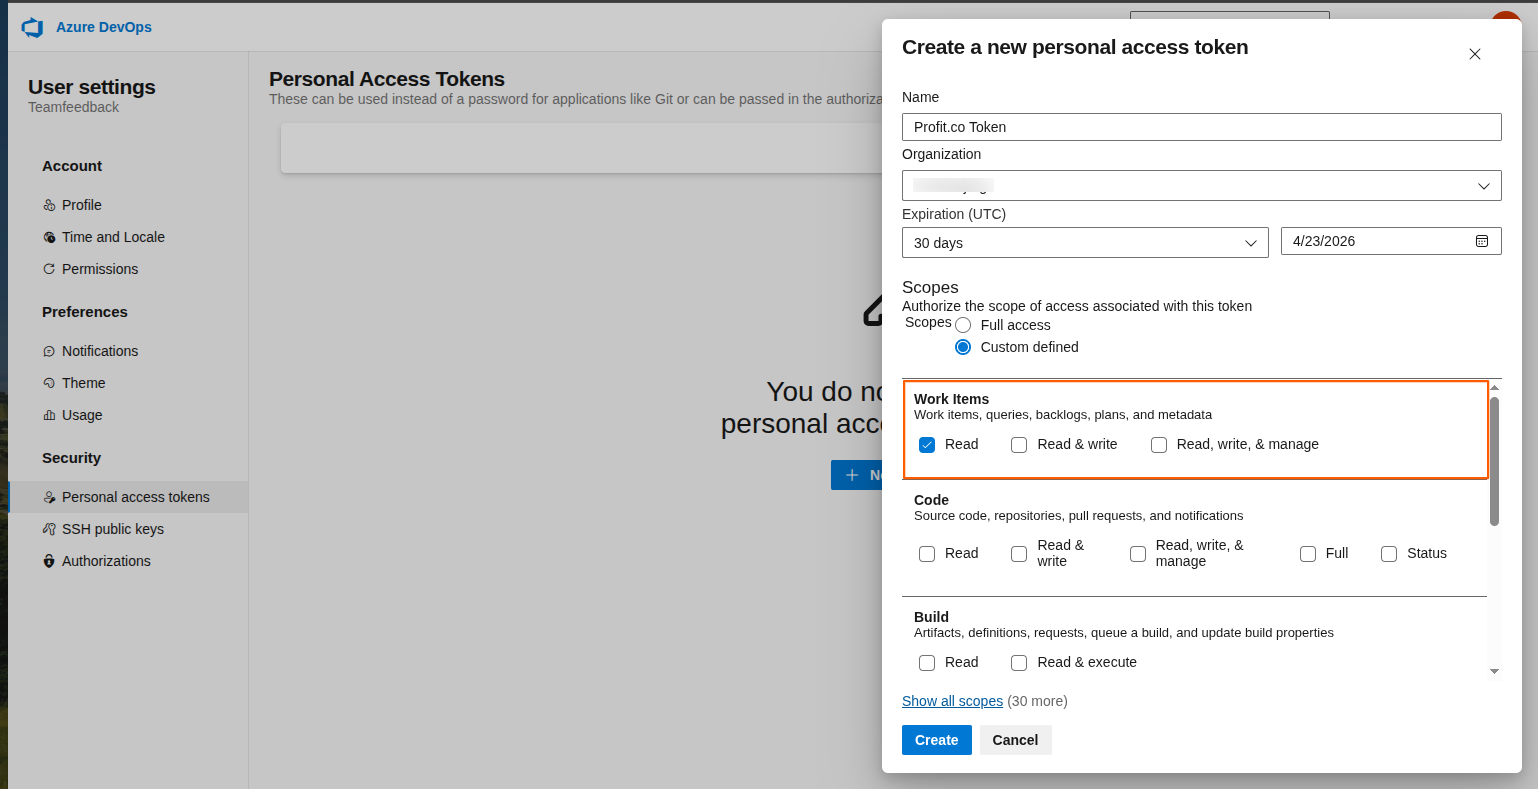
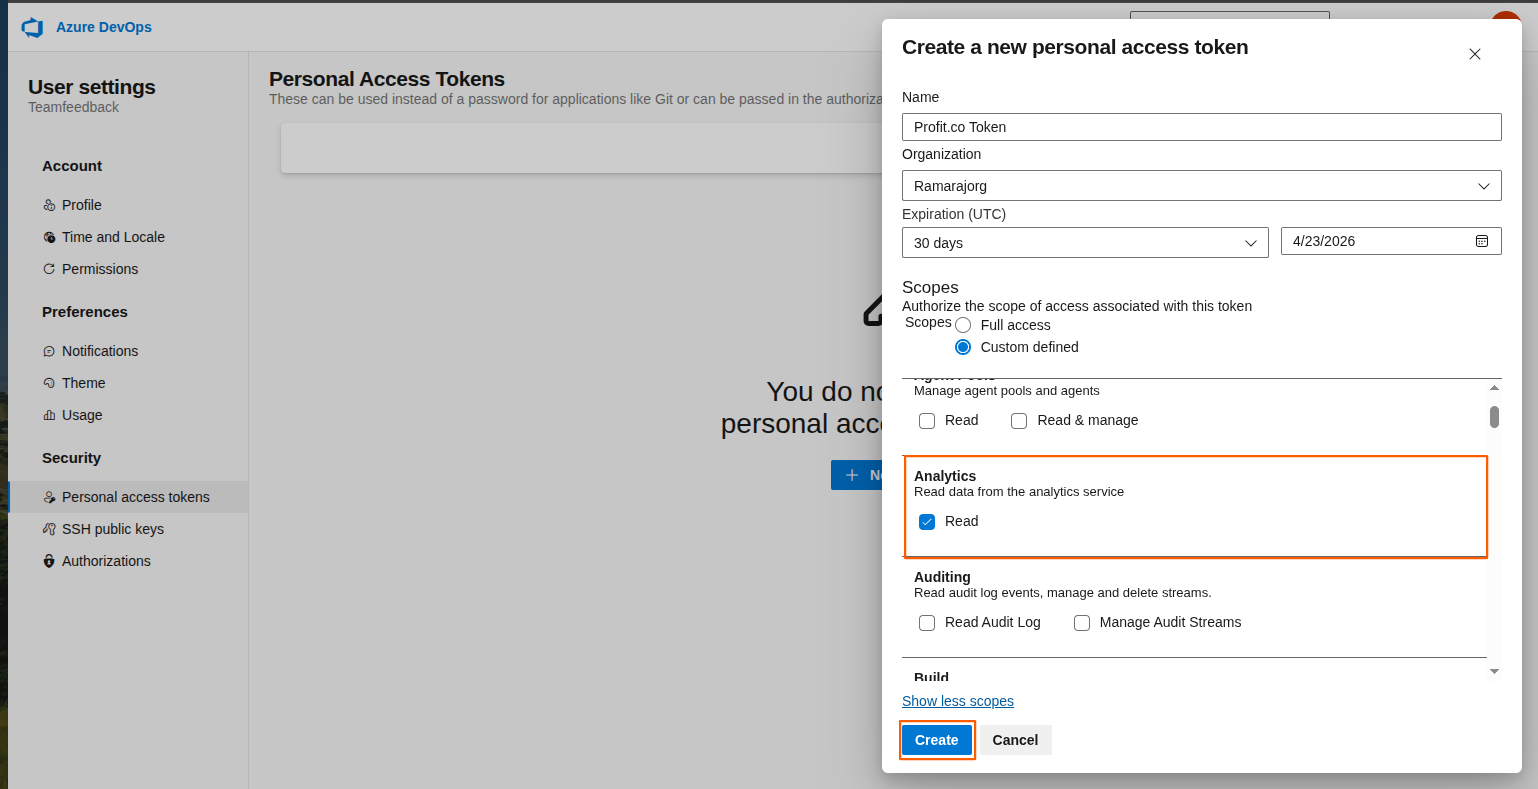
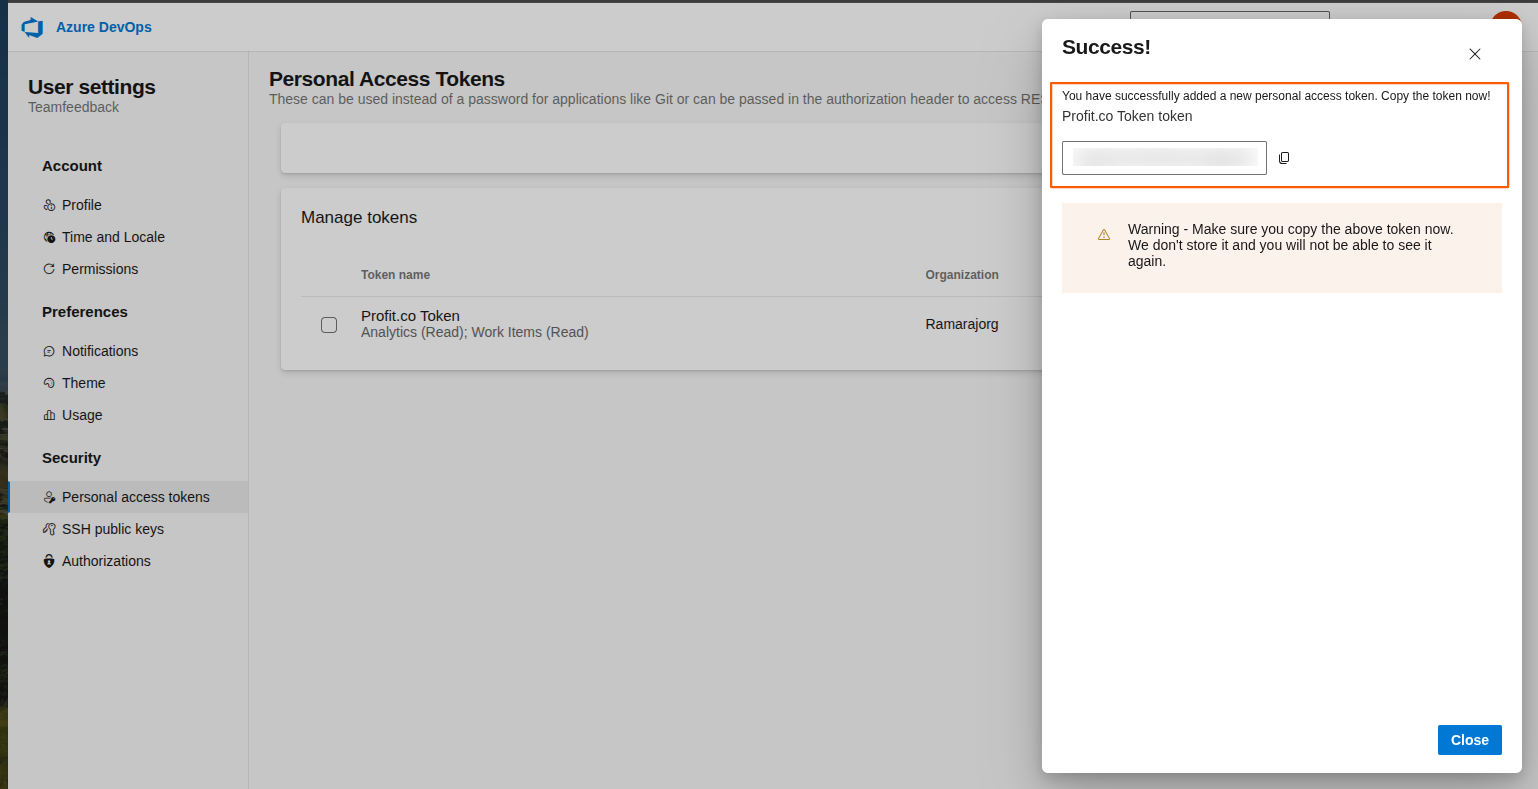
Generate a Personal Access Token to configure the application by doing the following these steps

- Name the token
- Select Read from the work items
- Click Show all scopes to select Read from Analytics
- Click Create
Step 4
Once the token is generated, copy and paste it in the configuration page to log in to your Profit.co account.

Step 5
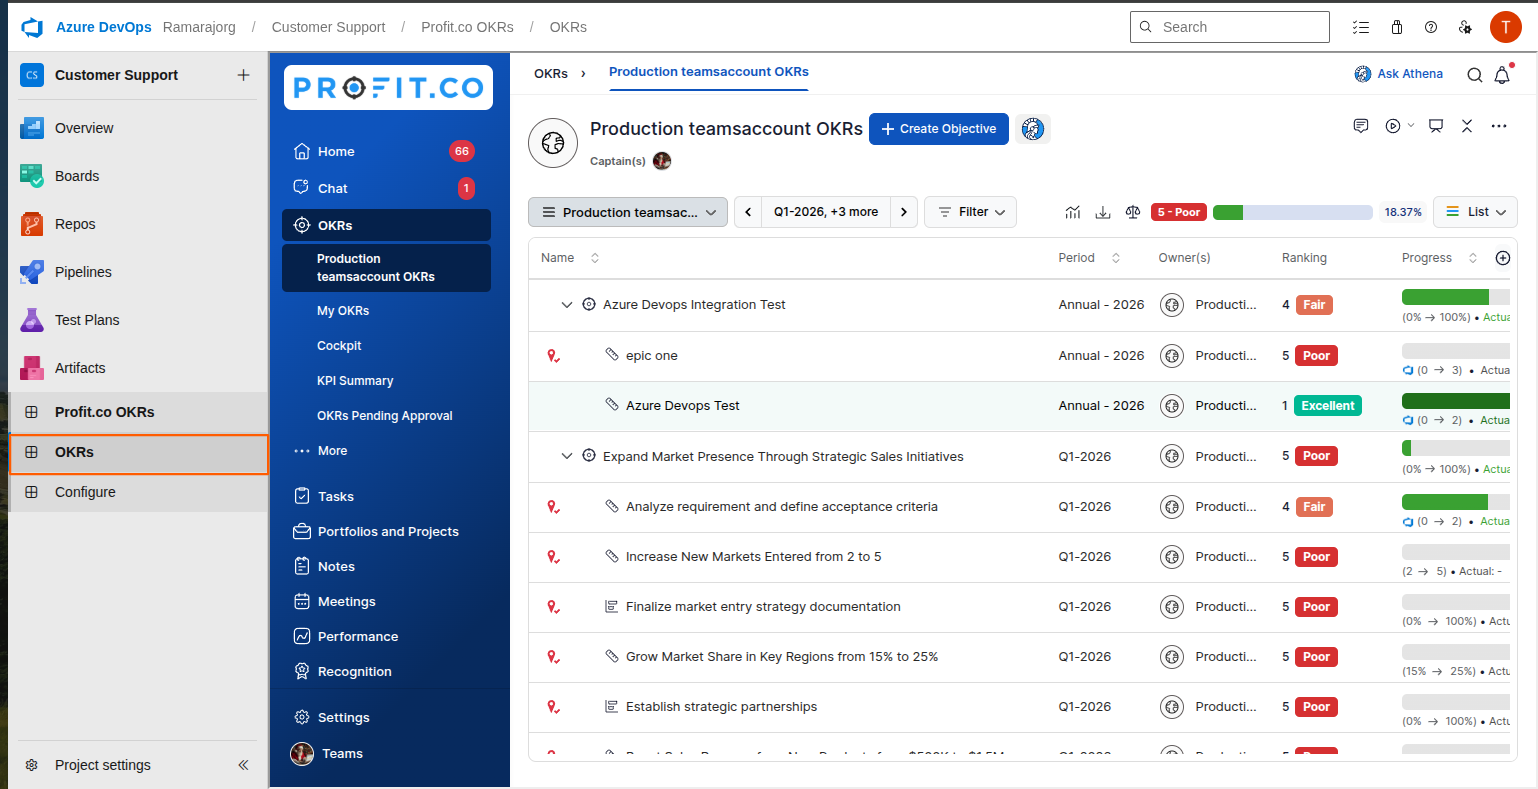
After successfully configuring, click OKRs in the left navigation menu to log in and access your Profit.co account.
Creating an epic as a Key Result in Profit.co
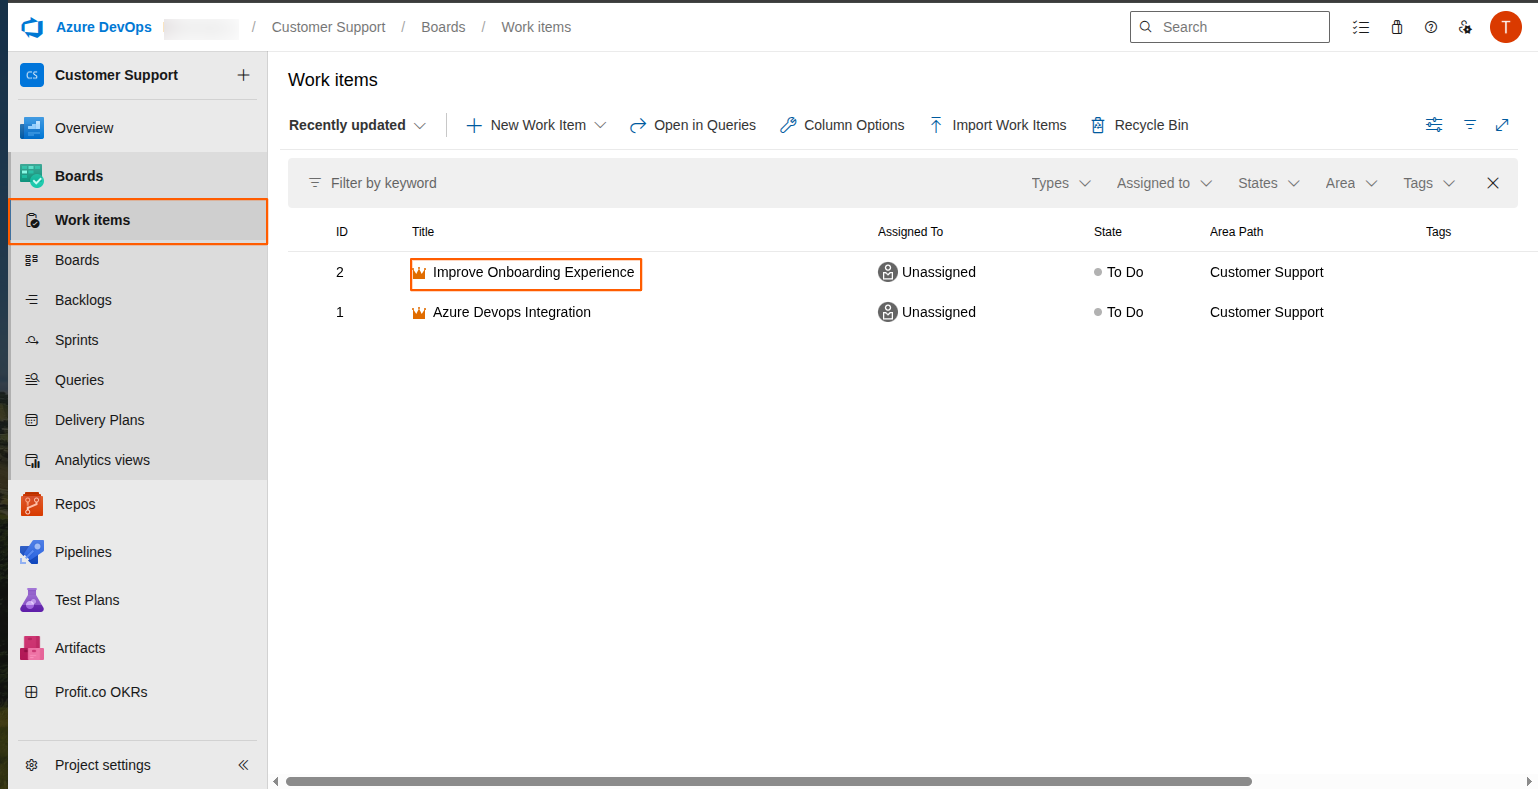
To create the epic as a key result in Profit.co, select a project and click Board in the left menu.
Click the “Click to view all/linked OKRs” button to view all the OKRs.
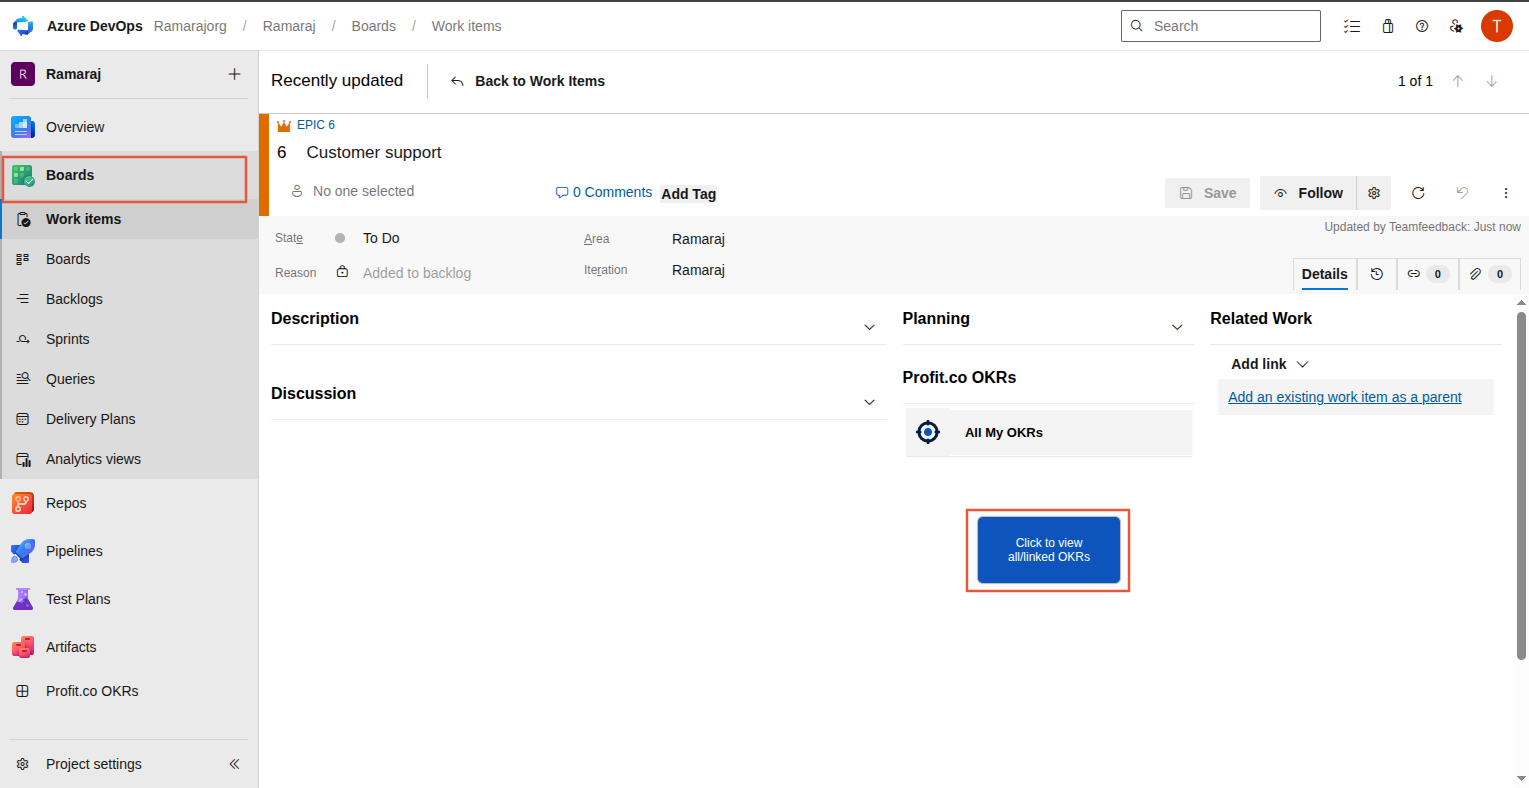 Note: When a user clicks the button on the Azure DevOps work item page, Profit.co automatically creates the required webhook subscription in Azure DevOps through a backend process.
The user performing this action must have one of the following permissions:
- Azure DevOps Organization Administrator access, or
- Edit Subscription permission for Azure DevOps Service Hooks.
These permissions are required only for the initial webhook subscription creation and must be granted to an authorized administrator or a user with the appropriate Service Hooks permissions.
Once the webhook subscription is created successfully, the Profit.co webhook integration will function for all users within the same Azure DevOps organization without requiring any additional webhook setup.
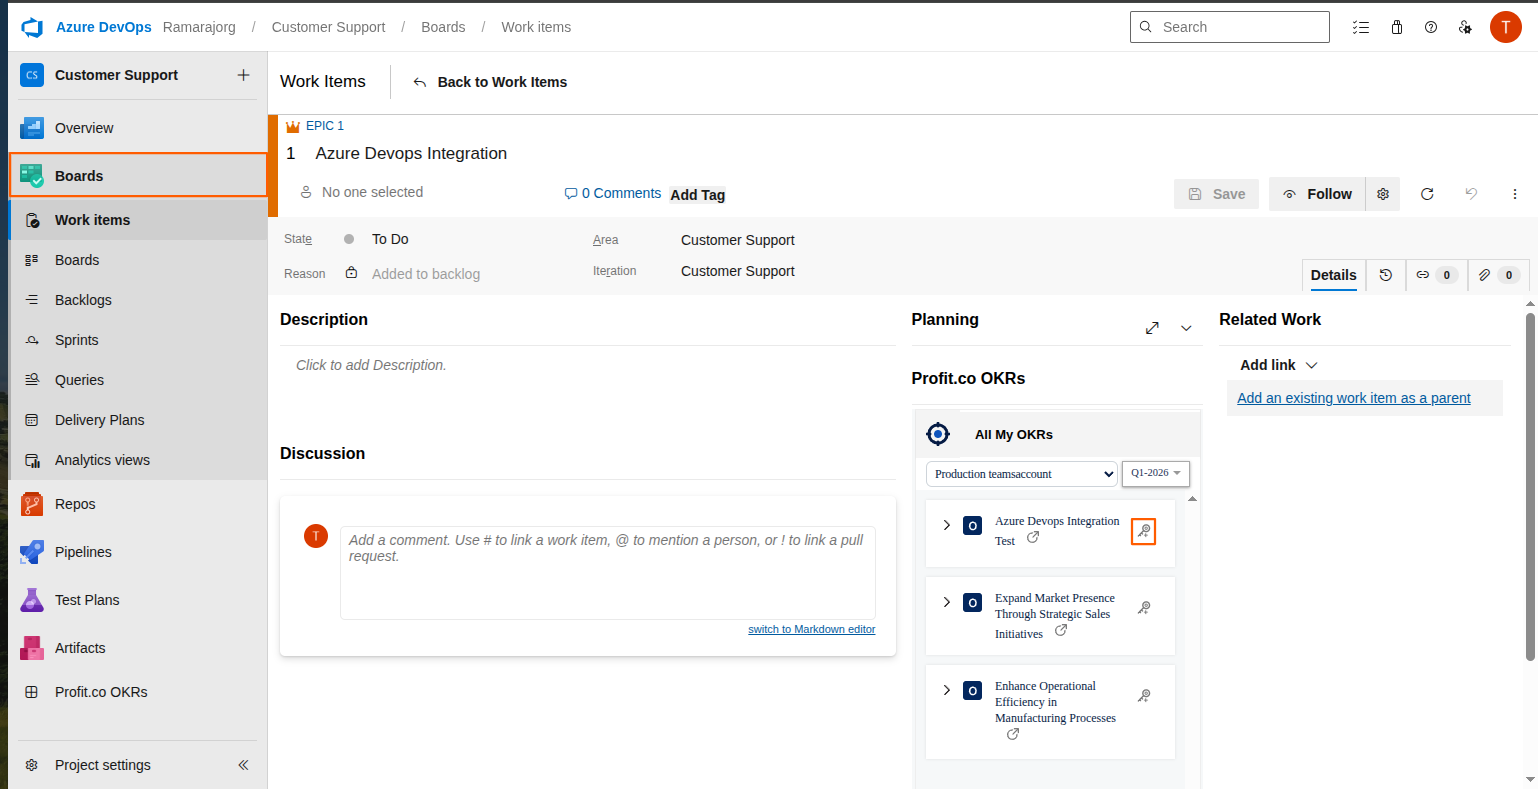
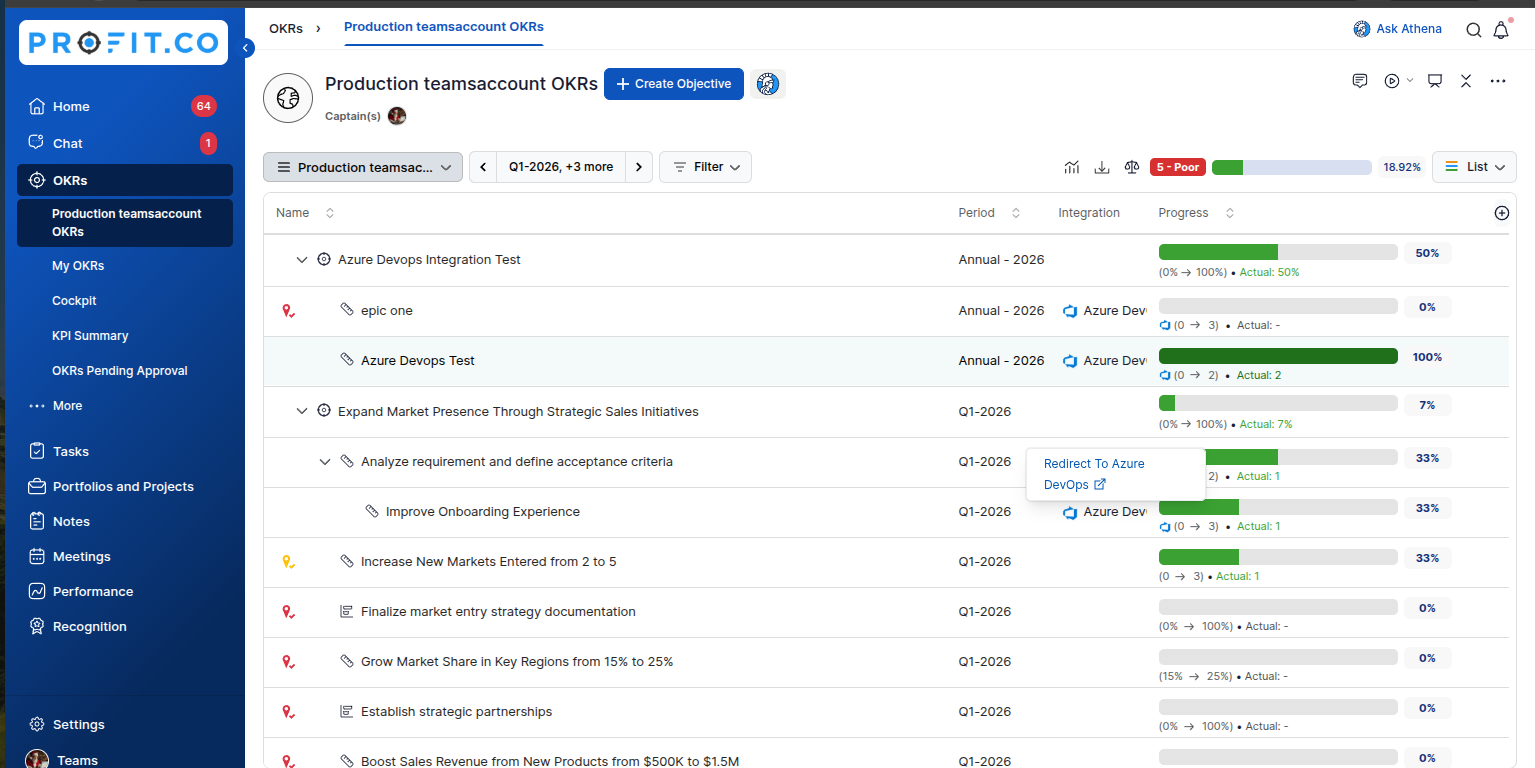
Select the OKR level as shown in the image below, then click the key icon to create an issue as a key result in Profit.co.
The progress will be automated when the child items are done in the Azure DevOps.
Automate and Monitor your OKR Progress from Azure DevOps:
Create a DevOps Issue as a Key Result
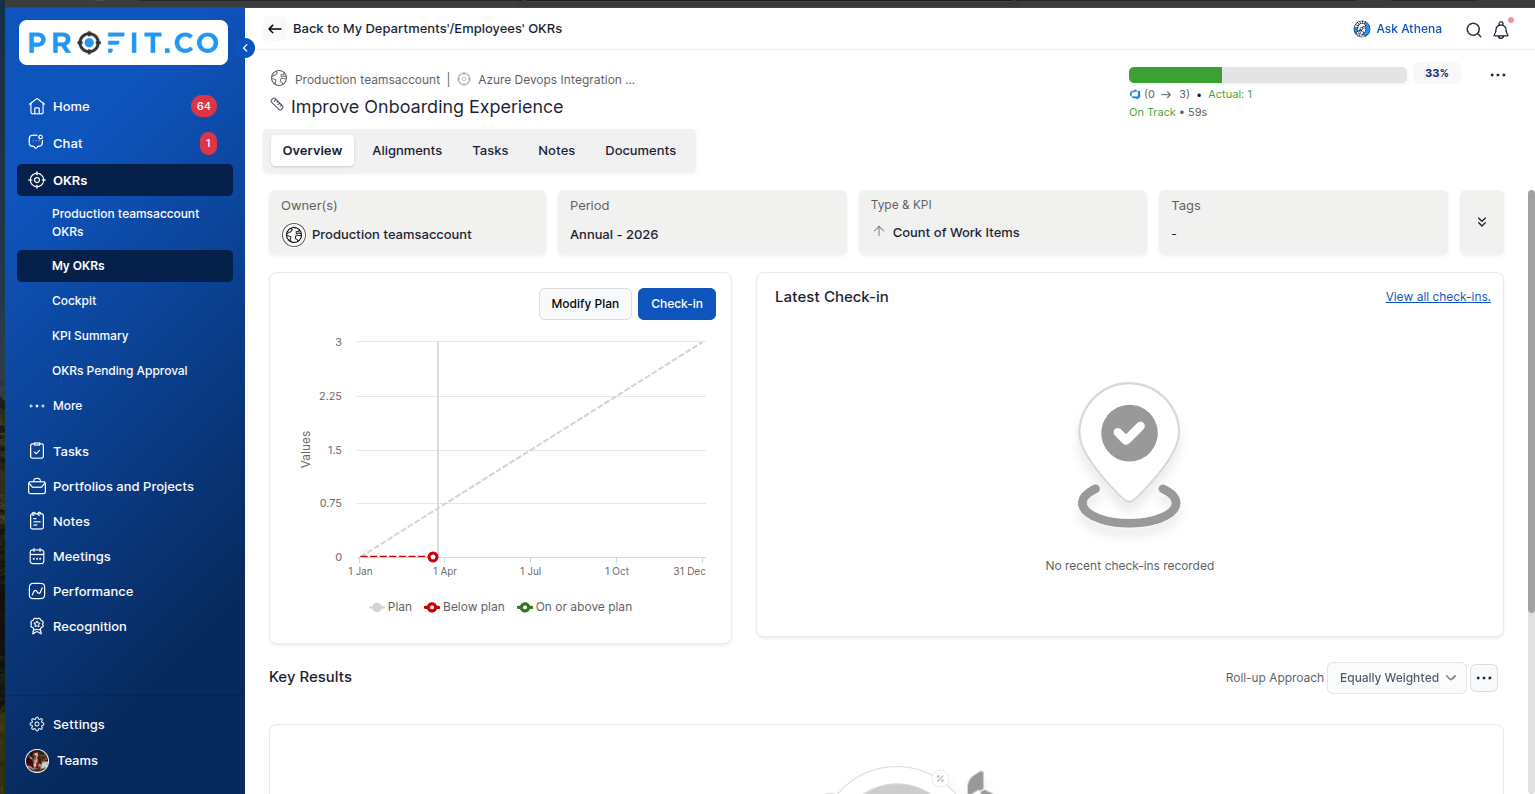
Profit.co will automatically update and monitor your OKR progress in real-time from Azure DevOps, and now the effort points are directly linked to a key result. Monitor your OKR progress and address the areas that need your attention to improve project delivery performance.
Step 1
Once the Profit.co OKR software app is installed and configured in Azure DevOps, you will be able to view Profit.co OKRs on your Azure DevOps page. Additionally, your work items can be linked to your OKRs.
Step 2
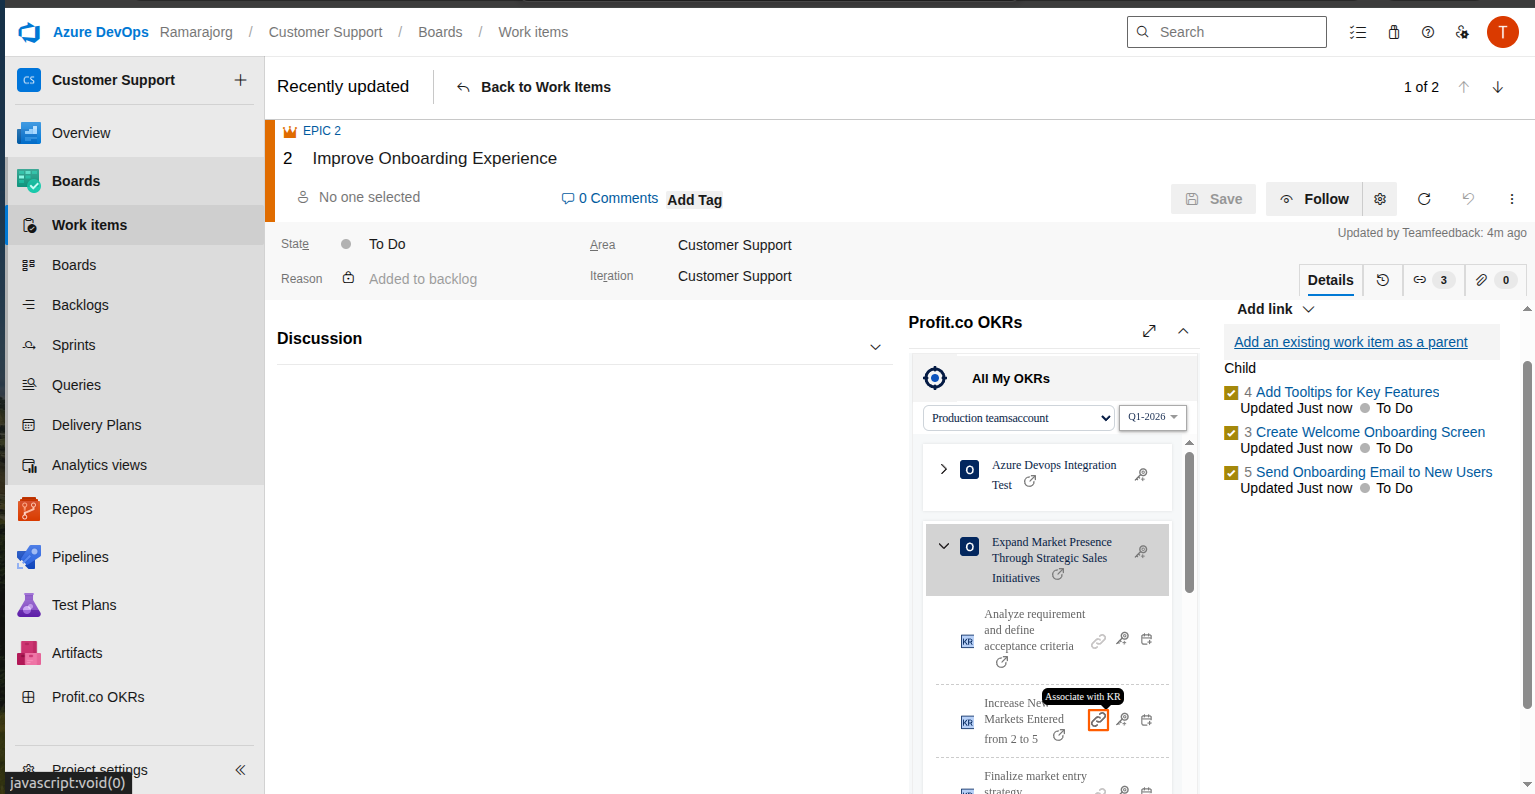
Click on the work item epic that you want to link to your key result in Profit.co.
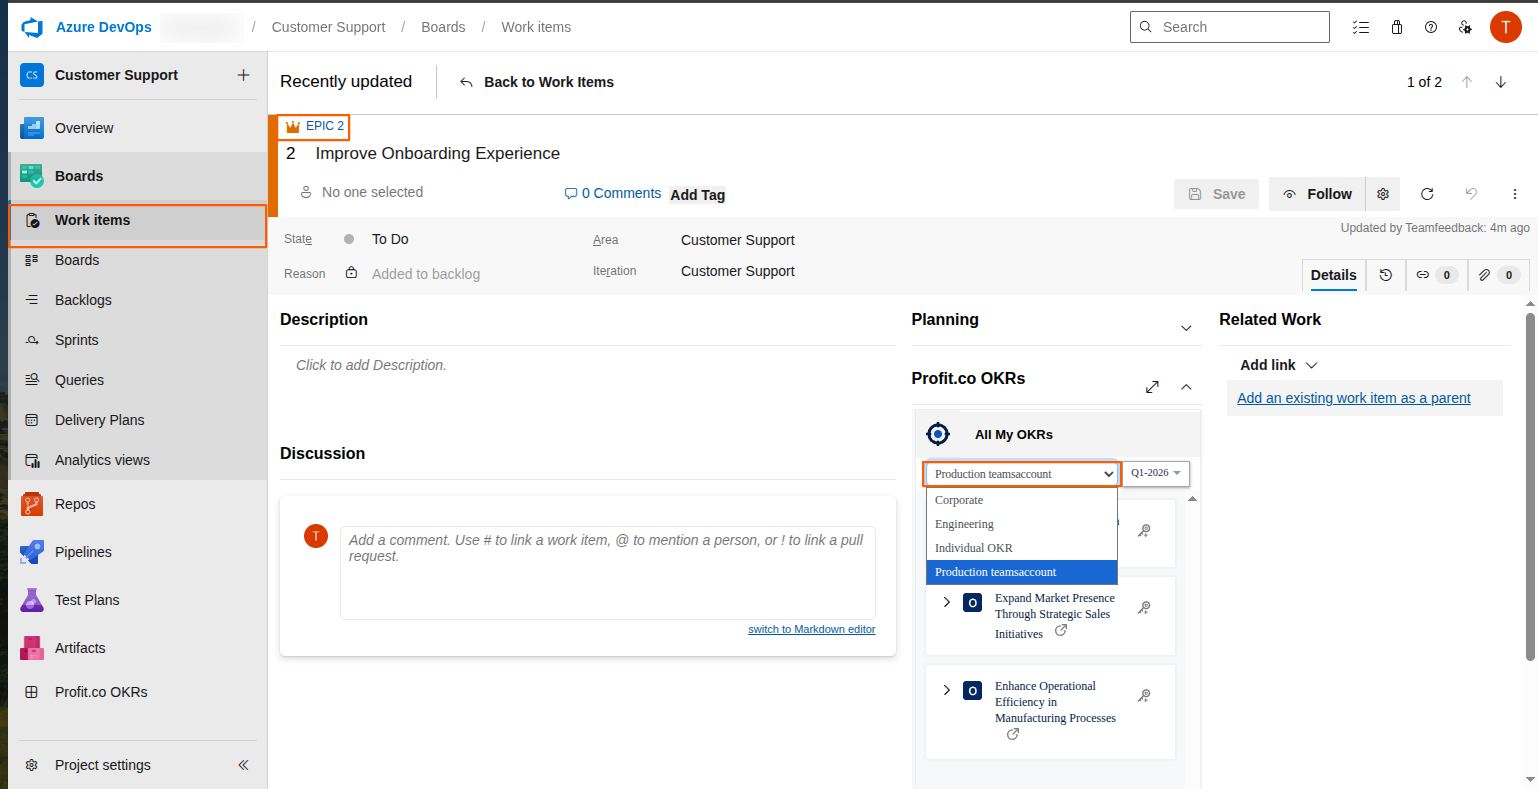
Click on Profit.co OKRs to view your individual OKRs.
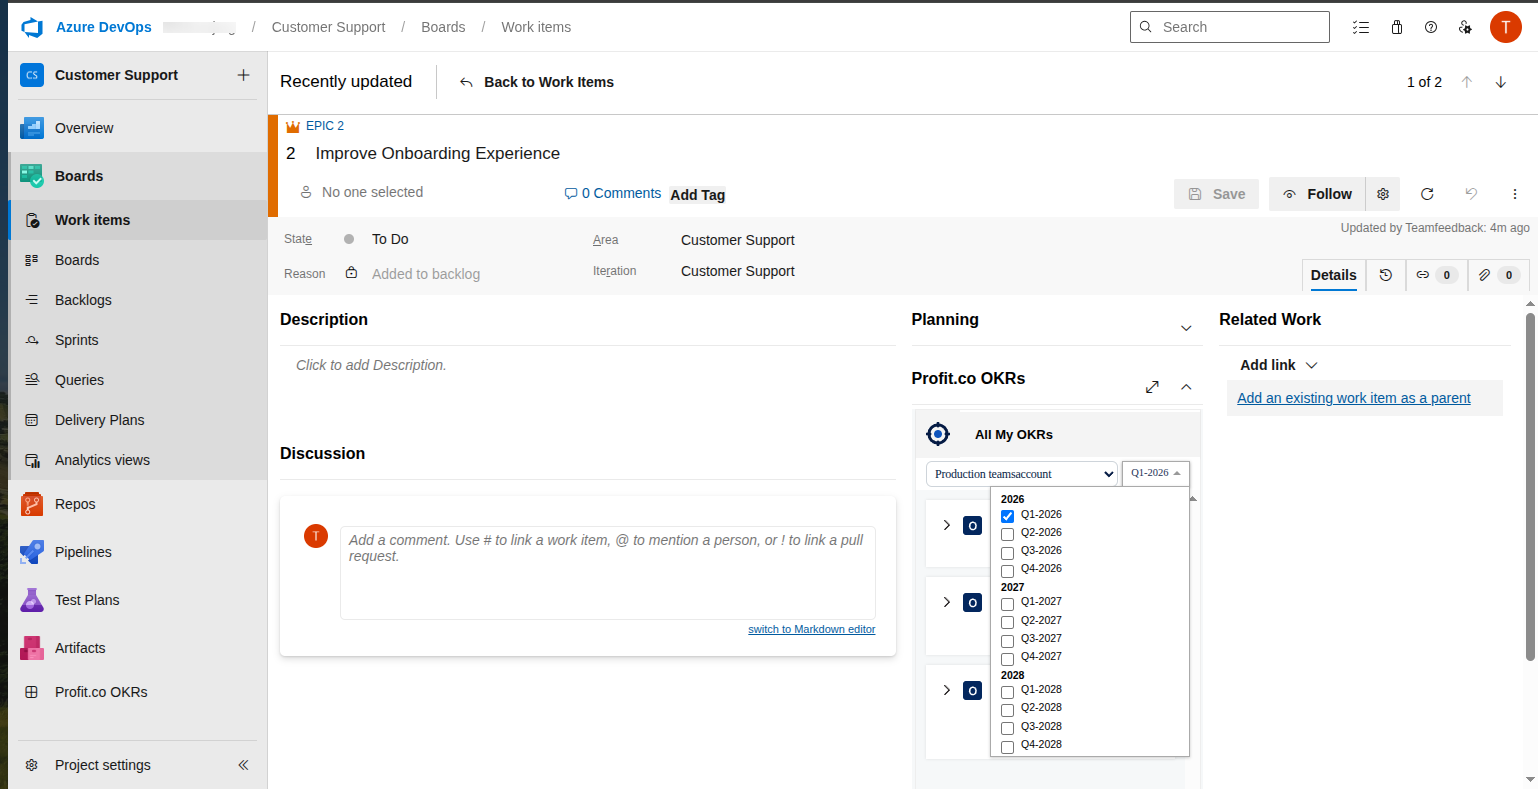
Use the department dropdown to view corporate and departmental OKRs across different periods. You can also switch between periods from here.
Step 3
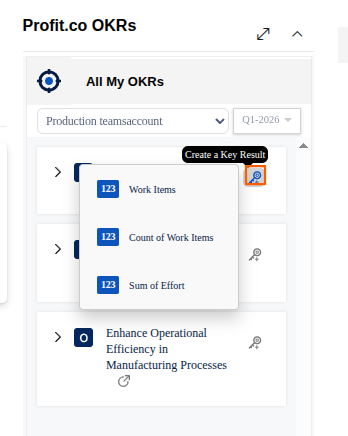
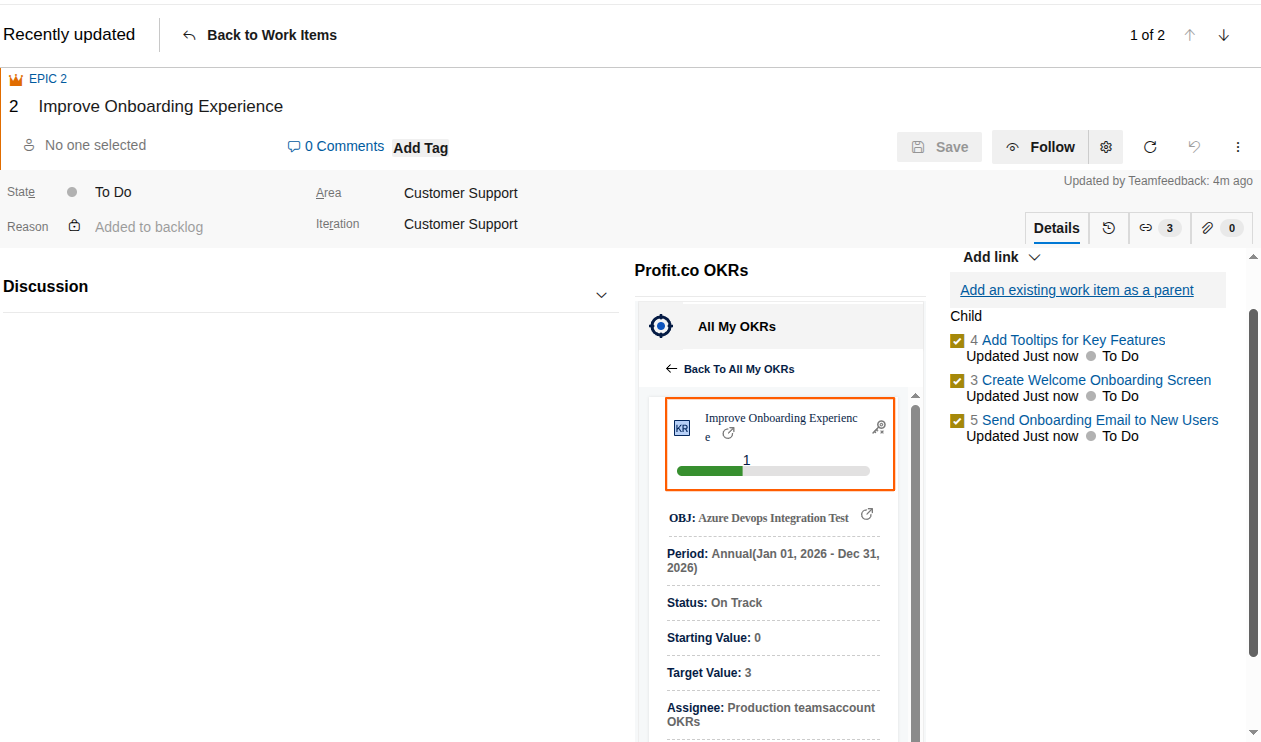
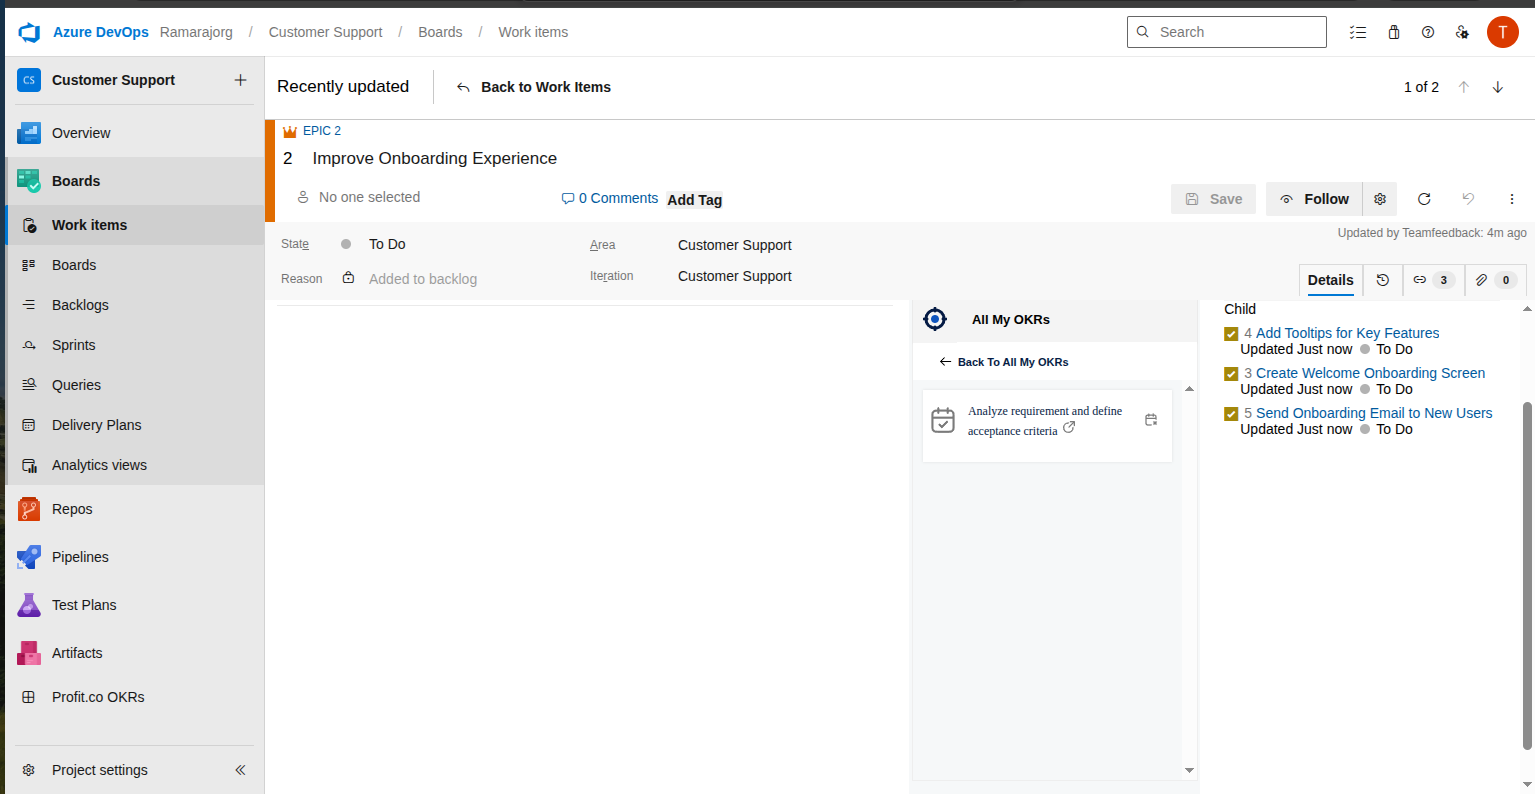
Now, click on the key icon against any OKR to create your Azure DevOps epic “Improve on-boarding experience” as a key result under that OKR.
Step 4
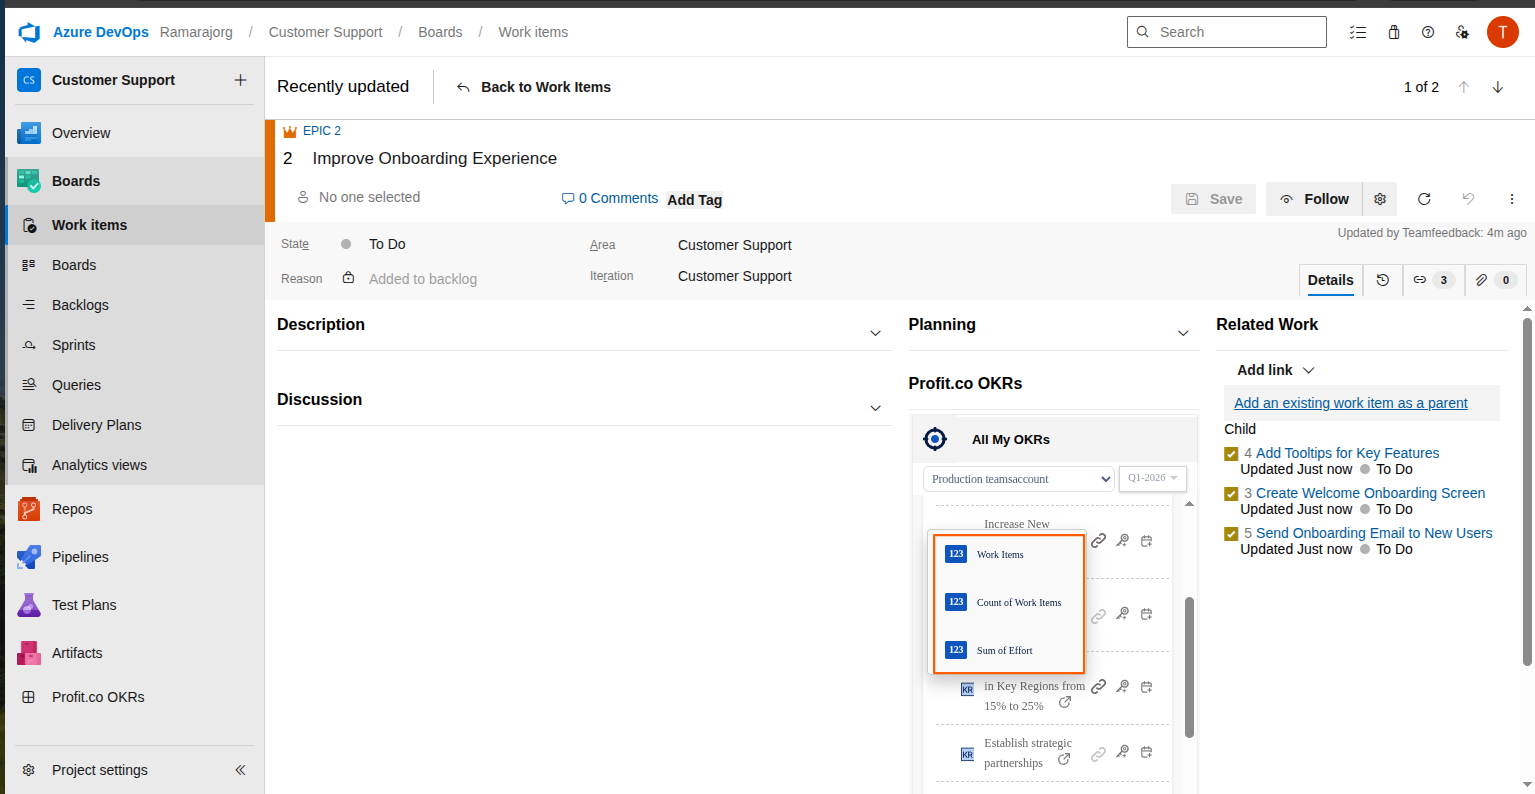
Now add the details of
| Azure KPI | Description |
|---|---|
| Count of Work Items | Represents the total number of work items (tasks, bugs, user stories, etc.) created or tracked within a specific period. |
| Sum of Effort | Indicates the total effort (in hours or story points) estimated or logged across all work items. |
| Work Items | Refers to individual units of work in Azure DevOps, such as tasks, bugs, features, or user stories, used to track progress. |
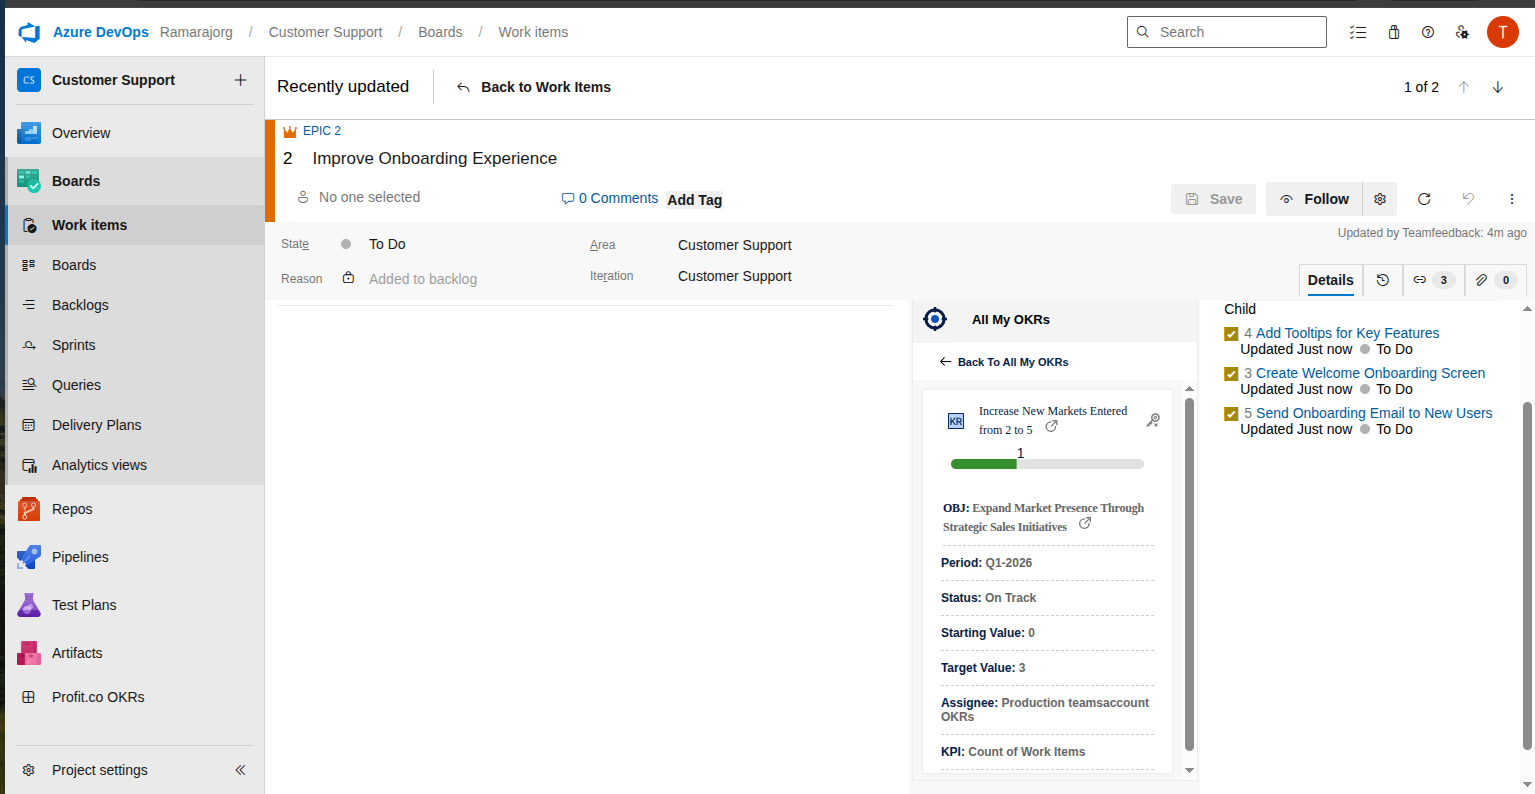
Once you link them all, the key results will be shown here.
Step 5
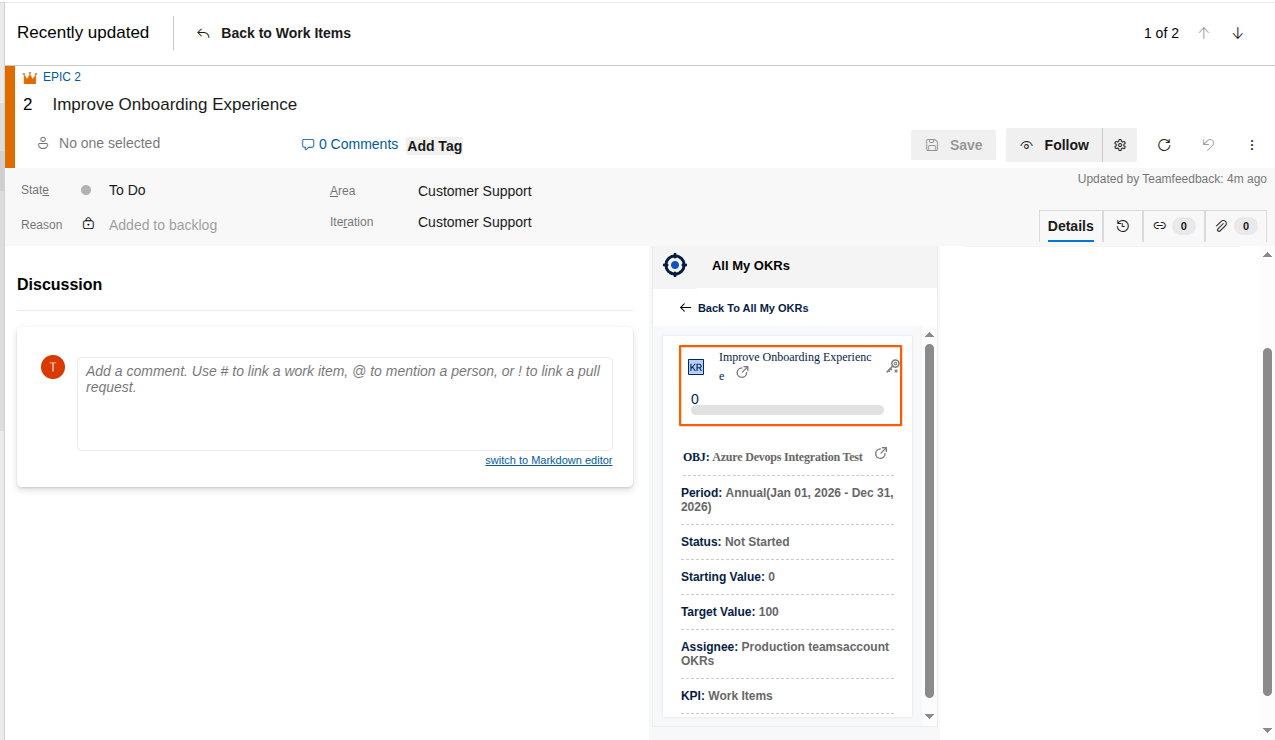
Now, your epic is created as a key result under the objective.
Step 6
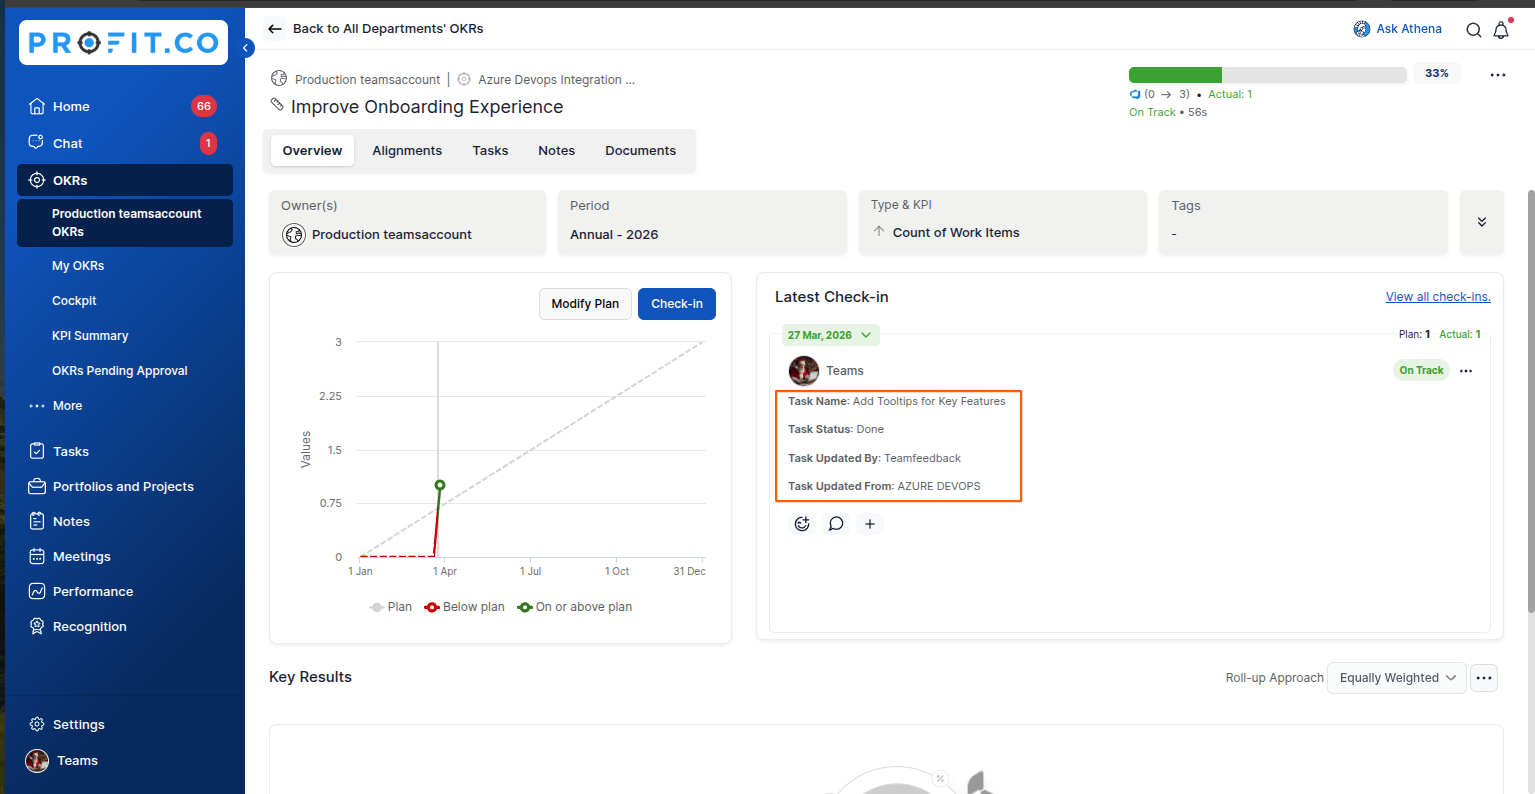
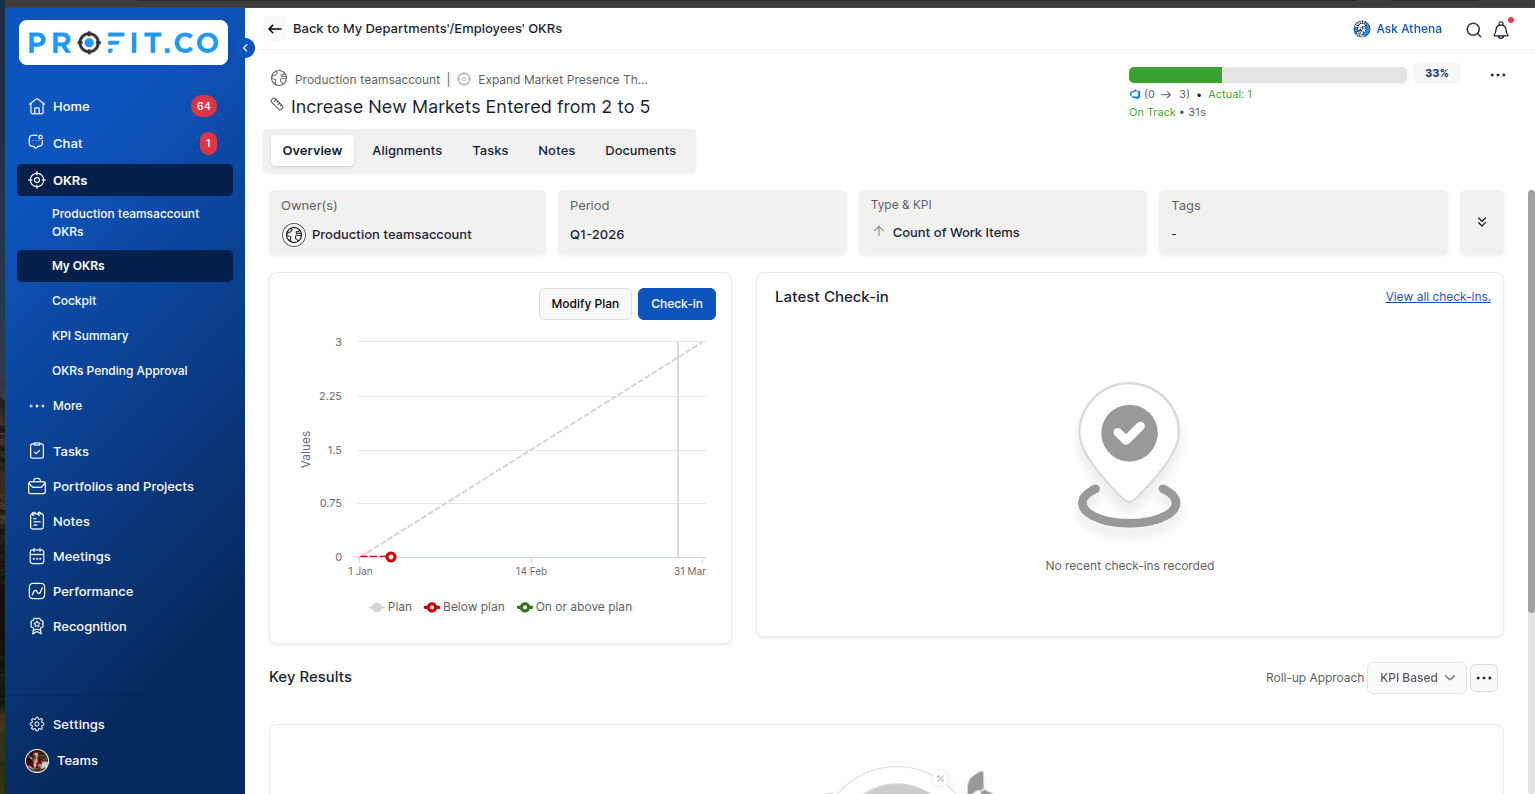
Whenever you complete a point under the Azure DevOps epic/issue, your key result in Profit.co will automatically be updated based on the points assigned to it.

Step 7
Your actions of adding and removing stories will also be synced in the key result.
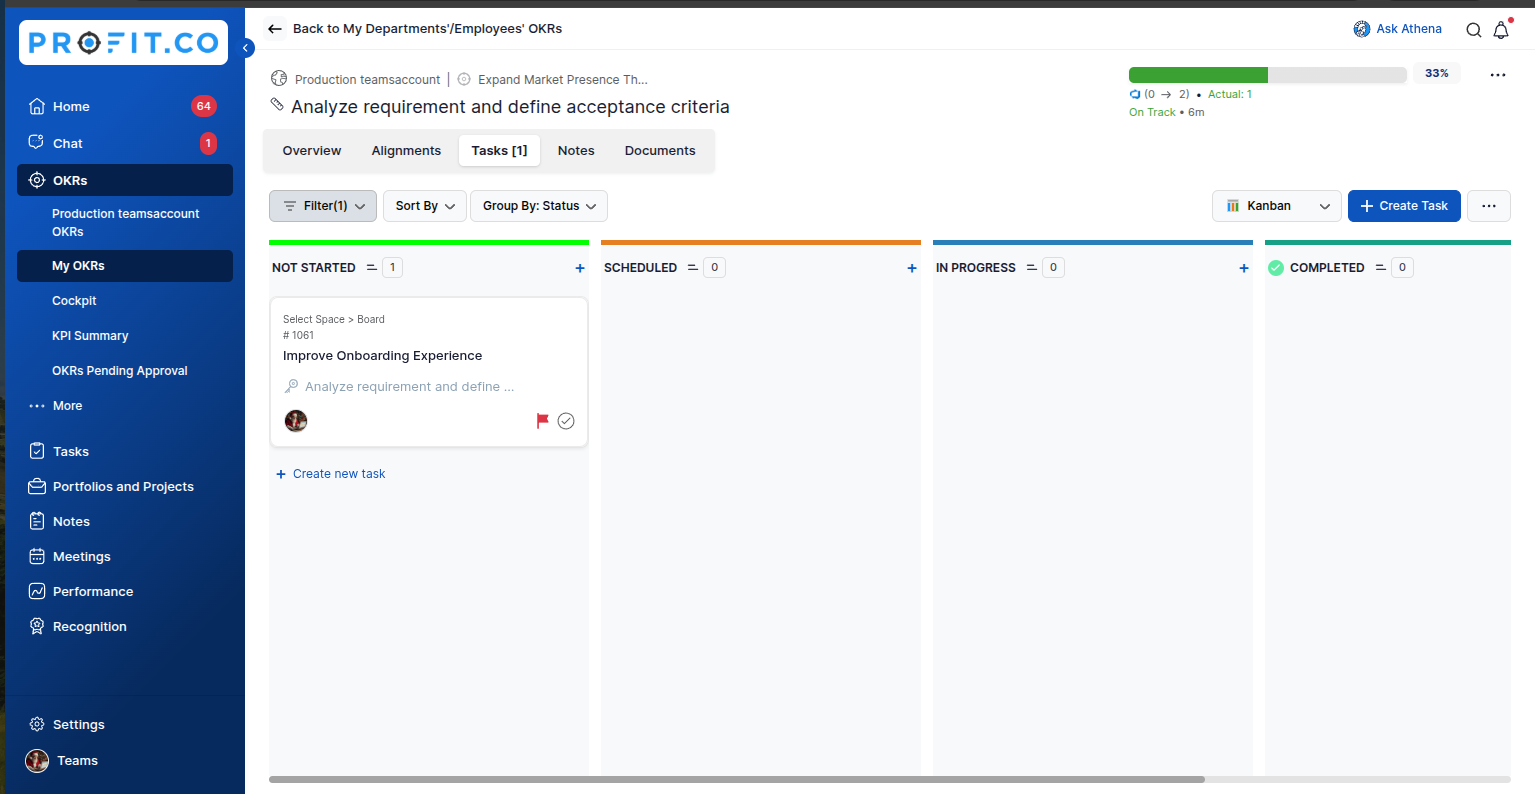
You can view the key result “Improve onboarding experience” is created under the objective with a KPI “Count of Work Items.”
Check-in Comment
You can view your check-in comments based on your task completion
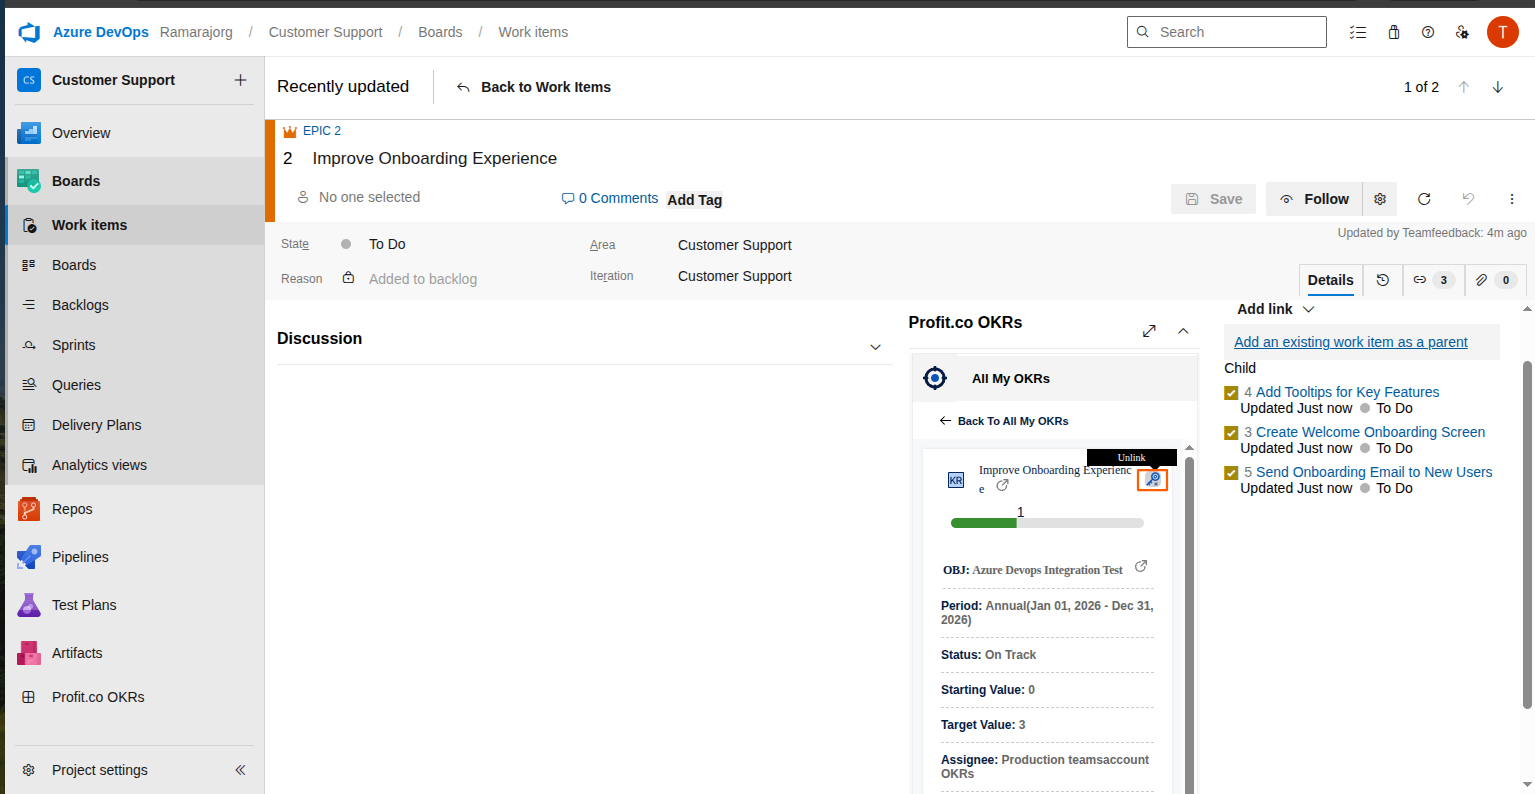
After updating to unlink the key result in your Azure account, click the Unlink button.
Create a DevOps issue as a sub-key result.
Follow the same steps as given above for the process of creating key results.
To create a sub-key result, choose the Key Result that you want.
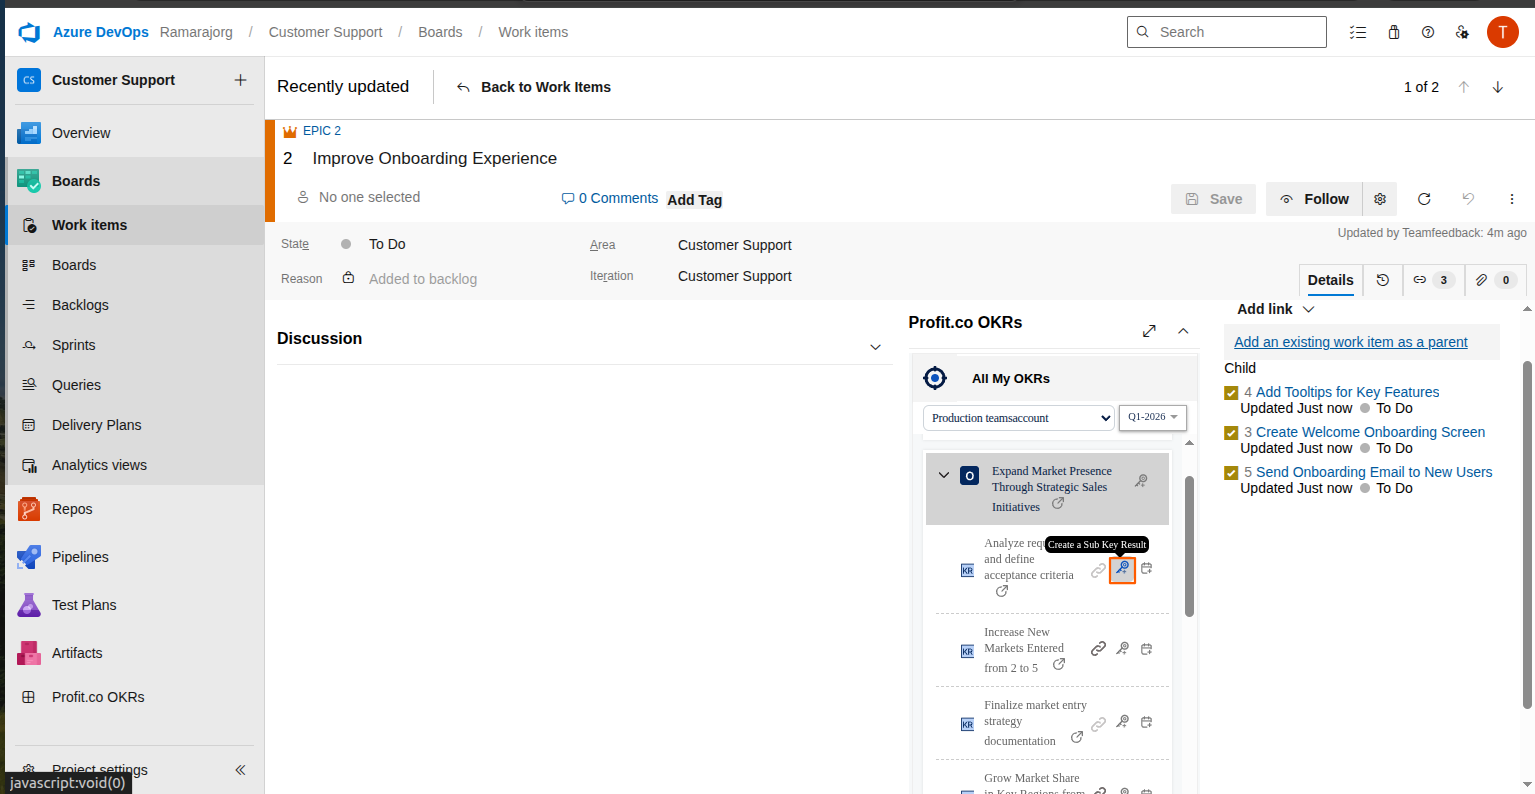
In DevOps, select the dropdown and click the link icon on the key result to add the sub key result.
You’ll be getting the KPI to select for the sub key result.
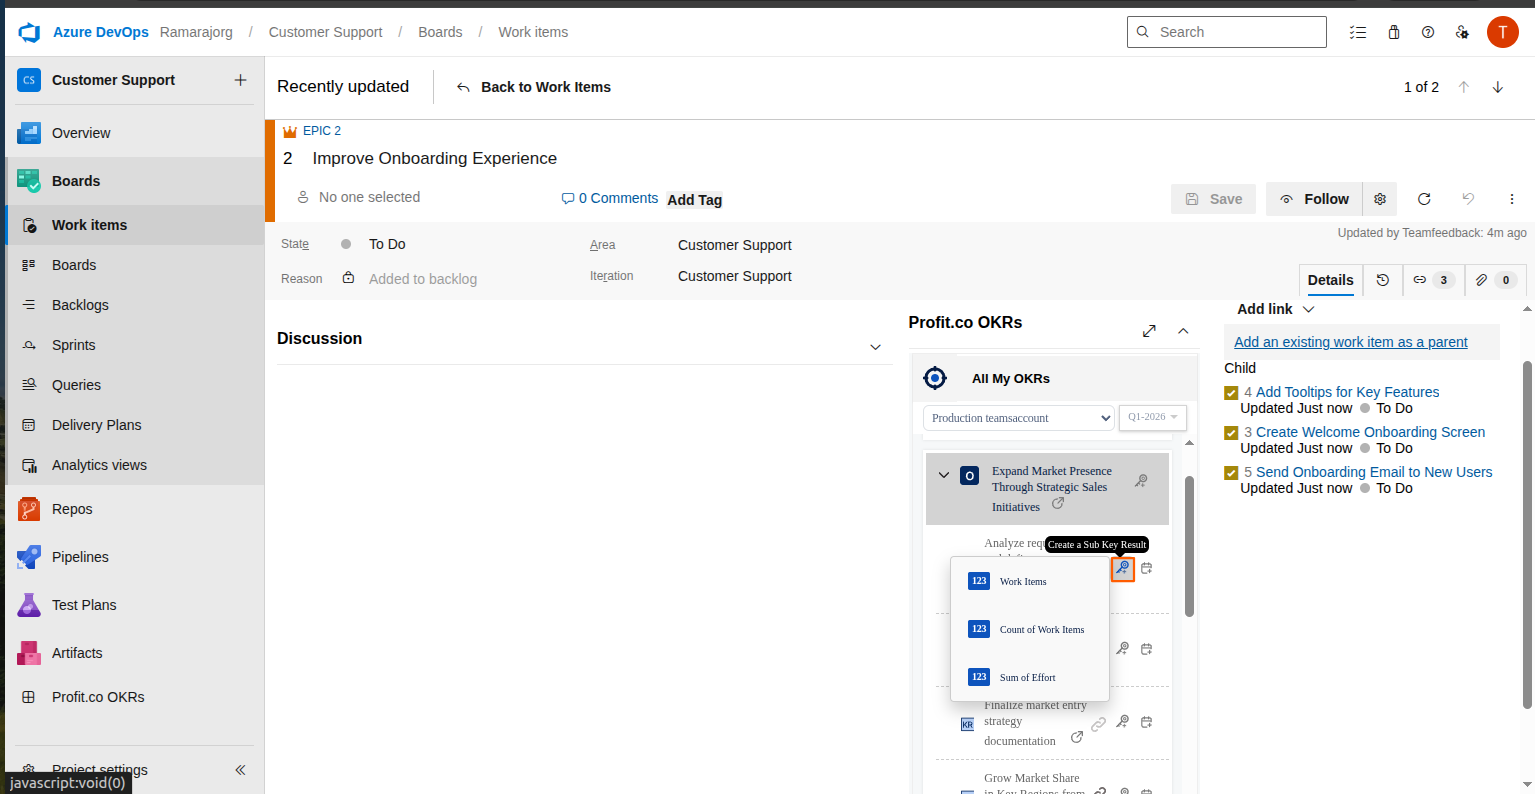
The sub key result will be shown in DevOps.
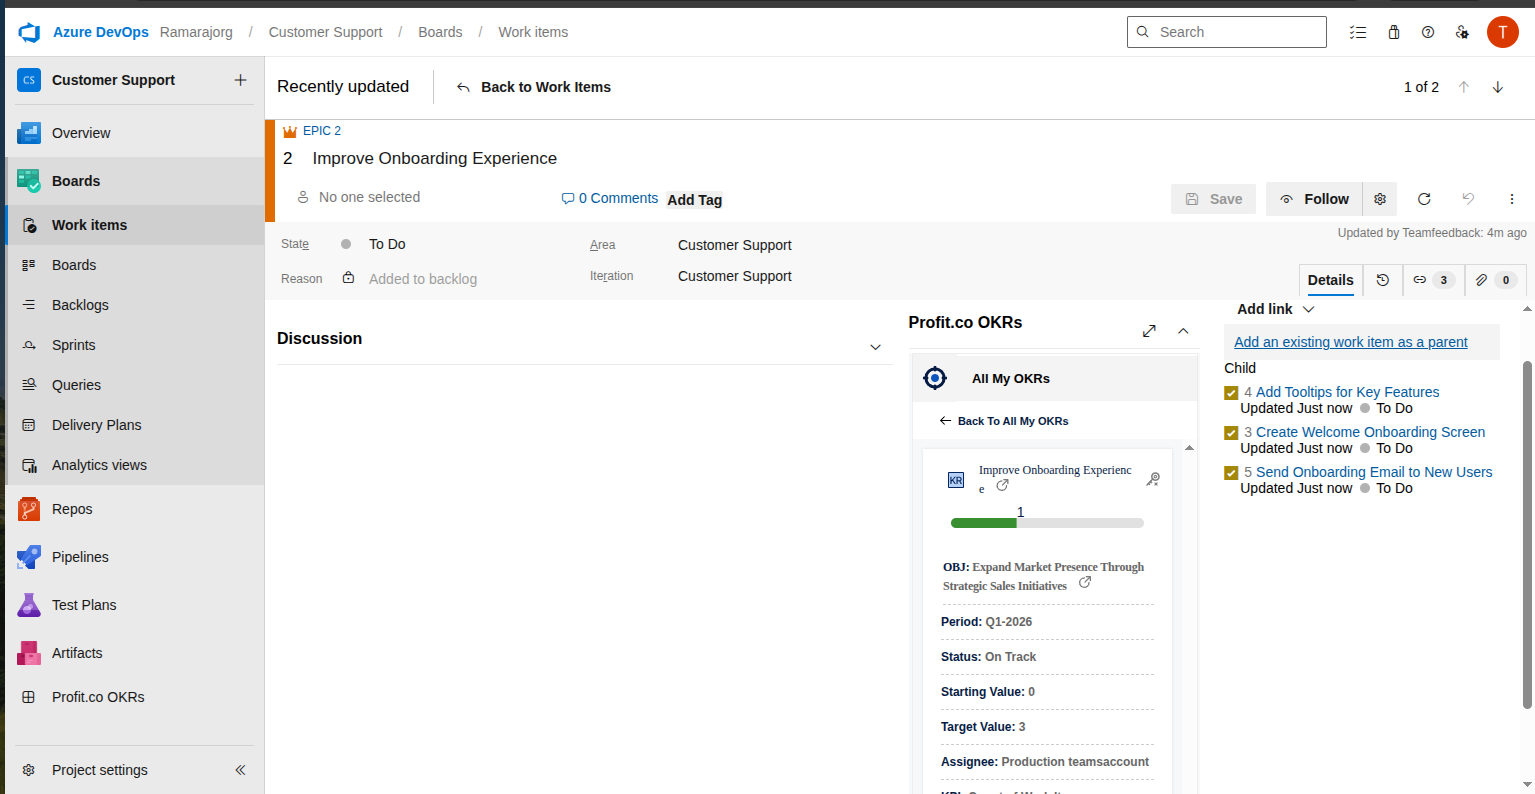
Also, you can see the subkey result with the updated progress in Profit.co
Note: The information from the Task Due Date and Assignee fields in the DevOps plugin will also appear in Profit.co.This option is not applicable for associated Key results.
Note: Clicking on the Profit.co hyperlink button will lead to redirection to the DevOps account.
To track the DevOps issue Progress as an Existing Key Result
To track the progress of the epic with existing key results, follow these steps:
Click on the Key Result you want to associate with Epic.
The completion of the Child Issue will contribute to the progress of the Key Result.
Also, you can see the key result with the updated progress in Profit.co
Create a DevOps issue as a Task
To create a task in Profit.co, click on the dropdown menu of the selected objective and click on the pin icon to add it as a task.
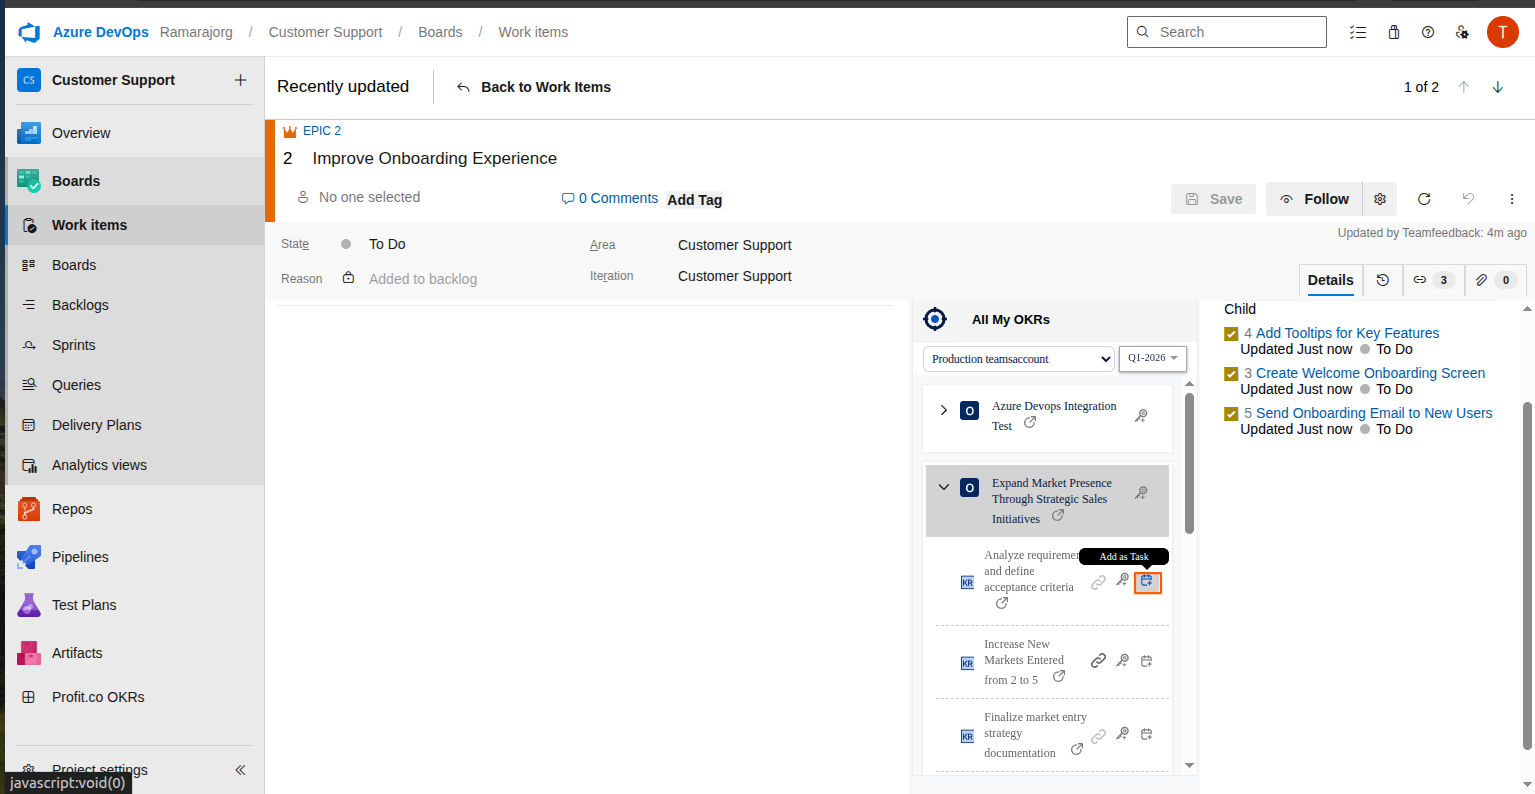
Finally, in DevOps, it’ll be added as a task.
Note: If you want to unlink the task, click on the same task icon.
In Profit.co, you will be able to see the tasks associated with the key result.
Note: If the epic status reaches the Done stage, it will be indicated as the Completed status for tasks in Profit.co