How to add the “Profit.co for Gmail” add-on to my Gmail?
Gmail add-ons are similar to extensions in that they are created to extend the functionality of Gmail. The difference between an extension and an add-on is that the add-on is installed into your Google Workspace app, not the browser.
Step 1:
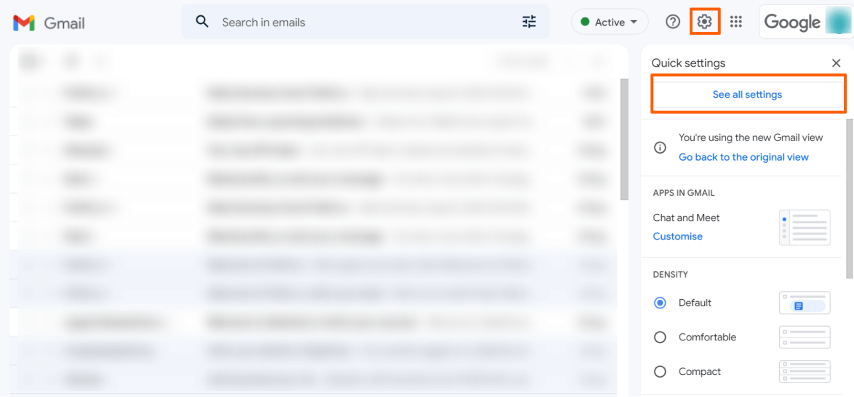
To add Profit for Gmail add-on to your gmail, Login to your Gmail account and navigate to the Settings icon on the top right corner and select “See all settings”.
Step 2:
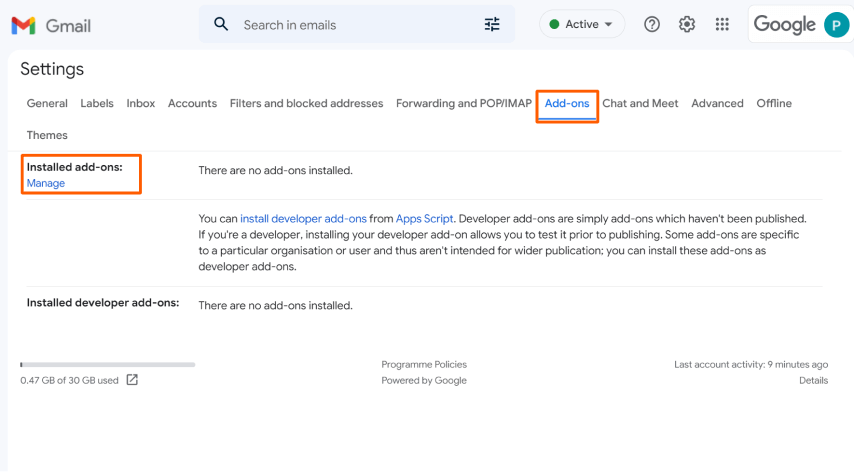
On the setting page select Add-ons and click Manage
Step 3:
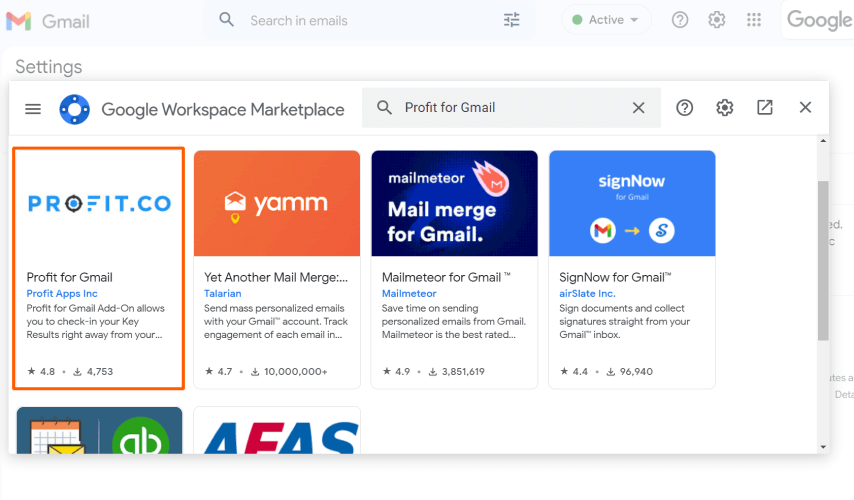
Type Profit for Gmail in the search bar & select the application and click on install button to add Profit add-on to your gmail.

Step 4:
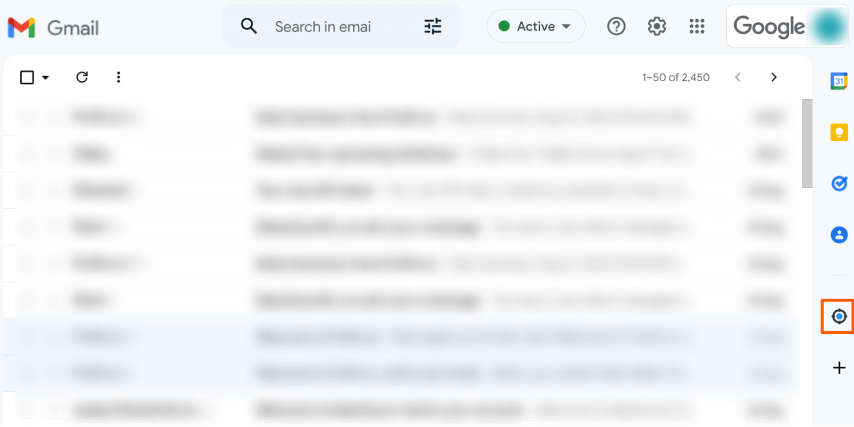
You can see Profit Gmail Add-on on the right side of the Gmail page.
Step 5:
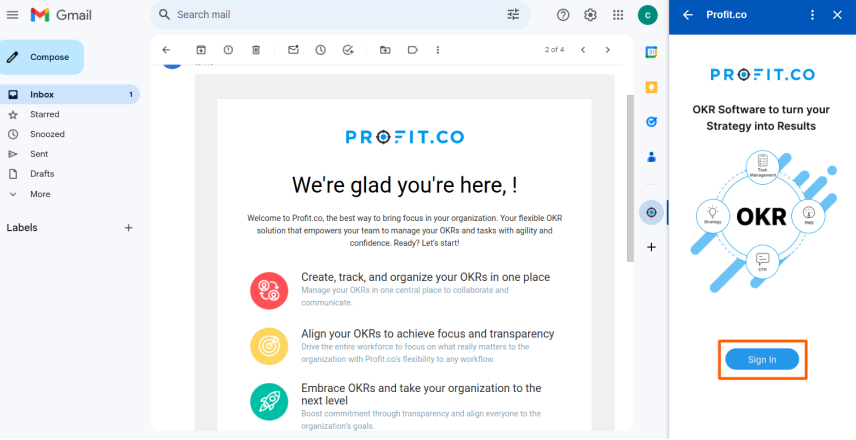
To Get started open an email or conversation & click on the Profit Add-on it will open a popup, and click on the login button.
Step 6:
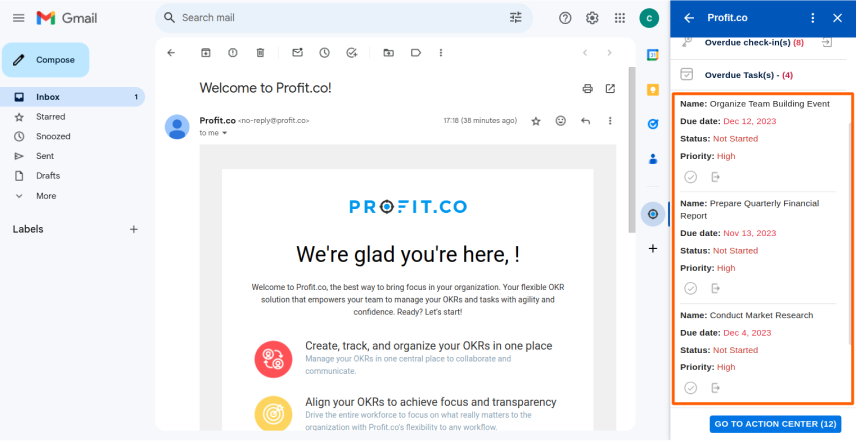
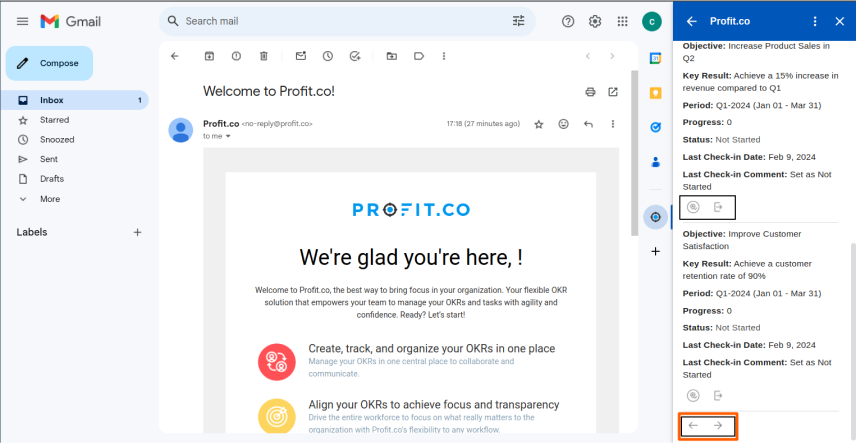
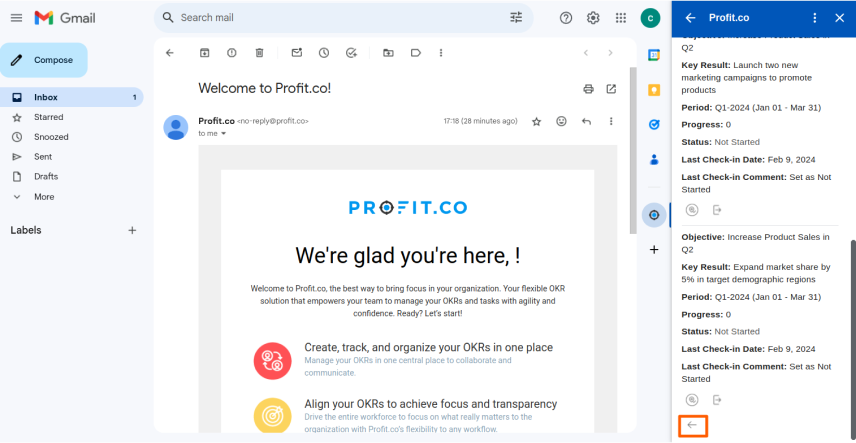
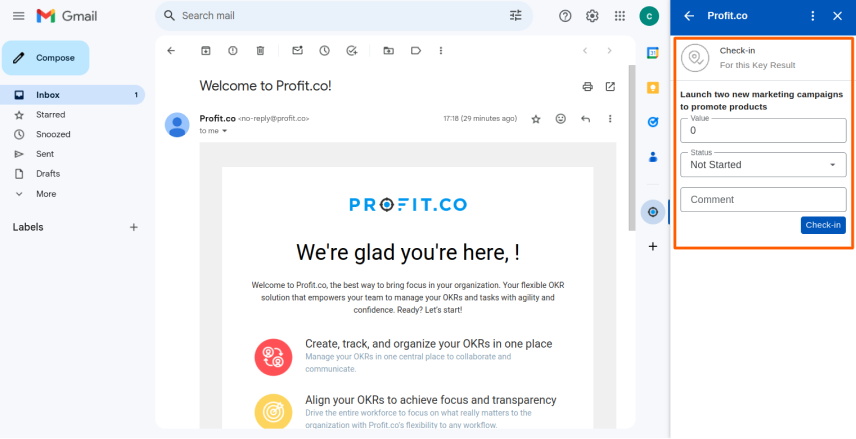
After signing in to your account open any email and click on Profit Add-on to view the key results that have pending check-ins & you can check-in to the key results to update the progress of your key result. Click on the View icon to view all your pending KRs. Note: To view all your pending OKRs, click the Next arrow below, as only 4 pending OKRs will be visible on the page.
Step 7:
You can also create task for the overdue items using the Gmail Add-on by following the below steps and assign it to someone.
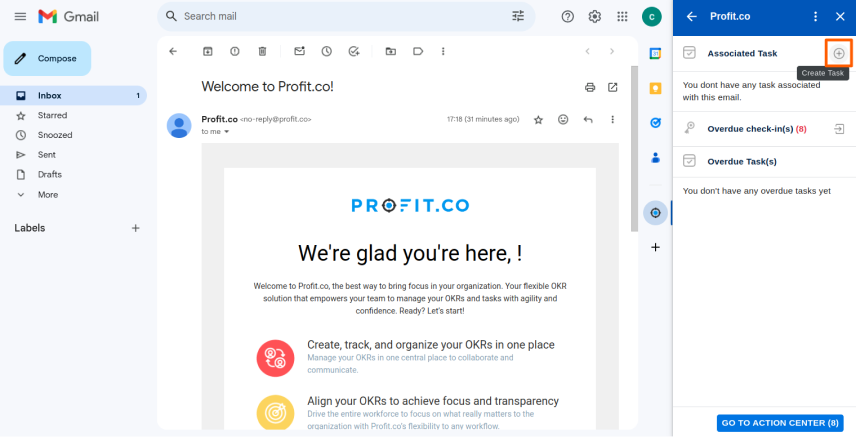
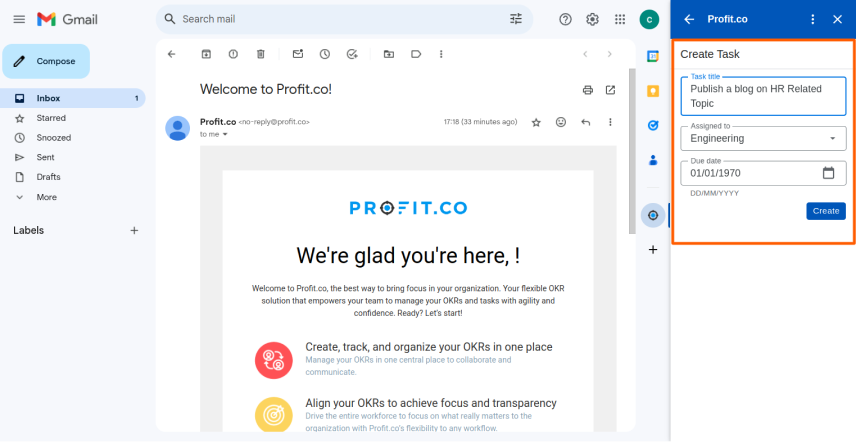 Note: When you create a task, it will be associated with the email in which you created it.
Upon logging into the same mail, you will find the details of your task stating its name, status, assignee, and priority.
Note: When you create a task, it will be associated with the email in which you created it.
Upon logging into the same mail, you will find the details of your task stating its name, status, assignee, and priority.
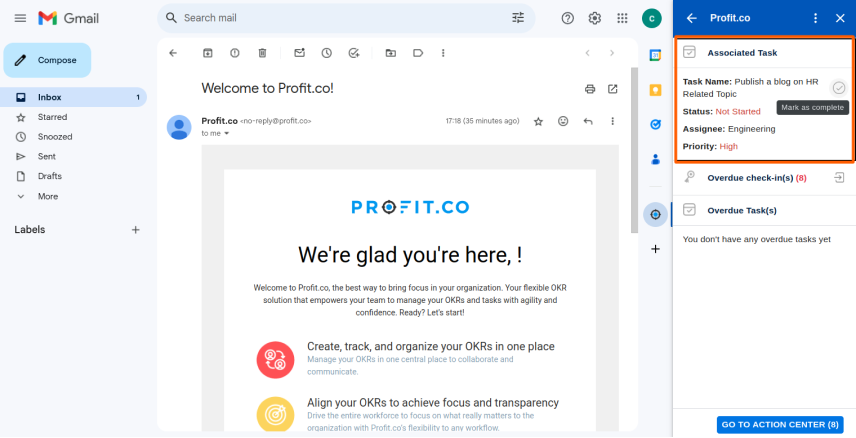 Complete any tasks you have created or assigned.
 You can also view your overdue tasks.