


Configure OKTA SSO for Profit.co
OKTA is an identity management service that eliminates username and password struggles.
What you can do with Profit.co – OKTA Integration
- With your OKTA single sign-on, you can access Profit.co OKR software using your existing company credentials.
- You can Import users from Profit.co to create new OKTA user
You must have OKTA admin access to perform the following steps:
Step 1
To enable OKTA single sign-on, you first need to add the Profit.co app in your OKTA application dashboard.
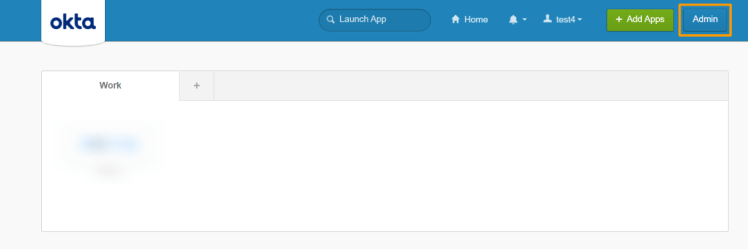
Navigate to your OKTA Admin account. Click on the Admin tab.
Step 2
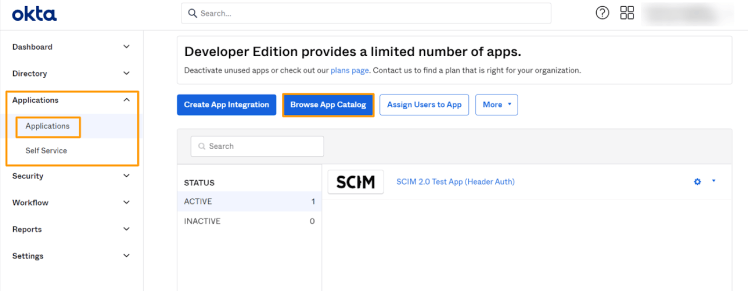
Once you click on the Admin tab, you will be navigated to the Application dashboard. On the Applications page, from the left panel select Applications. Now select Browse App Catalog.
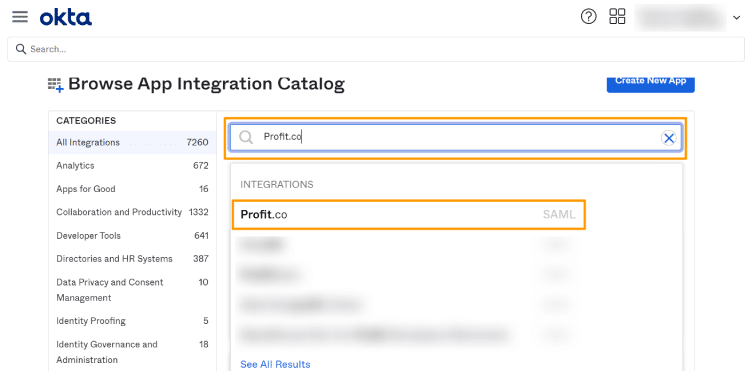
Search for the Profit.co application.
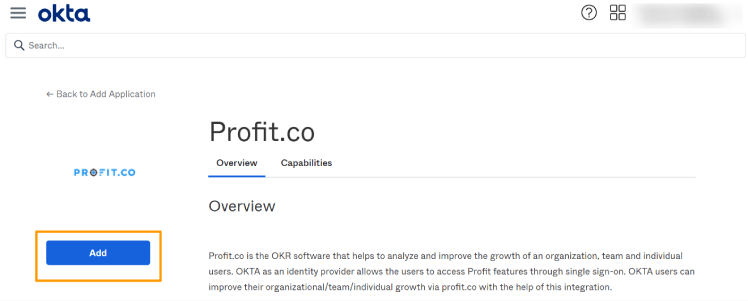
Click on Add button to add the Profit.co application.
Step 3
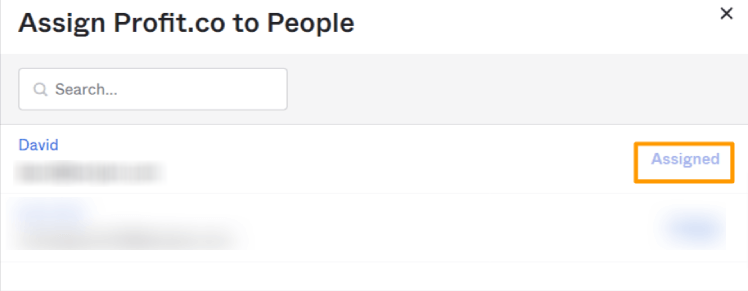
After adding the Profit.co app, click on the Settings icon against the app and select the Assign users button. You will see the list of OKTA users of your organization. Make sure you add yourself and add users to whom you would like to provide SSO access to Profit.co OKR software.
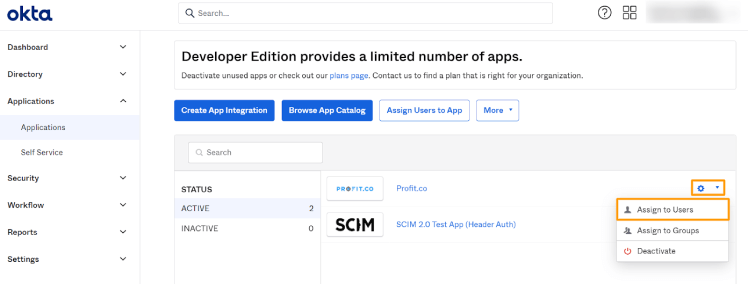
Once you click on the Assign to users option, the status will be shown as Assigned against the user’s name.
Note: Once the Configuration steps are done, Admin should assign the required users to Profit.co App to sync into Profit.co (If the users are assigned already before configuration, they must be removed and should be Reassigned in this step).
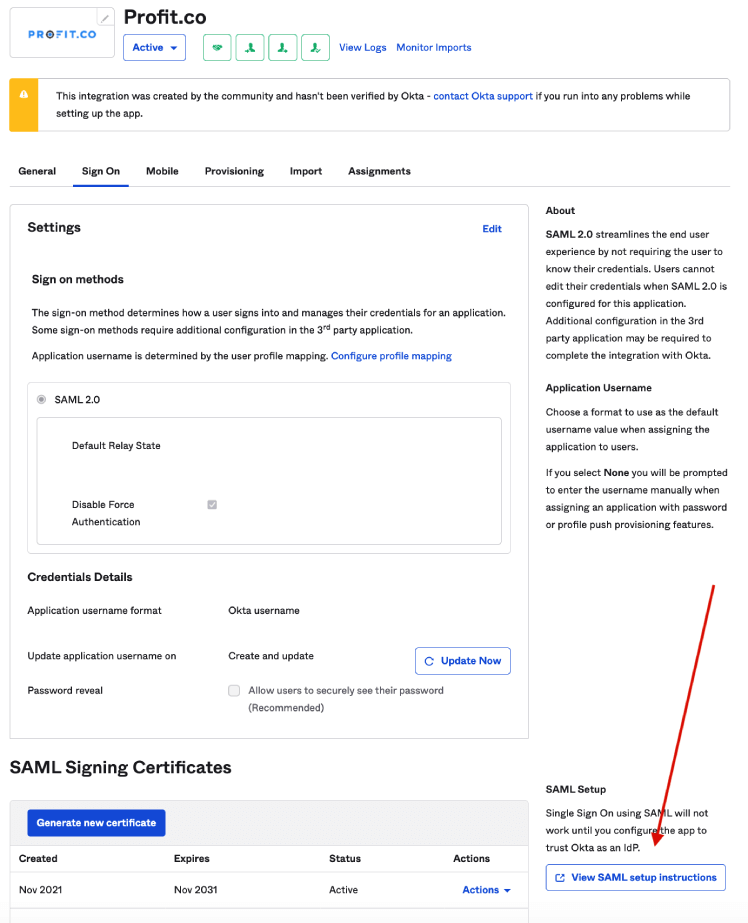
Step 4
After assigning users to the application, click on the Profit.co app.

Now click on the Sign On tab, to navigate.
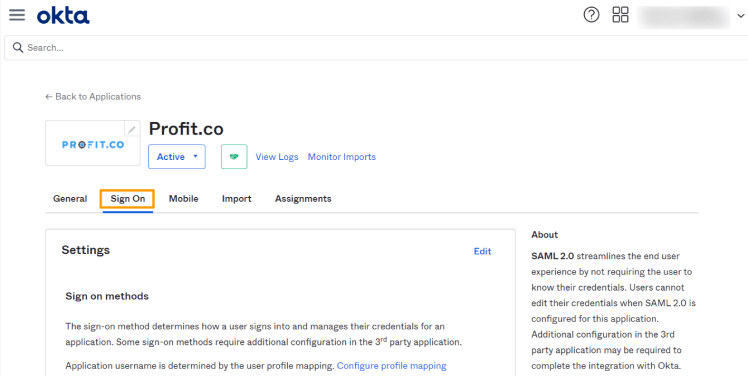
Scroll down a bit and hit the View Setup Instructions button.
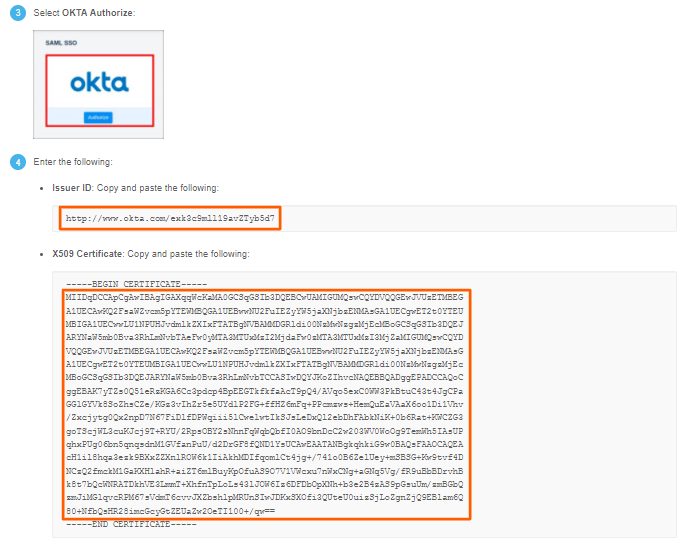
Step 5
This will redirect you to the page called How to Configure SAML 2.0 for Profit.co. Scroll down, select and copy the issuer id and X509 certificate as shown below:
Note: Please copy only the text between BEGIN CERTIFICATE and END CERTIFICATE, including those lines.
Step 6
Navigate to Settings from the left navigation panel. Click on Integrations, select the SAML SSO tab, and click the OKTA Authorize Button.

Paste the issuer ID and the X509 Certificate, and then press Authorize.

Step 7
Now go to your OKTA End-User Dashboard tab in your browser and click on MyApps. You will be able to see the Profit.co app. Clicking on the app should take you to Profit.co OKR software without asking for your username and password.

Configure OKTA User Provisioning for Profit.co
Features
The following provisioning features are supported:
- Push New Users Users assigned to Profit.co OKTA App will be created in Profit.co User Management.
- Push Profile Updates Updates made to the user’s profile through OKTA will be pushed to Profit.co User Management.
- Push User Deactivation Deactivating the user or disabling the user’s access to the application through OKTA will deactivate the user in Profit.co User Management.
- Reactivate Users User accounts can be reactivated in the application.
- User Import Import users from Profit.co to create new OKTA users.
Requirements
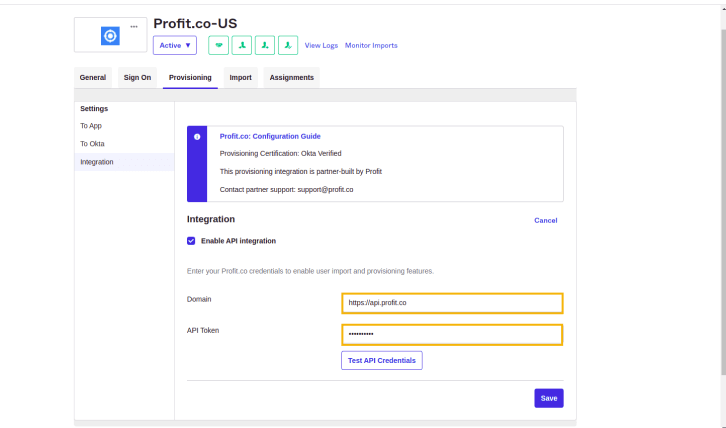
You need Admin account access in Profit.co to get API Key and SCIM Key to form the SCIM Bearer Token.Configuration Steps
To install the Profit.co application please refer to the above steps.
Step 1:
Select Email for the Application username format on the Sign On tab in the Installed application and Save.Step 2:
In the Provisioning Tab, Click the Edit button and Provide the Domain (if applicable) and Bearer token. The domain should be either https://api.profit.co or https://eu2-app.profit.co To generate the Bearer token go to Settings → Security → API Access and get the values of API Key and SCIM Key. Form the Bearer Token in the following Format. → Bearer API_KEY: SCIM_KEY
Step 3:
In the Provisioning to App module, click the edit button and enable all checkboxes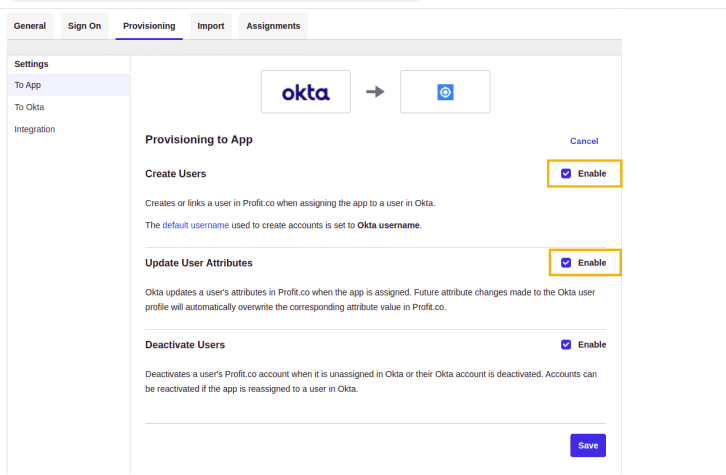 Click on “Test API Credentials” and Save the configuration
The supported attributes are listed below,
- Username
- Given name
- Family name
- Primary email
- Primary email type
- Department
- Job title
- Active Status