Jira is a tool used to track issues and bugs related to your software. It is also used for project management. You can integrate Profit.co with Jira to use it inside Jira software.
What you can do with Jira and Profit.co Integration?
- The issues in epic in your Jira Projects can be used as Key Results/Sub-key Results Or Tasks in our Profit.co.
- The status and the progress in Jira will be reflected in our Key result/Sub-Key Results and the Task of Profit.co.
- Perform check-ins instantly from your Jira account.
Here’s a walk-through of setting up Profit.co and Jira app to perform check-ins.
Note: Login with the same Email in Profit.co website in a separate tab.
- How to install Profit.co app in Jira software?
- How to configure Profit.co in Jira after installation?
- Modelling epic story points as a key result

How to install Profit.co app in Jira software?
Note: This configuration can be done only at the Admin level.
Step 1:
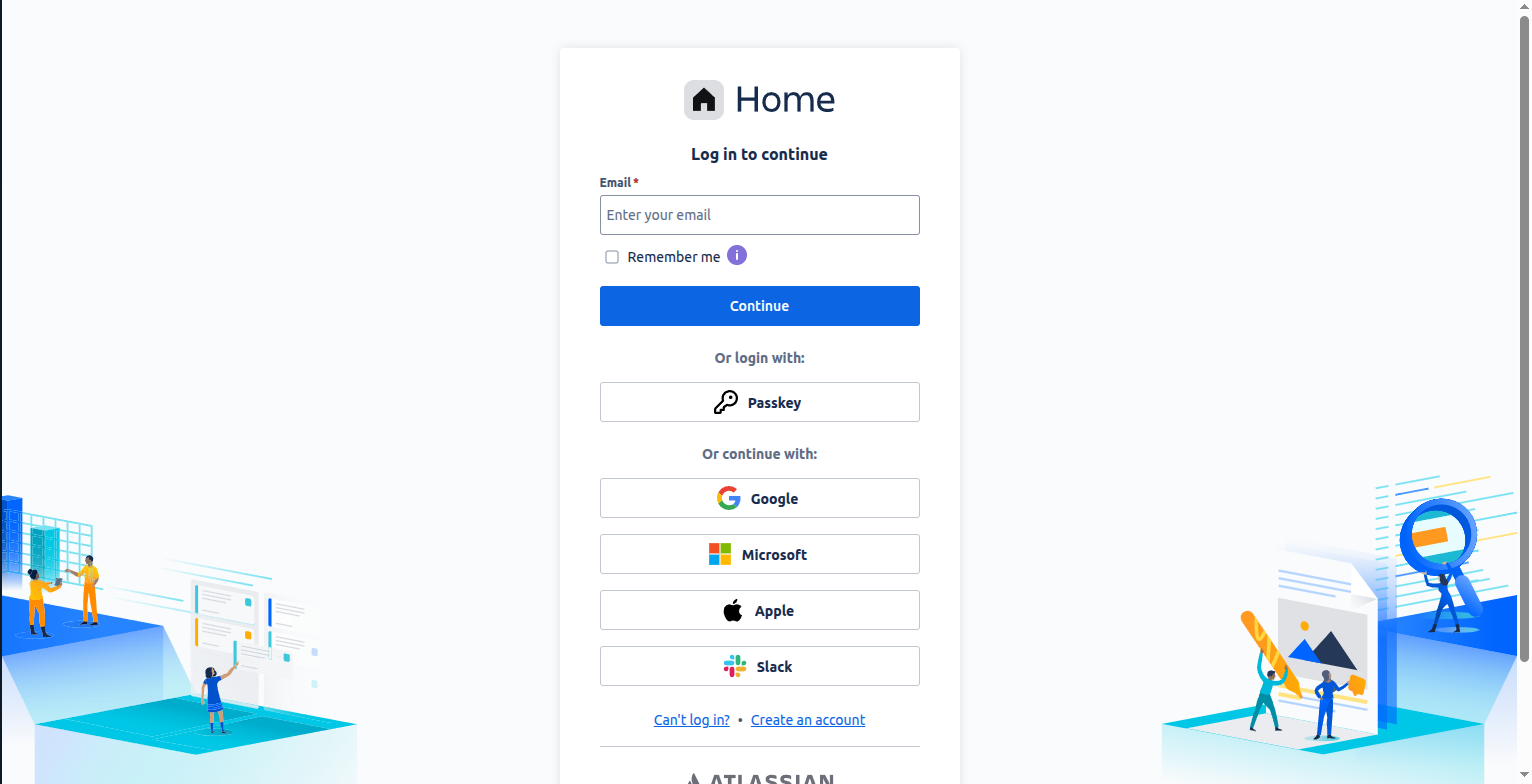
Go to the Atlassian https://id.atlassian.com website. Enter your email address on the login page and click on Continue or you can log in with Google.
Enter your password to log in to your Jira account.
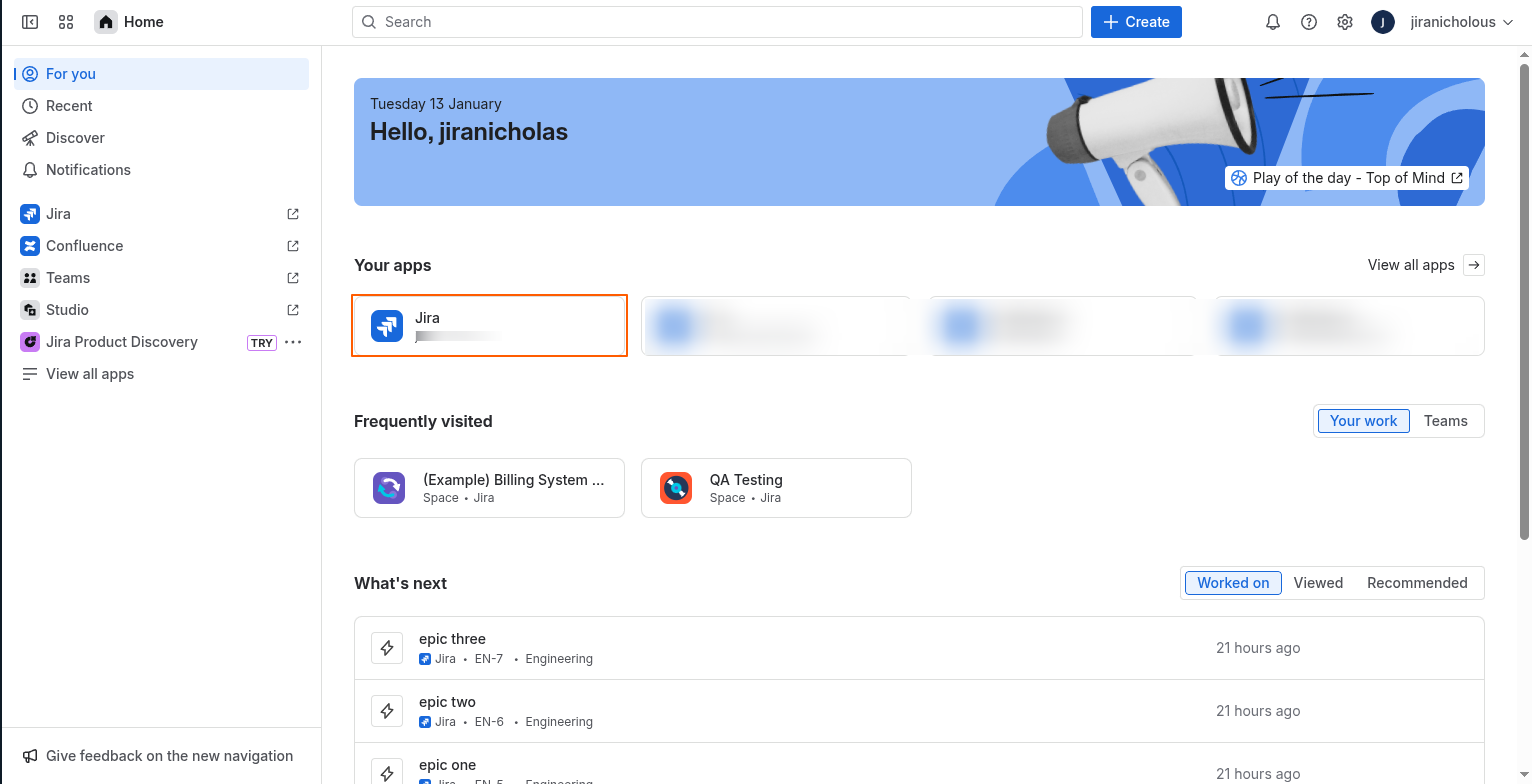
It will redirect you to the Home page. Click on the Jira Software icon.
Step 2:
Click on Apps on the top menu.
Select Find new apps
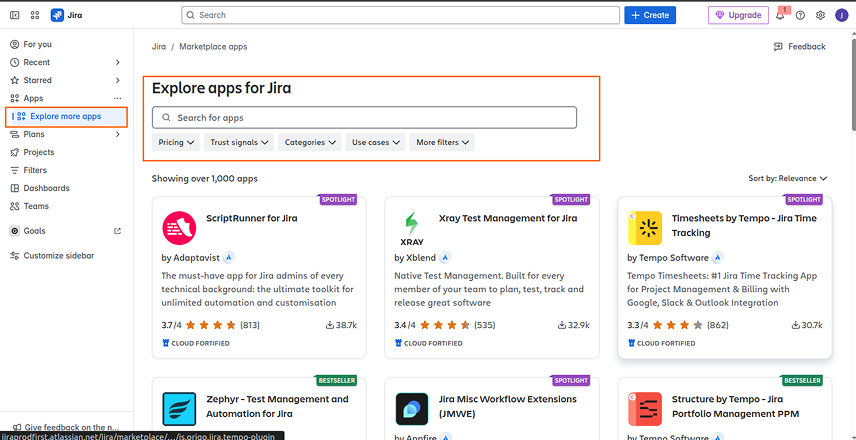
Step 3:
On the search bar, type in “Profit.co” and press Enter. Click on the Profit.co app.
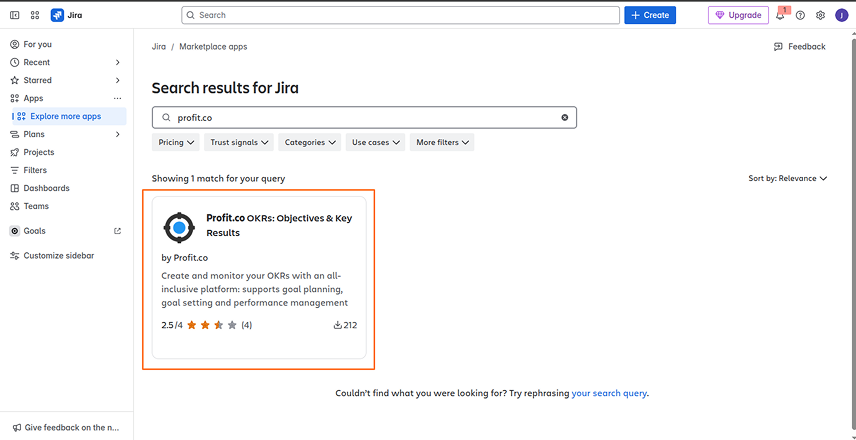
Step 4:
Now click on the Get app button to install Profit.co.

Step 5:
A pop-up will appear, click the Get it now button.
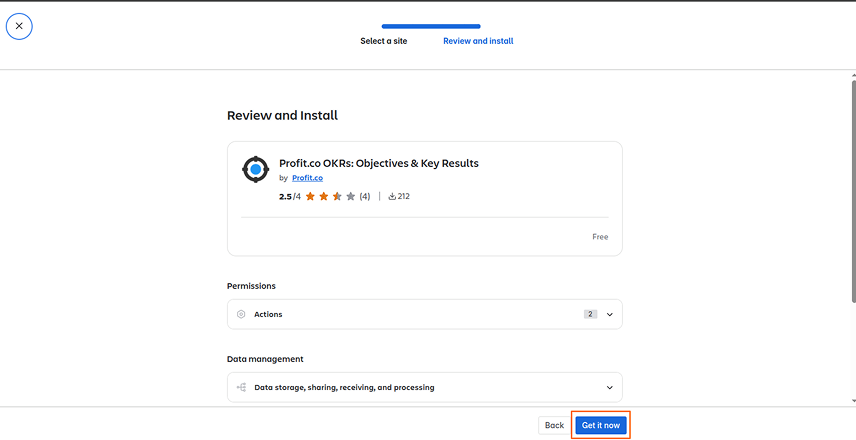
Step 6:
You will see a message showing Profit.co has been added.

How to configure Profit.co in Jira after installation?
Configure JIRA in Profit.co
Note: Only Super Users can be able to configure the Profit.co <> JIRA Plugin Integrations
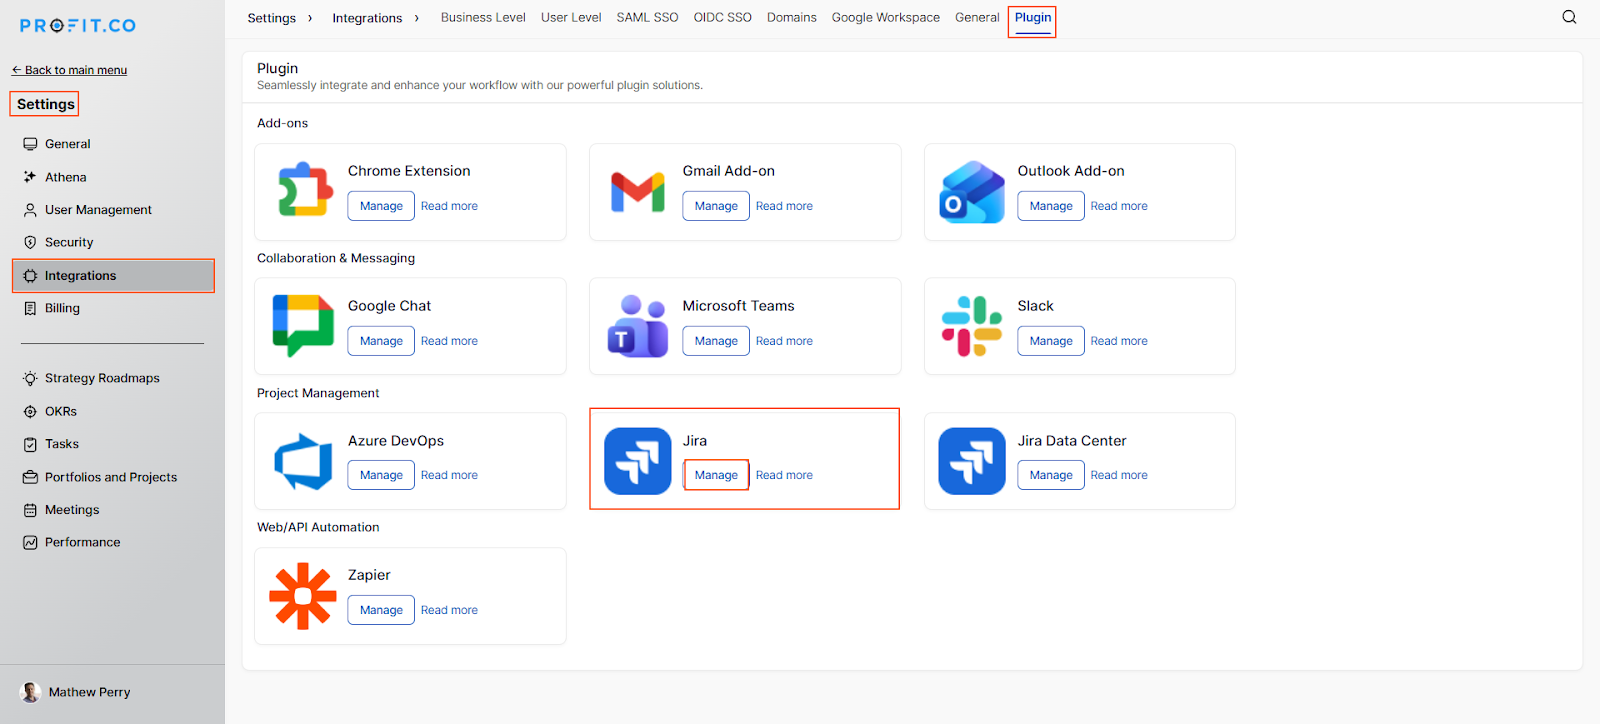
Step 1:
Log in to Profit.co and navigate to Settings → Integrations from the left navigation panel, and switch to the Plugin tab. Click on the Jira Manage button.
Then, click the Connect to Sign in to Jira button.
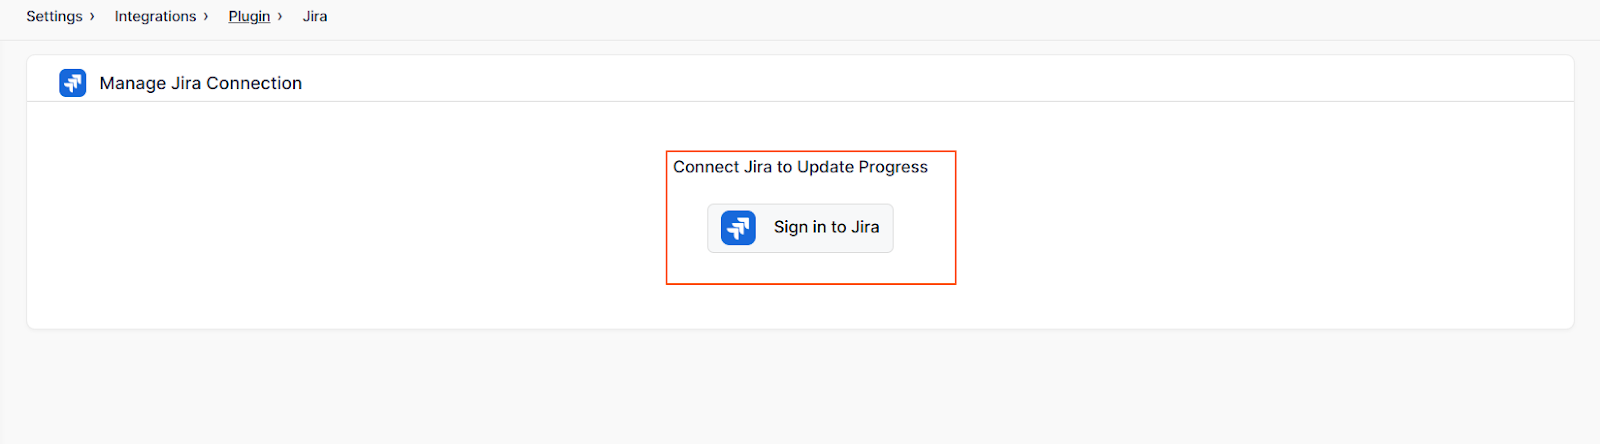
In the Left panel, enter the Jira subdomain, and click on the Sign in to Jira button.
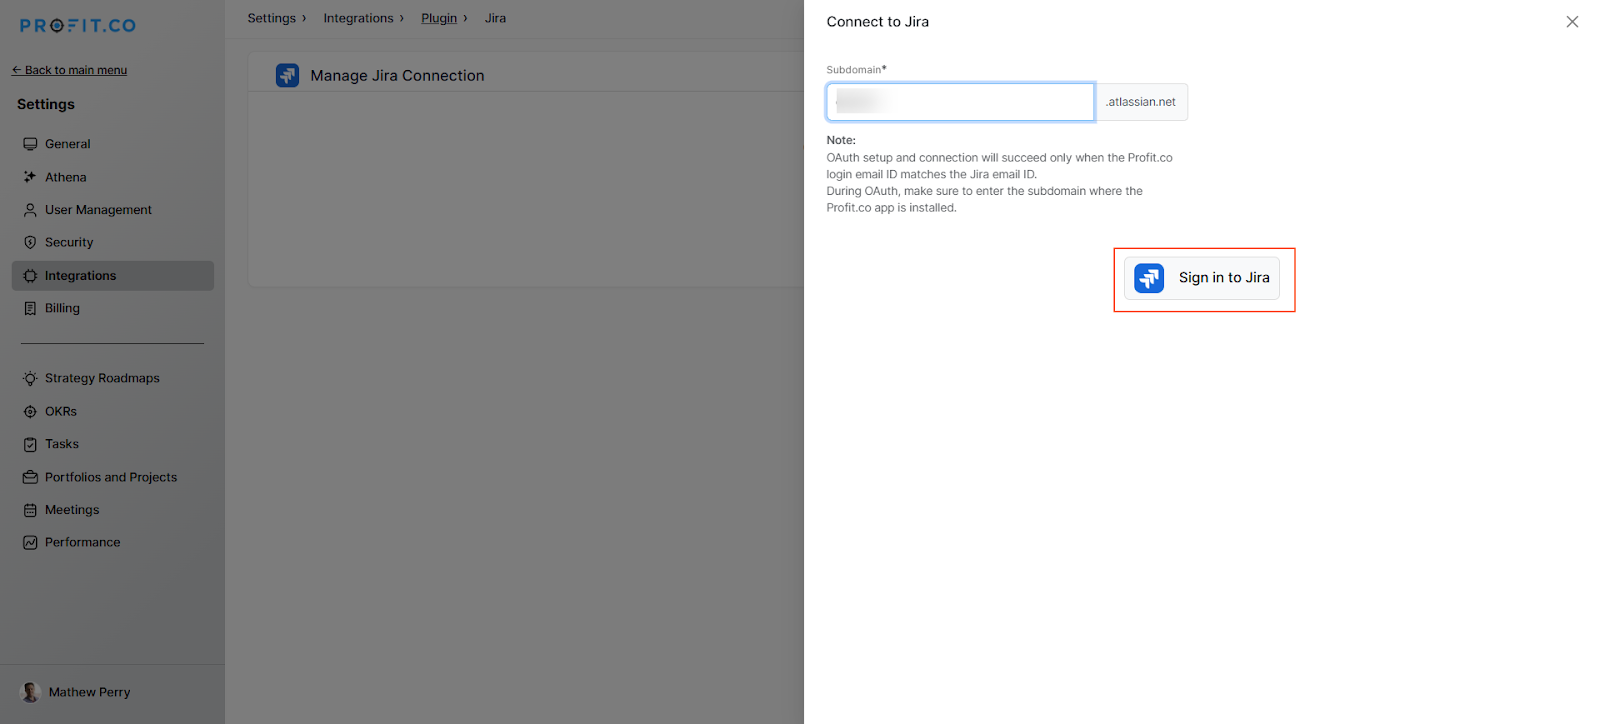
Step 2:
Note: OAuth setup and connection will succeed only when the Profit.co login email ID matches the Jira email ID.
During OAuth, make sure to enter the subdomain where the Profit.co app is installed.
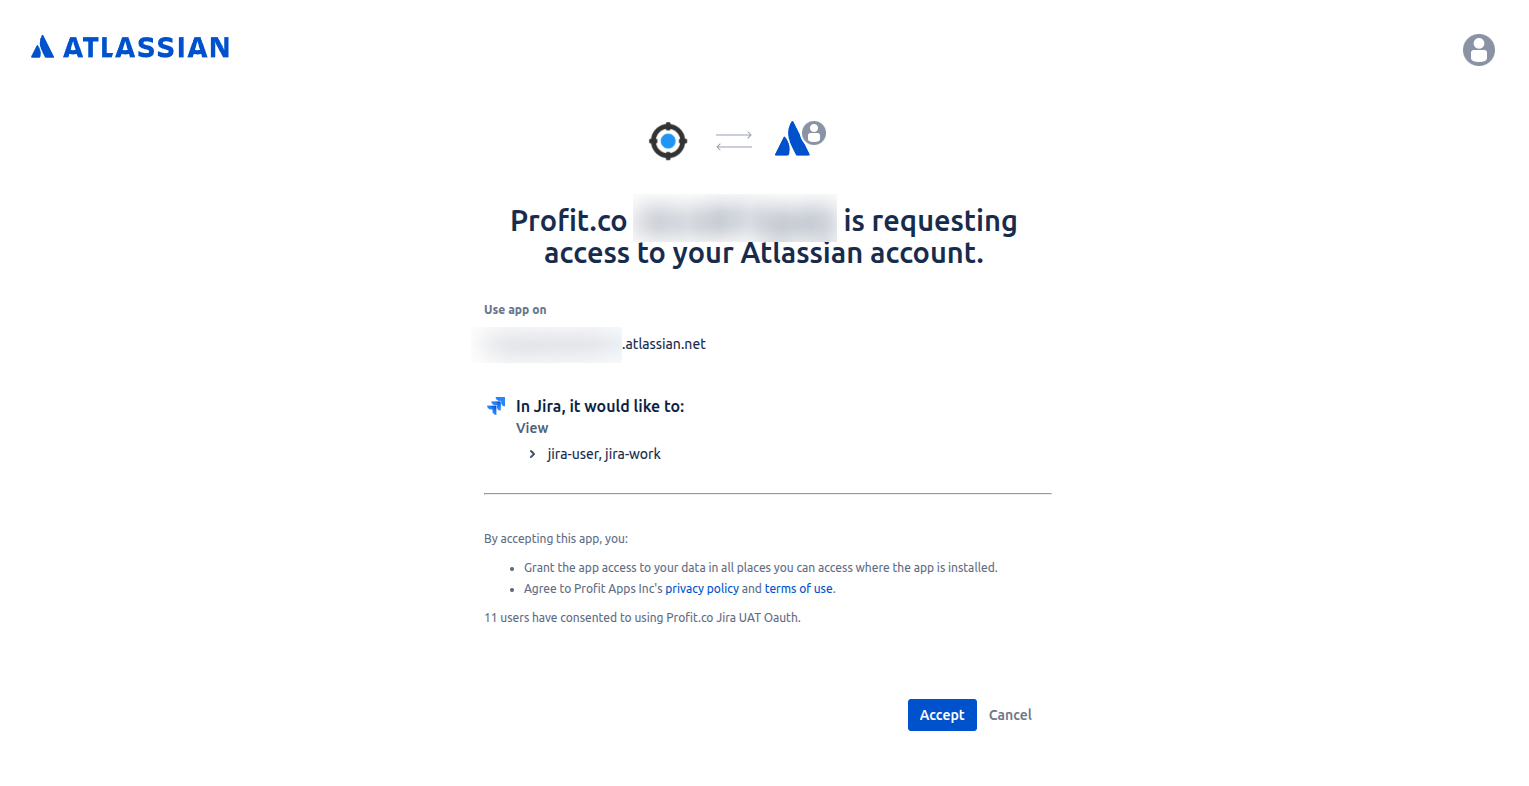
After clicking on Accept, the Jira connection is successfully configured in Profit.co.
After a successful connection, if a user already exists in Jira and is subsequently added in Profit.co, the Jira user will be automatically connected with Profit.co < > Jira Plugin.
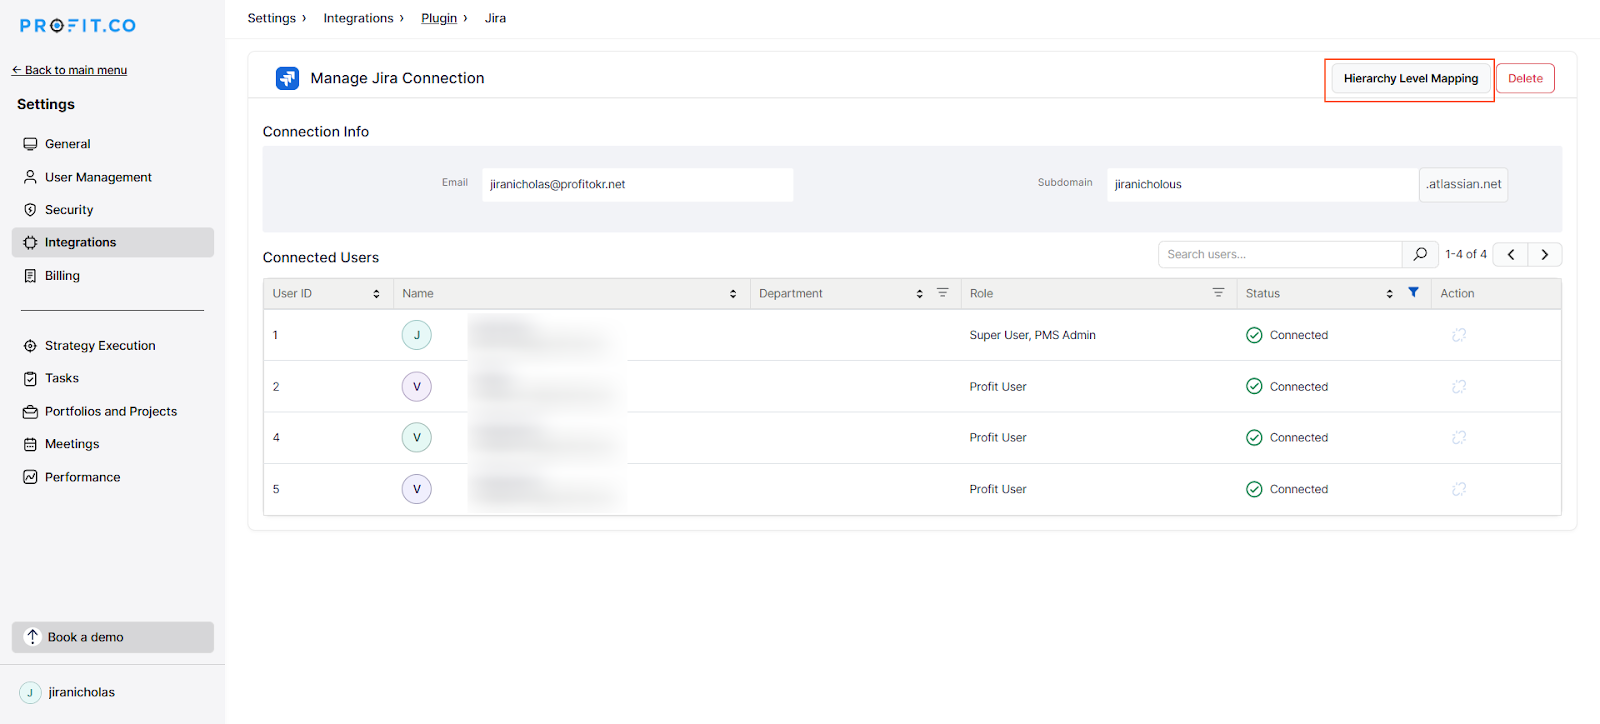
The connected users list is now displayed, allowing users to connect or disconnect users from both platforms.
Step 3:
Manage users’ connections in JIRA
Go to the Jira admin settings page, choose the Profit.co app, and click on the Connect to Profit.co button.

Here, it shows the list of connected users. From here, you can also manage user connections.

Step 4:
In Profit.co, when integrating with Jira, users have the flexibility to choose between Basic and Advanced levels based on their requirements.
To choose between basic and advanced levels, navigate to Settings → Integrations from the left navigation panel, and switch to the Plugin tab. Click on the Jira Manage button.
Click on the Hierarchy Level Mapping.
Basic – Integrate with all Jira Issue types by Default
Advanced – Integrate with all Jira issue types in a controlled hierarchical order. To know more about the advanced level, click here.

Note:
Sync Progress from Jira:
- This toggle controls whether progress updates from Jira issues are reflected in the Key Result’s progress. Once disabled, progress from Jira will no longer be reflected in the Key Result progress.
- Turning off the “Sync progress from Jira” toggle does not affect Key Results already linked to Jira issues. These will continue to receive progress updates from Jira as usual.
- Only the Key Results linked while the toggle is turned off will not sync their progress from Jira.
- Once the toggle is turned back on, newly linked Key Results will resume syncing progress from Jira.
Sync Progress from Sub Key Results:
This toggle enables automatic progress updates from Sub-KRs to their parent Key Results. When this toggle is enabled, Sub-KRs created via Jira hierarchy mapping will be included by default, and progress from these Sub-KRs will sync automatically to the parent KR.
In Jira, if you have defined specific issue types, those same issue types will be displayed in Profit.co. You can choose the relevant issue type within Profit.co. For example, if you have defined issue types such as Initiative, Release, Feature, and Epic in Jira, the same will appear in Profit.co.
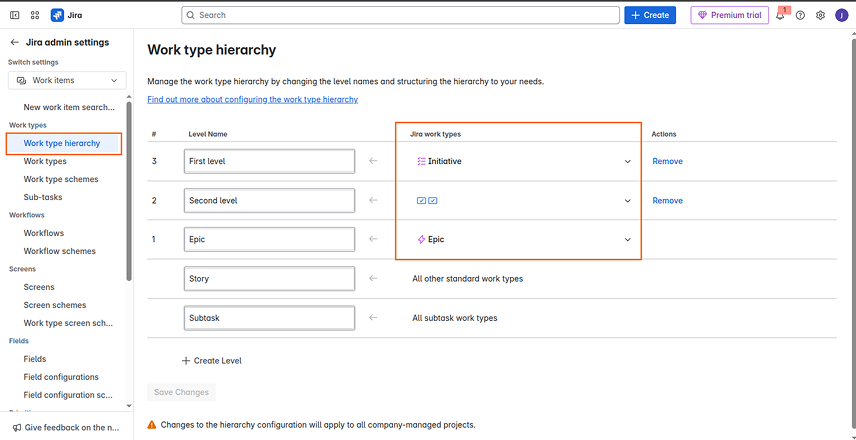
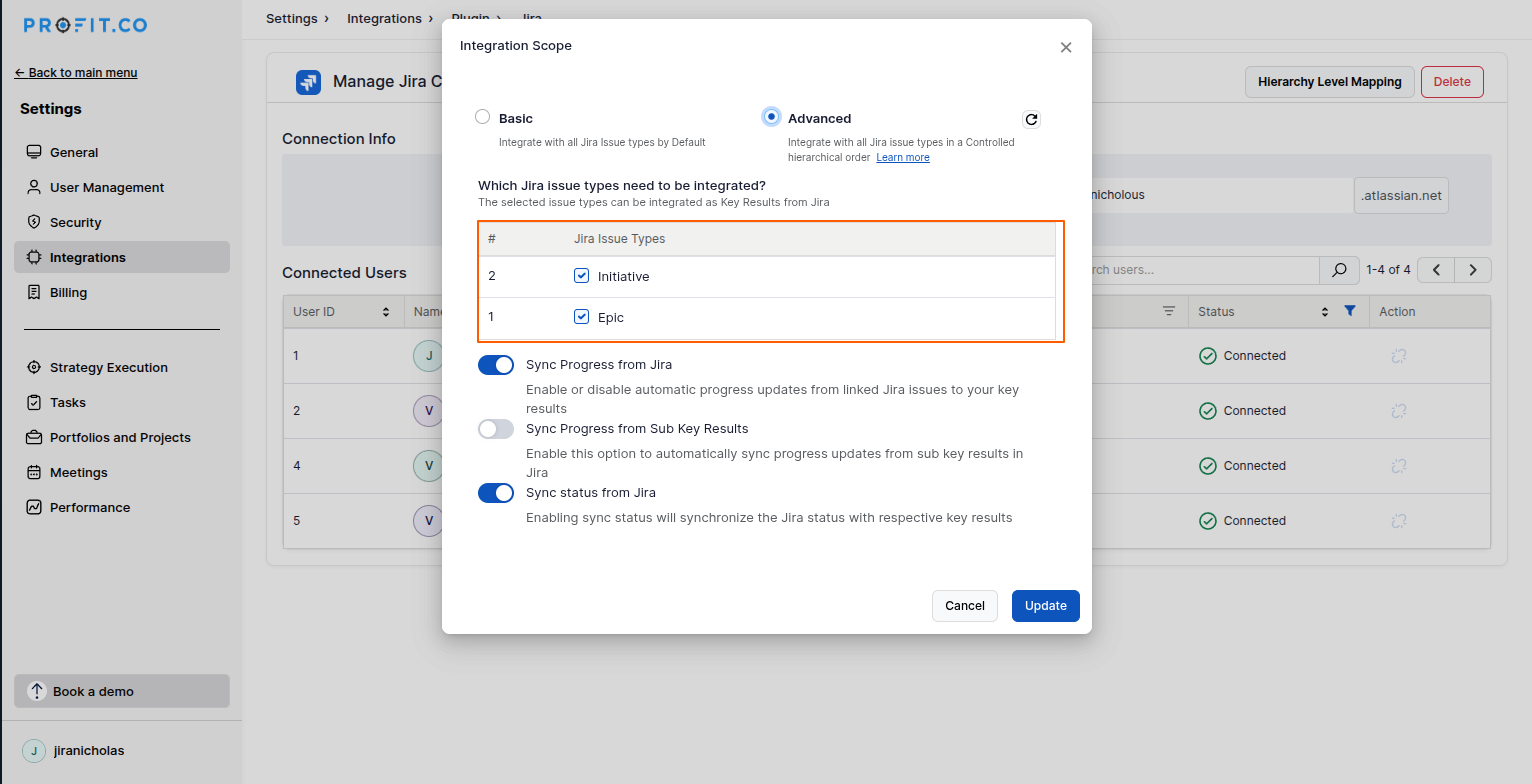
If you choose not to select ‘Release,’ the related lower-level issue types such as ‘Feature’ and ‘Epic’ will not be linked.
Note: If you make changes in Jira, they will only reflect in Profit.co after you click the refresh button.

Step 5:
Now you will be able to see Profit.co in the Jira Software menu.

Step 6:
Now you will be able to see Profit.co in the Jira Software menu.

Modeling epic story points as a key result
Create a Jira Epic as a Key Result
The Profit.co for Jira plugin allows you to track the epic progress in the Jira epic as a Key result under any of your OKRs in Profit.co.
You can track the progress of the linked OKR from your Jira account.
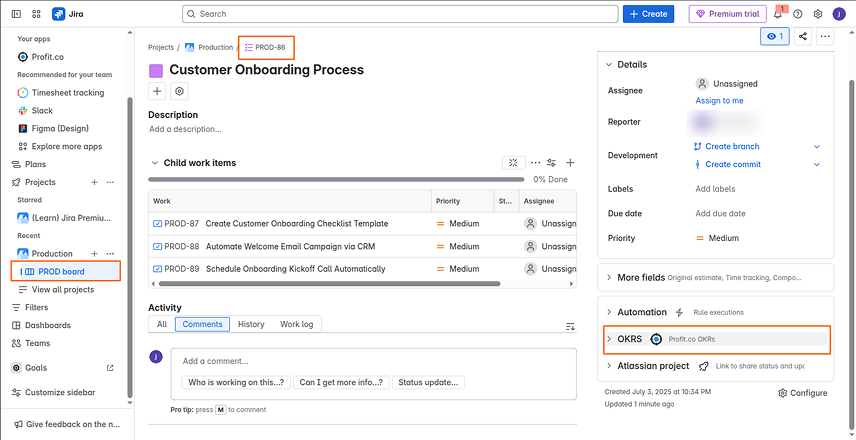
Step 1:
In your Jira account, go to Issues → All Issues.
Open an epic and click on Profit.co on your right menu.
Step 2:
Click to view all/linked OKRs.
Choose your OKR level / Department and the required Period.

Step 3:
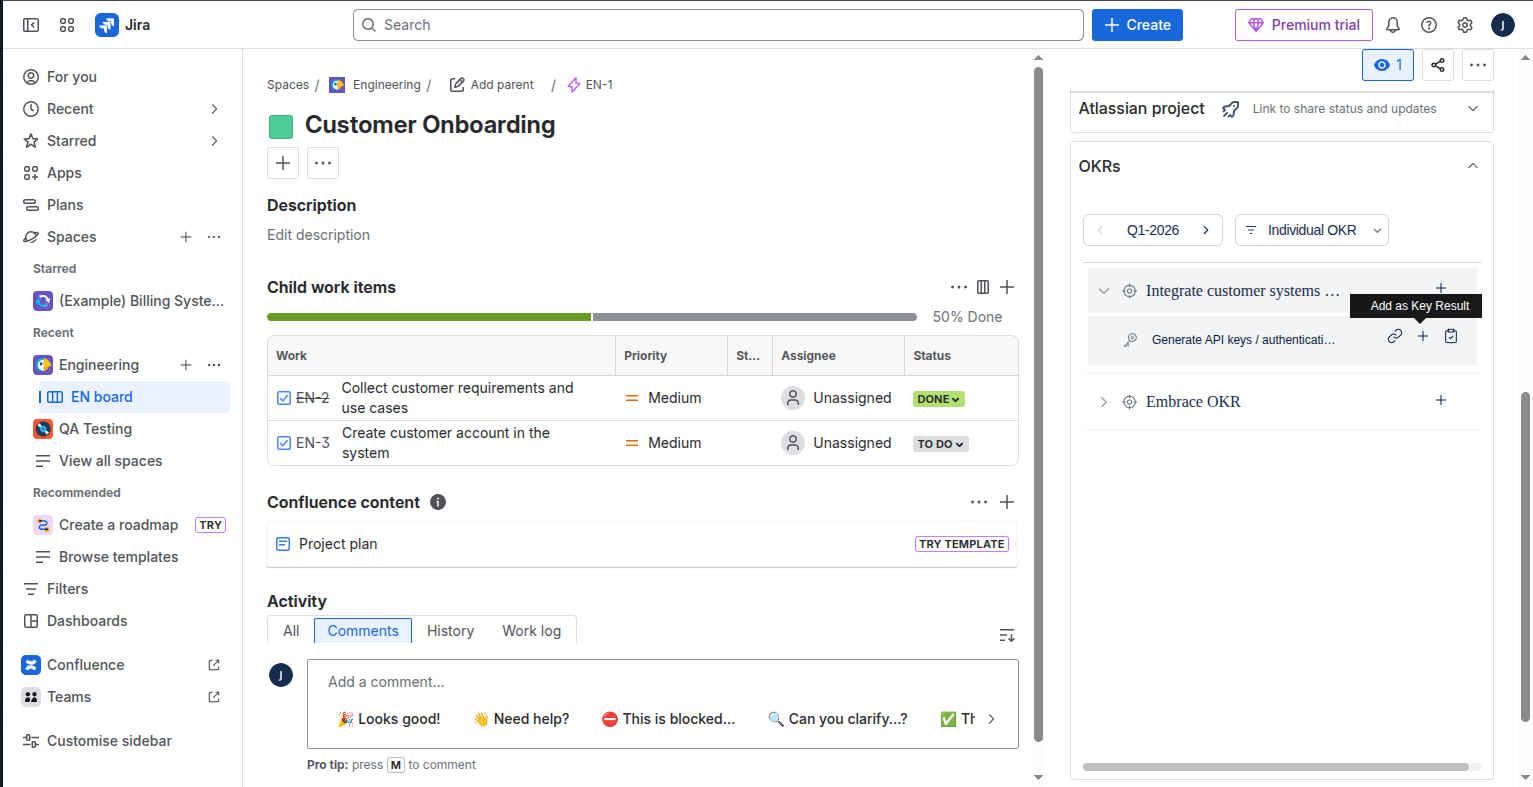
Choose the Objective where you want to create your epic as a key result.
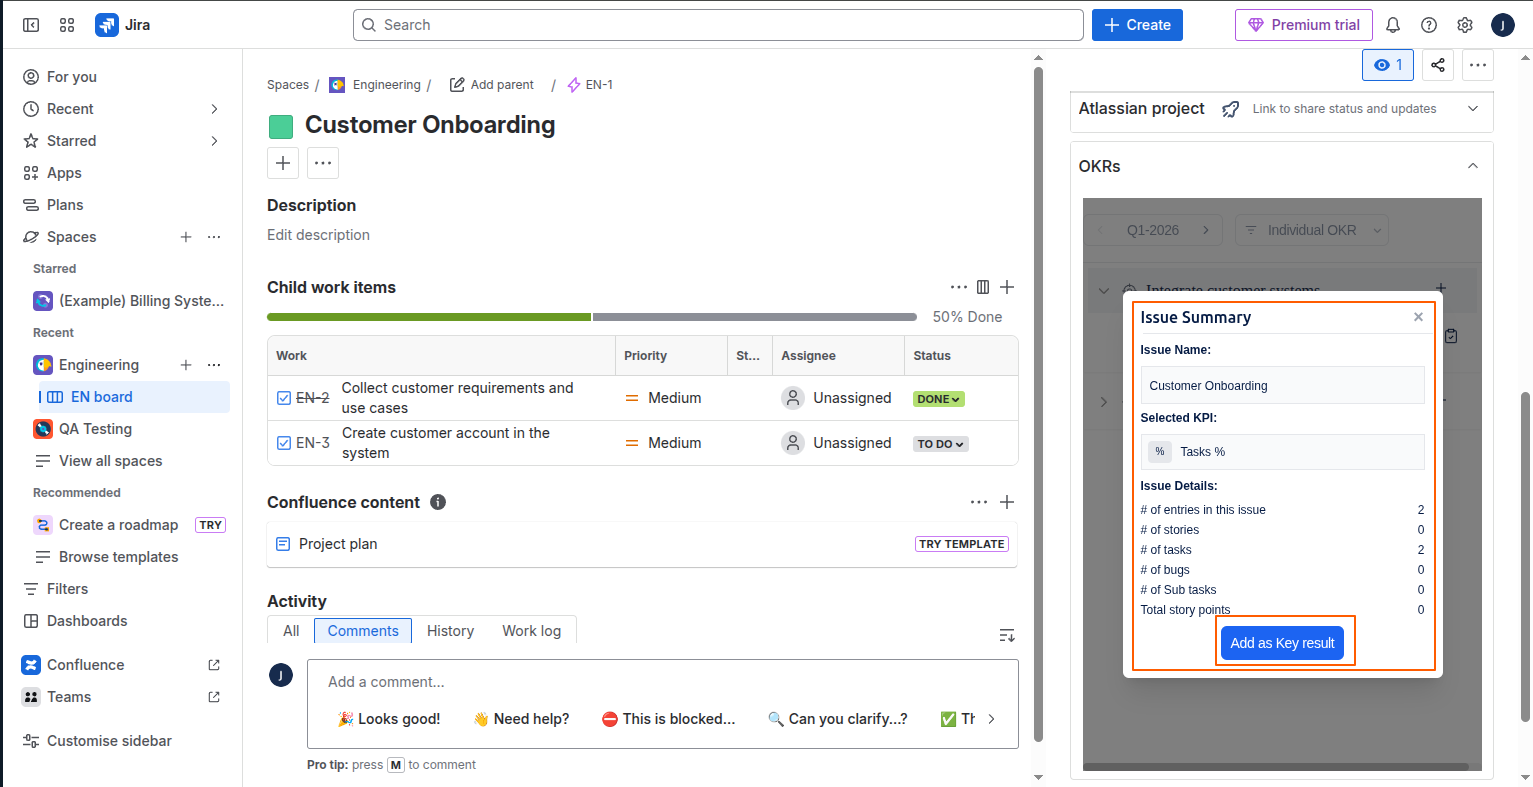
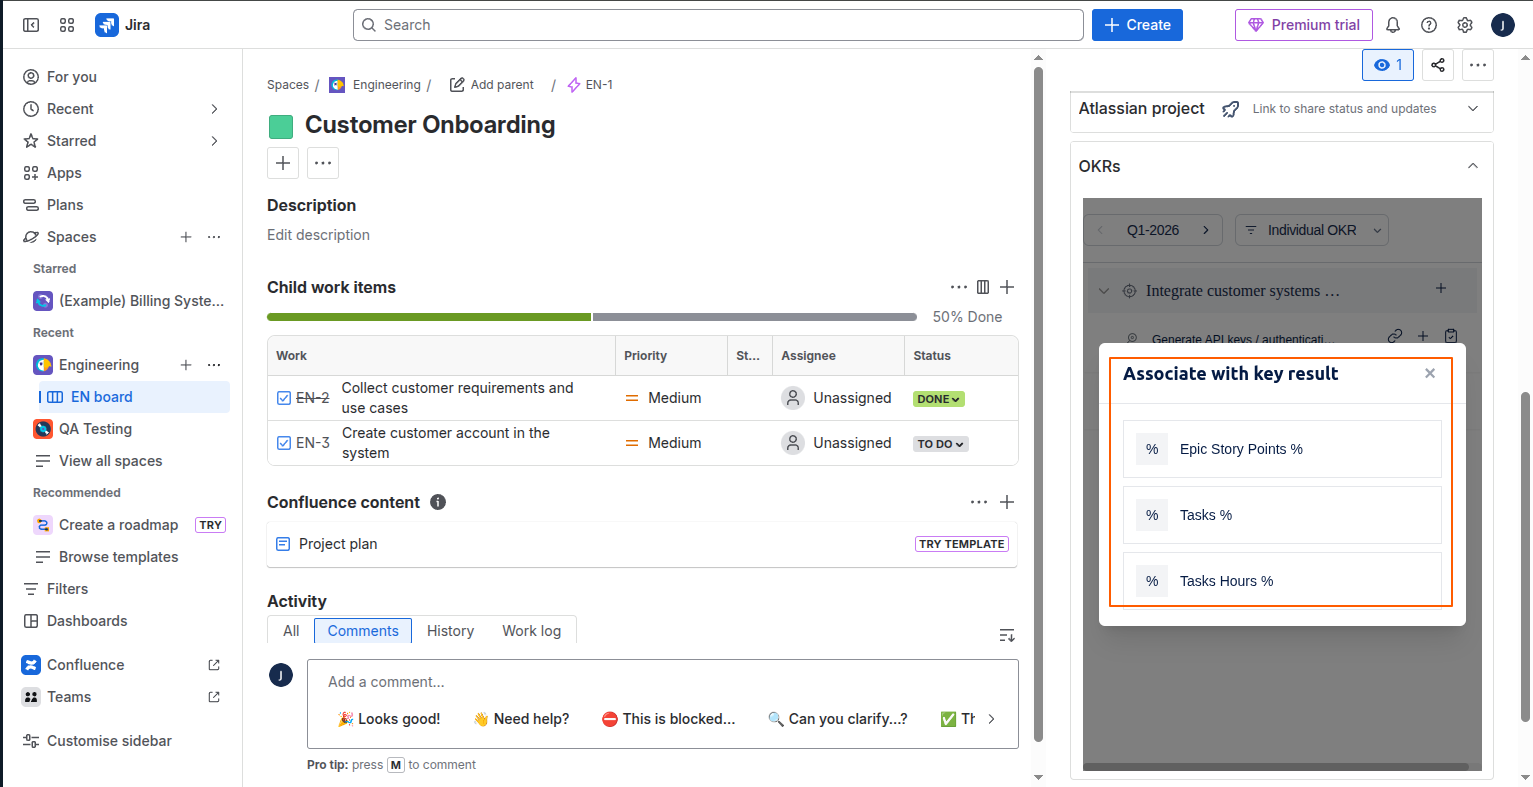
Select the + icon to choose the KPI for the key result.
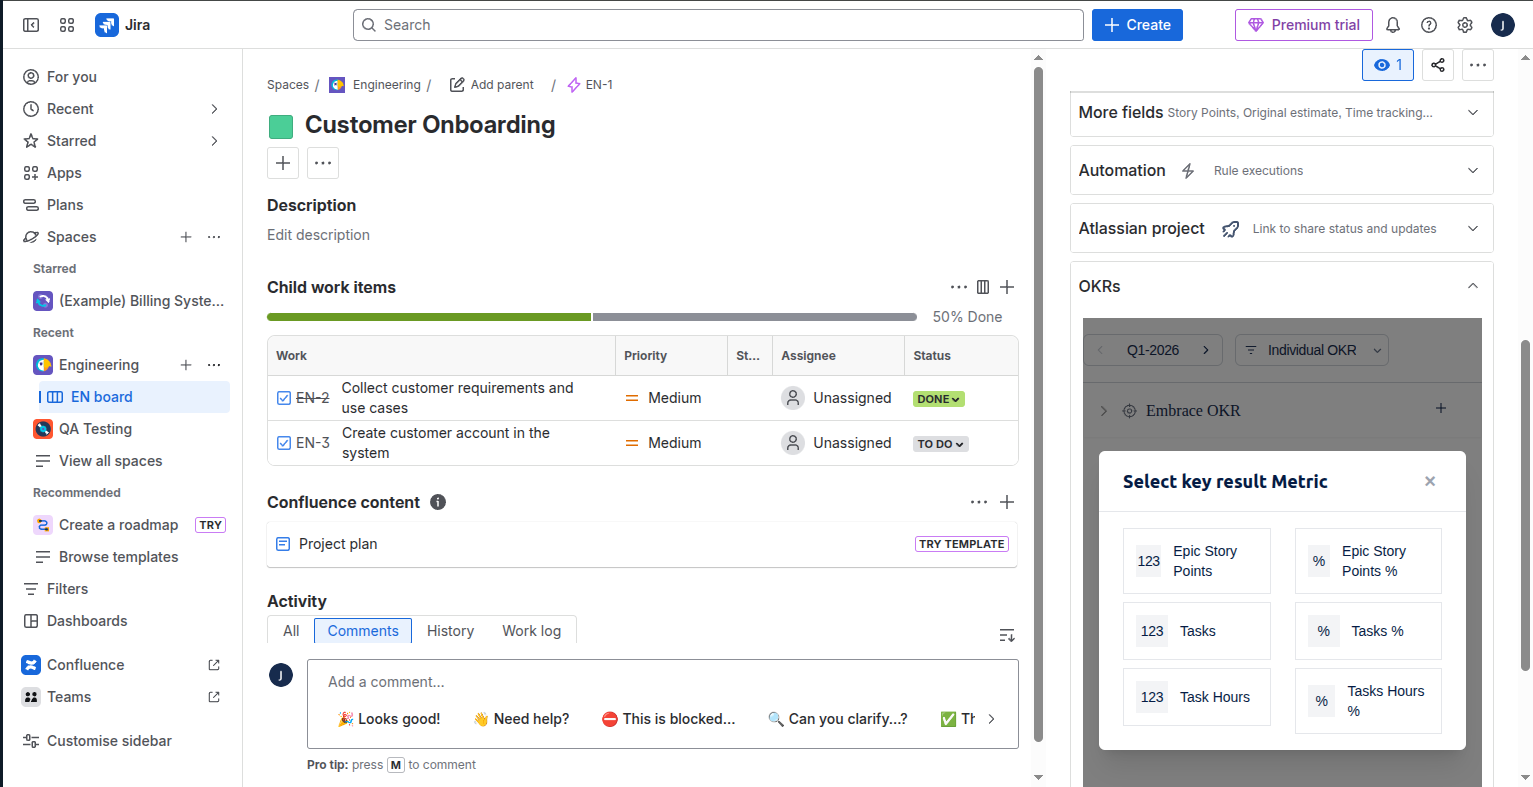
The Jira-supported KPIs are listed below,
| Jira KPI | Description |
|---|---|
| Epic Story Points % | Track the number of stories completed on average against the total stories under the Jira epic. (This is displayed as a percentage) |
| Epic Story Points | Track the number of story points completed against total story points under the Jira epic. |
| Tasks | Track the number of Tasks completed on average against the total Tasks under the Jira epic. |
| Tasks % | Track the number of Tasks completed in % on average against the total Tasks under the Jira epic. |
| Tasks Hours | The total of the task hours will be taken into consideration and the progress will reflect based on the completed tasks. |
| Tasks Hours % | The percentage of the task hours will be taken into consideration and the progress will reflect based on the completed percentage. |
Profit.co provides support for all types of default issues in Jira
For Example, A Project manager’s objective is “Improve Project Delivery Performance”. How can they measure if they have improved on-time delivery?
One of the potential indicators which can help you measure your objective performance is Story Points. Tracking the burnout of story points can tell you how confident are you and your team in achieving your objective.
| Objective | Improve Project Delivery Performance |
| KR1 | 60 story points delivered per month |
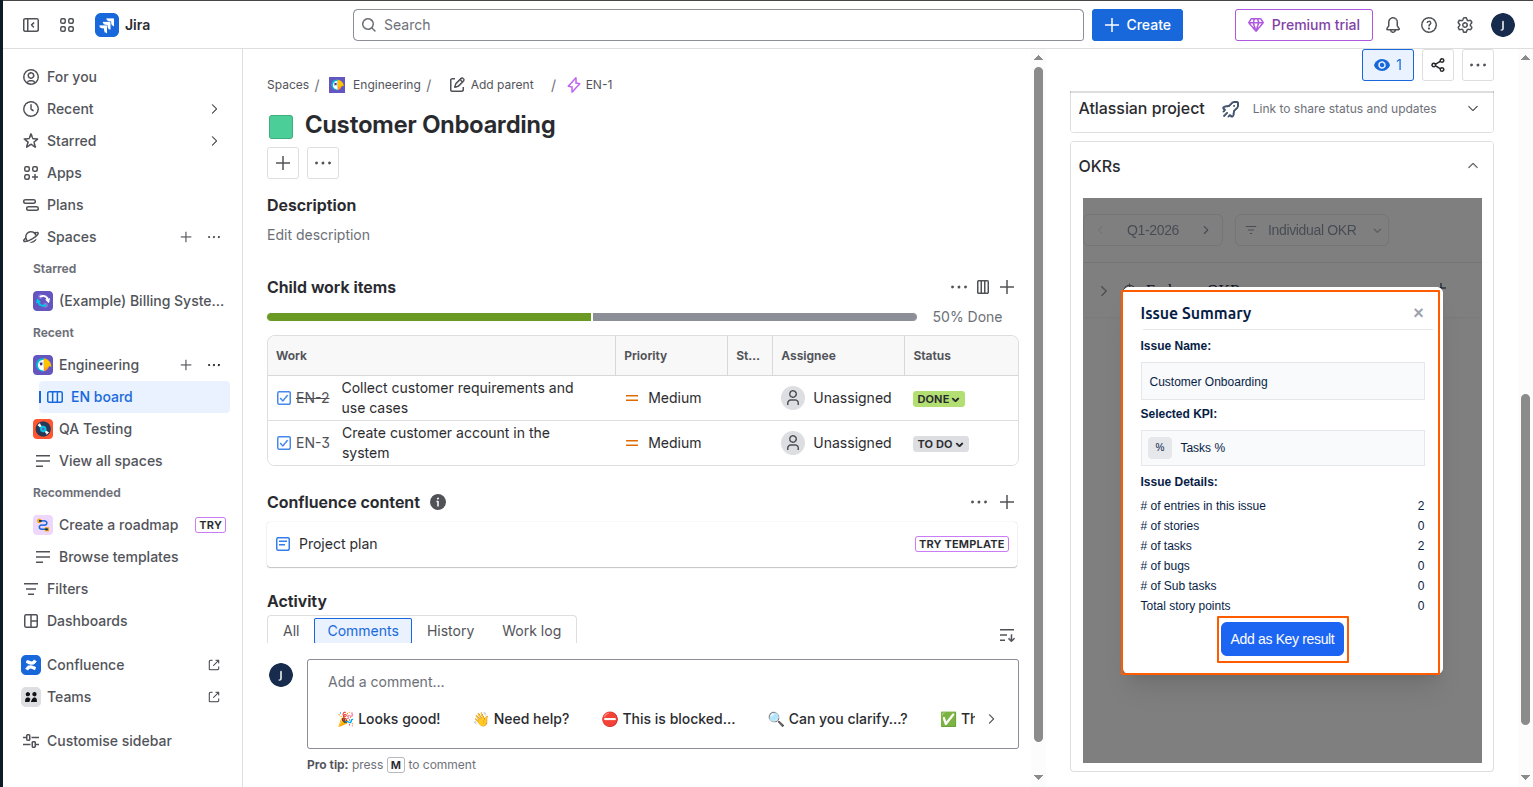
For instance, let’s select the Customer Service OKRs and choose Tasks% KPI.
Step 4:
Choose a KPI and click Add, to create a key result in profit.co
Note: The Key Results will be created based on the Epic name.
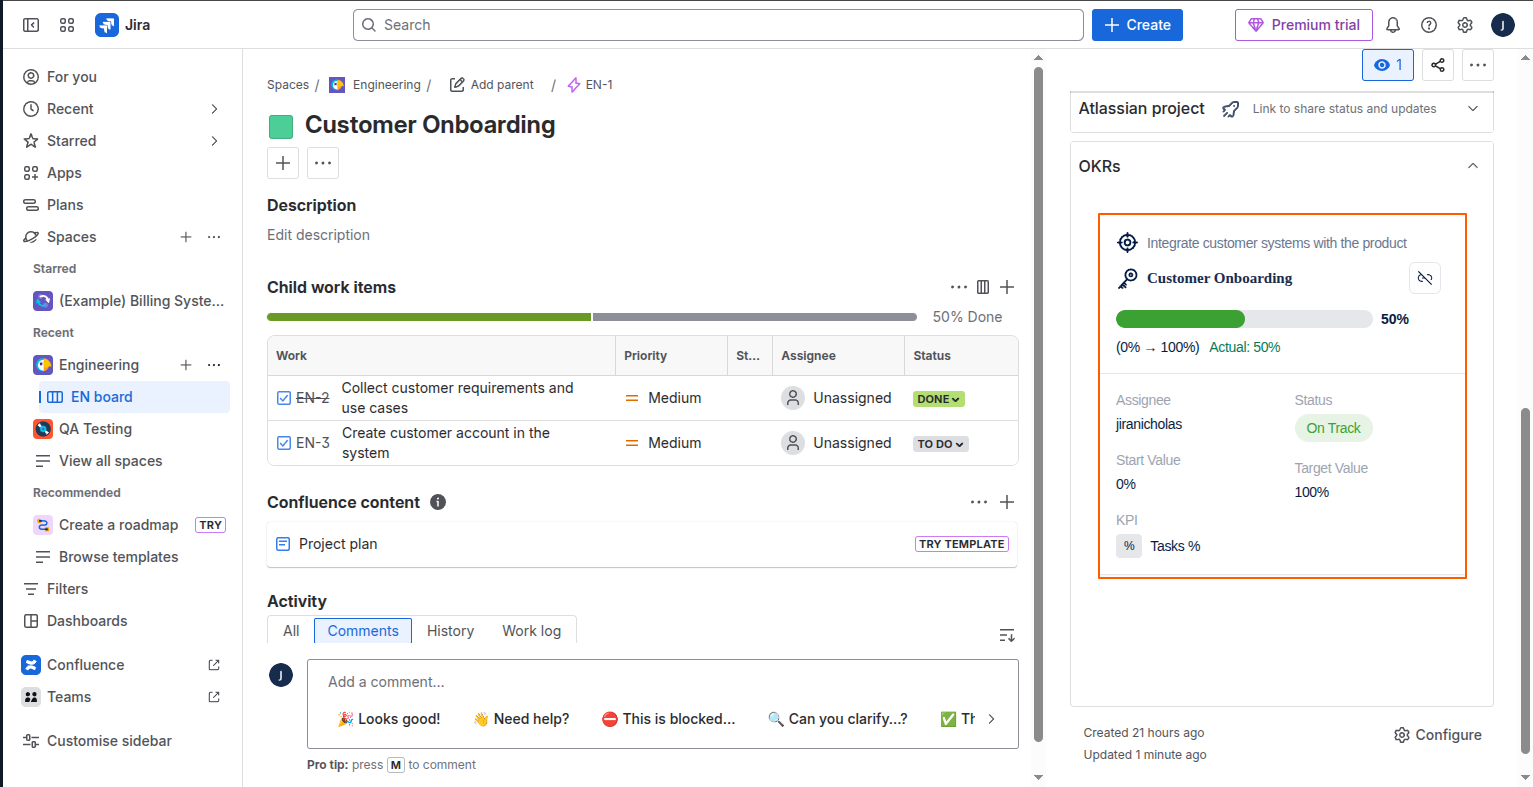
Step 5:
The Key Result will be created in your profit.co and the progress can be seen inside Jira.
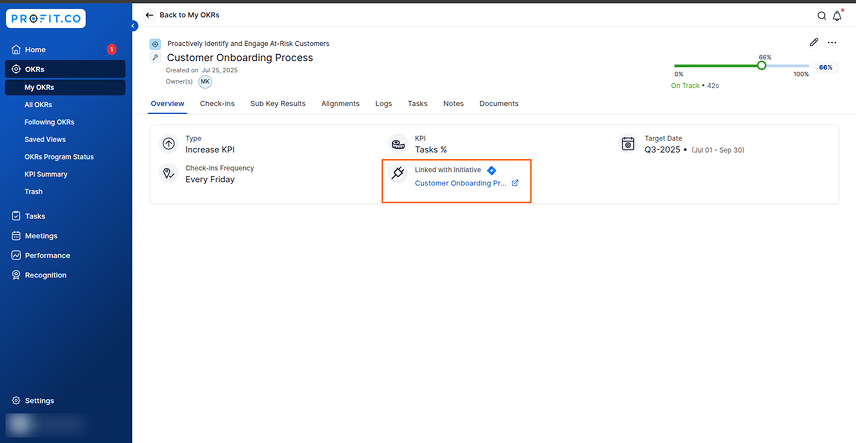
Clicking the Redirect icon will take you directly to the relevant objective or key result in Profit.co.

Note: For every update that is happening in the epic, the progress will be updated in the Key Result.

Check in Comment
You can view your check in the comment based on your task completion.

Create a Jira Epic as a Sub-Key Result
Follow the same steps as given above for the process of creating key results.
To create a subkey result, choose the Key Result that you want.

In Jira, select the dropdown and click the + icon on the key result to add the sub key result.
You’ll be getting the KPI to select for the sub key result.

For instance, let’s add the KPI Tasks in Numeric.
Finally, click on Add.
The sub key result will be shown in Jira.
Also, you can see the subkey result with the updated progress in Profit.co
Note: The information from the Task Due date and Assignee fields in the Jira plugin will also appear in Profit.co.This option is not applicable for associated Key results.
Clicking on the Redirect to Jira button will take you directly to Jira.
Note: Clicking on the Profit.co hyperlink button will lead to redirection to the Jira account.
To track the Jira Epic Progress as an Existing Key Result
To track the progress of epic with existing Key results follow these steps:
Click on the Key Result you want to associate with Epic.

The completion of the Child Issue will contribute to the progress of the Key Result.

Also, you can see the key result with the updated progress in Profit.co

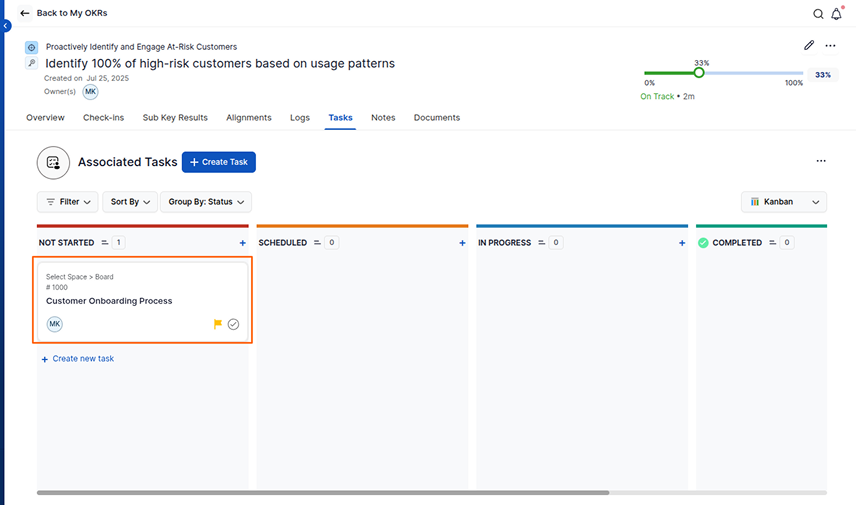
Create a Jira Epic as a Task
To create a task in Profit.co, click on the Dropdown menu of the selected Objective and click on the pin icon to add it as Task.

Finally in Jira, it’ll be added as a task.

Note: Note: If you want to unlink the task click on the same task icon.
In Profit.co you will be able to see the task associated with the key result.
Note: If the epic status reaches the Done stage, it will be indicated as the Completed status for tasks in Profit.co