


Microsoft Power BI uncovers insights in organizational data by connecting, transforming, and visualizing it through charts, shareable with colleagues.
What you can do with Power BI and Profit.co Integration?
Integrate Power BI in Profit.co key result and automate the progress.
Configure Power BI in Profit.co
Note: Only Super Users can be able to configure the Profit.co <> Power BI Integrations.STEP 1:
Navigate to Settings from the left navigation panel. Click on Integrations.
On the Integration page, Select the Business Level tab and click on the Power BI Manage button


STEP 2:
Click on the Sign in to Power BI button.

Sign in to Microsoft Power BI Account and provide access.
Consent Step
If you are not an administrator in Power BI, you will see the screen below. Please contact your Power BI administrator to complete the first-time setup and grant consent.


Select this option to stay signed in
STEP 3:
After signing in the connection for the Power BI will be established.
Note: You can now create multiple connections.

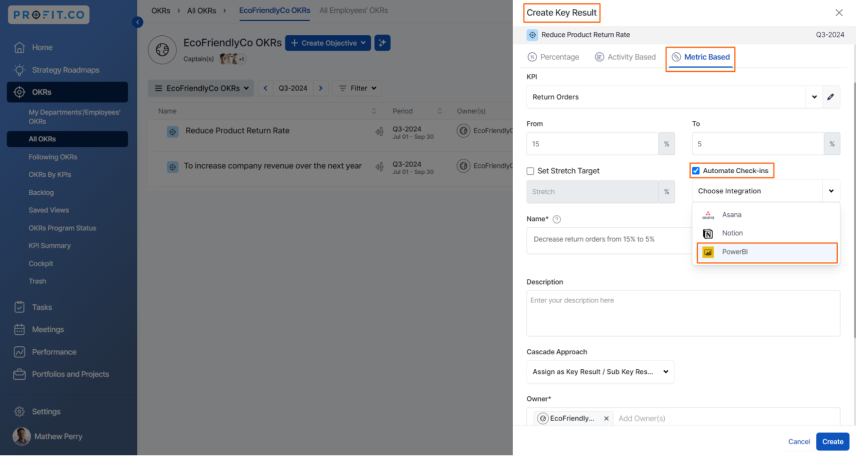
Create a Key Result and select the Power BI from the Automate check-ins.
Note: Power BI supports Increase KPI, Decrease KPI, or Control KPI type.
STEP 4:
On the Connect to Power BI page, select the desired Connection Name, Workspace, and Report. Then, enter the DAX Query and click on Run.
Then, you will be able to choose the required Columns and Aggregation Type, and you will find the current value. Then, click on Add.
Note: You can also set the current value as the start value by clicking the Set as start value checkbox.

Note: Here is a sample DAX query.
STEP 5:
Once the key result is successfully created, click on the Check-in button and complete the Check-in to update the status value in the key result.

You can Check-in to make progress to your key result.
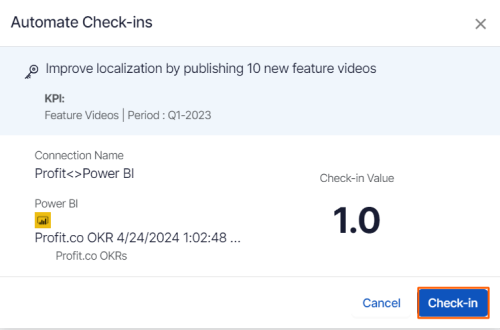
Finally, you can Update it to make progress to your key result.


Note: The automatic check-in will happen every day at 09.00 AM based on the user region.