


Notion is a freemium productivity and note-taking web application developed by Notion Labs Inc. It offers organizational tools including task management, project tracking, to-do lists, and bookmarking. Notion App allows users to create and customize their workspace based on their specific needs and preferences.
What you can do with Notion and Profit.co Integration?
Now you can integrate your Profit.co account with Notion and help the team, organize, manage work effectively and create key results to track performance instantly.
Configure Notion in Profit.co
Note: Only Super Users can enable the Notion integration in Profit.co.
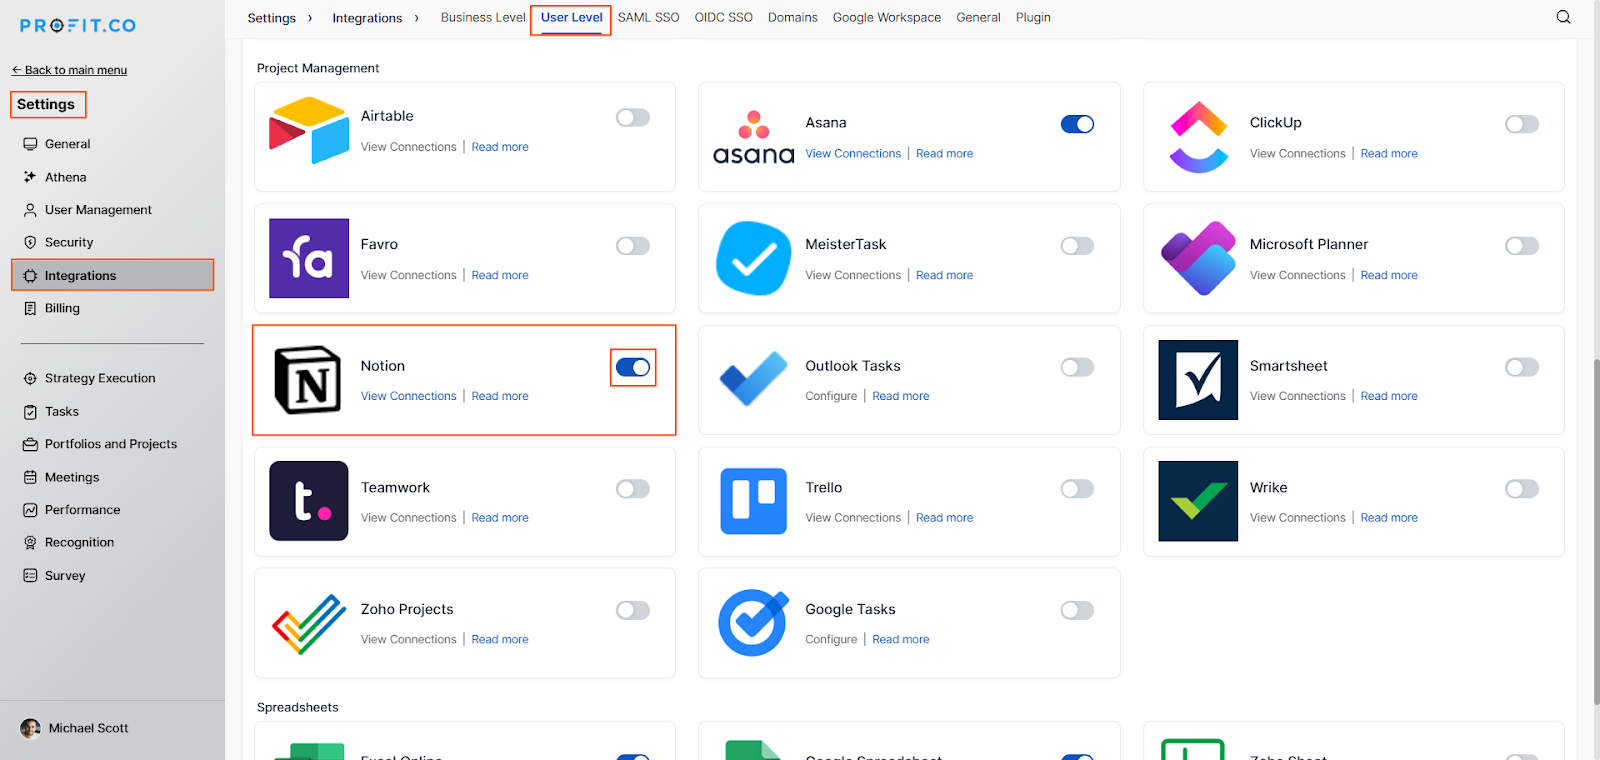
Step 1Navigate to Settings from the left navigation panel. Click Integrations, select the User Level tab, and enable the Notion.
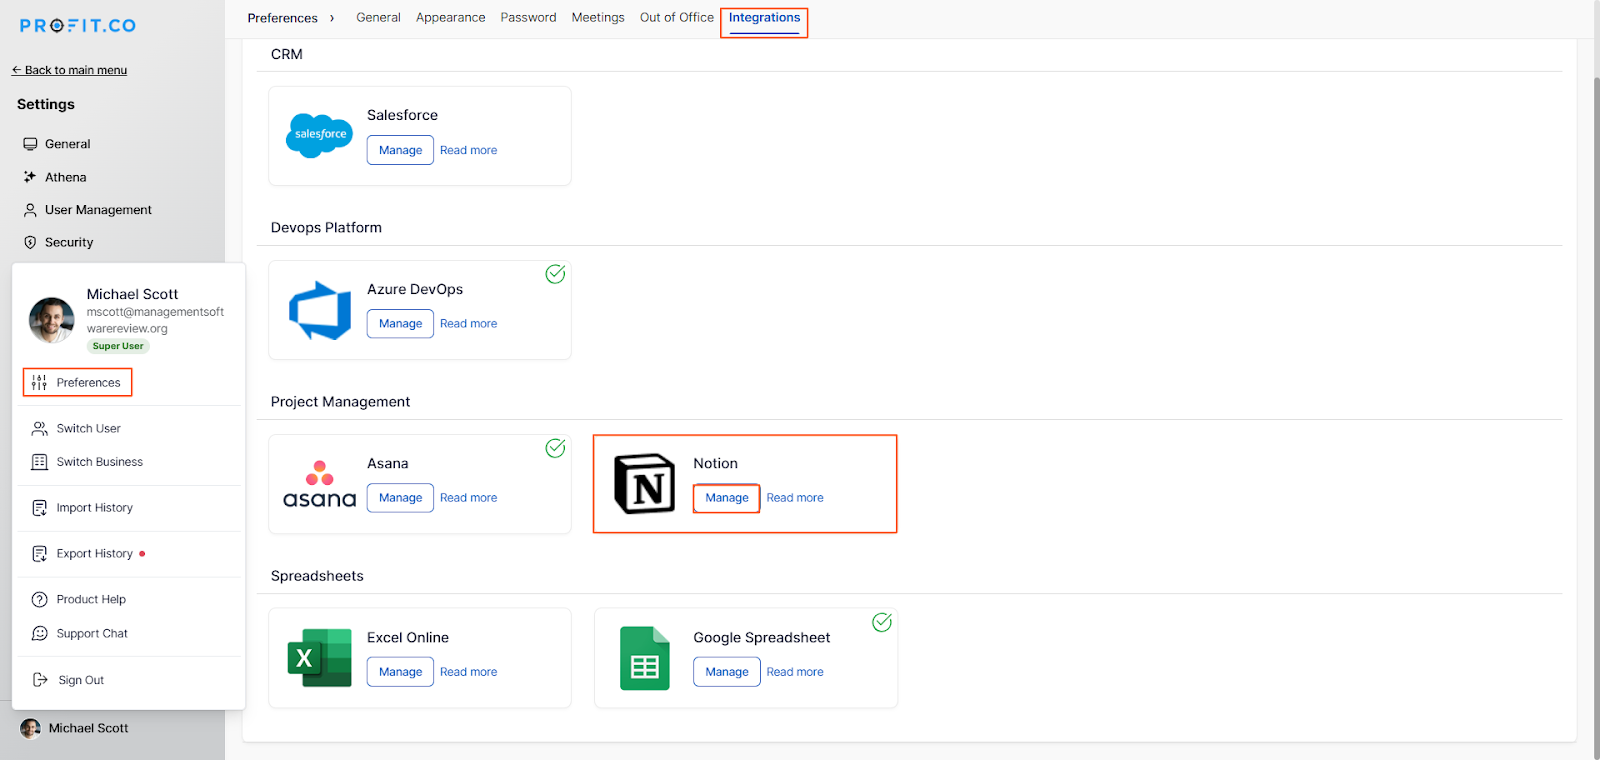
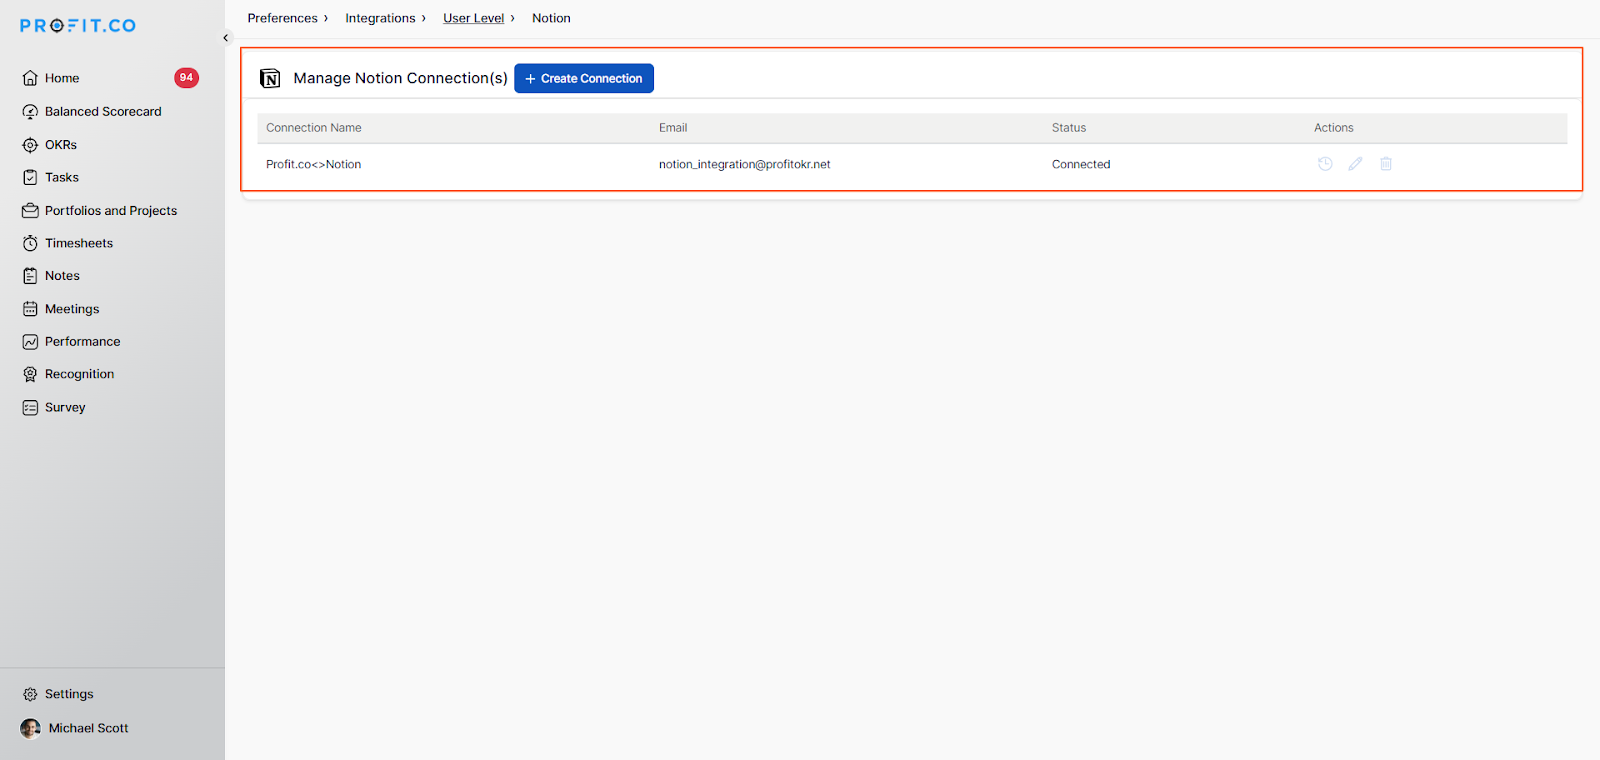
 After enabling it, navigate to Preferences from the left navigation panel, select the Integrations tab, and click the Notion – Manage button to create a connection.
 Step 2
Click Connect to Notion.
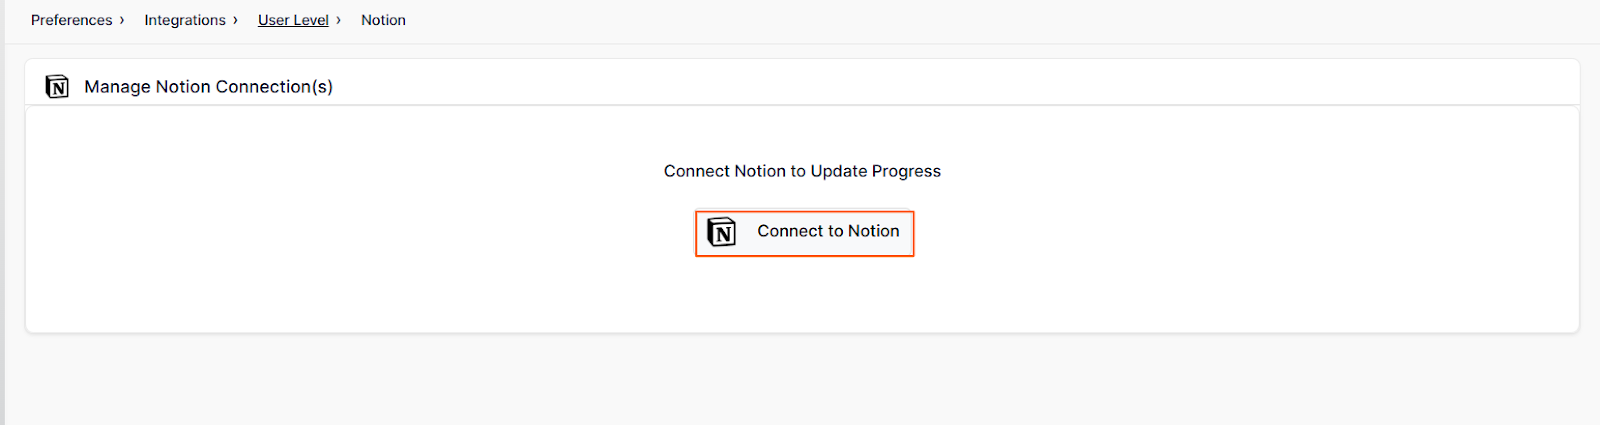 Once clicked, you will be redirected to the connection setup page.
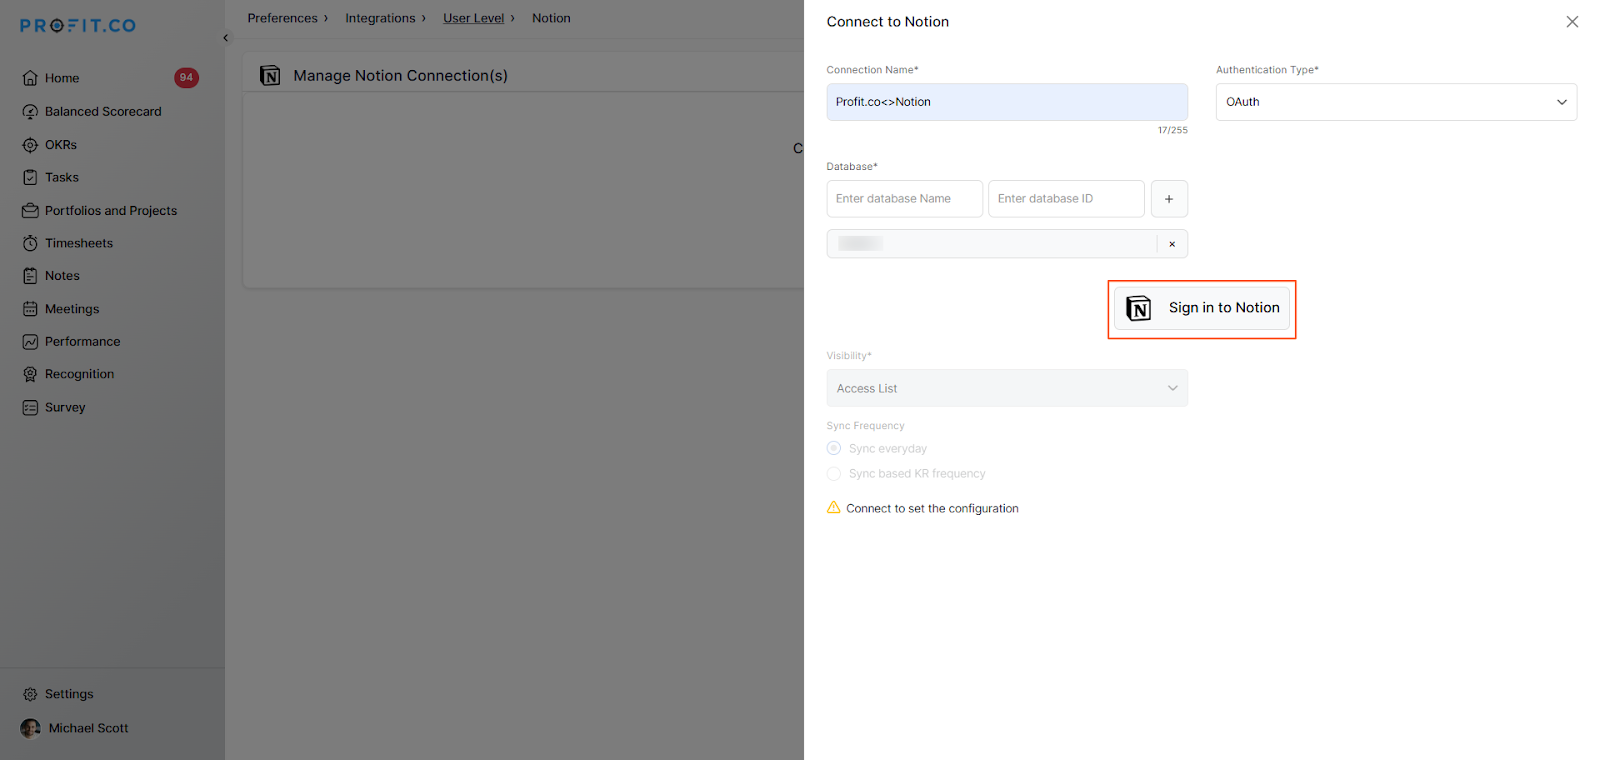
OAuth Authentication
Follow the steps below to connect using OAuth authentication:
Enter the connection name and select OAuth as the authentication type. Choose the Database, and click Sign in to NotionNote: After entering the Database ID, click the “+” icon.
You will be redirected to the Notion authorization page. Click Select Pages, then Allow Access.
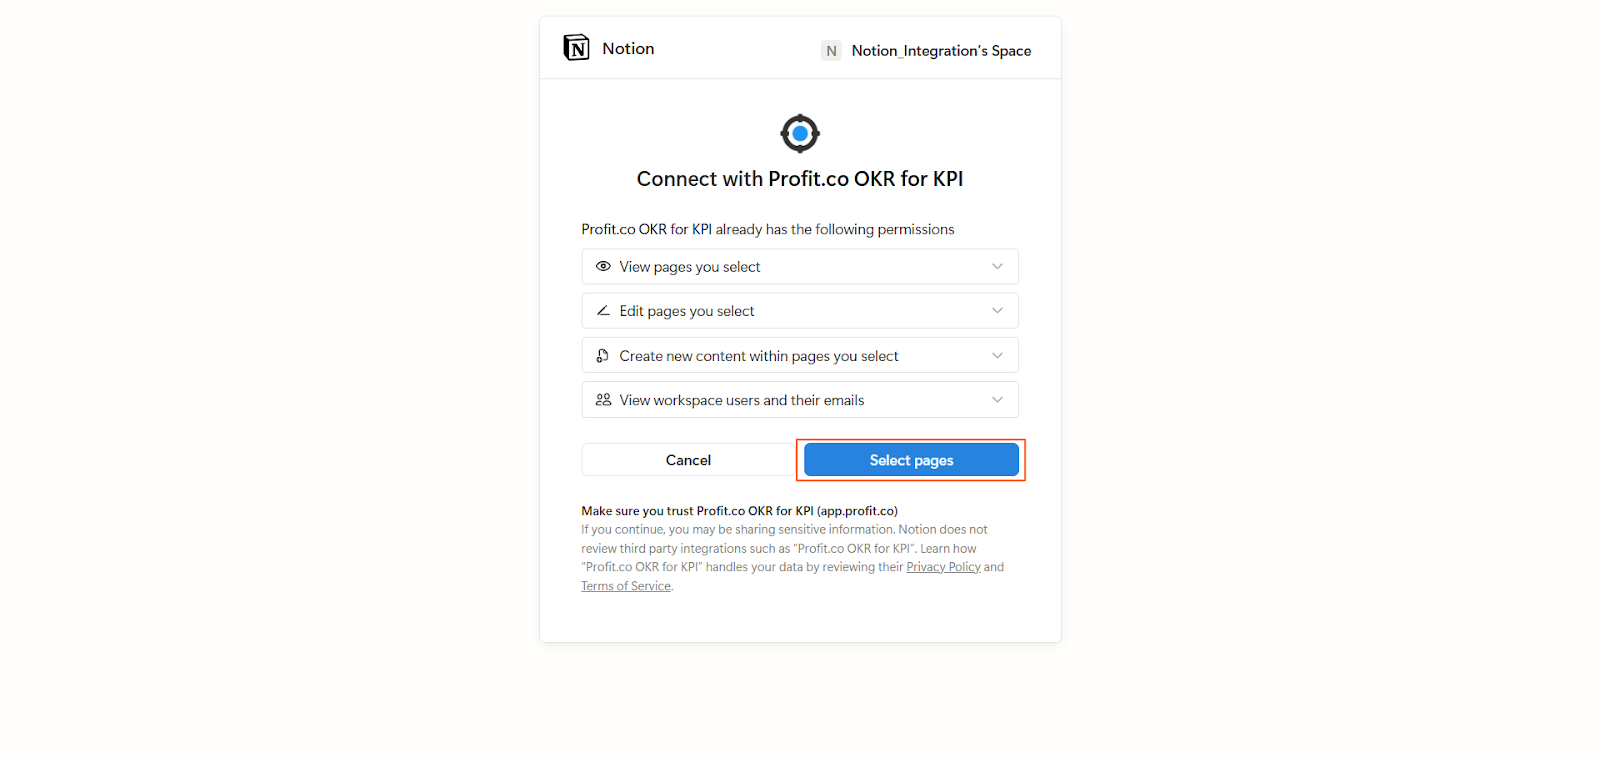
Once permission is granted, the connection will be successfully established in Profit.co.
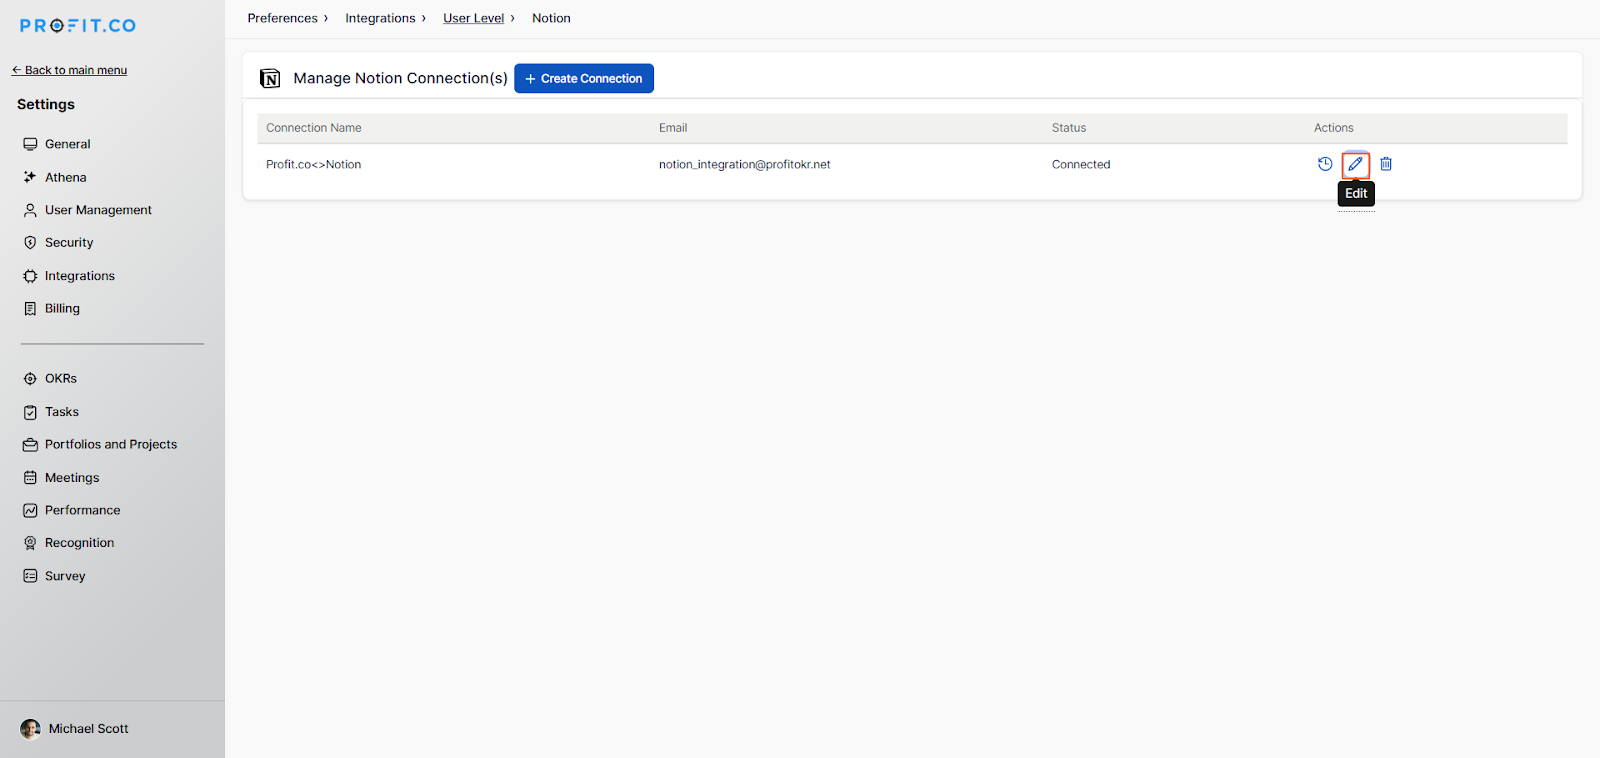
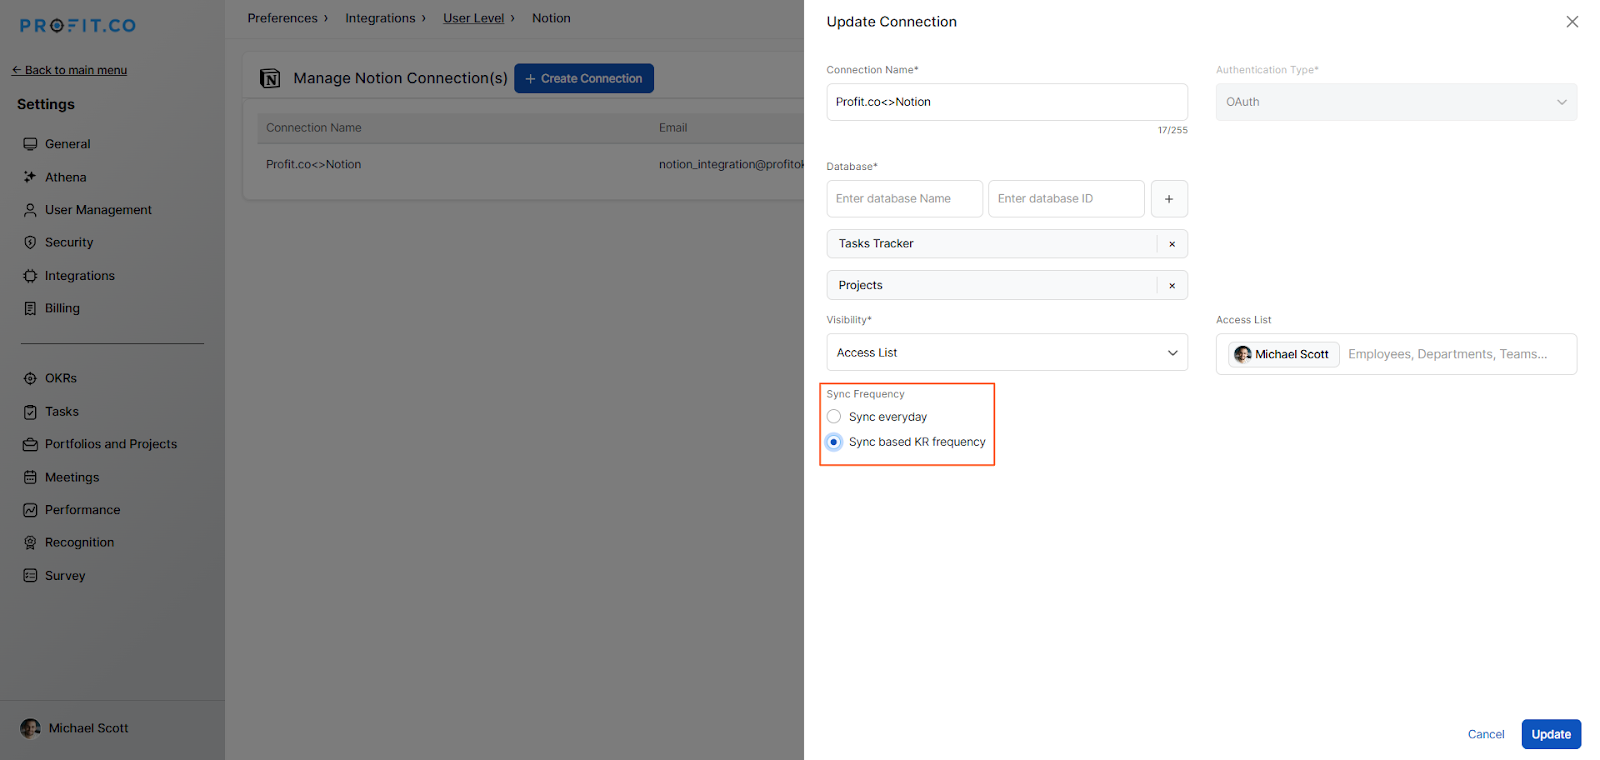
Once you click the Edit option, you can configure the visibility and by in the settings.
When the sync frequency is set to every day, the system updates progress daily.
When Sync based KR Frequency is selected, the system fetches data according to the configured check-in frequency.
Example: If the check-in frequency is set to every Friday, the system updates progress every Friday.
 Step 4
Now Create a key result in Profit.co where you want to integrate Notion in a key result.
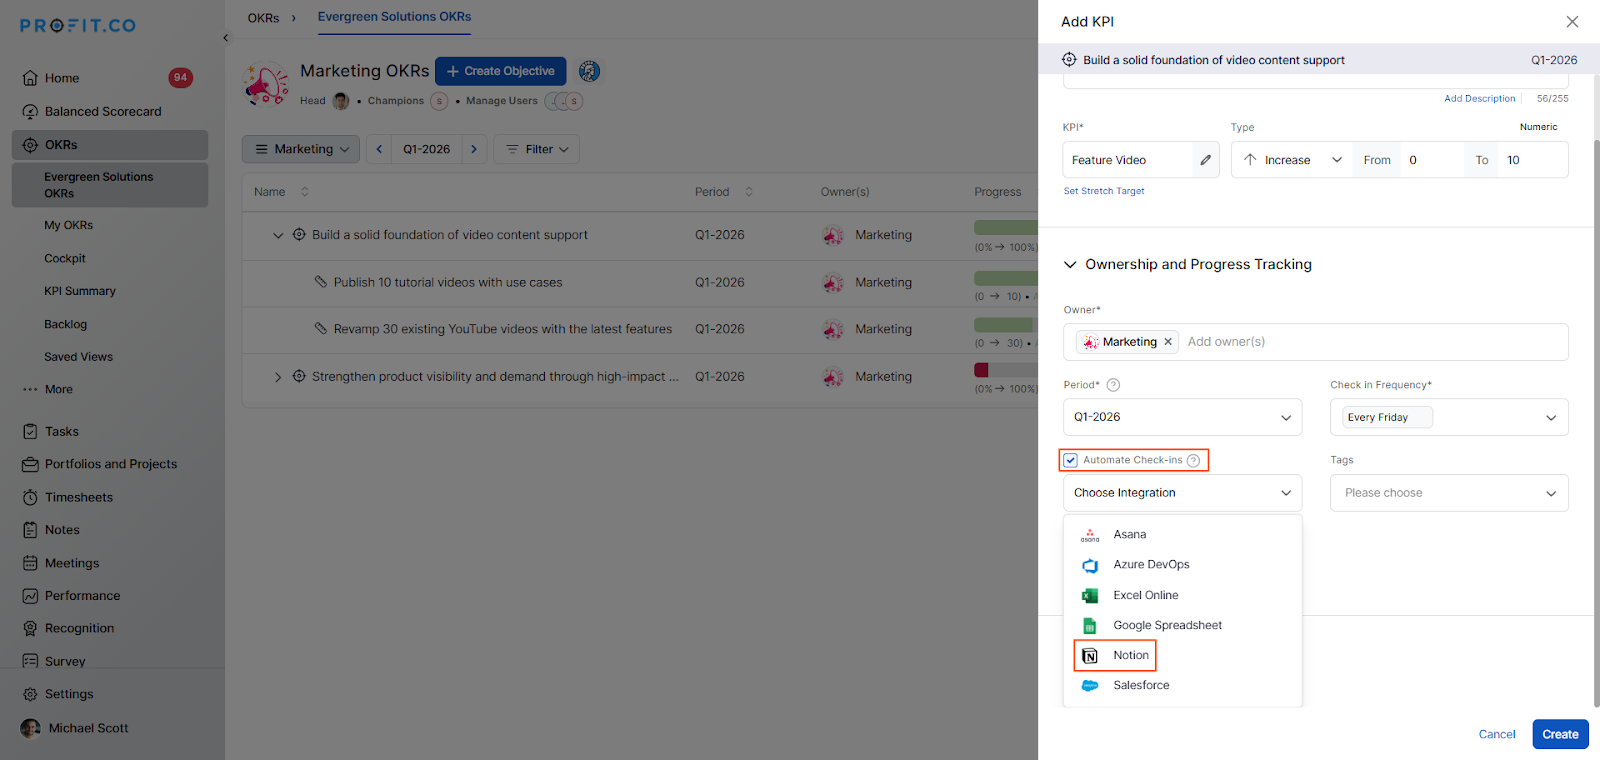
Create a Key Result in Profit.co where you want to integrate Notion. Enter the Key Result Name. Choose the required Key Result Type and KPI
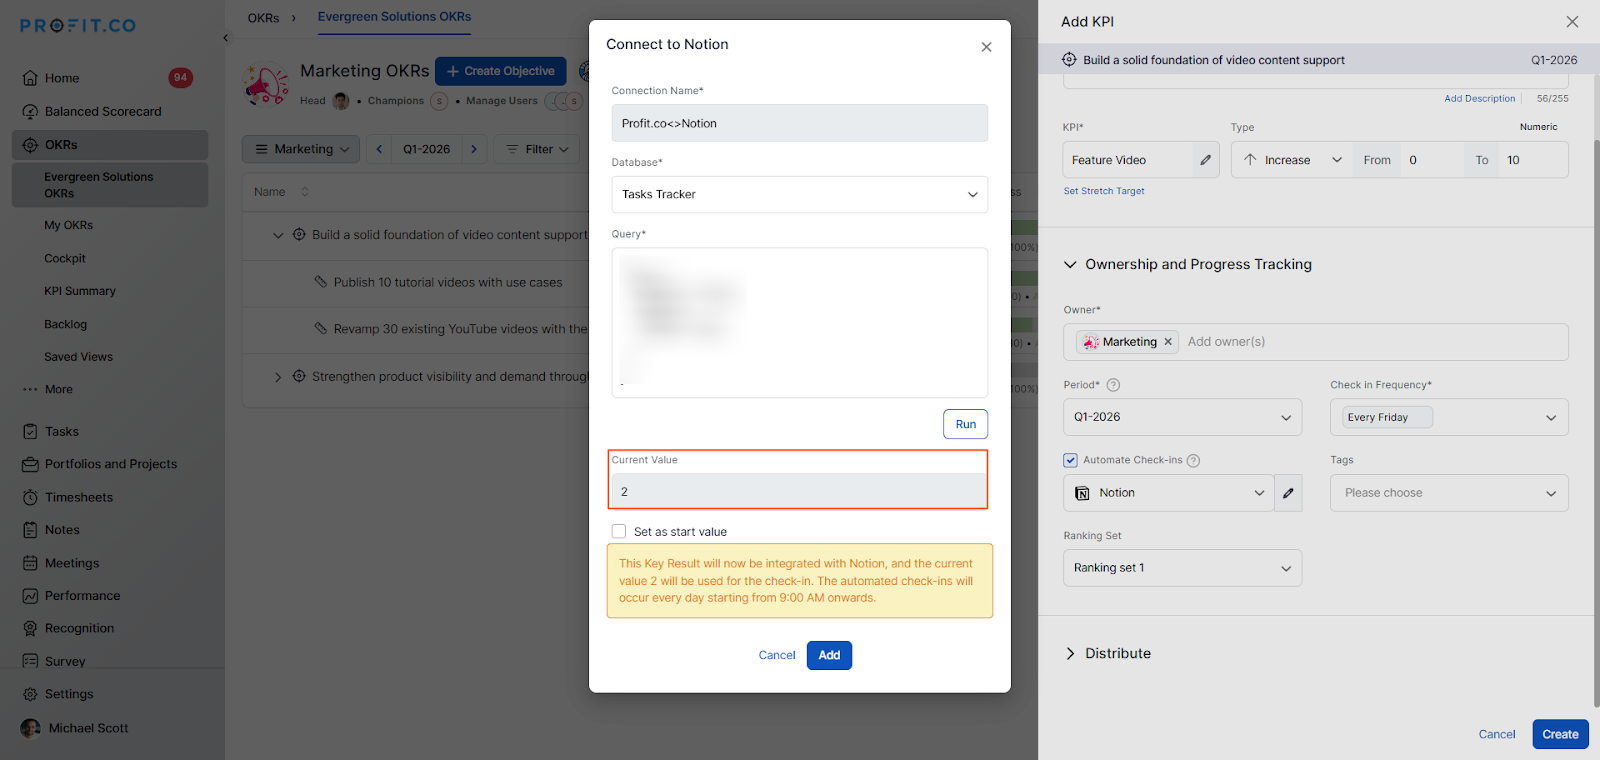
Enable Automate Check-in and select Notion from the Connection dropdown.
A pop-up window will appear. Enter the following:
- Connection Name
- Database
- Query
 Step 5
To get the Query follow the below steps:
Refer to the official Notion documentation below:
https://developers.notion.com/reference/post-database-query-filter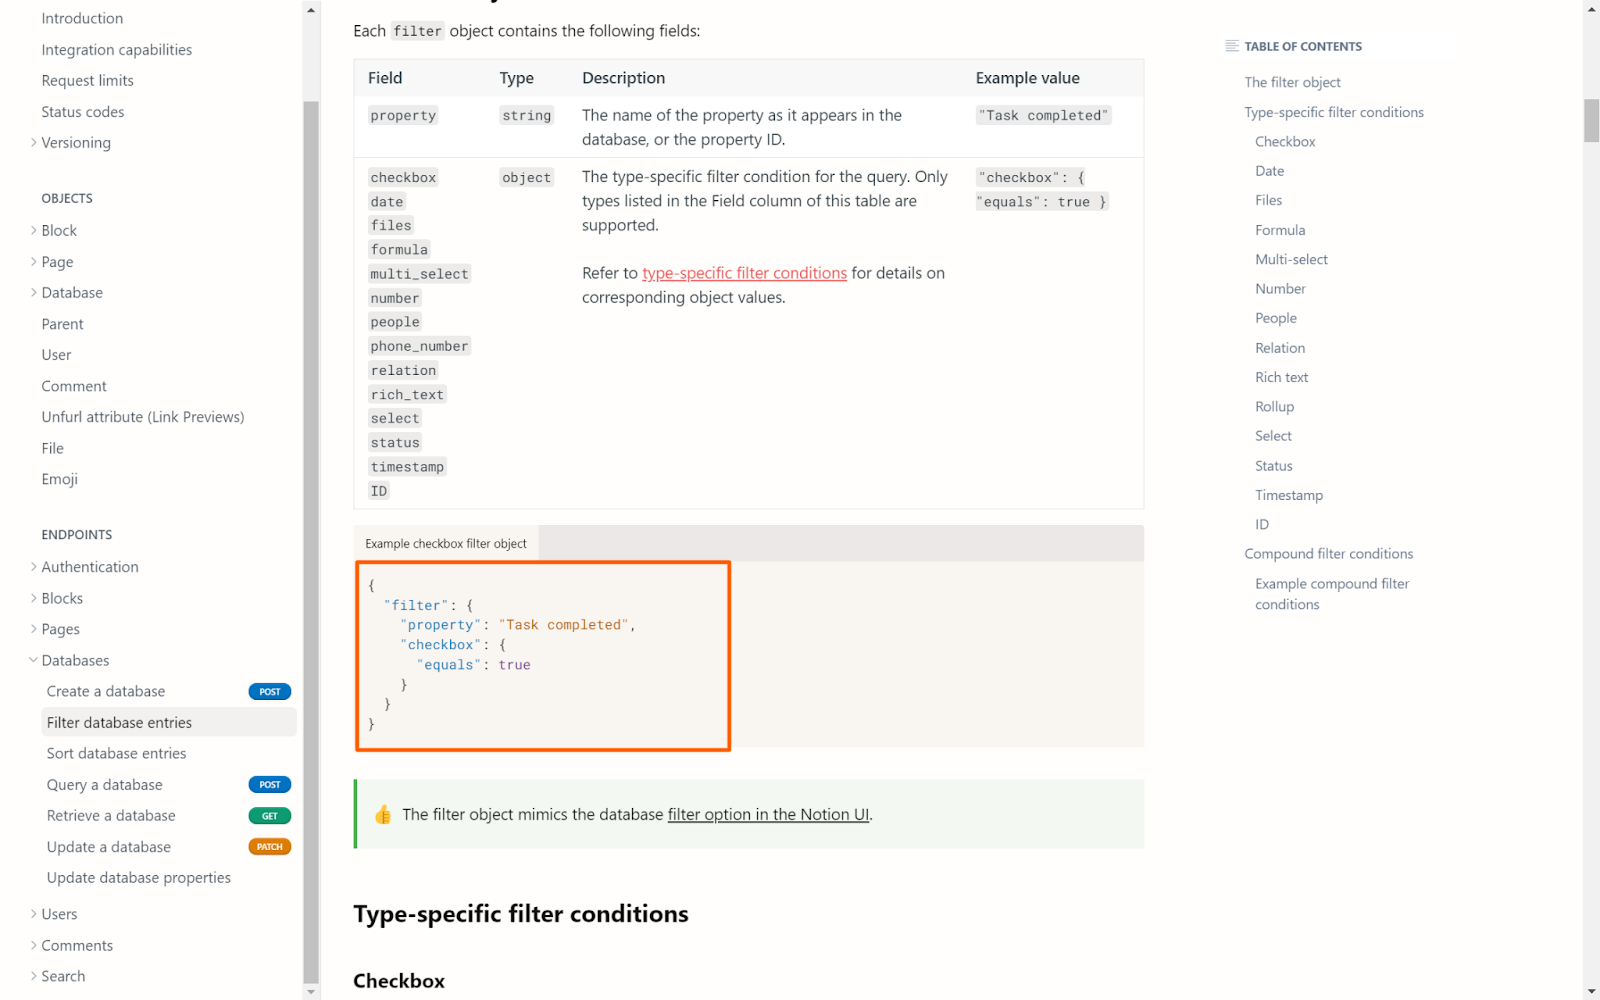 Once you click Run, the Current Value will be populated automatically.
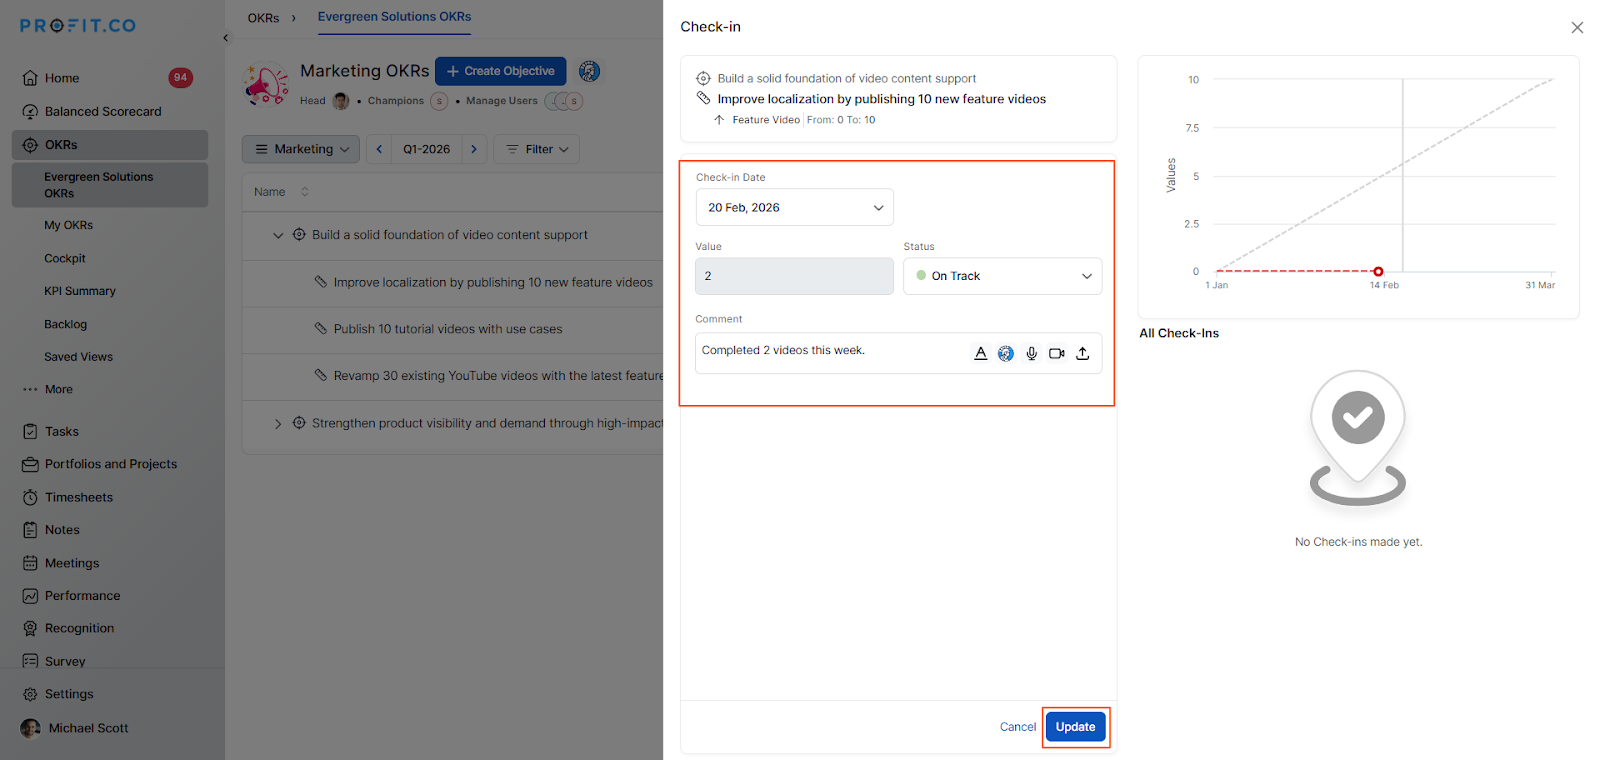
 Click Add, then Create to save the Key Result. After creation, click Check-in to update the progress.
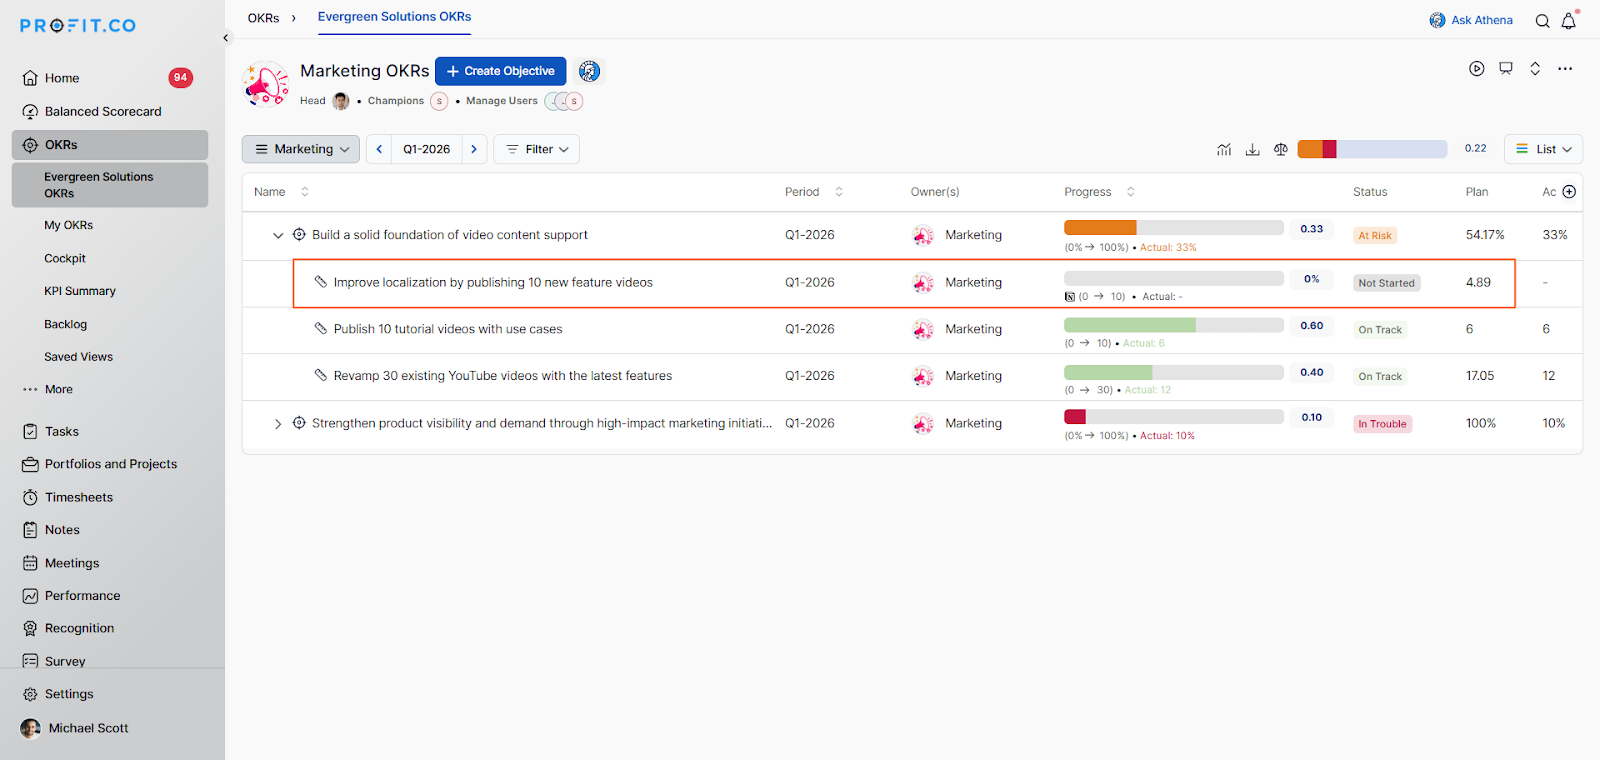
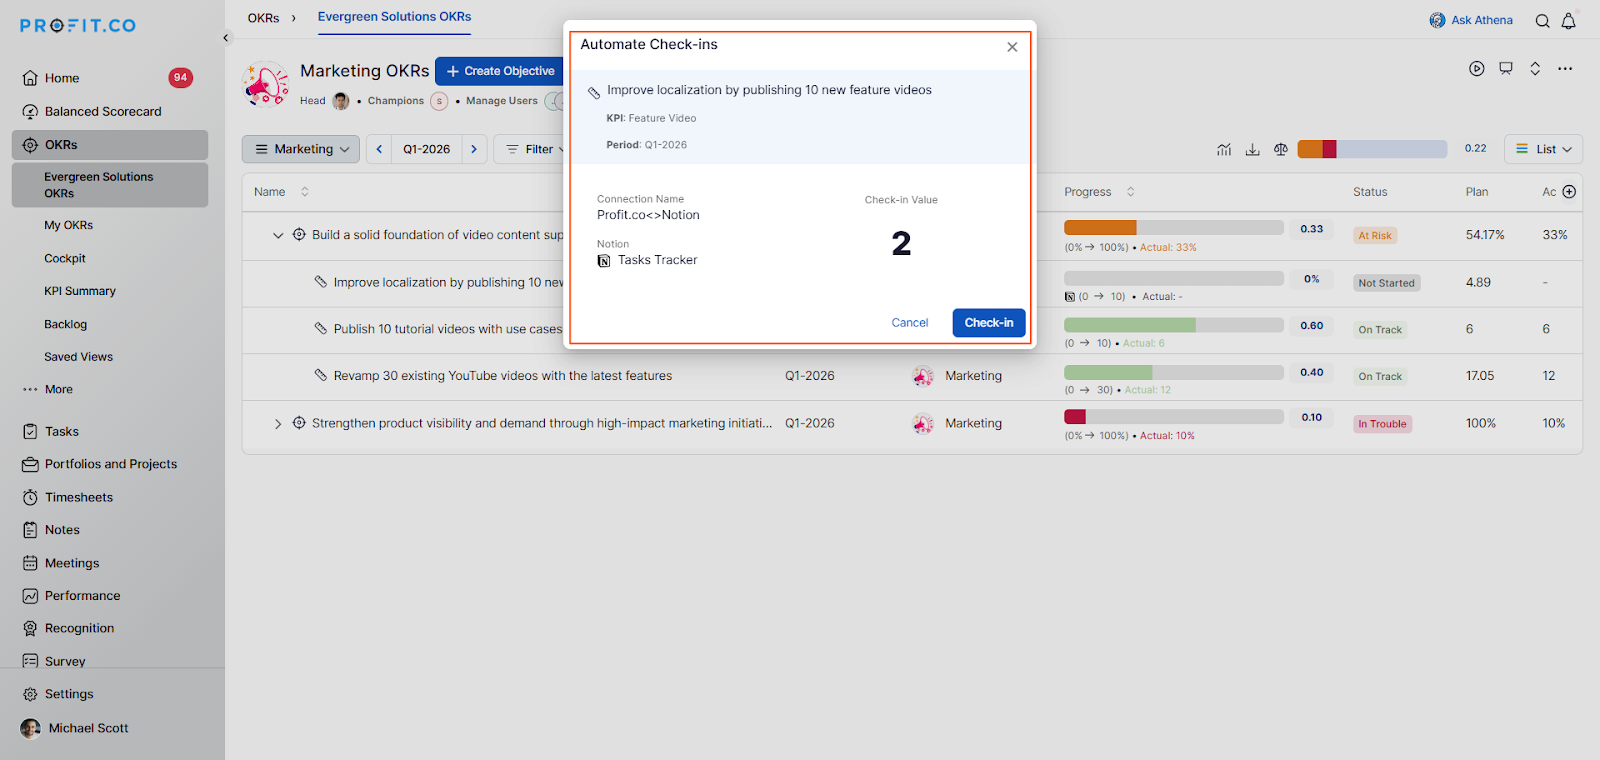
You’ll be redirected to the review page where you can update the status value.
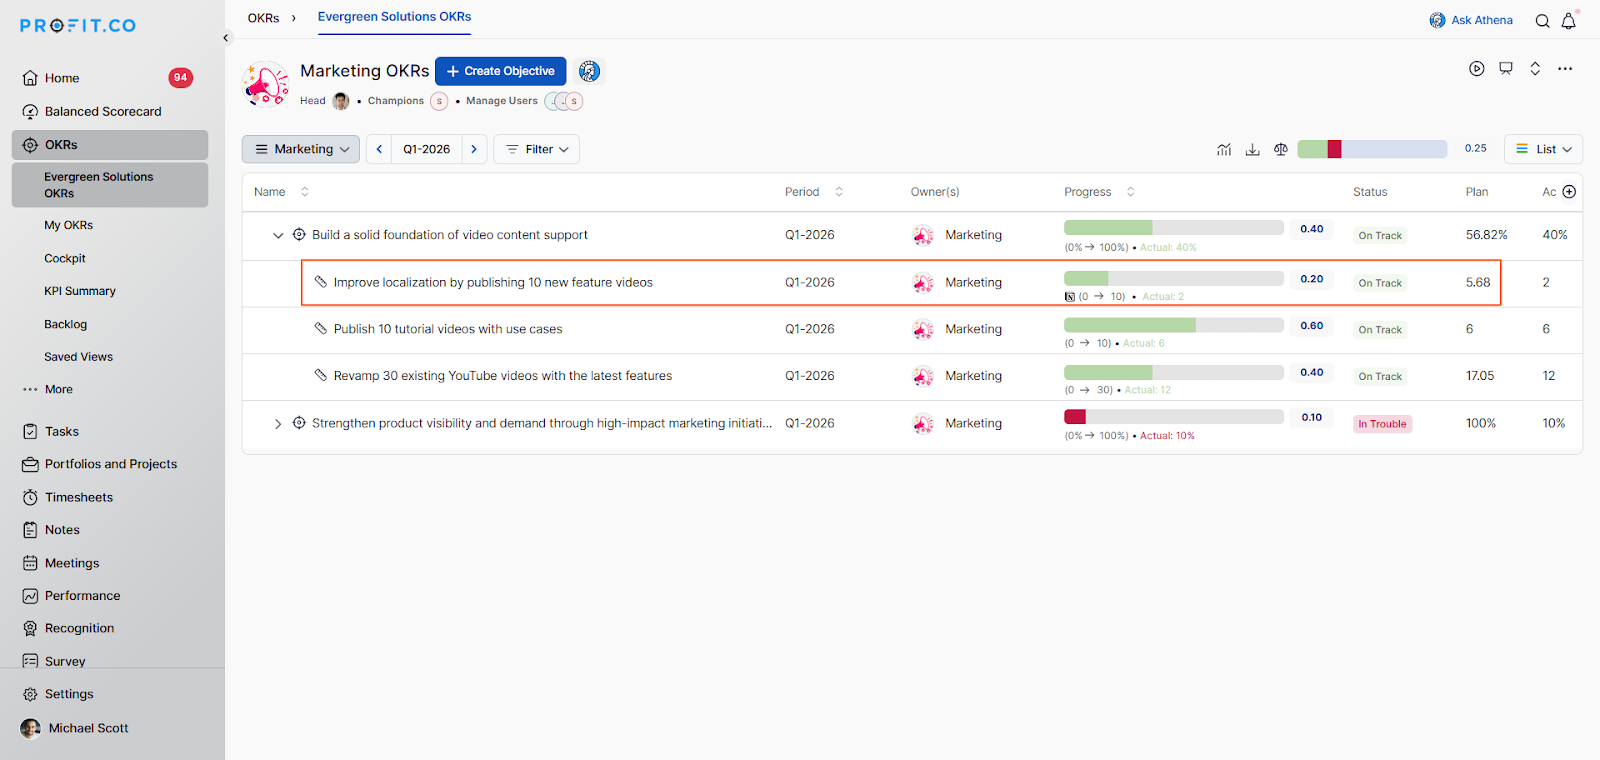 Note: The automatic check-in will happen every day at 09.00 AM based on the user’s region.
Connect Using API Secret Key
Enter the connection name, select secret authentication, and choose the Database, then click
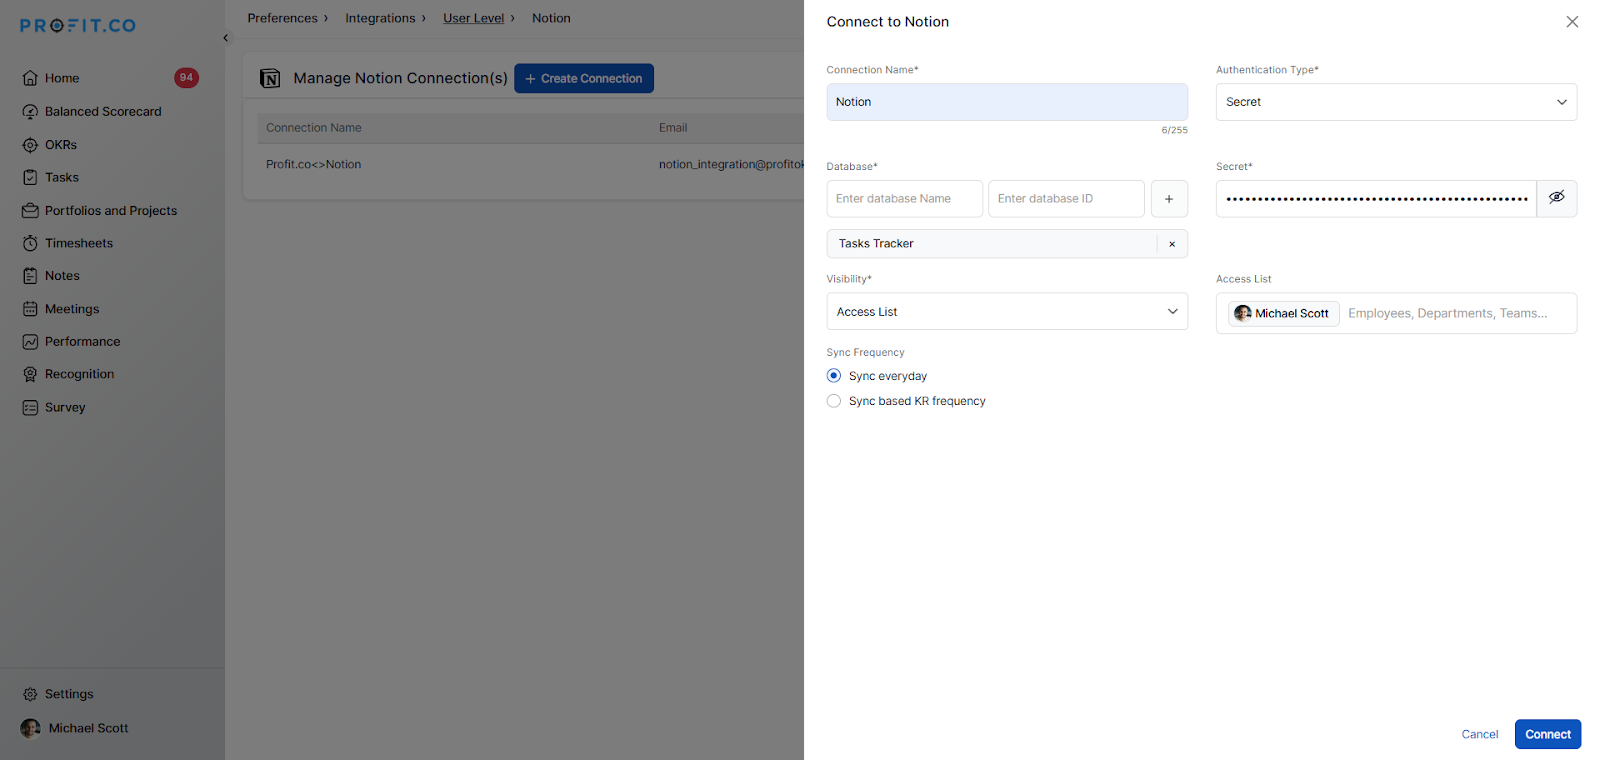 Note: After entering the Database ID, click the “+” icon.
When the sync frequency is set to every day, the system updates progress daily.
When Sync based KR Frequency is selected, the system fetches data according to the configured check-in frequency.
Example: If the check-in frequency is set to every Friday, the system updates progress every Friday.
Generate the Secret Key:
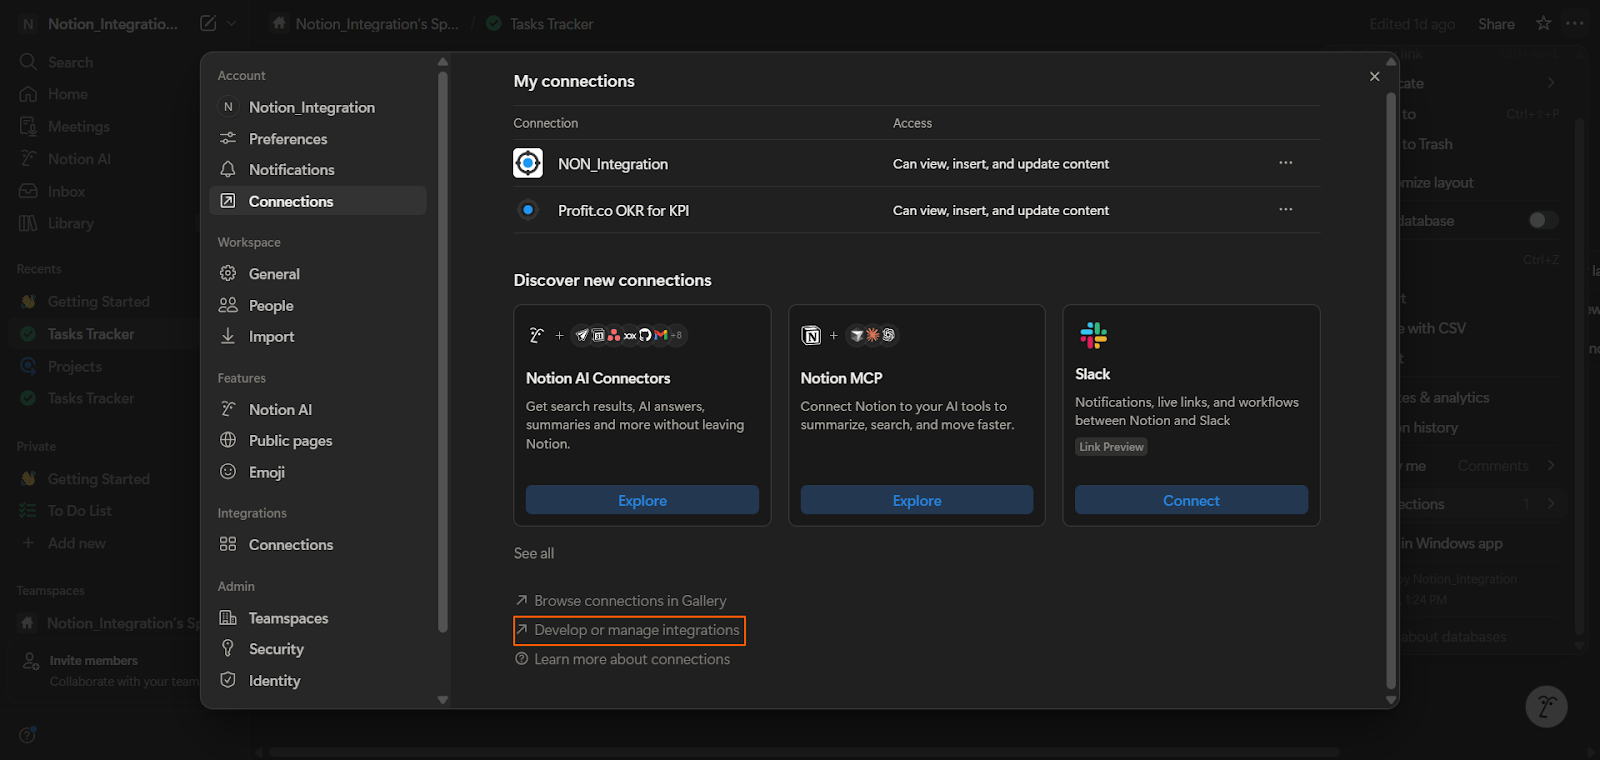
Log in to your Notion account. Click the ellipsis (⋯) icon. Select Connections under + Manage connections.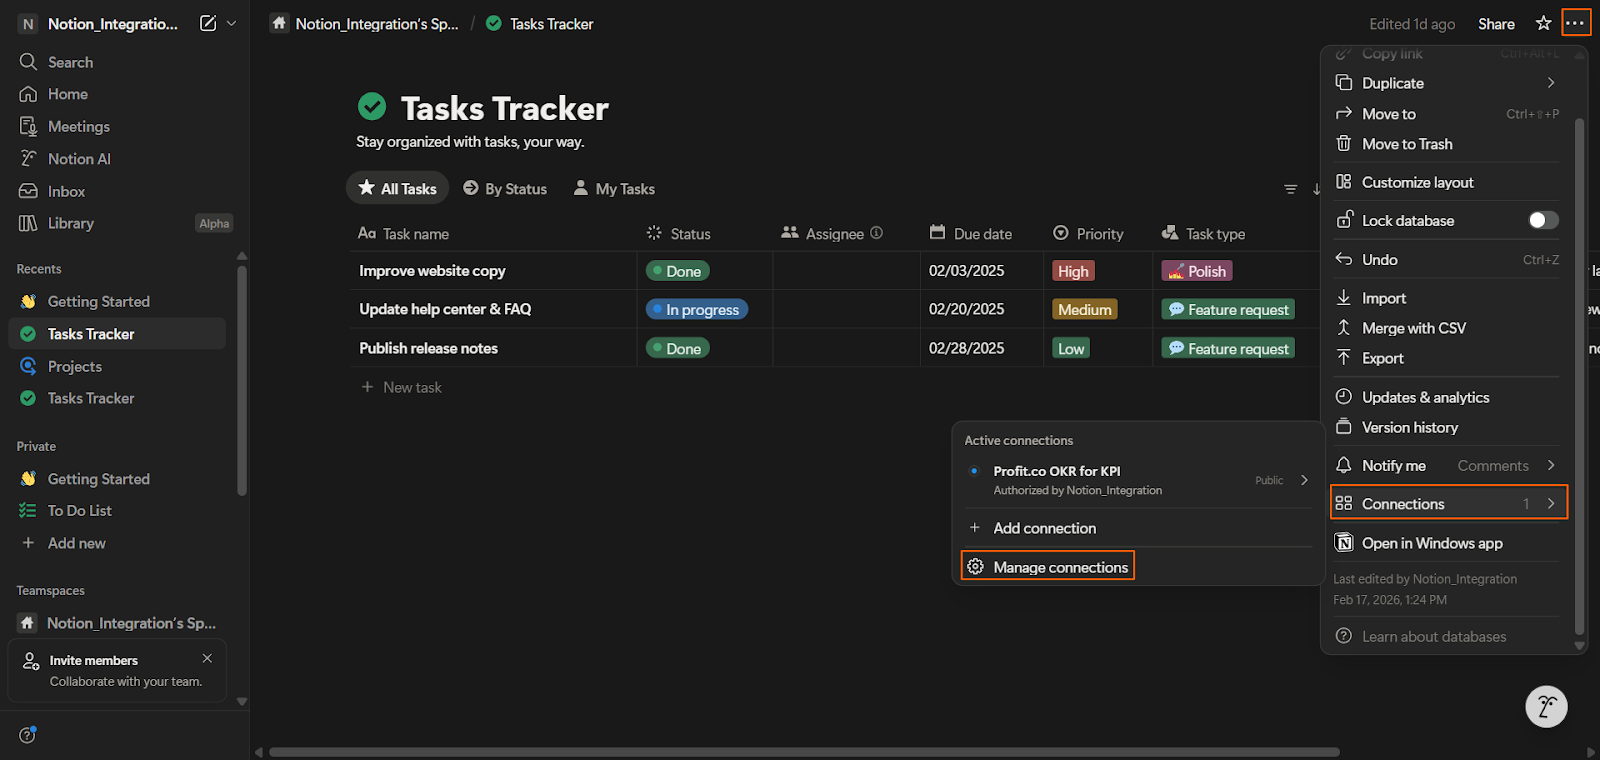 Click Develop or manage integrations.
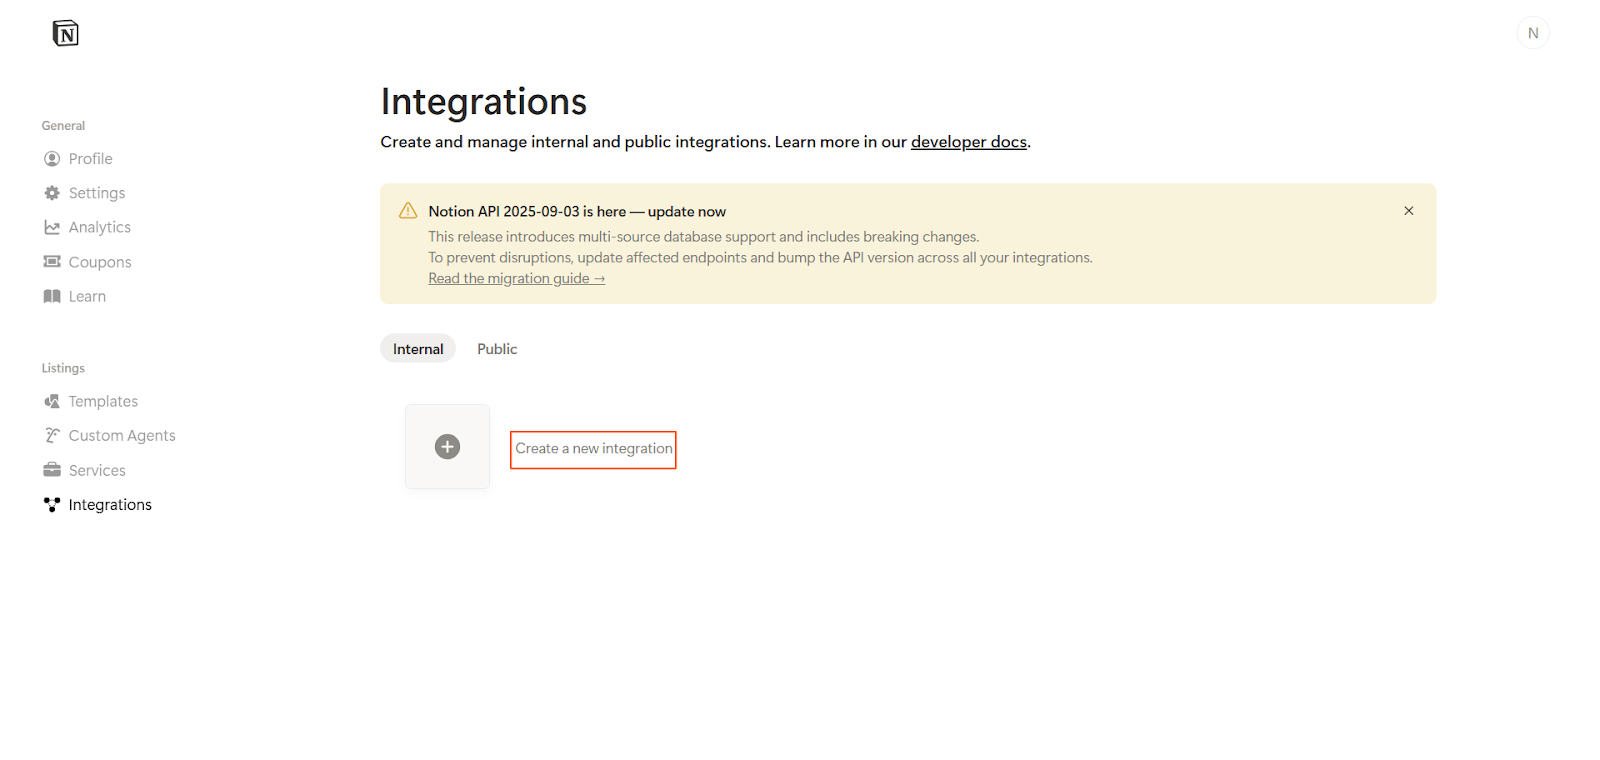
 Select Create New Integration.
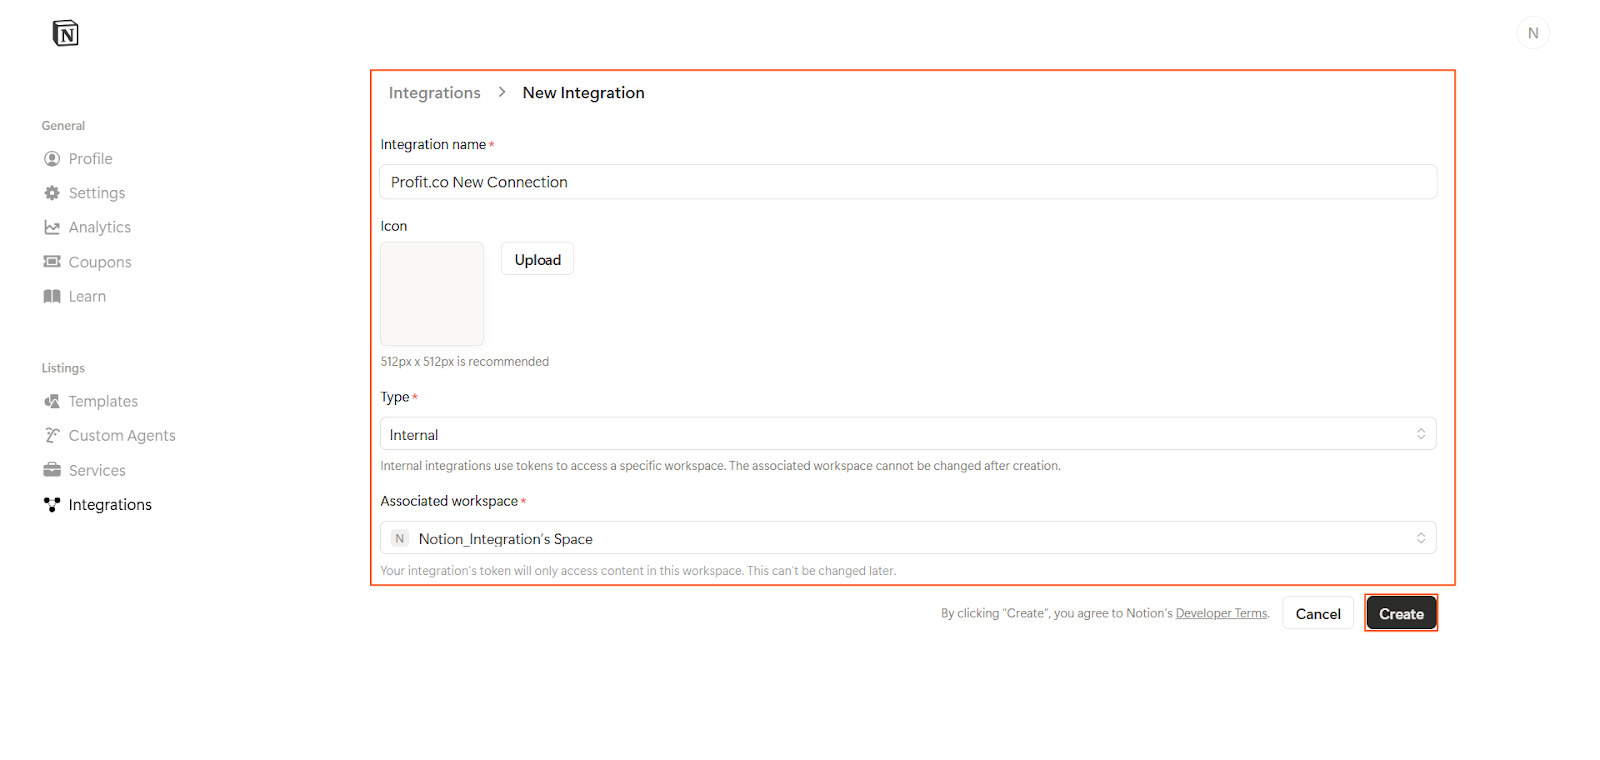
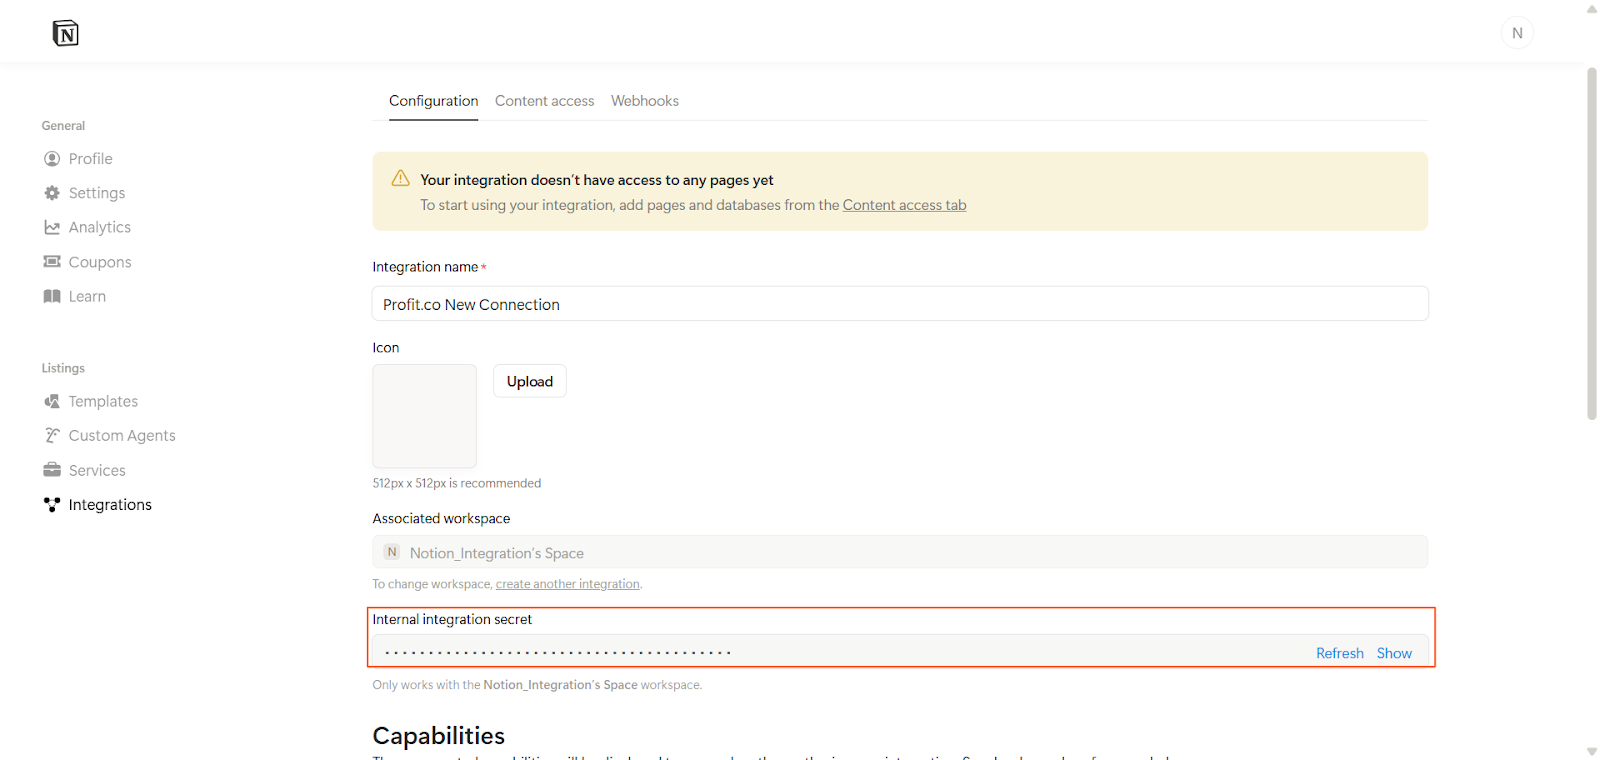
 Enter the Integration Name, select the Associated Workspace, and click Create. Copy the generated Secret Key
To get the Database, follow the steps below:
Click on Task, and you’ll find the Database ID in the address bar.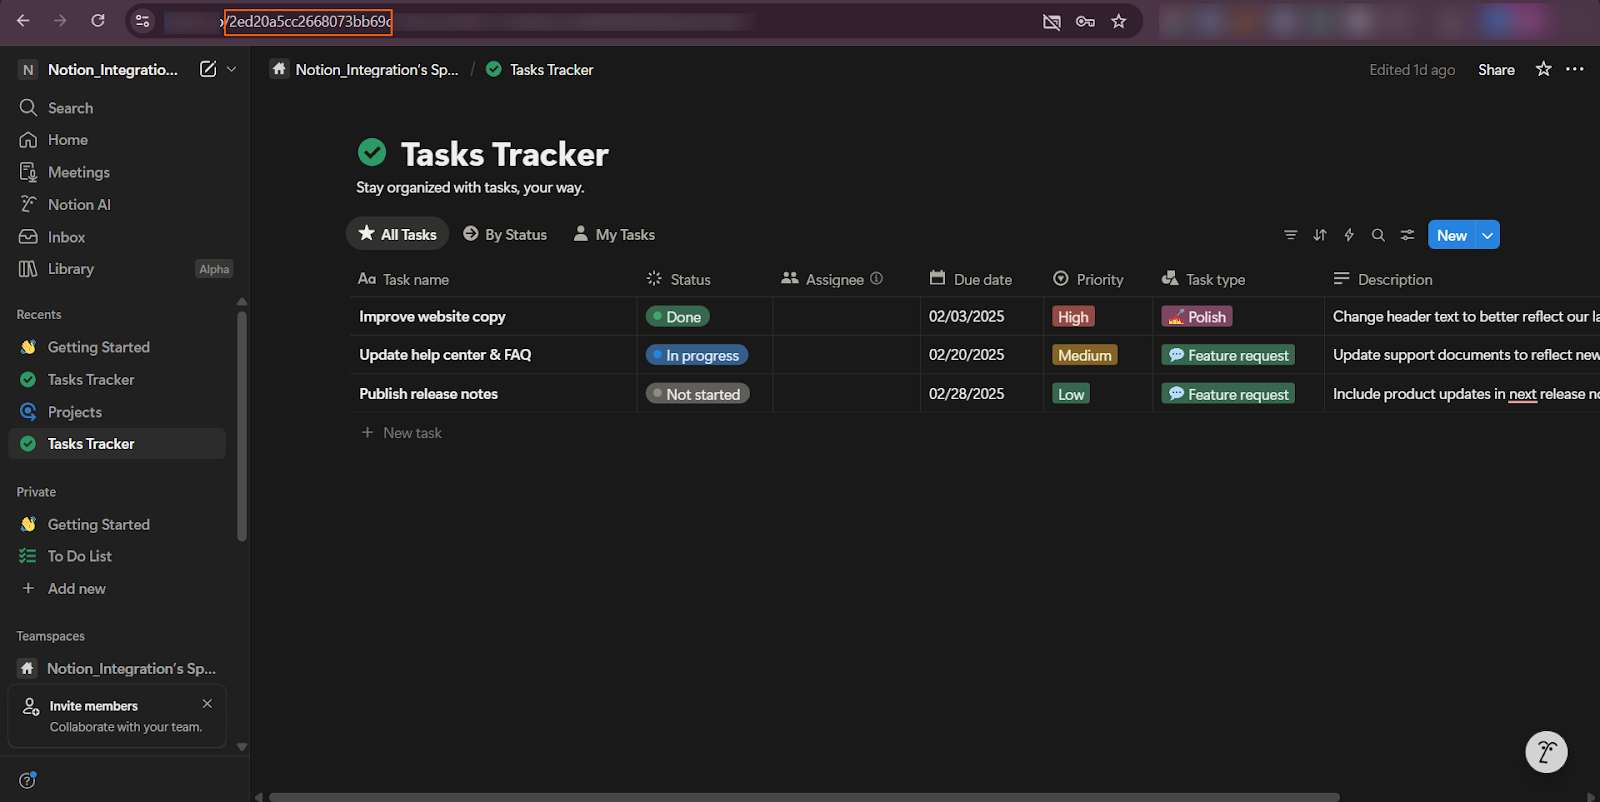 Note: You can use only Increase KPI, Decrease KPI, and Control KPI to create key results in this integration.
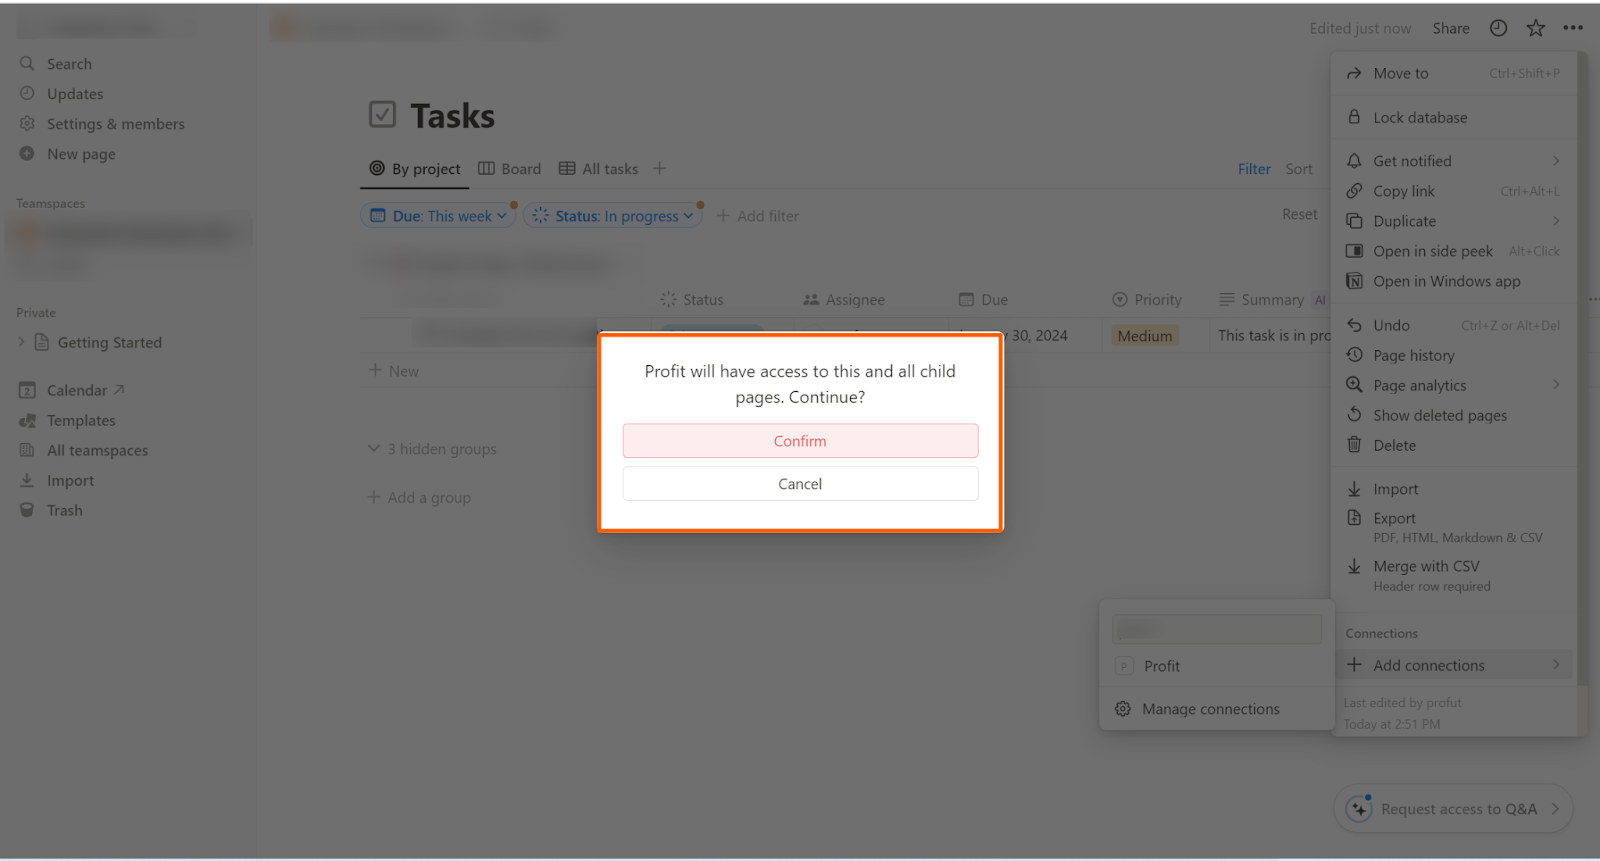
After clicking the Confirm button, you will gain access to the project.
To create a key result and check in, follow the same process starting from Step 4.