
Microsoft Entra ID, formerly known as Azure Active Directory (Azure AD), is a cloud-based identity and access management (IAM) service from Microsoft. It helps organizations secure and manage identities, enabling users to access both cloud and on-premises resources. Essentially, it provides a centralized way to manage user accounts, permissions, and access to various applications and services.
Configure Microsoft Entra ID SSO for Profit.co
Here's how to integrate Profit.co with Microsoft Entra ID so that your users can automatically sign in to Profit.co using their Microsoft Entra ID accounts.
Step 1
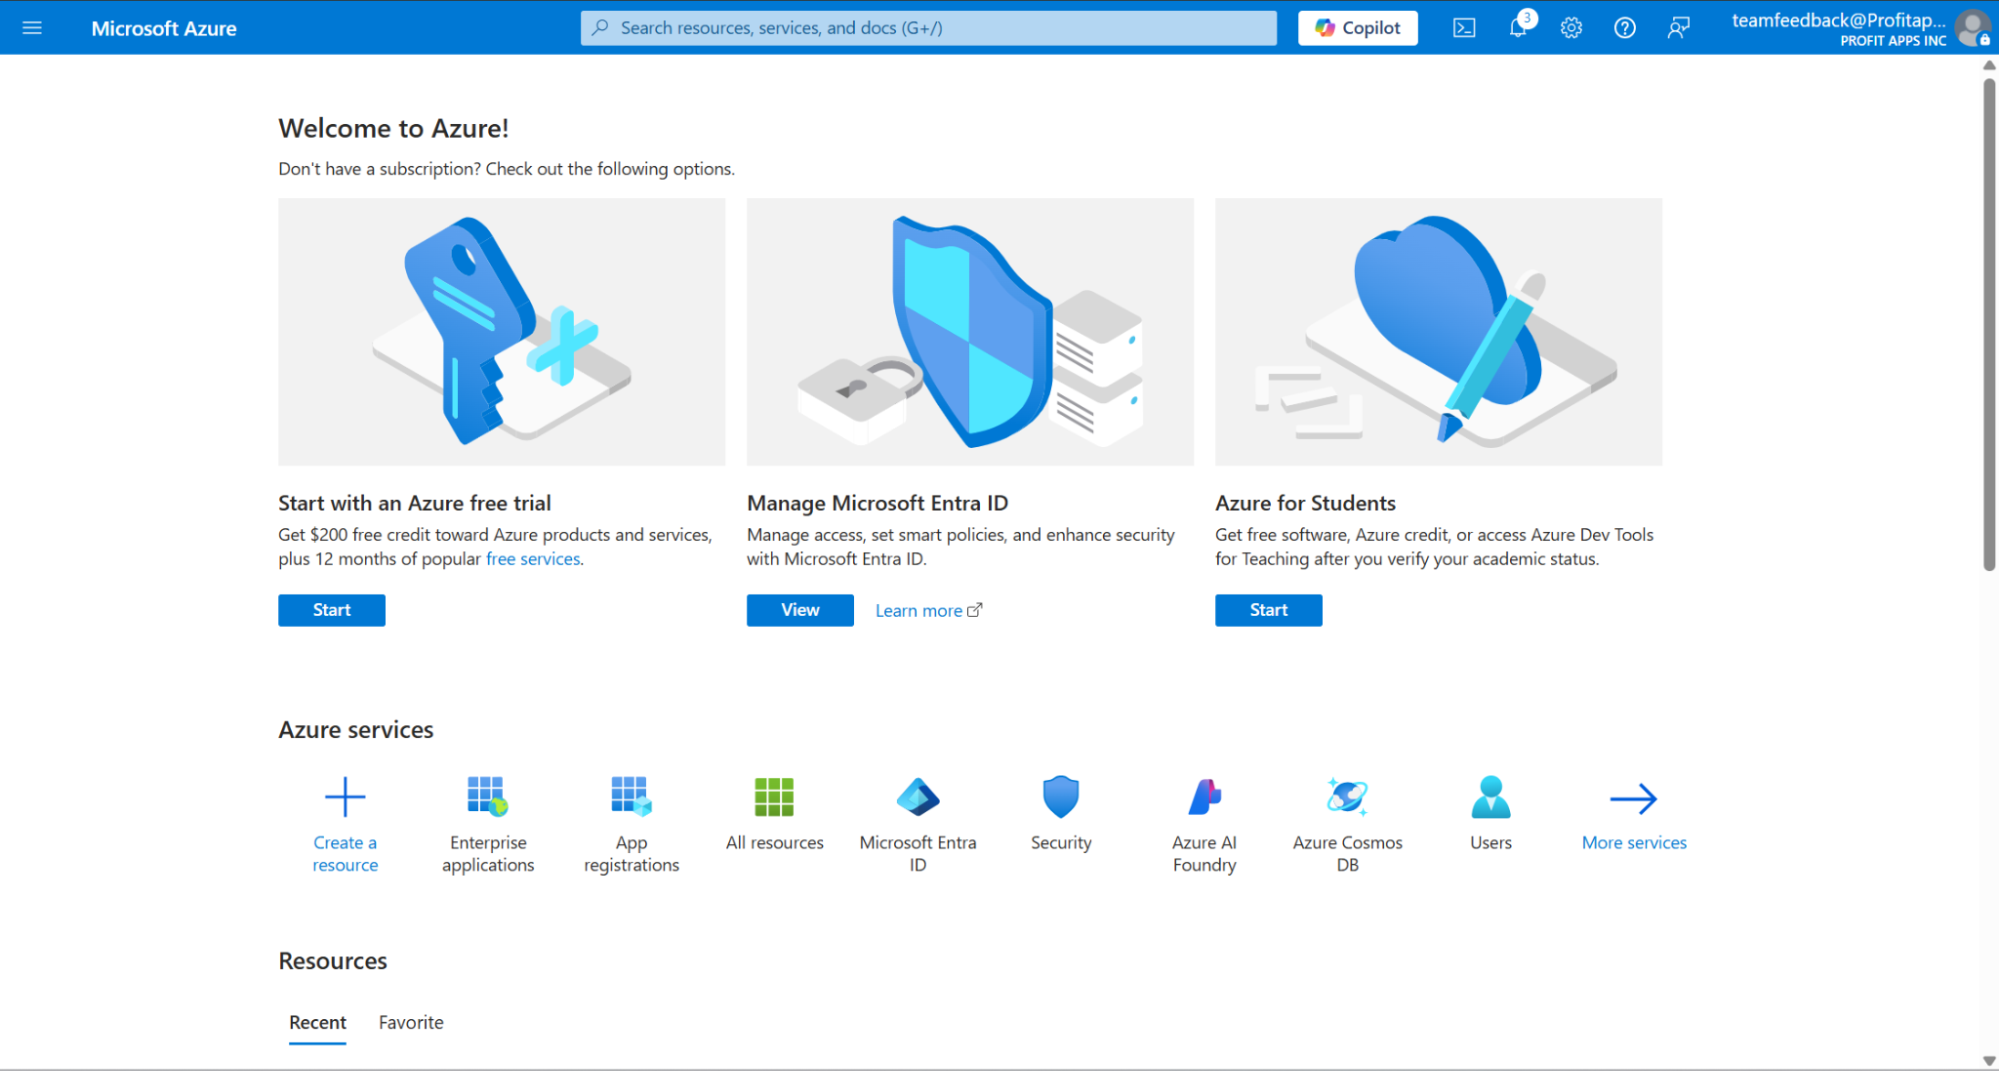
Log in to the Microsoft Entra ID portal and access the Microsoft Entra ID
Step 2
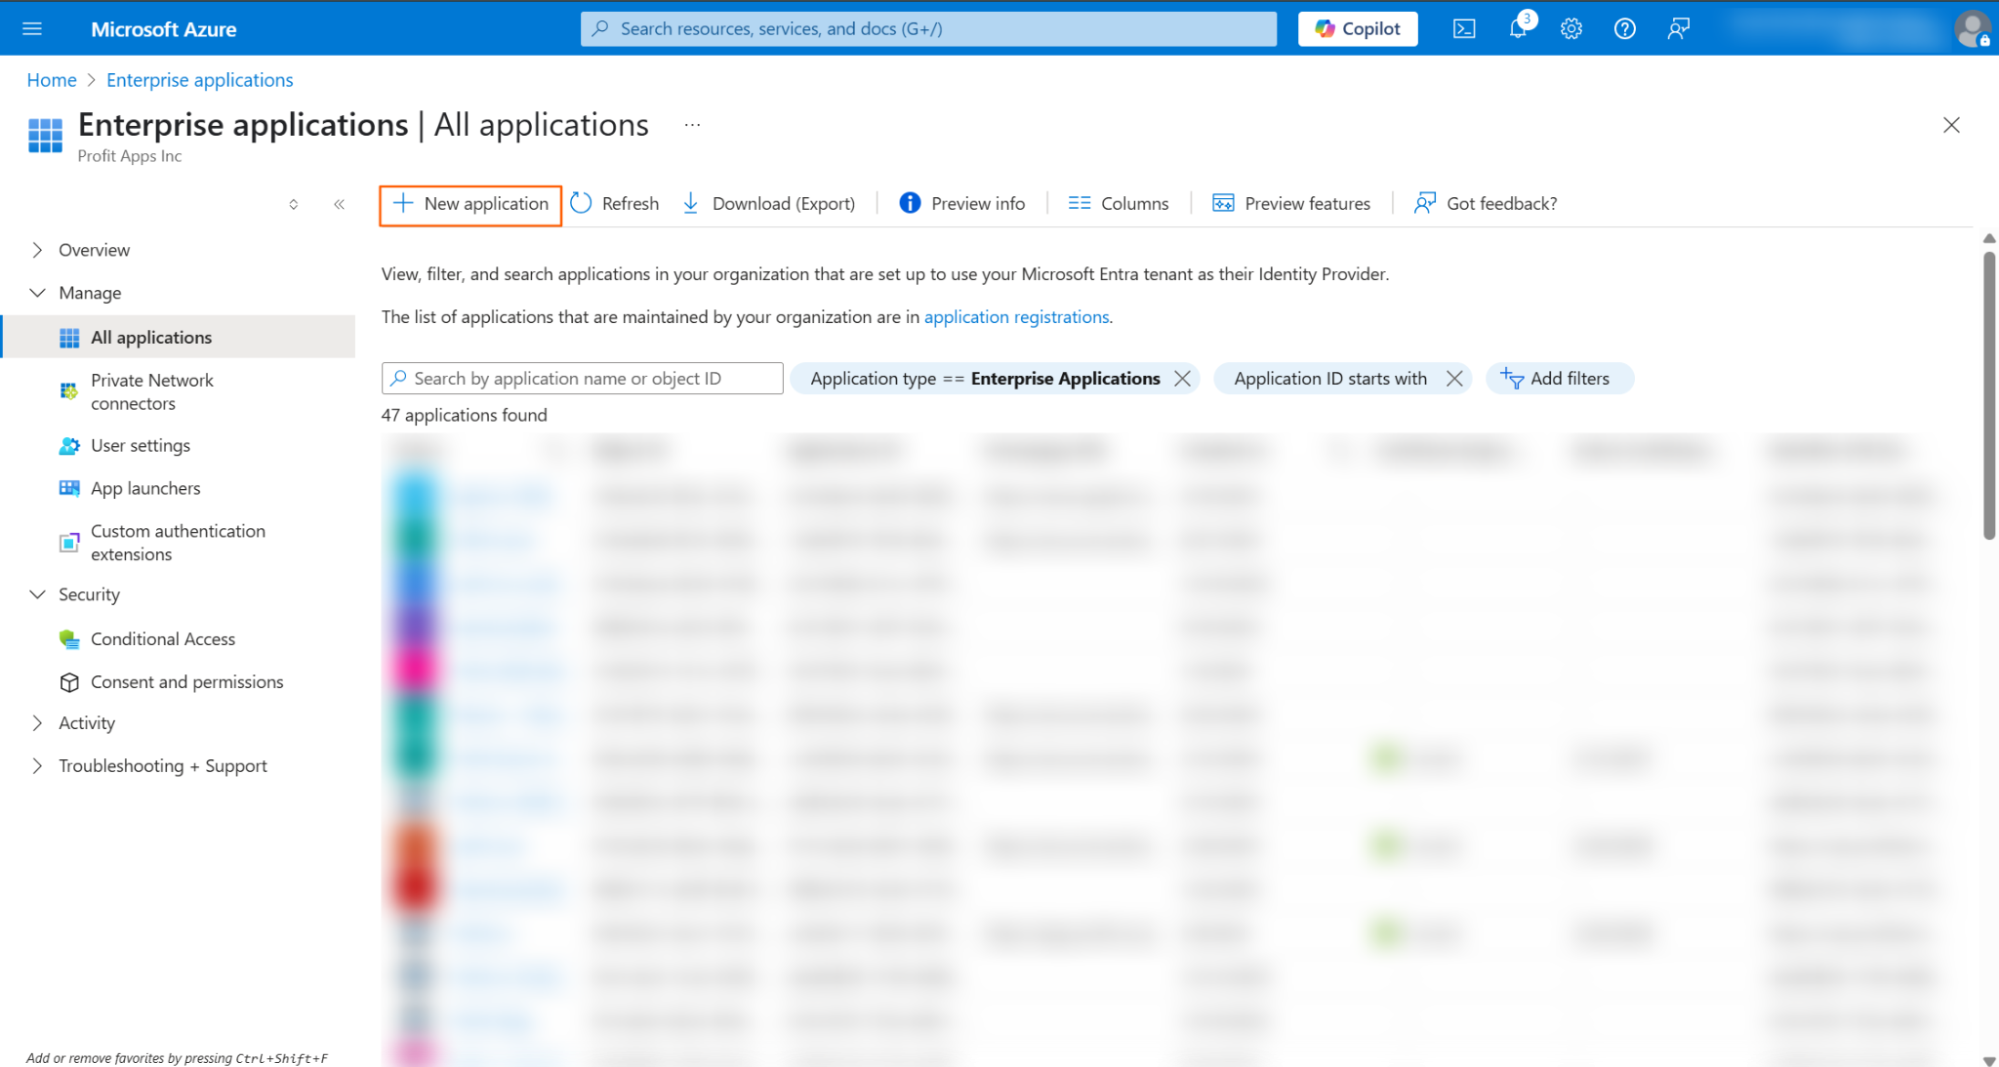
Click on Enterprise Applications from the Manage navigation.
Step 3
Search for Profit.co and click the application.
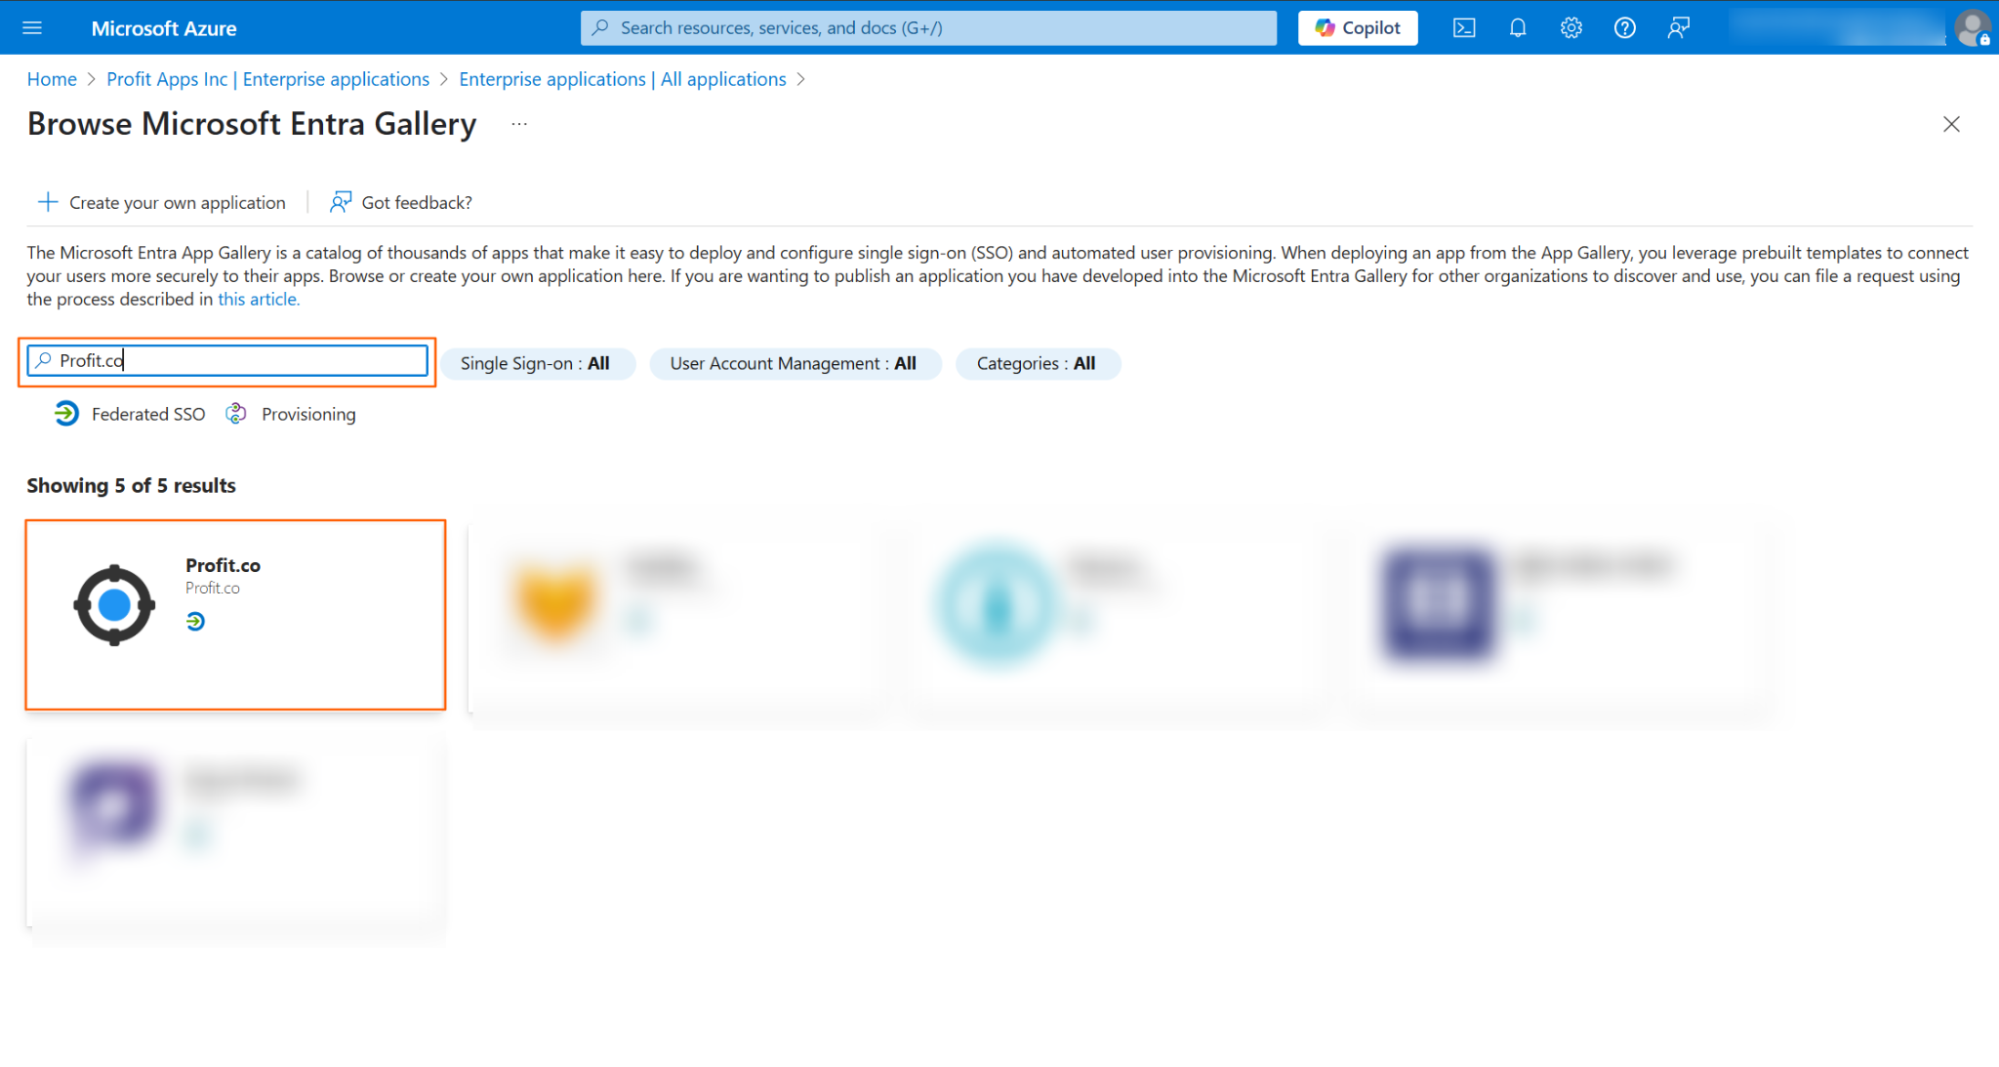
Note: If you don't find it there, kindly click on "New Application" and search to add it to your account.
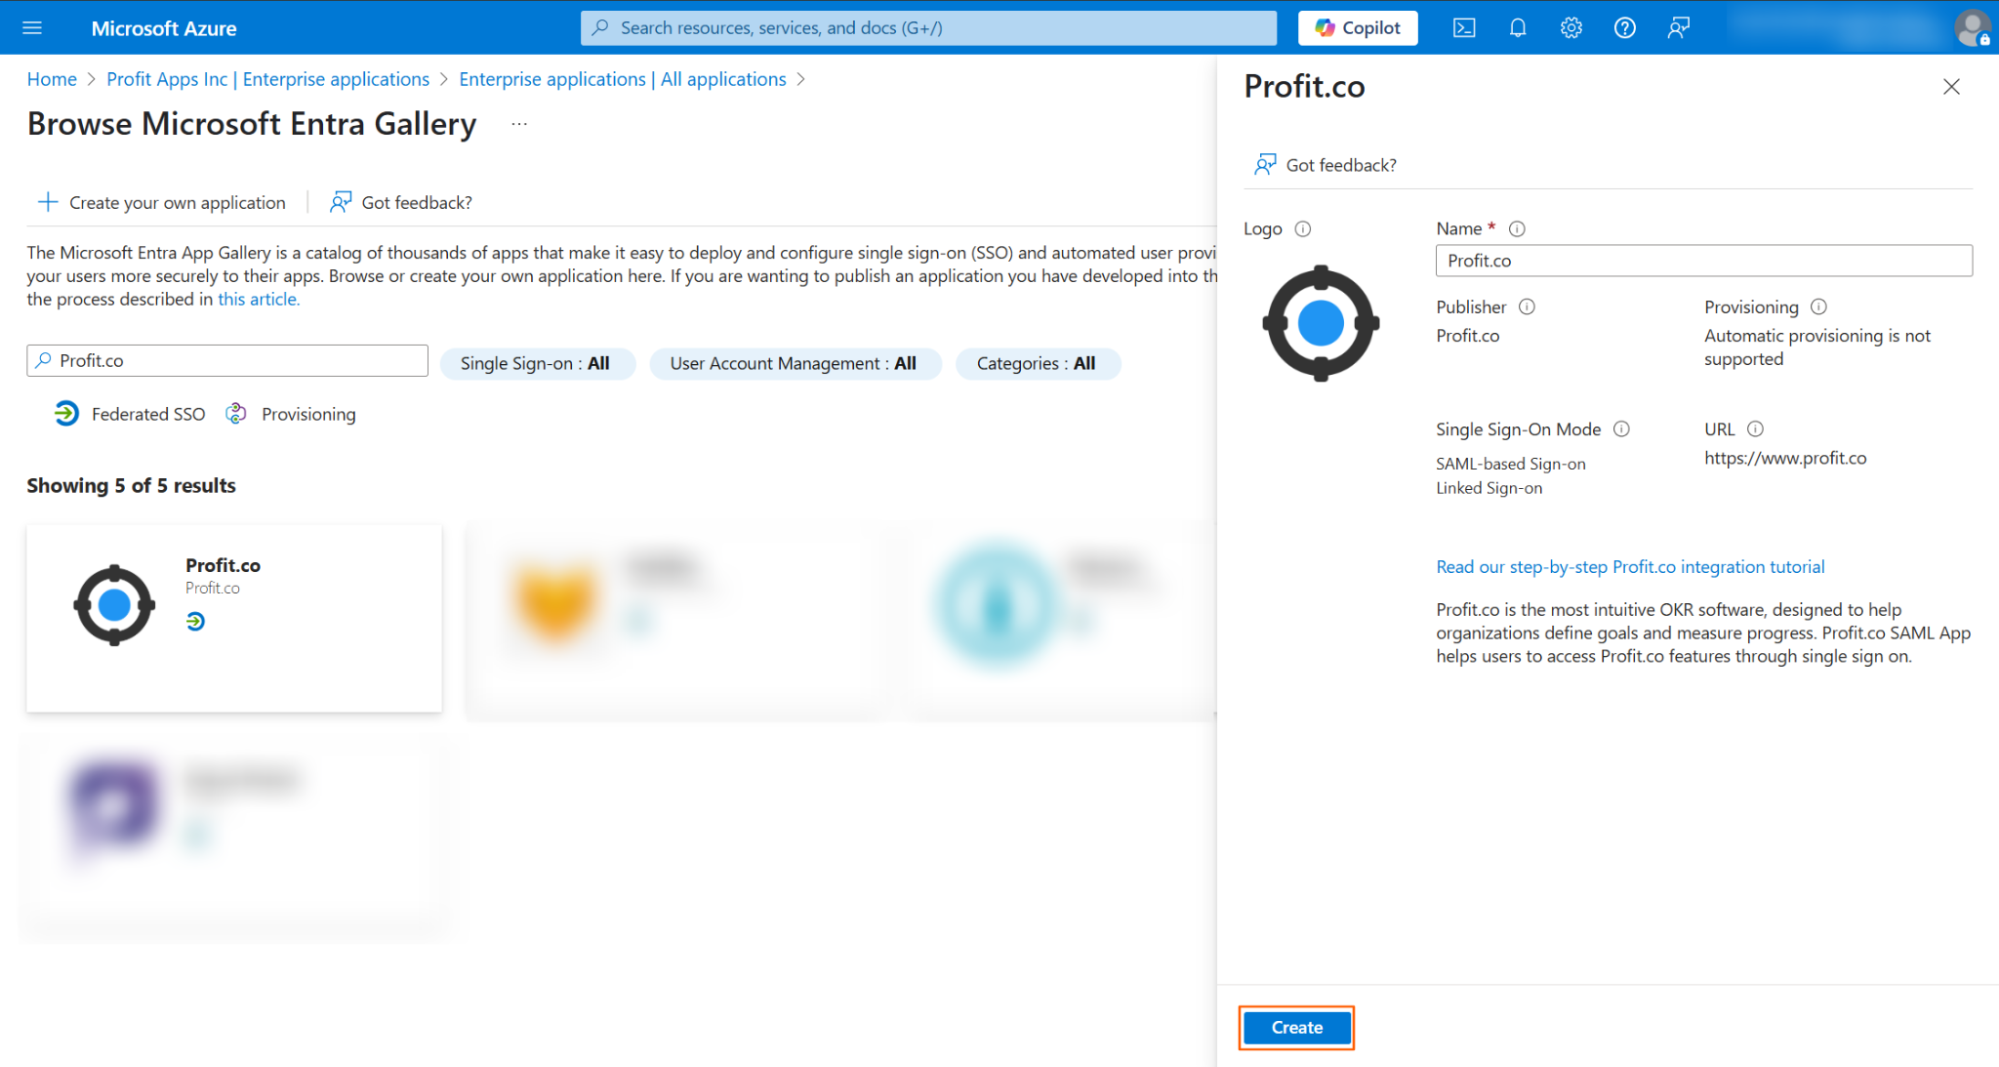
After selecting the application, click on Create
Step 4
Select Single Sign-on in the left menu and select 'SAML'
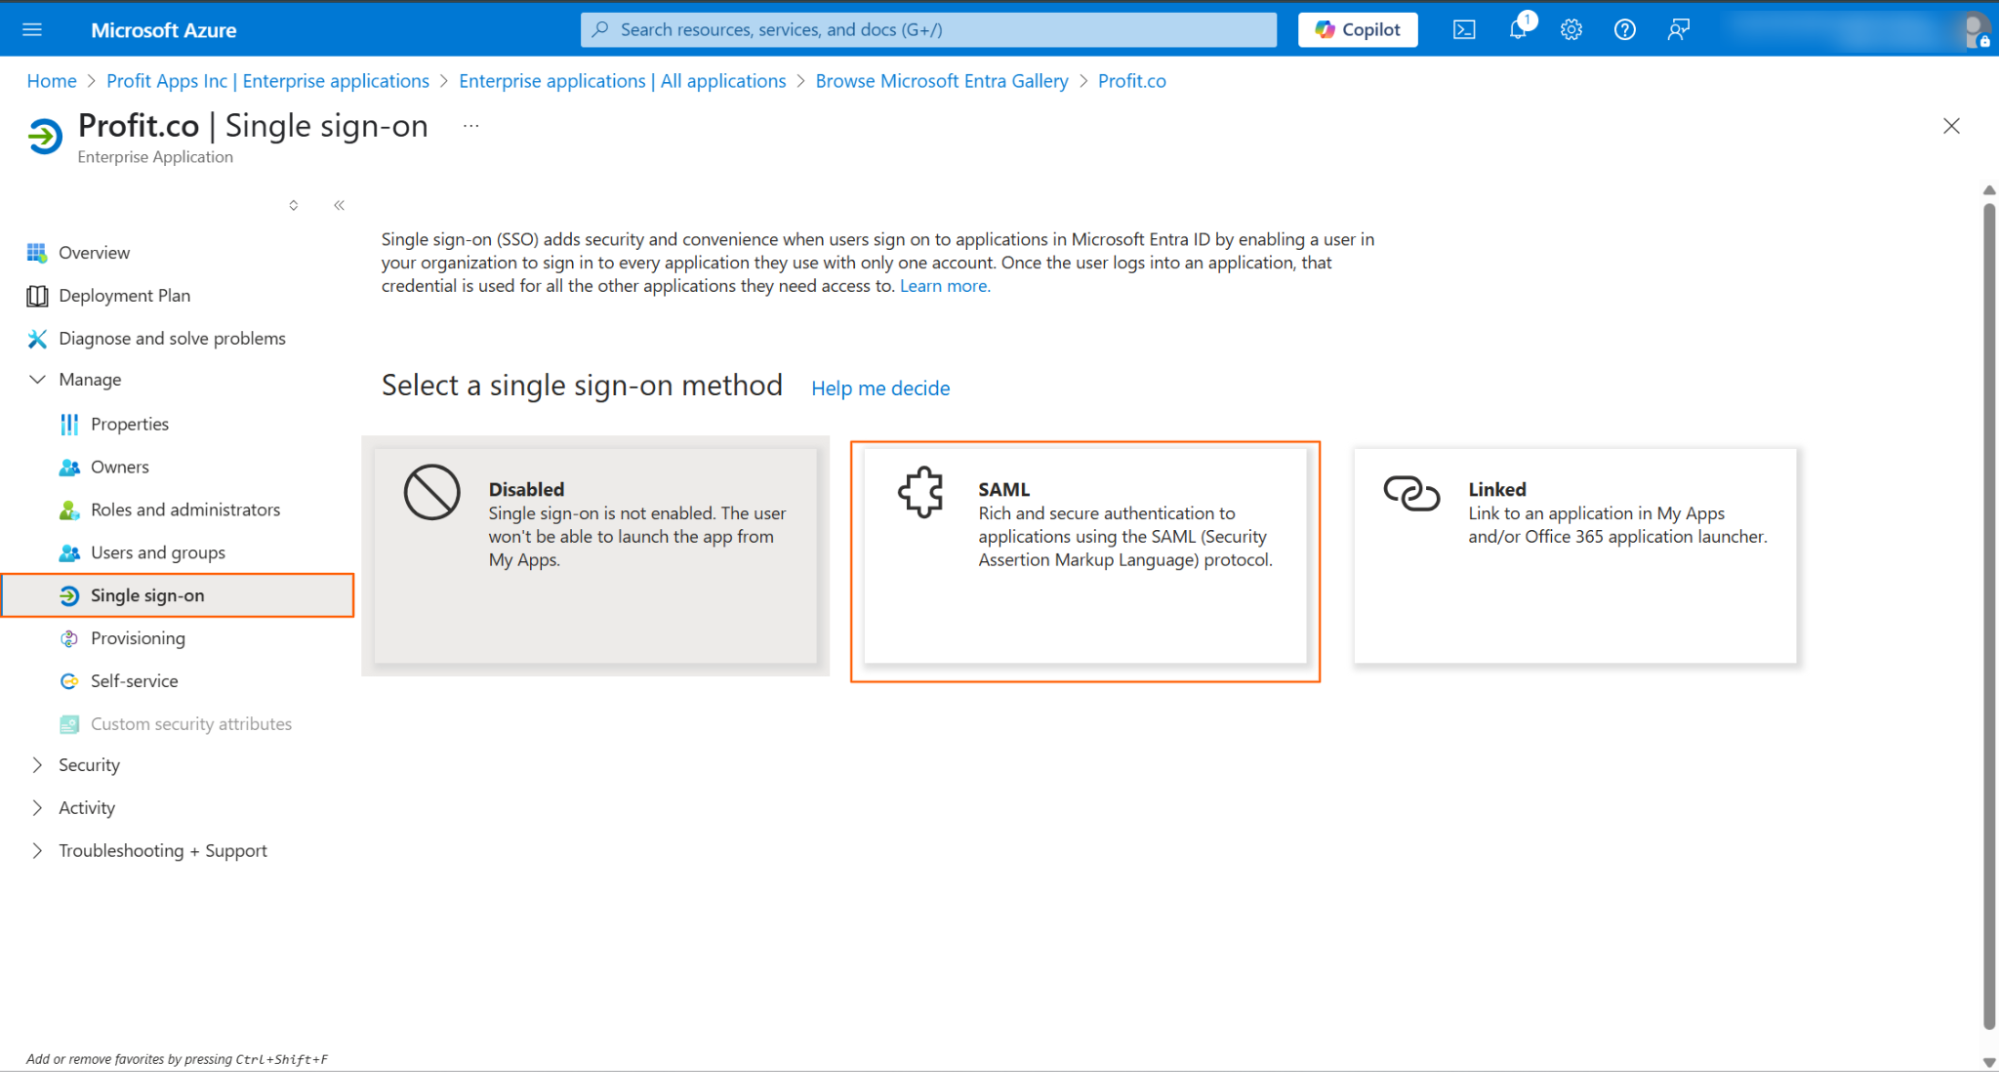
Click on the Edit button and click on Save.
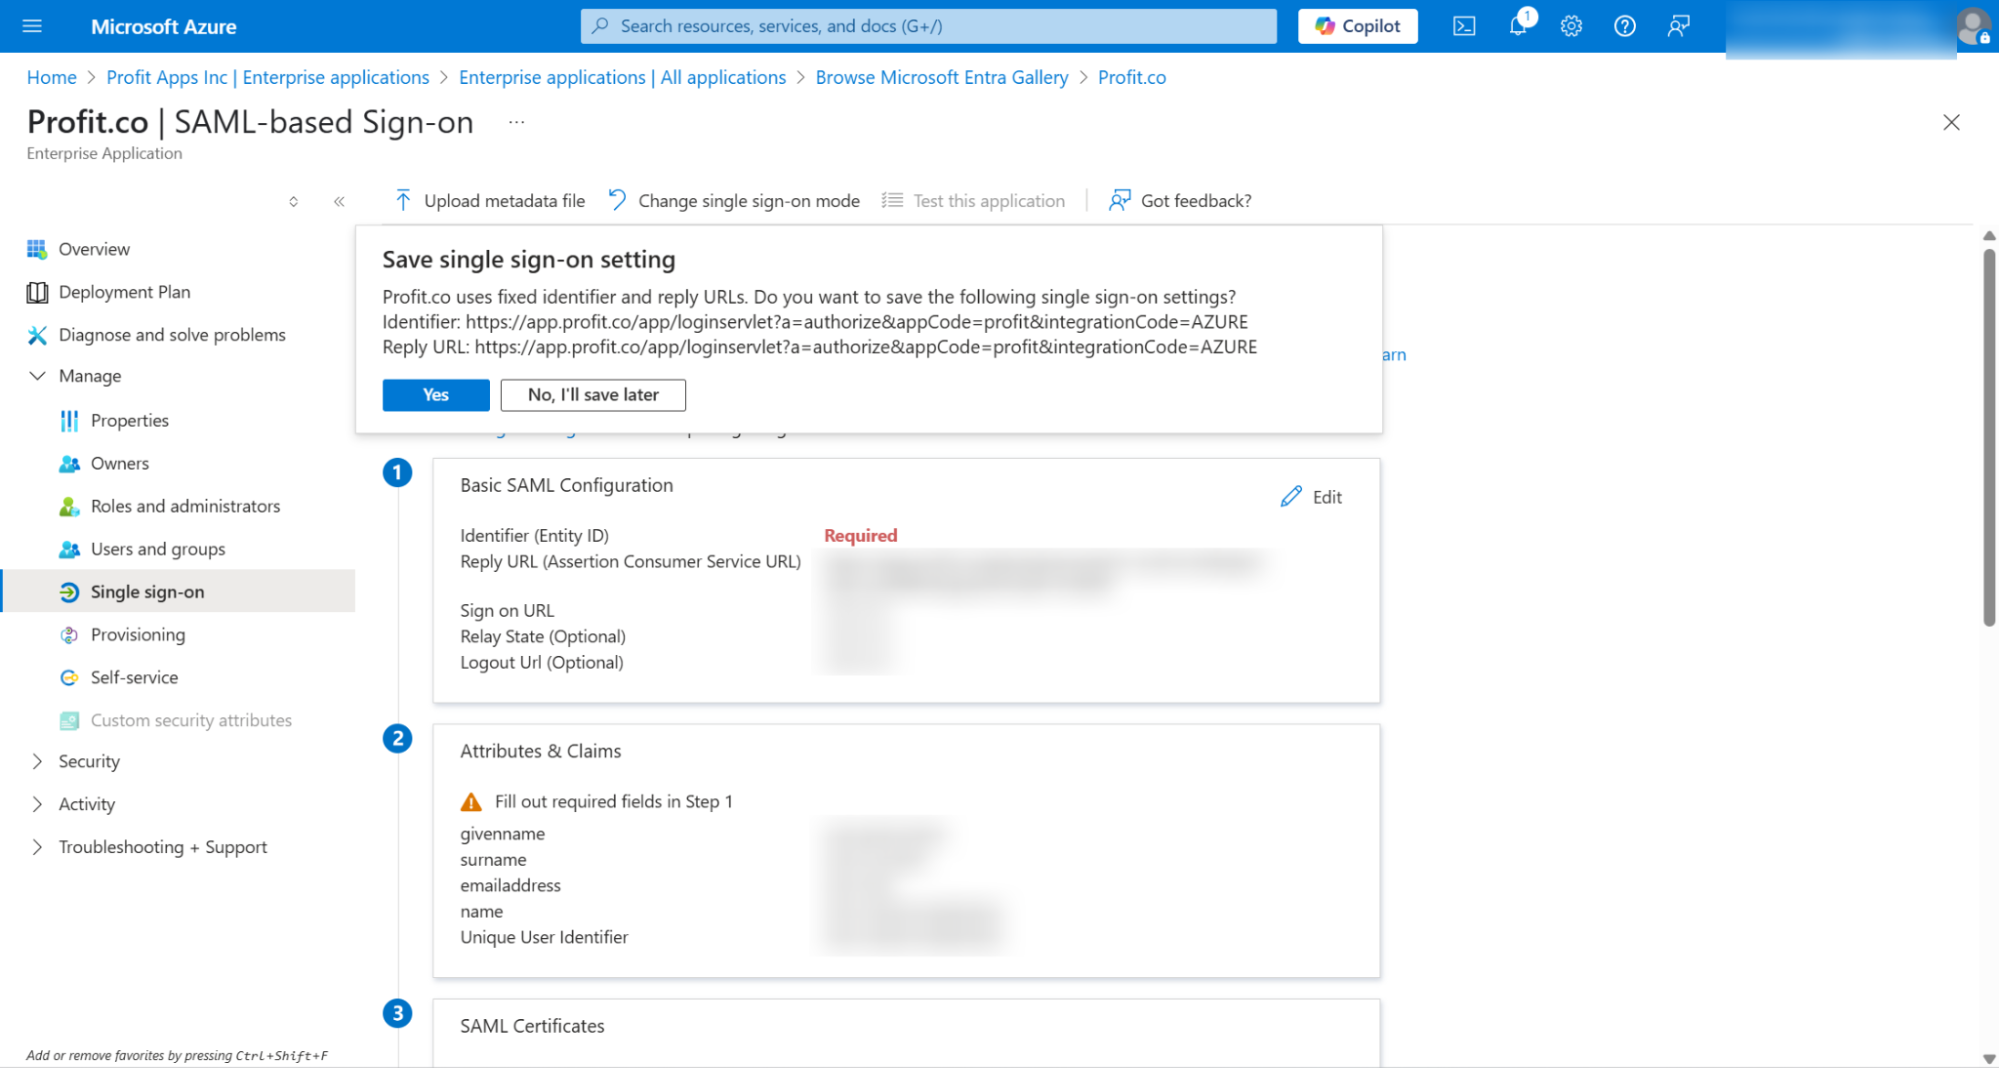
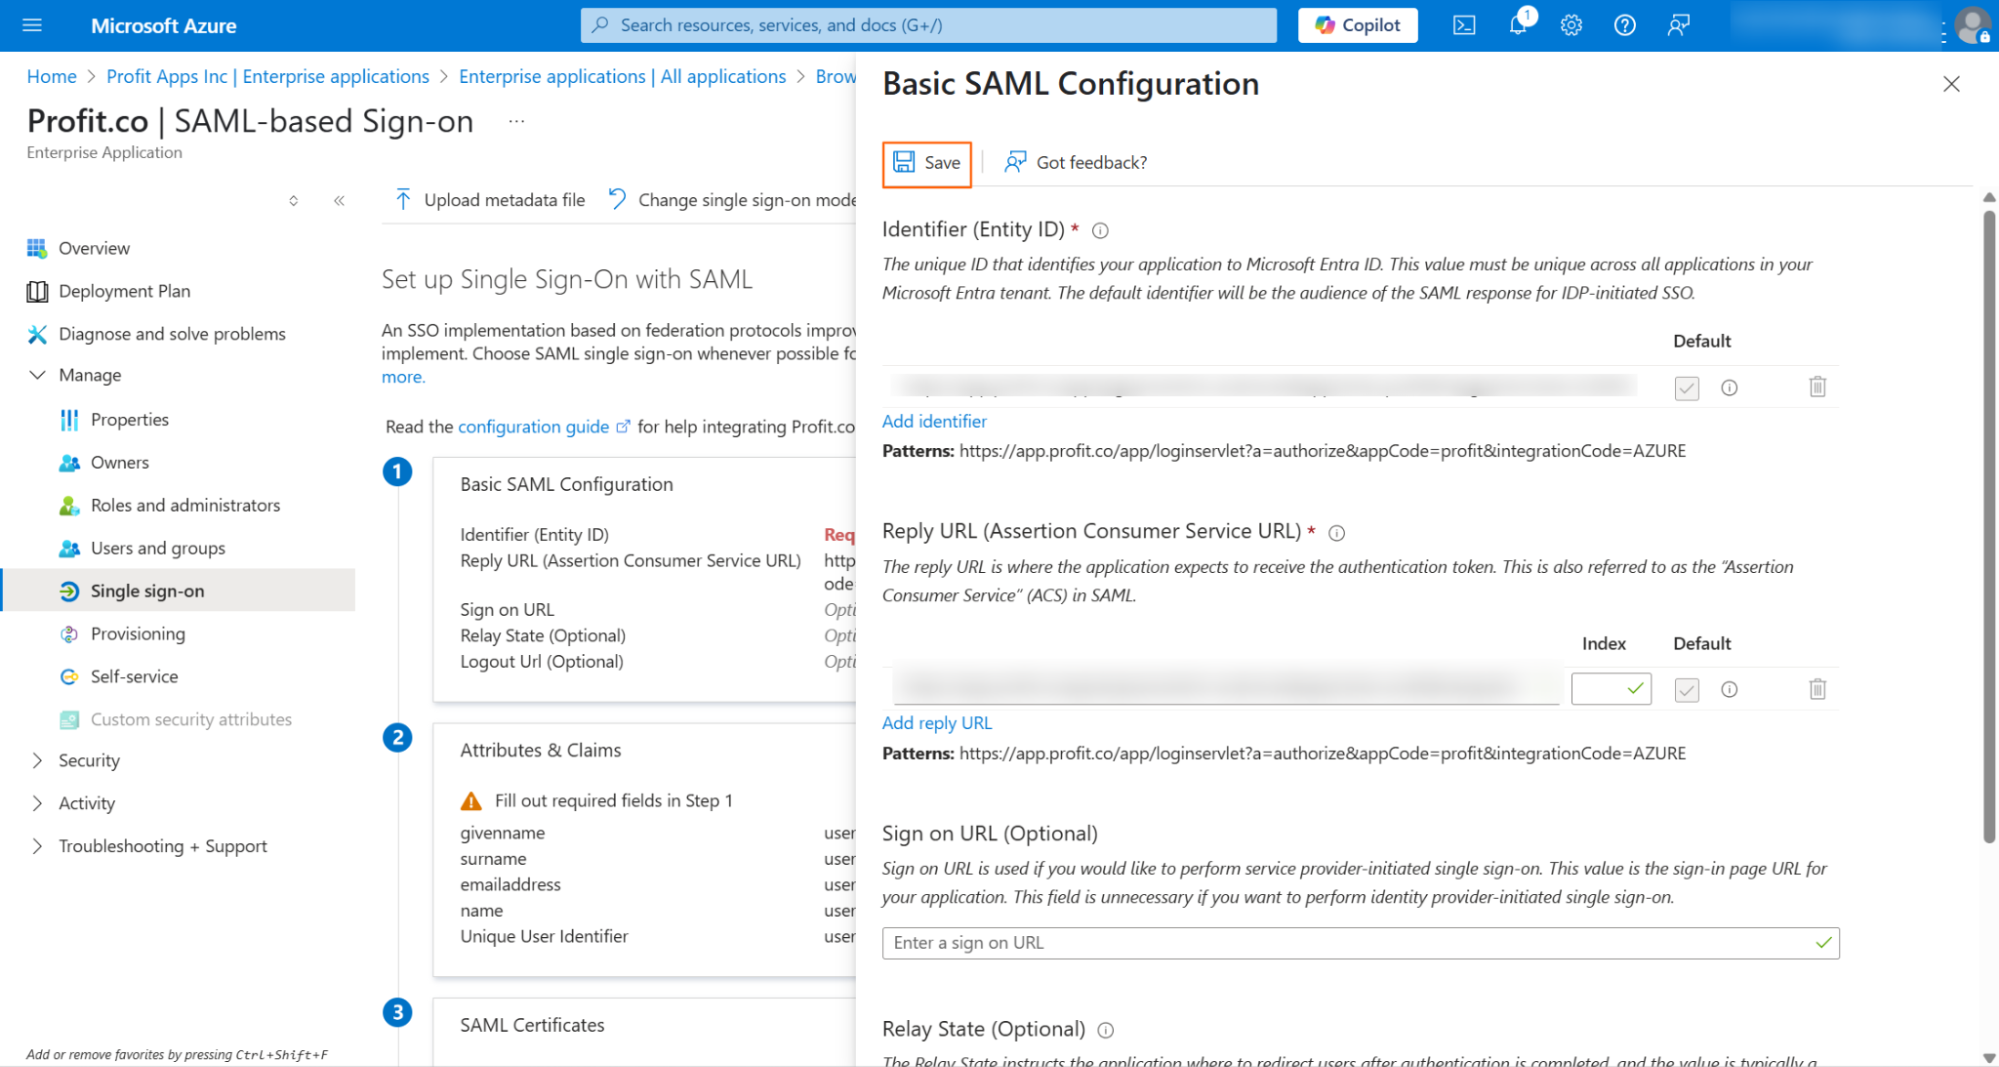
Click on Add identifier and provide ( If you want to change the region based on your choice) US Region -
https://app.profit.co/app/loginservlet?a=authorize&appCode=profit&integrationCode=AZURE(OR) EU Region -
https://eu2-app.profit.co/app/loginservlet?a=authorize&appCode=profit&integrationCode=AZUREClick on Add reply URL and provide : US Region -
https://app.profit.co/app/loginservlet?a=authorize&appCode=profit&integrationCode=AZURE(OR) EU Region -
https://eu2-app.profit.co/app/loginservlet?a=authorize&appCode=profit&integrationCode=AZURE(OR) ME Region
https://me1-app.profit.co/app/loginservlet?a=authorize&appCode=profit&integrationCode=AZUREStep 5
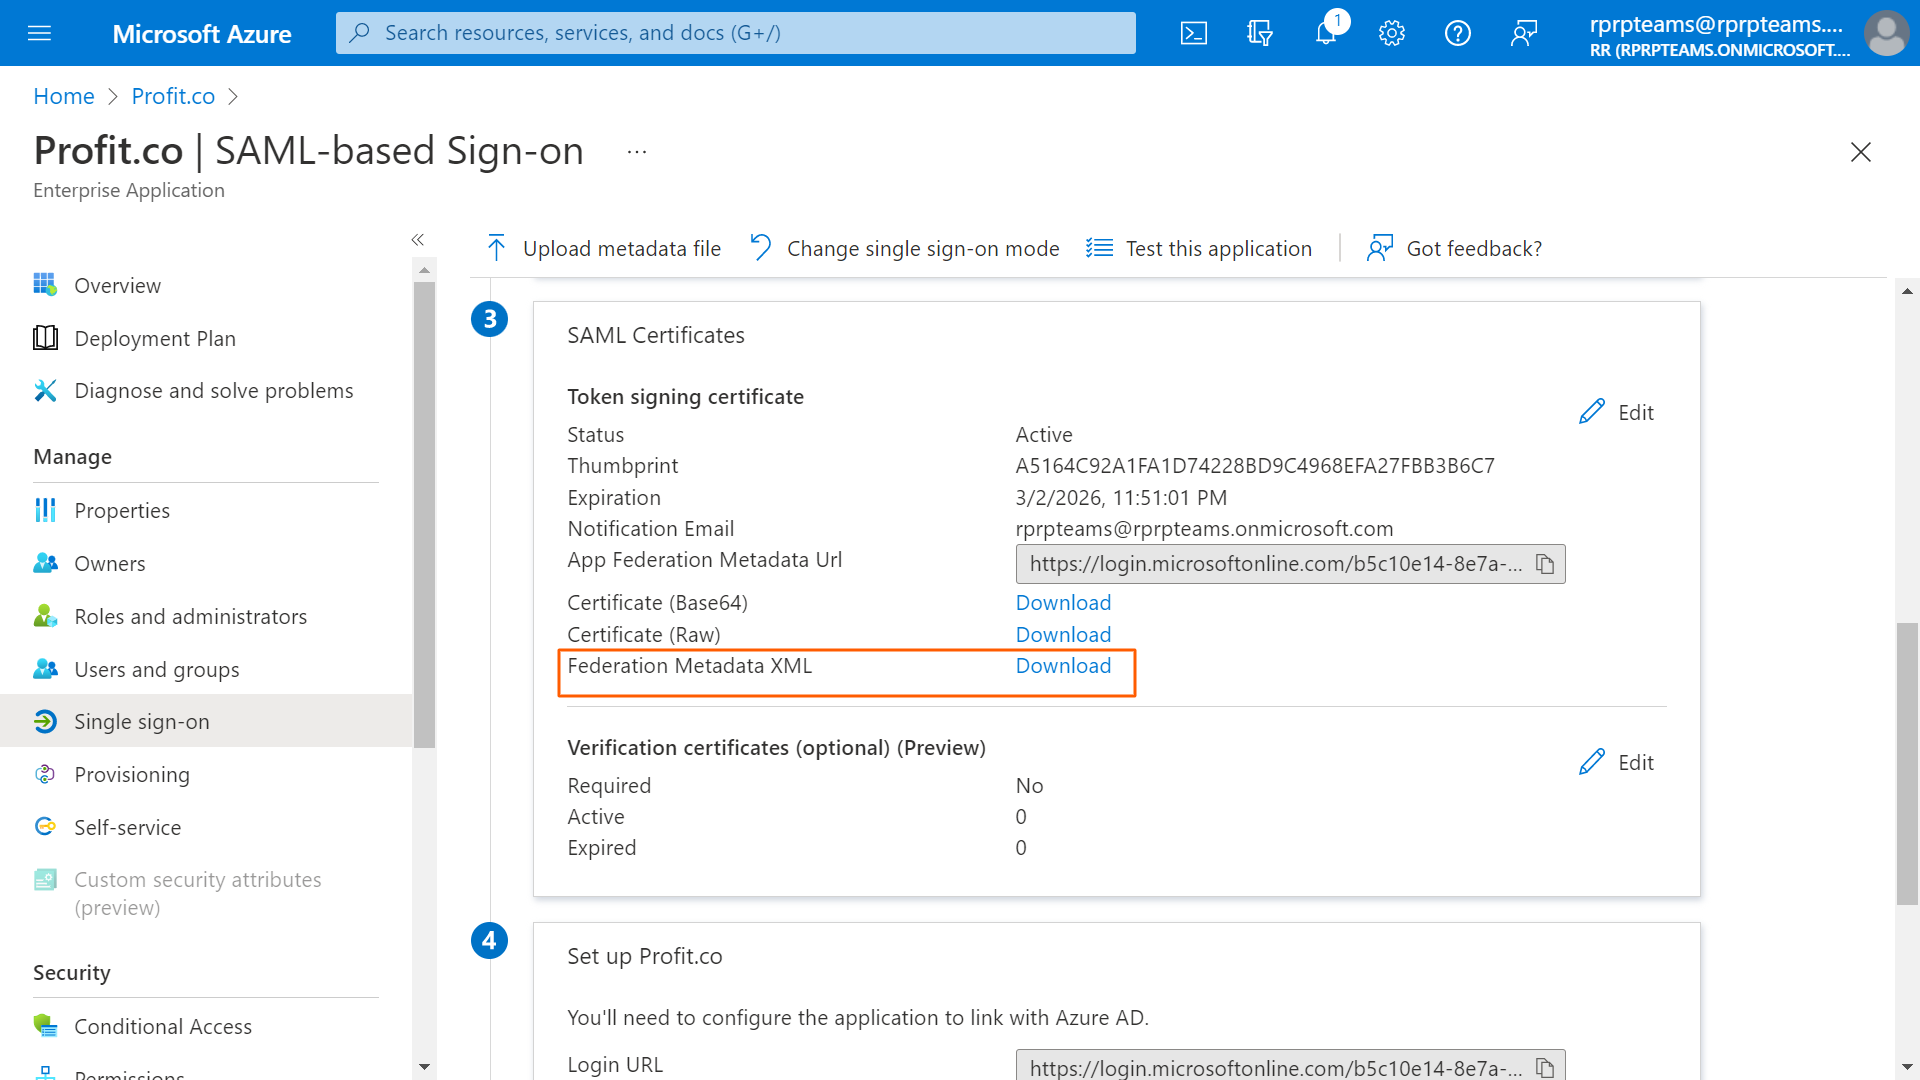
After saving, scroll down a bit and download the Federation Metadata XML in the SAML certificates.
Step 6
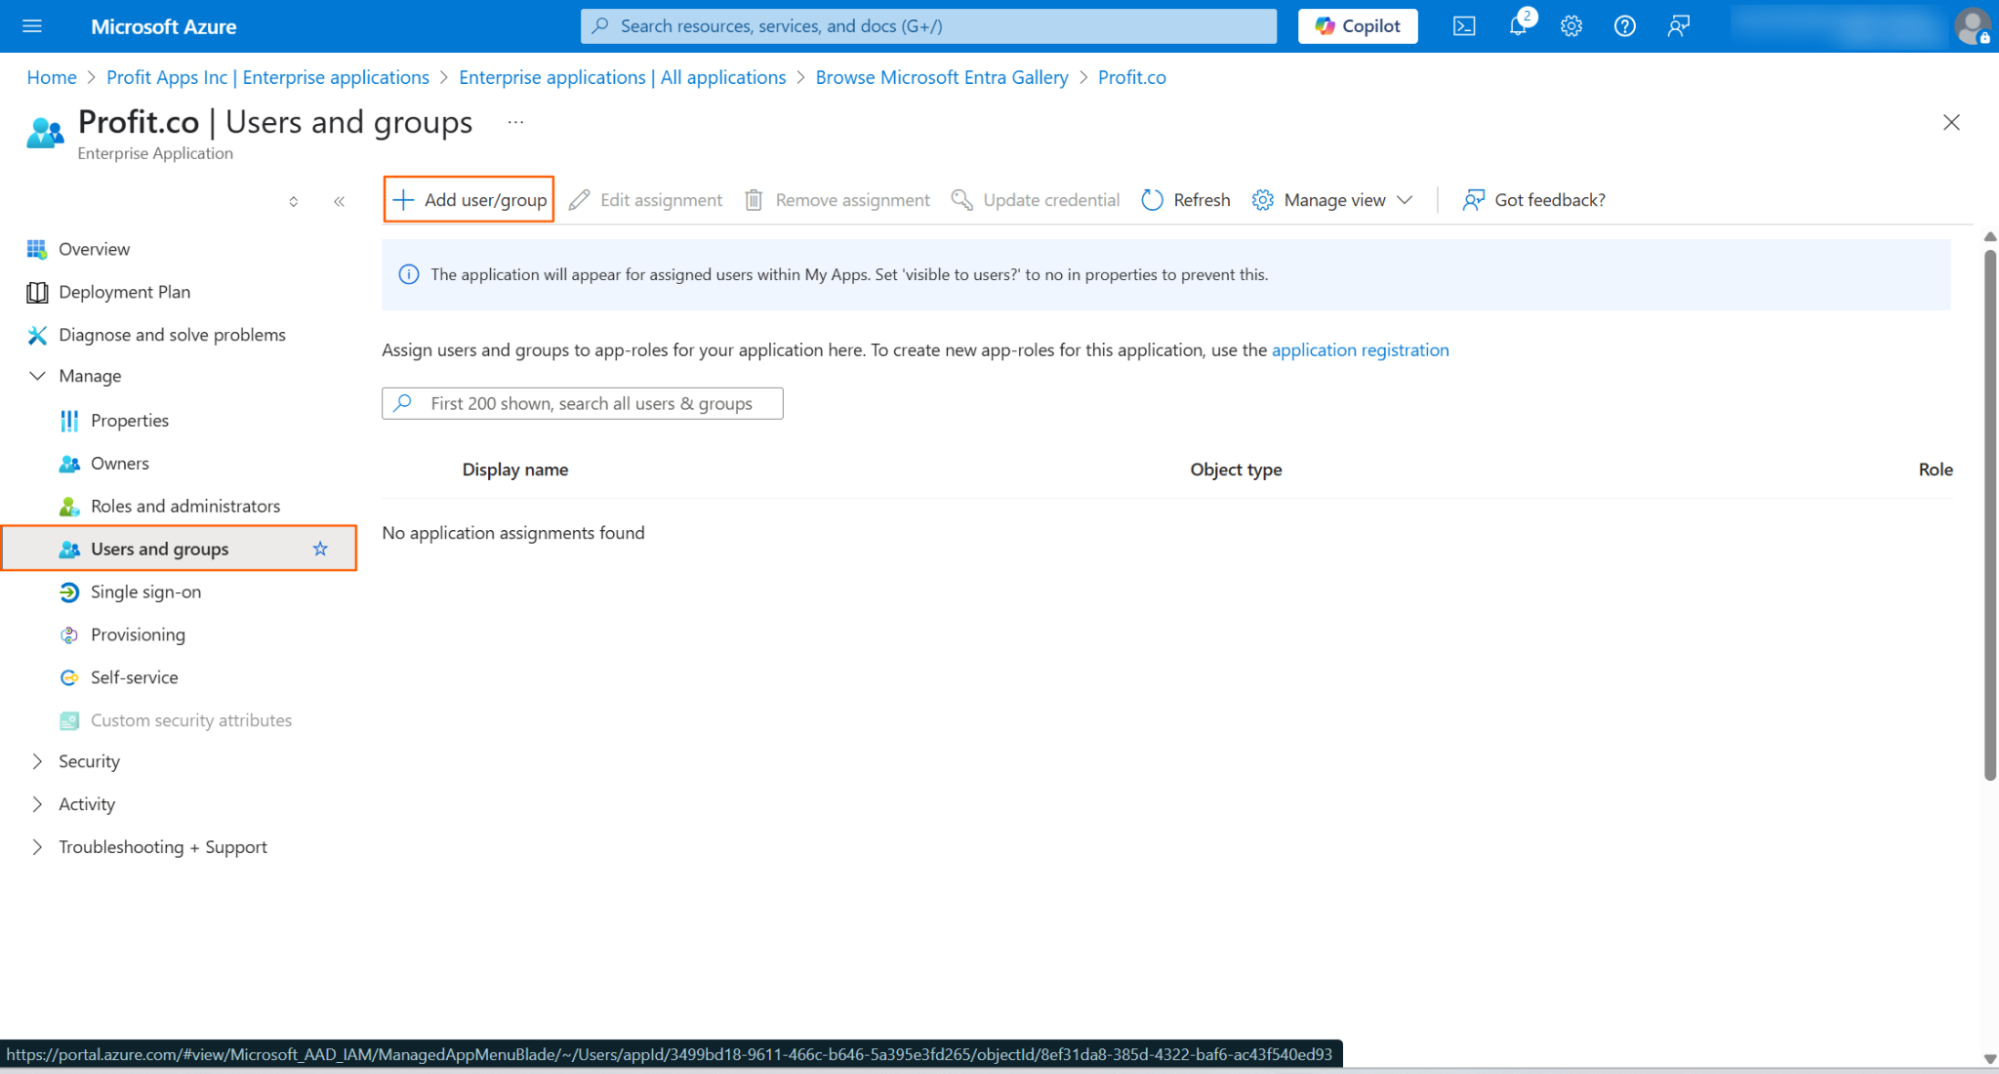
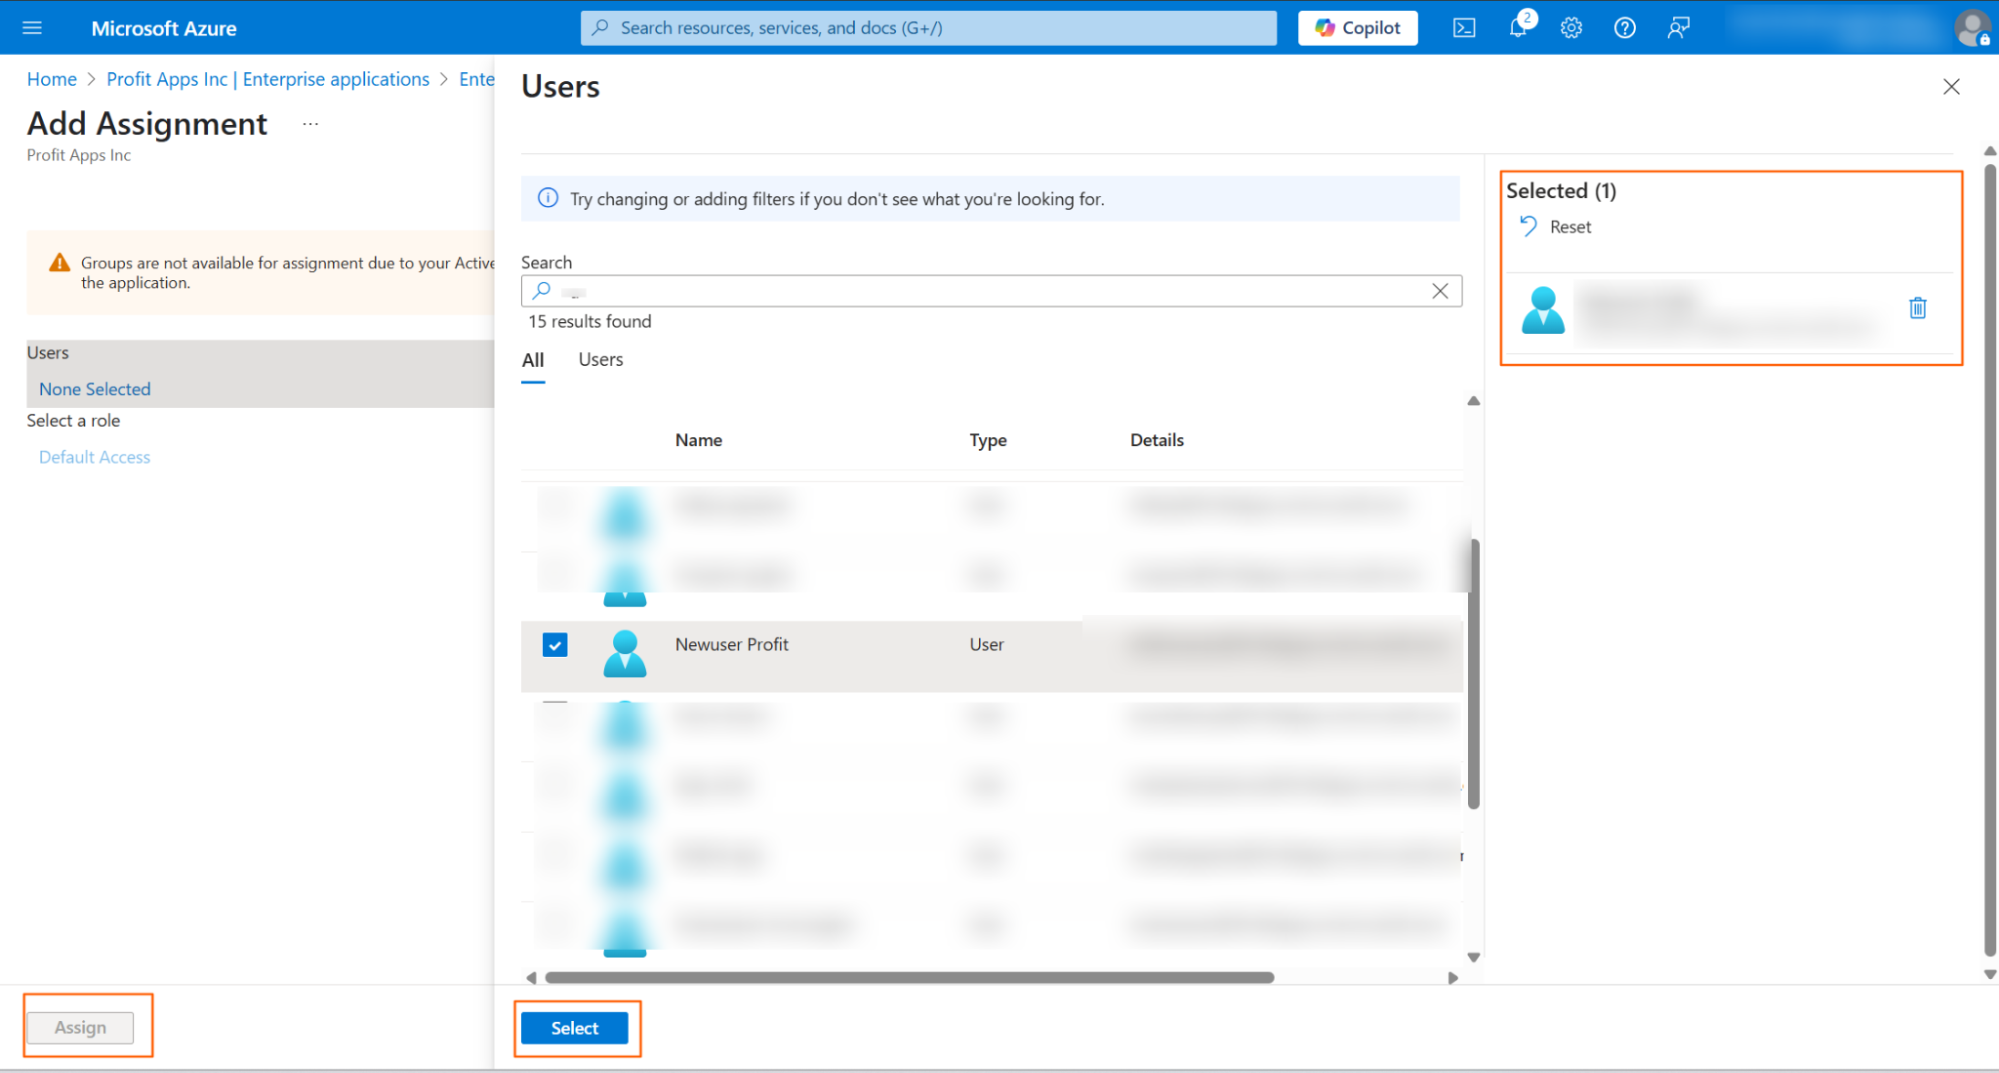
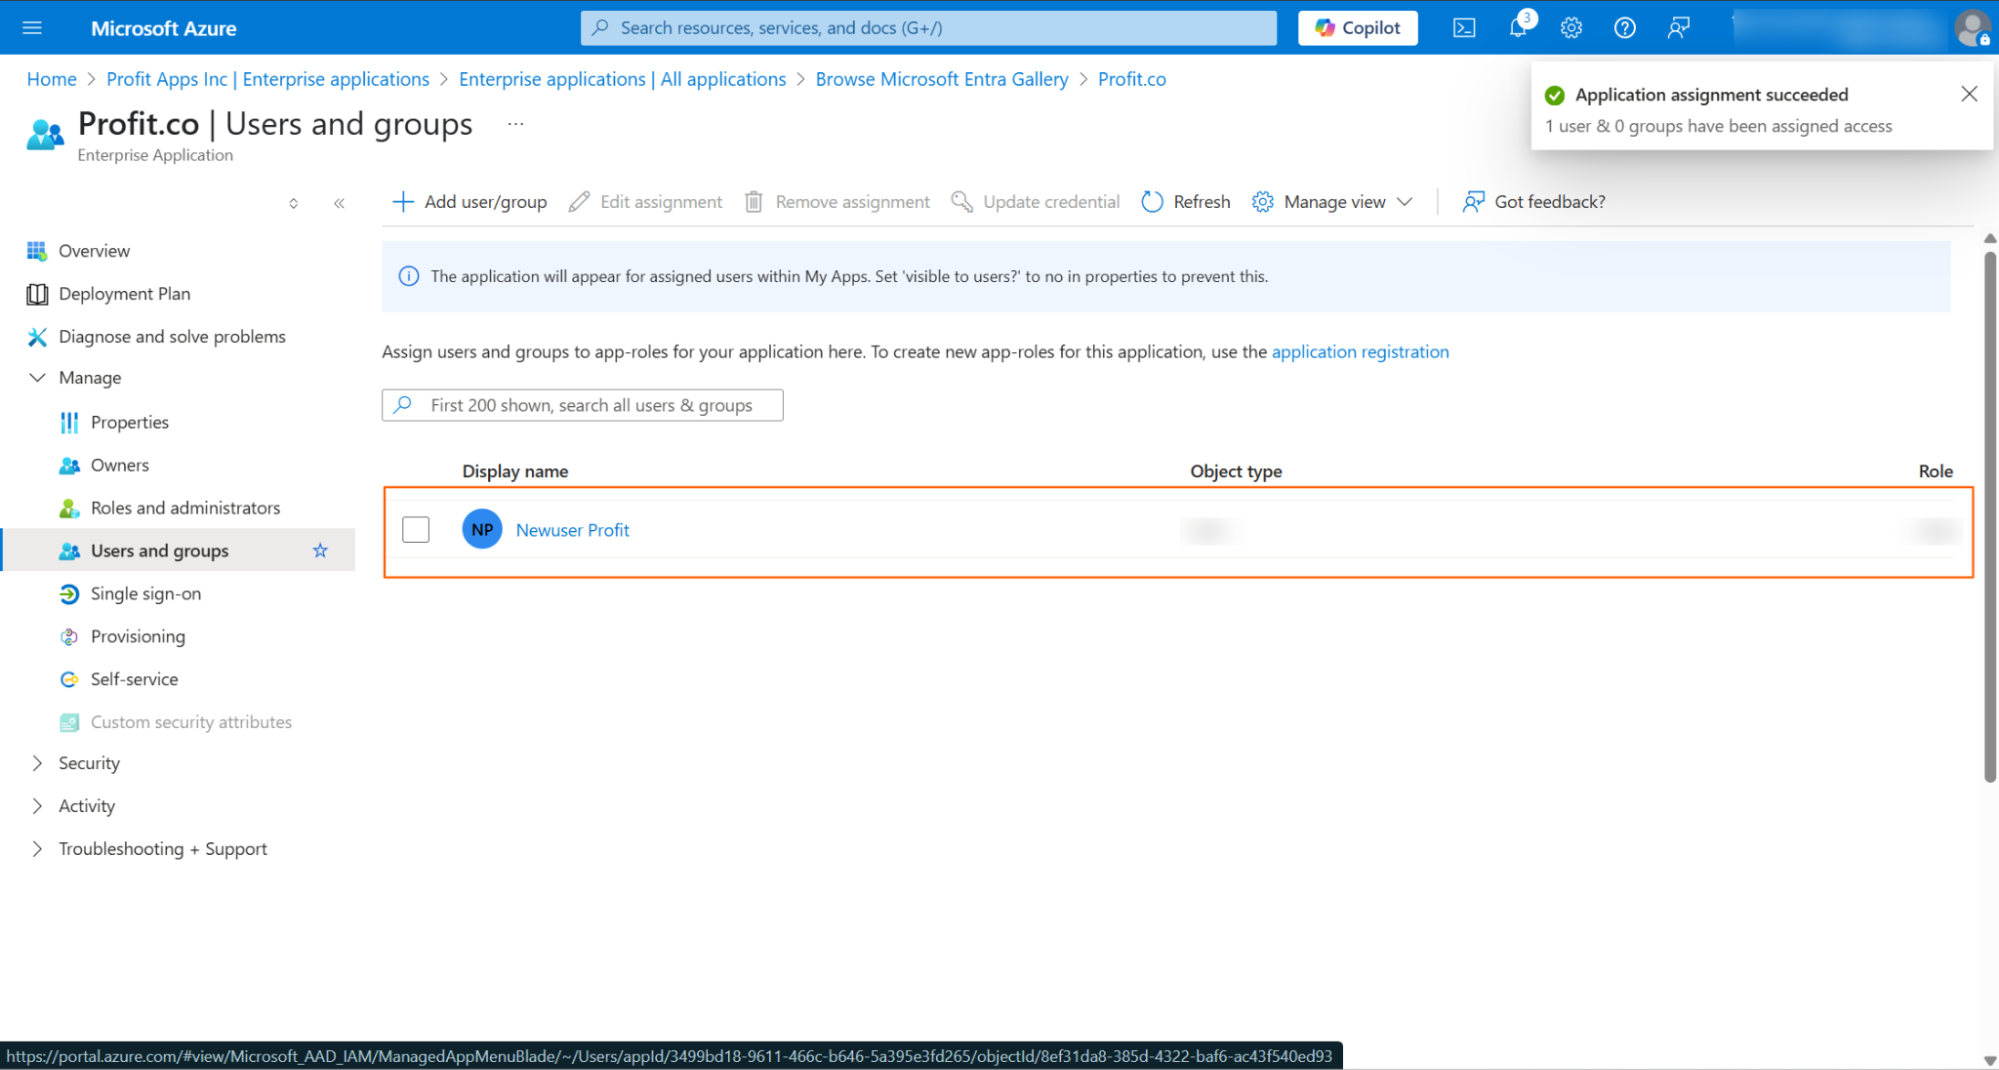
Now select Users and groups in the left menu, and click "Add user" to assign the app to the users.
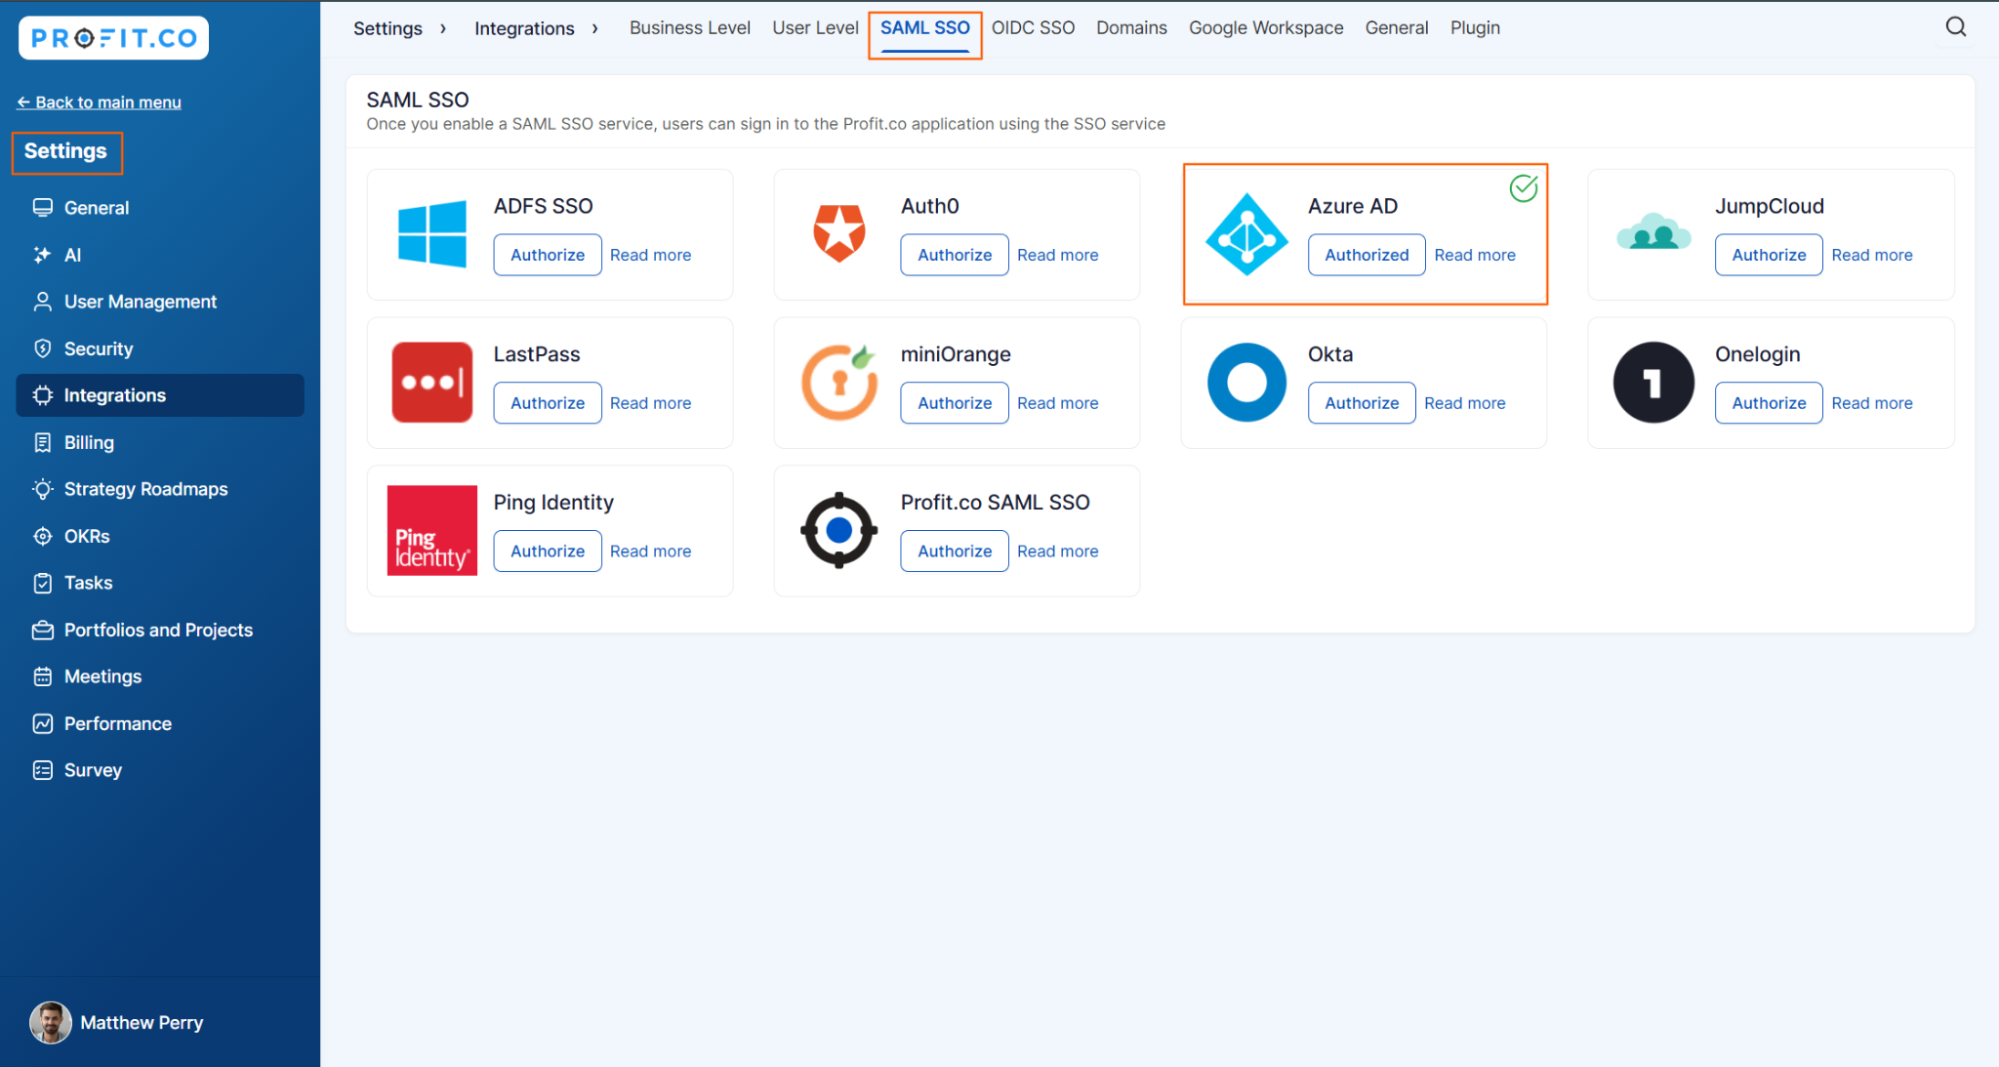
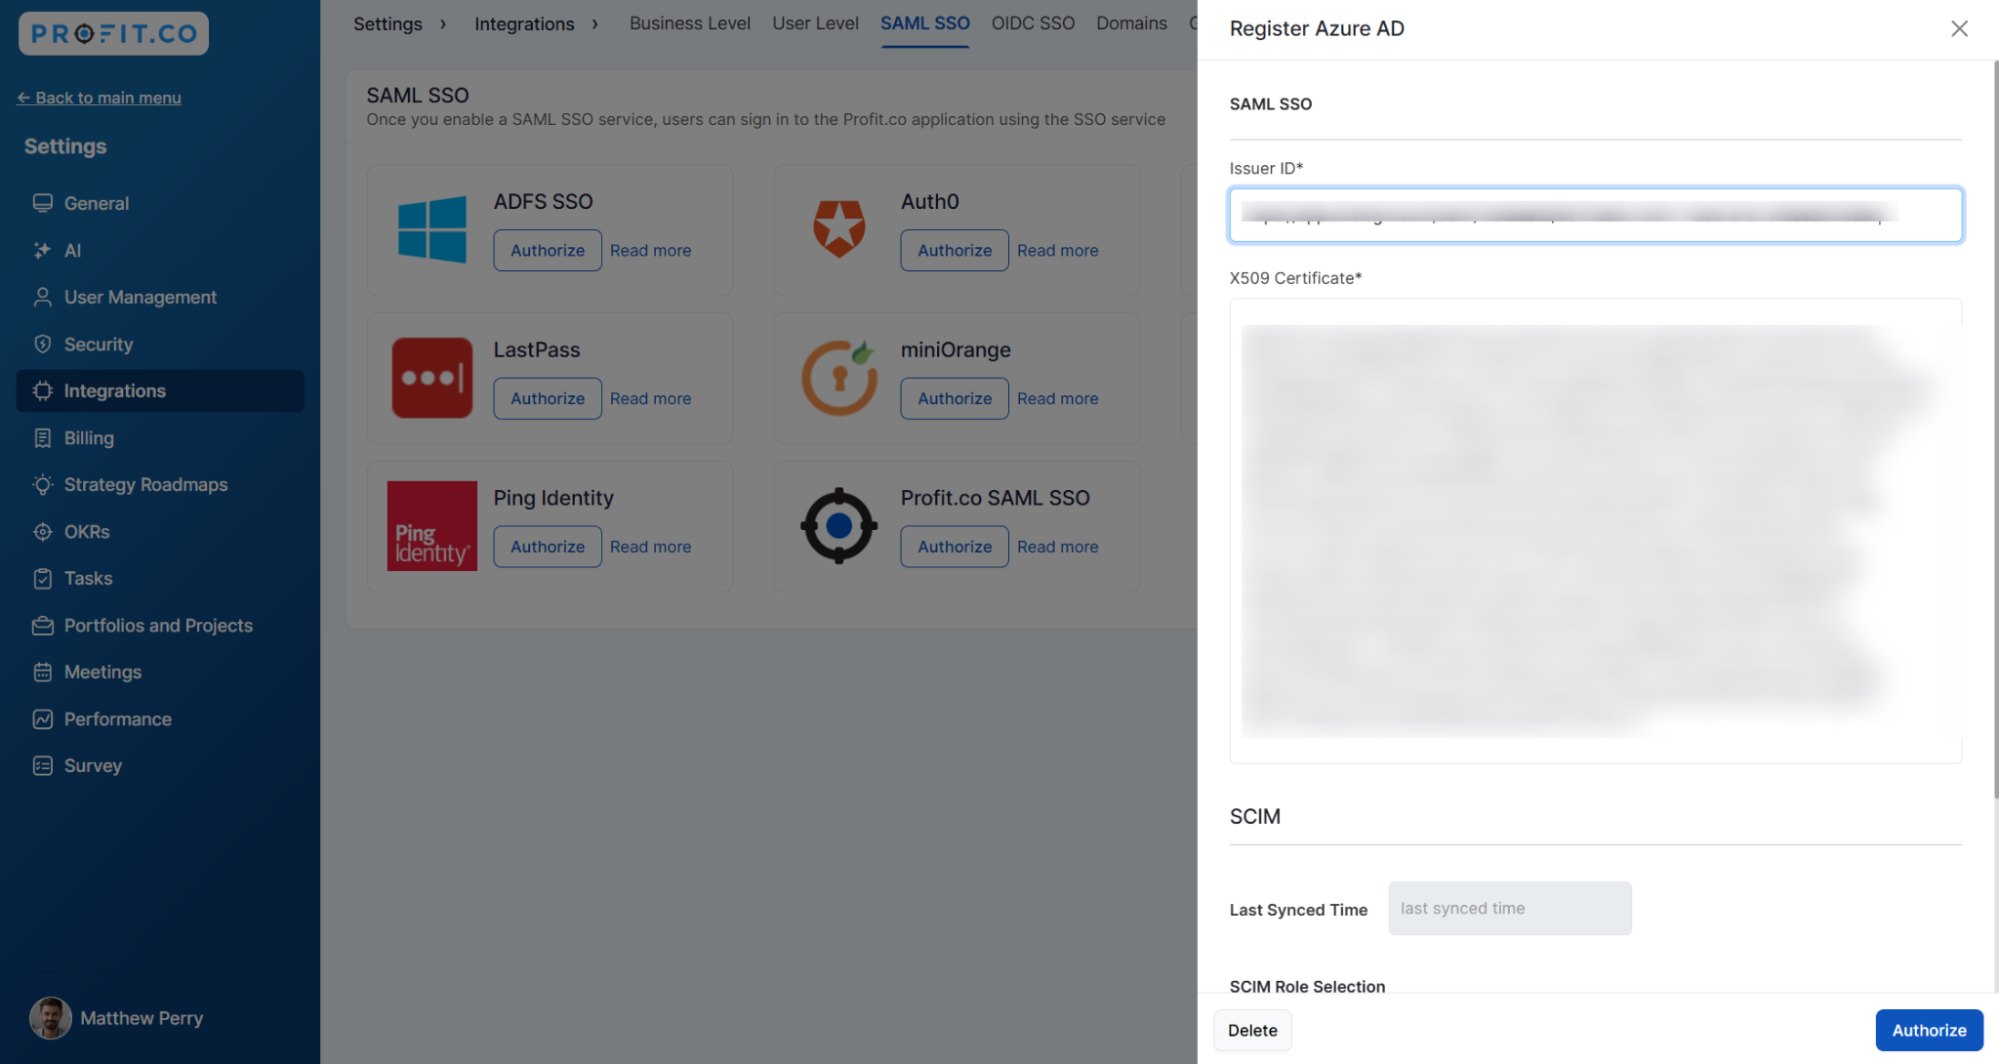
Navigate to Settings from the left navigation panel. Click on Integrations. Switch to the SAML SSO tab, and click on the Microsoft Entra ID Authorize button.
Click on Authorize Microsoft Entra ID and paste the Issuer ID and X509 certificate, then click the Authorize button.
Step 7
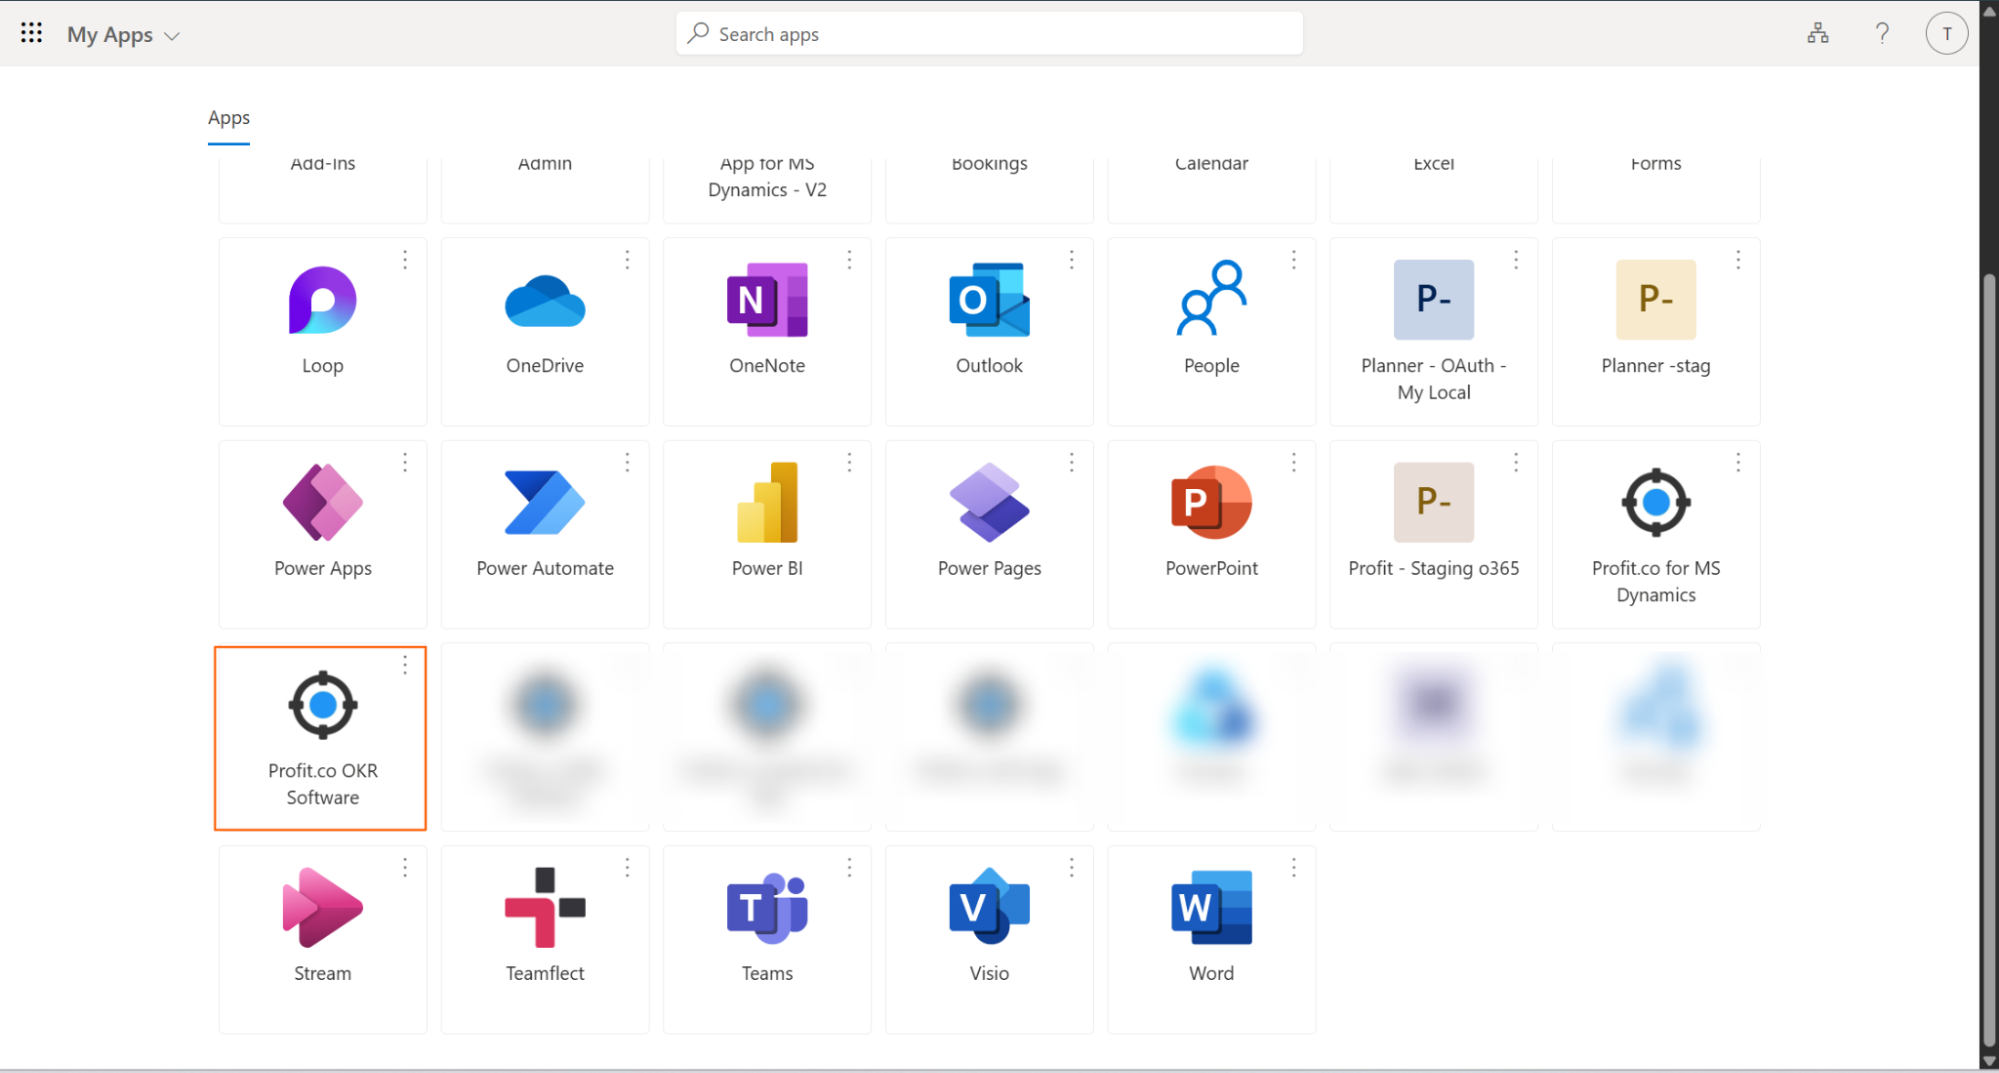
Once the app is assigned, the users can find Profit.co under My Apps. Clicking on the app would take them to their Profit.co account.
Consent Step
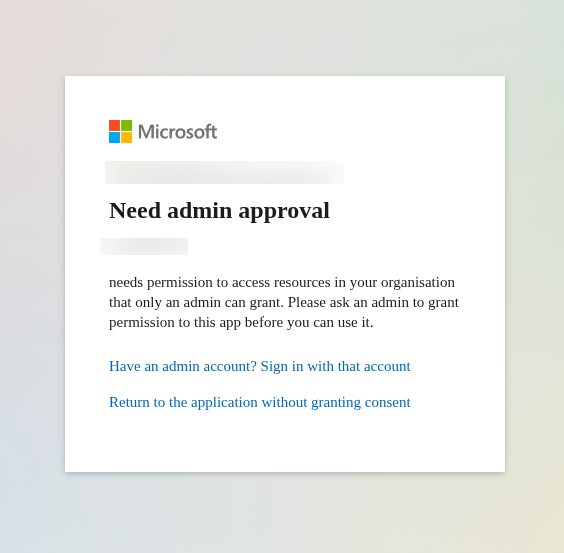
If you are not an administrator in Azure AD, you will see the screen below. Please contact your Azure AD administrator to complete the first-time setup and grant consent.
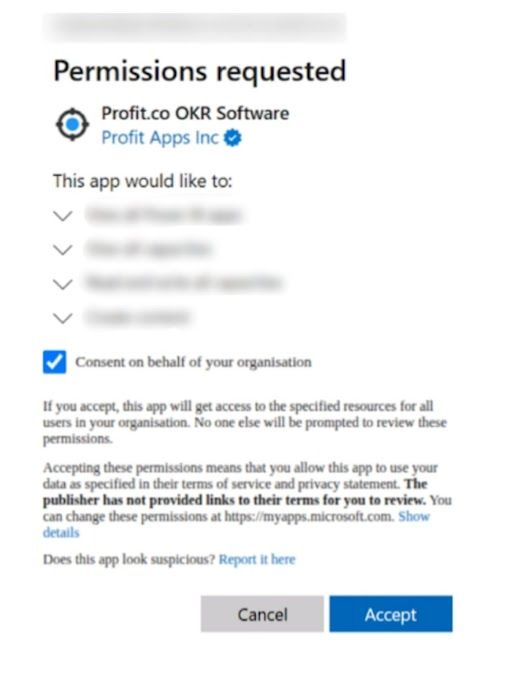
If you're an Azure AD administrator, you can grant consent to the application.
Select 'Consent on behalf of your organization' to grant access for all users in your organization.
Step 8
Click on the Sign in to Azure AD button.
Sign in to the Microsoft Azure AD Account and provide access.
Note: Once consent is granted, other users won't need to give consent and will be able to connect to Azure AD. From this point on, users can create Azure AD-linked Key Results without further admin intervention.
Reference
https://docs.microsoft.com/bs-cyrl-ba/azure/active-directory/manage-apps/add-gallery-app
Configure Microsoft Entra ID SSO and User Provisioning using custom app creation
Step 1
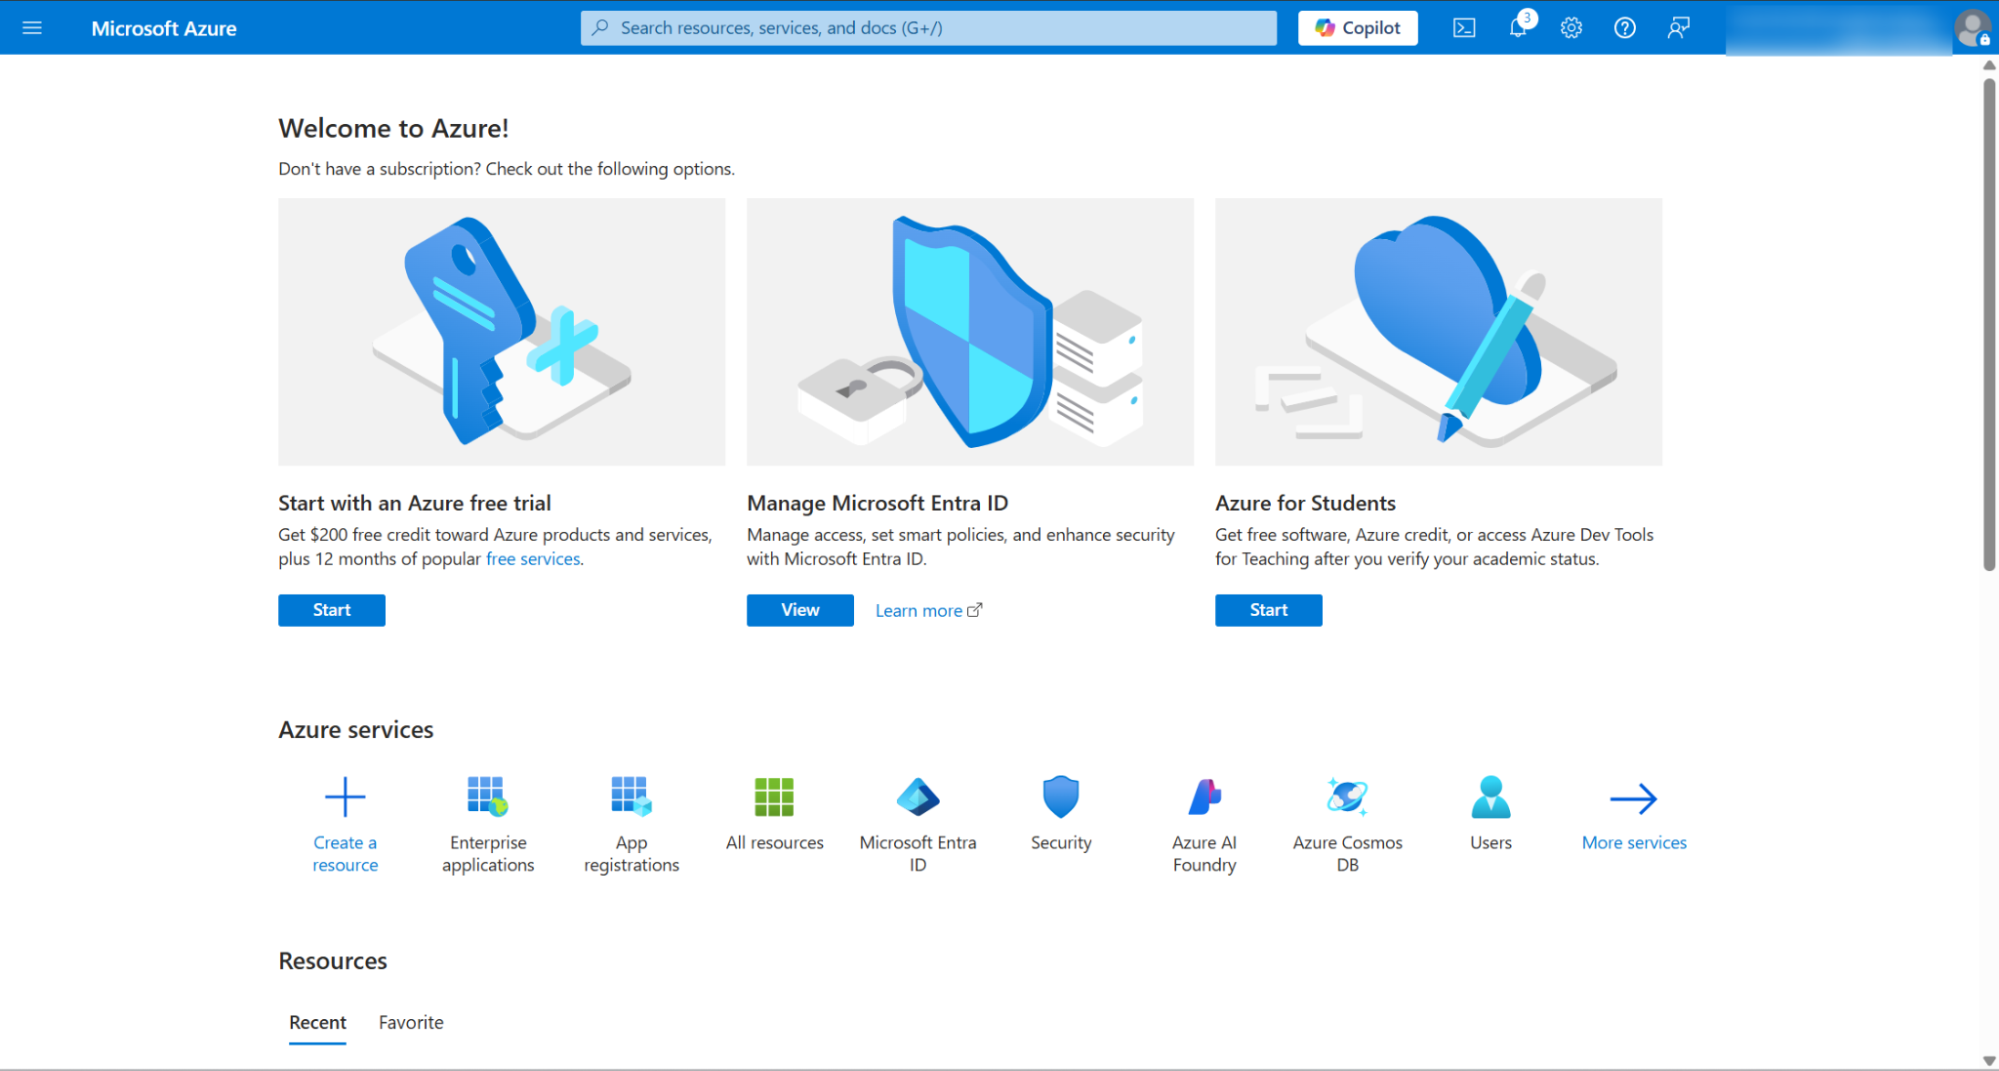
Navigate to the Microsoft Entra ID Portal Home Page and click on Enterprise Applications.
Step 2
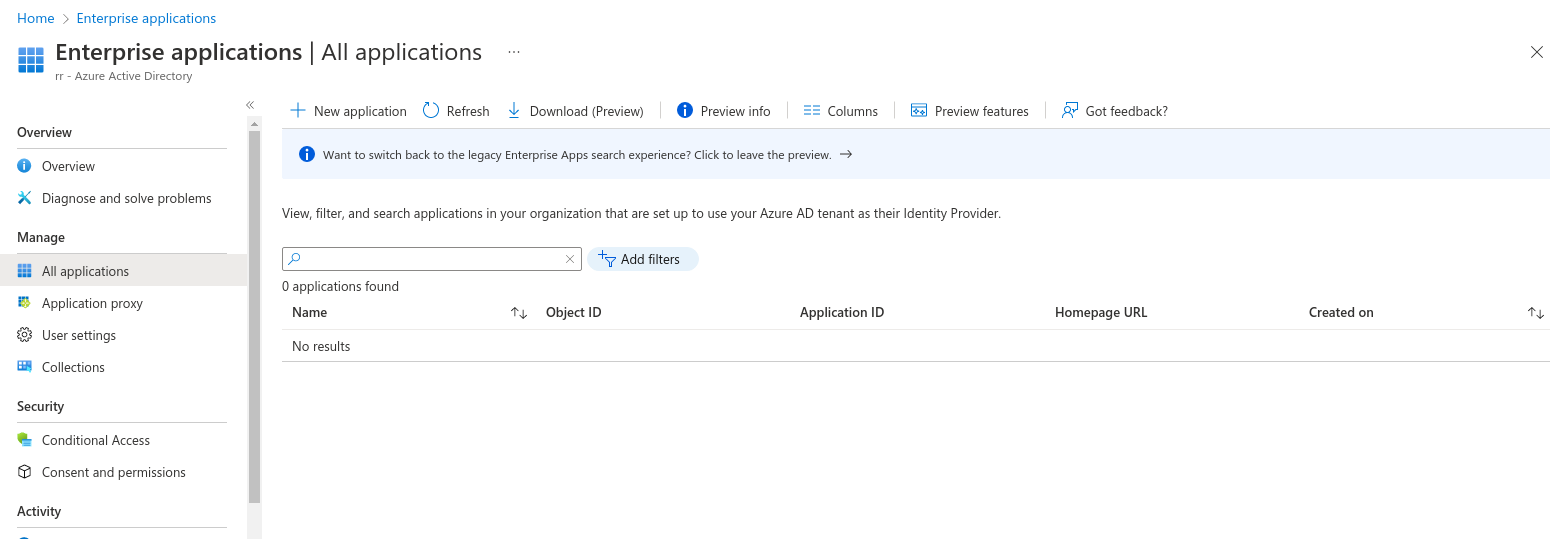
Click on the New Application button.
Step 3
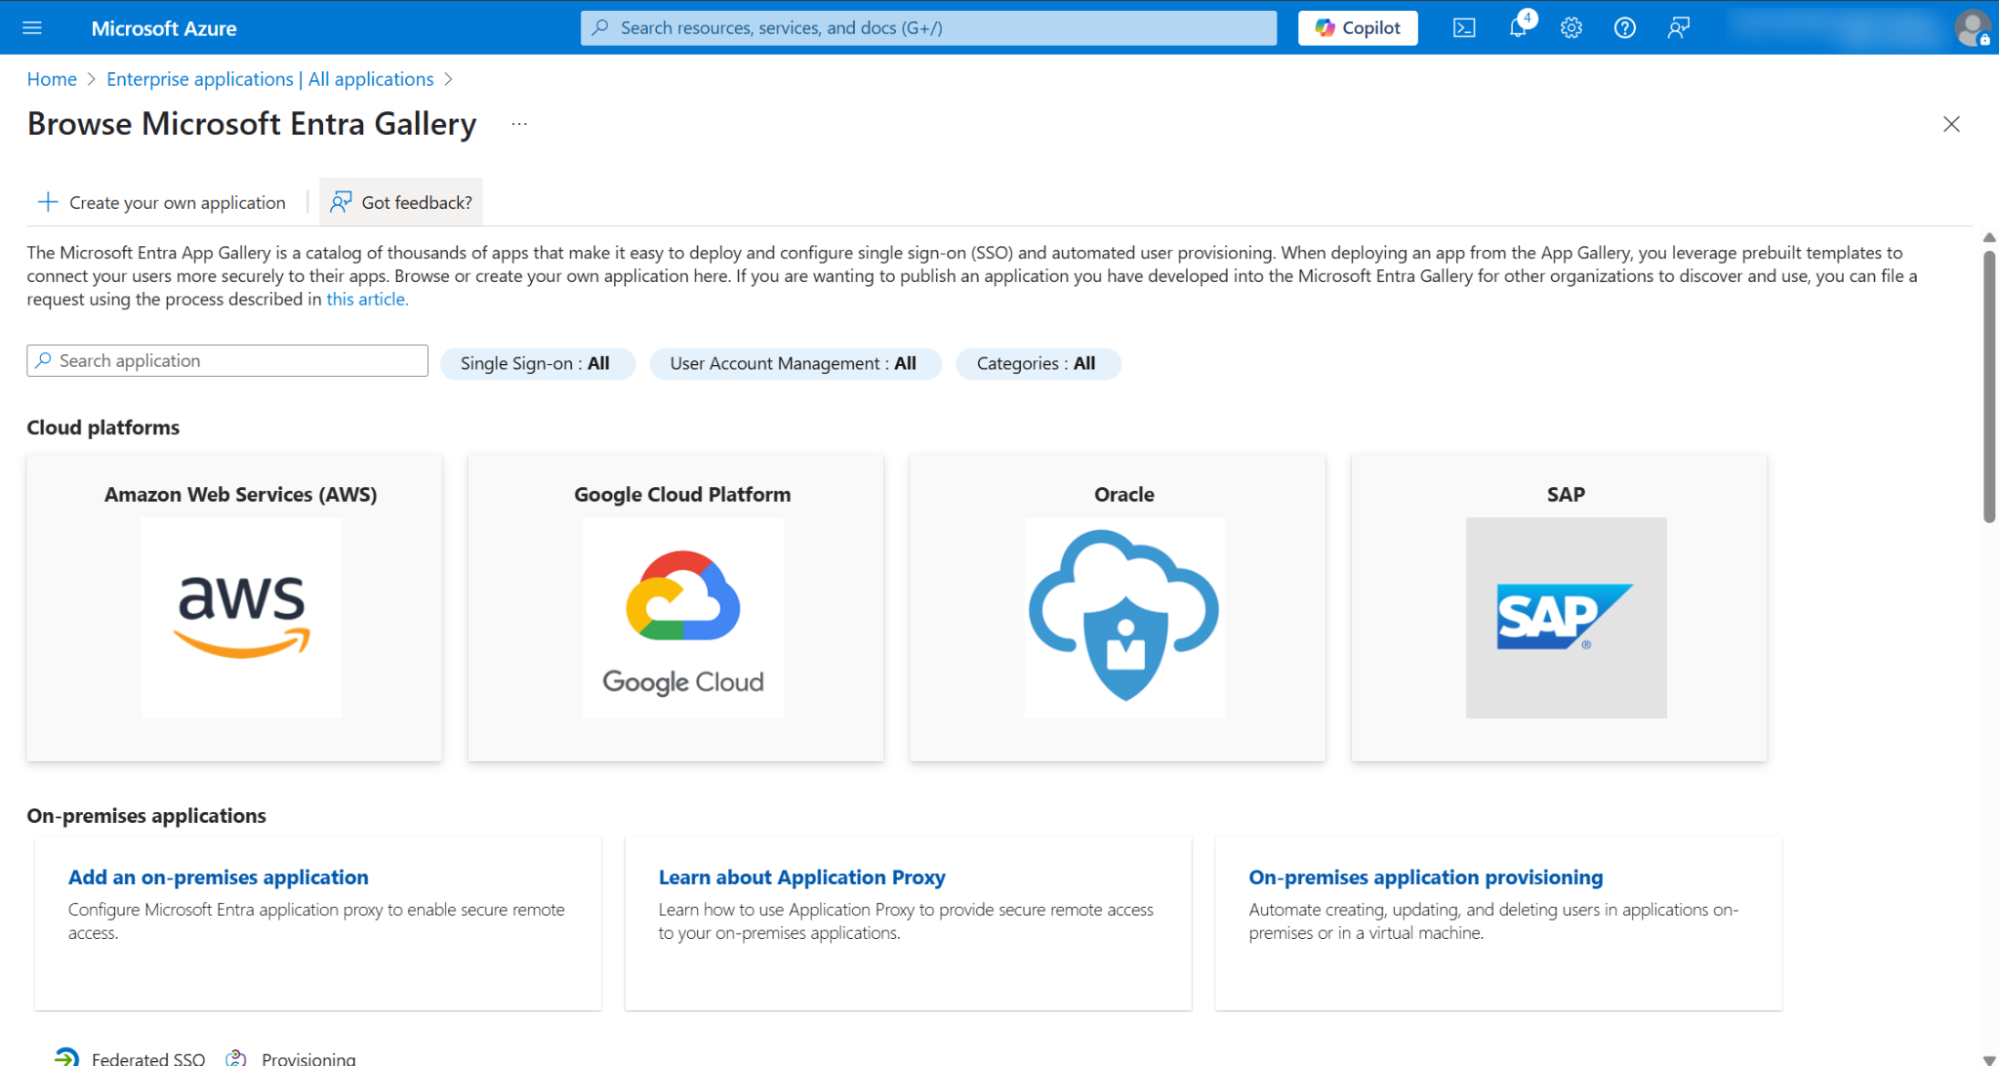
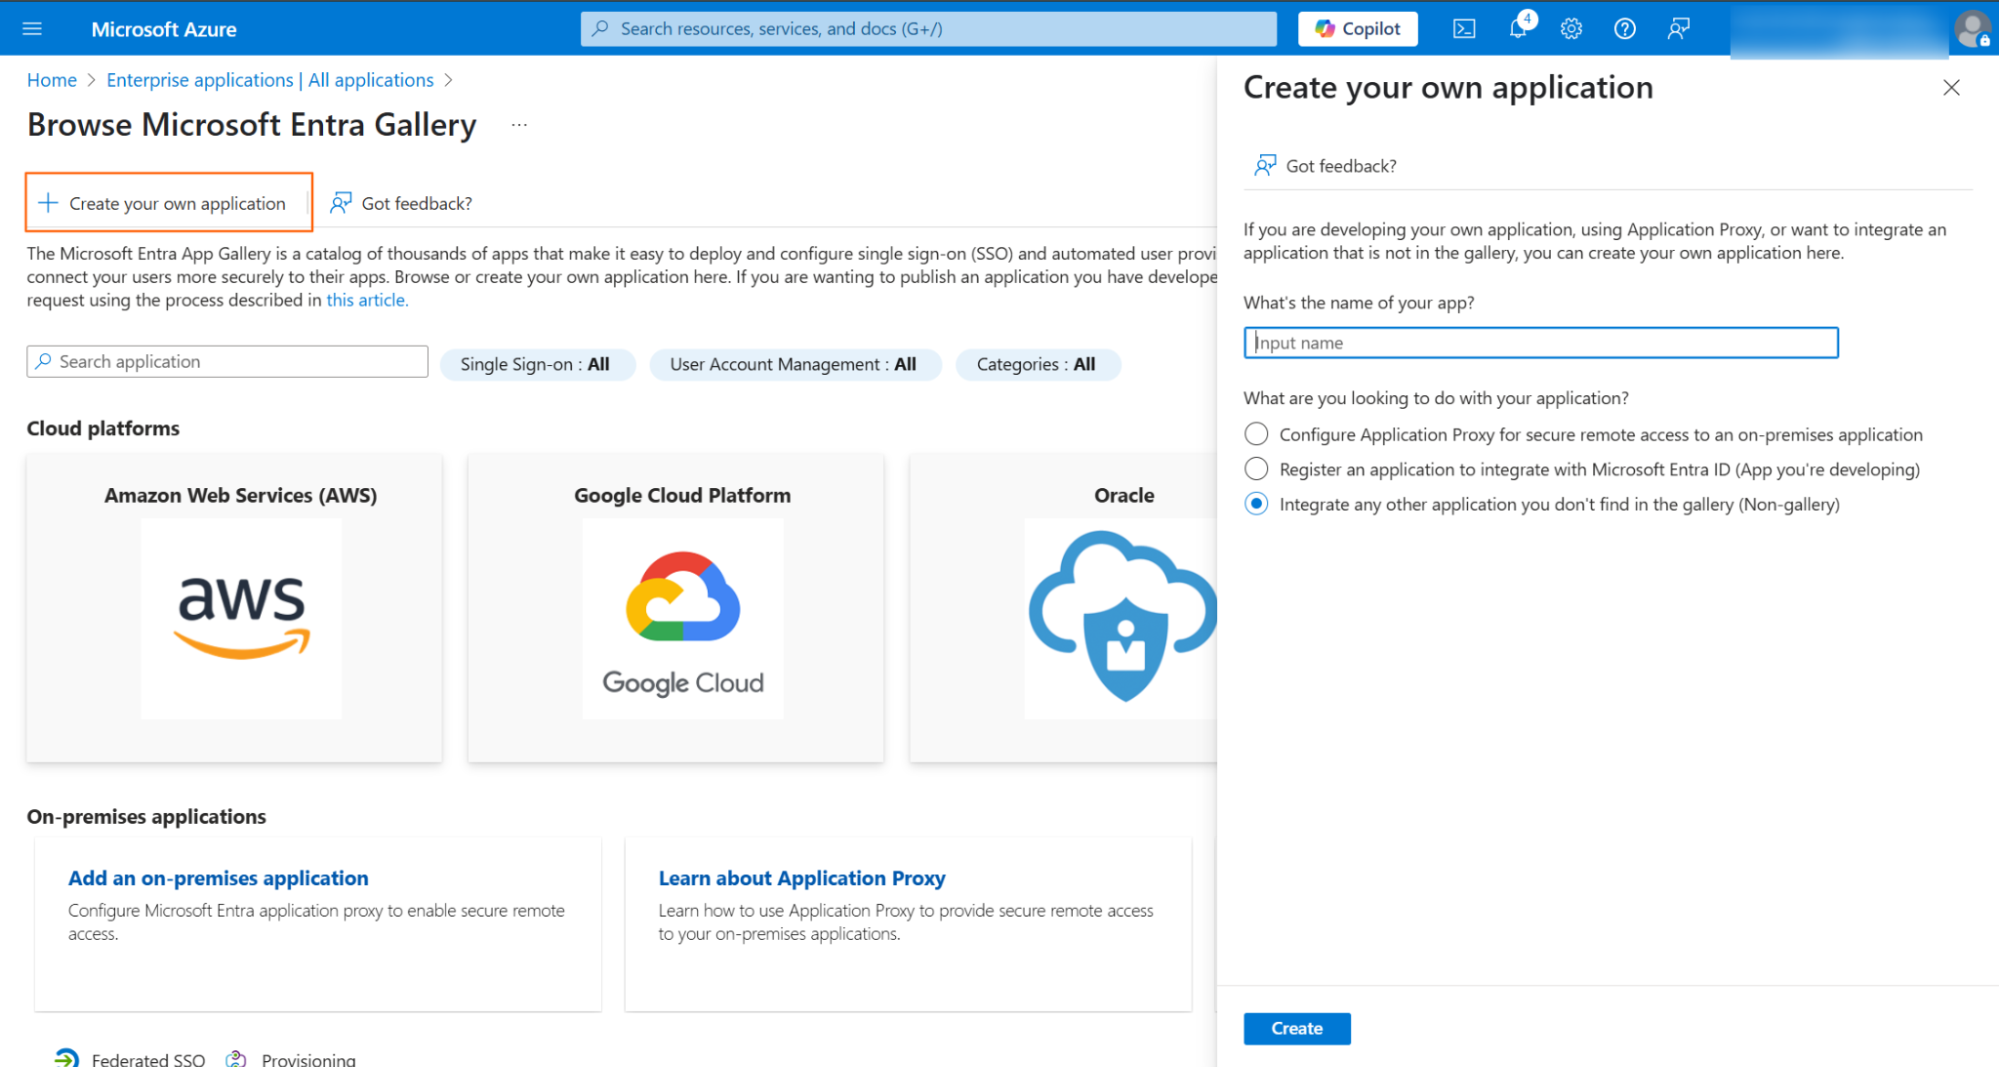
To start creating your own application, click the button. Name the application (for example, Profit.co OKR Software), choose Integrate any other application (Non-gallery), and then click the "Create" button.
Step 4
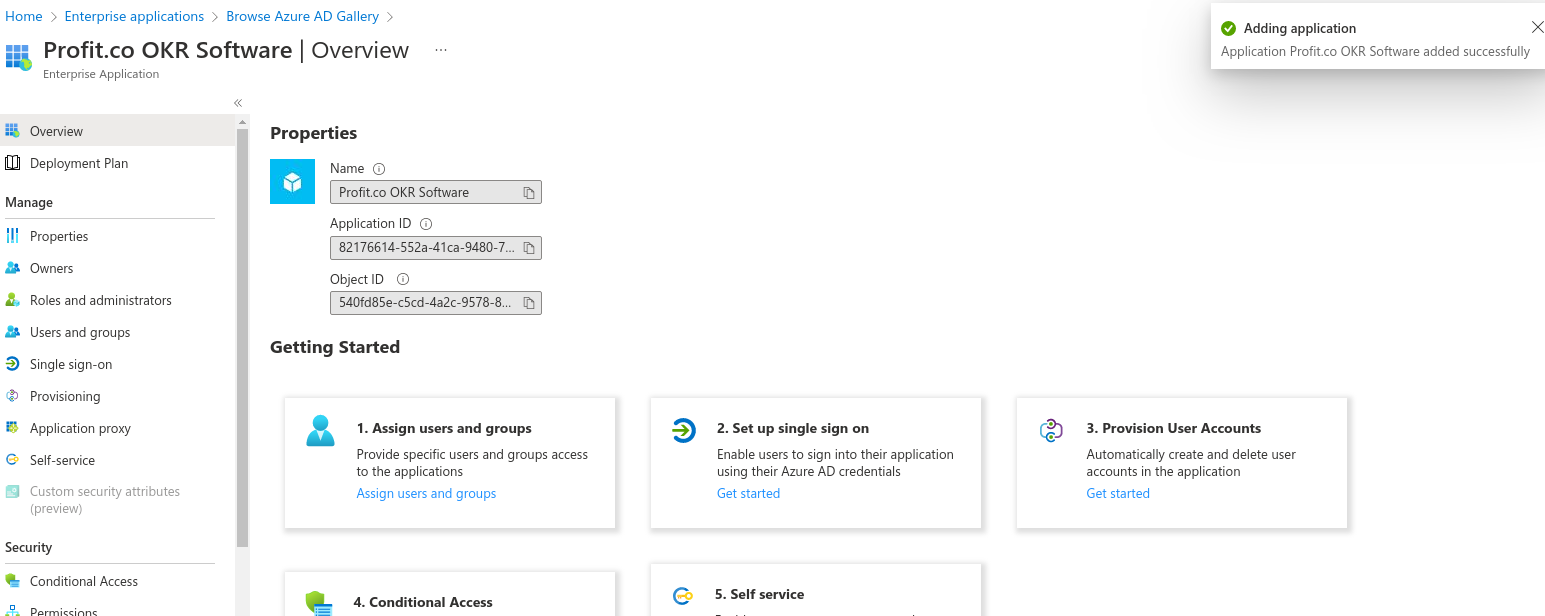
After creating the application, the Application Detail page will appear, as shown below. Under the Single Sign-On and Provisioning options in the left navigation menu, enter the Profit.co SSO and SCIM configuration details.
Step 5
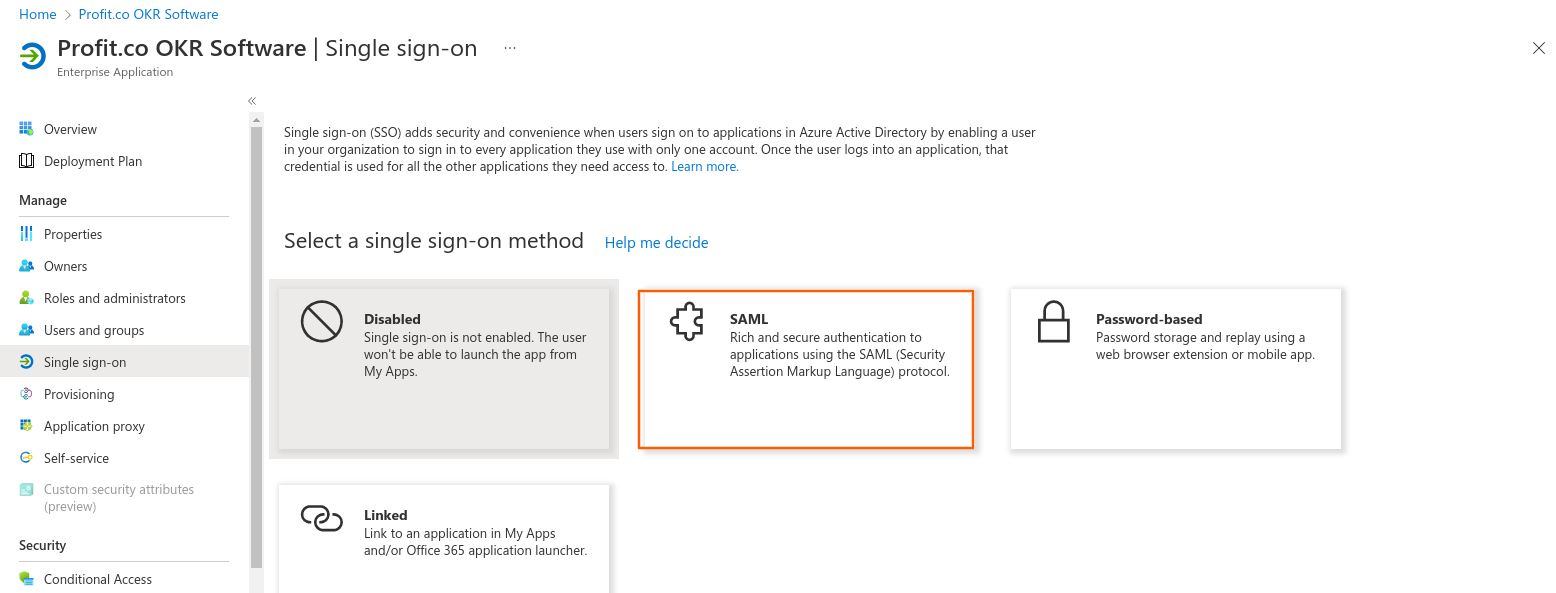
Navigate to Single Sign-On -> SAML and enter the following details. Click on the Edit button of the Basic SAML Configuration Section.
Click on the Save button.
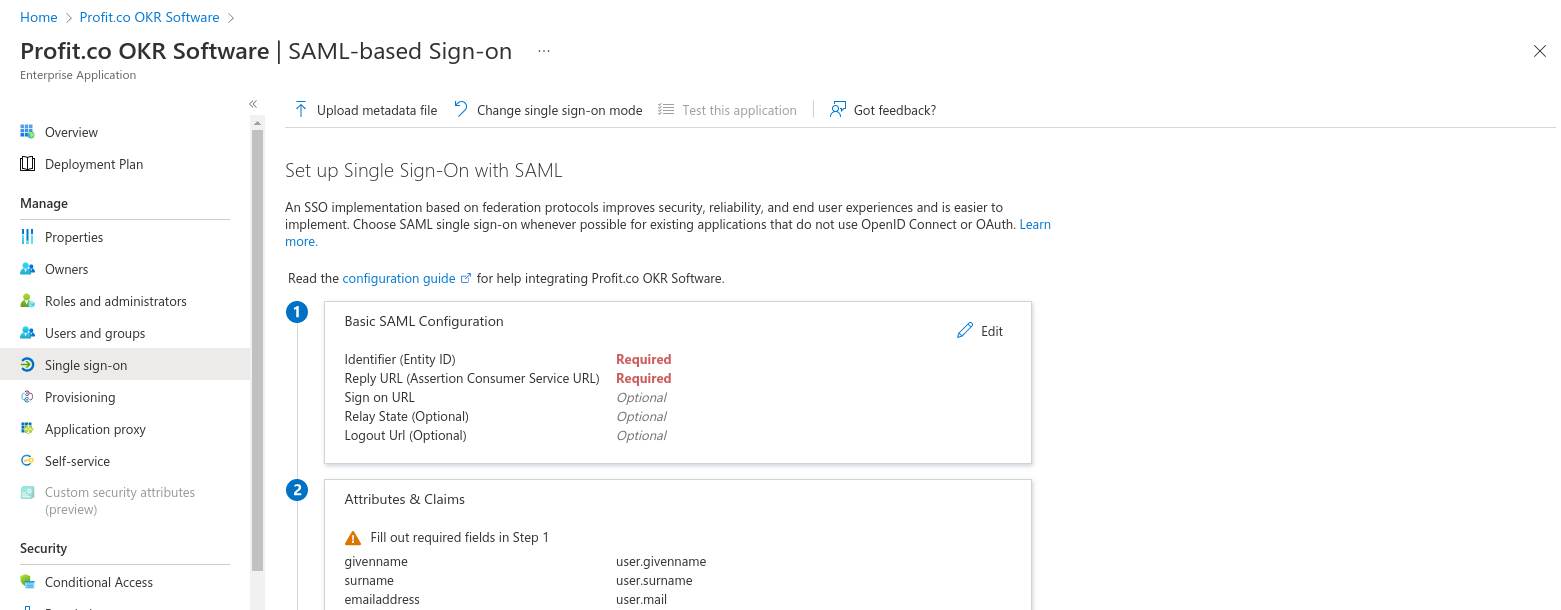
US Region:
https://app.profit.co/app/loginservlet?a=authorize&appCode=profit&integrationCode=AZUREEU Region:
https://eu2-app.profit.co/app/loginservlet?a=authorize&appCode=profit&integrationCode=AZUREME Region: Use the same URL for both the identifier and reply URL based on the selected region.
https://me1-app.profit.co/app/loginservlet?a=authorize&appCode=profit&integrationCode=AZURE
Step 6
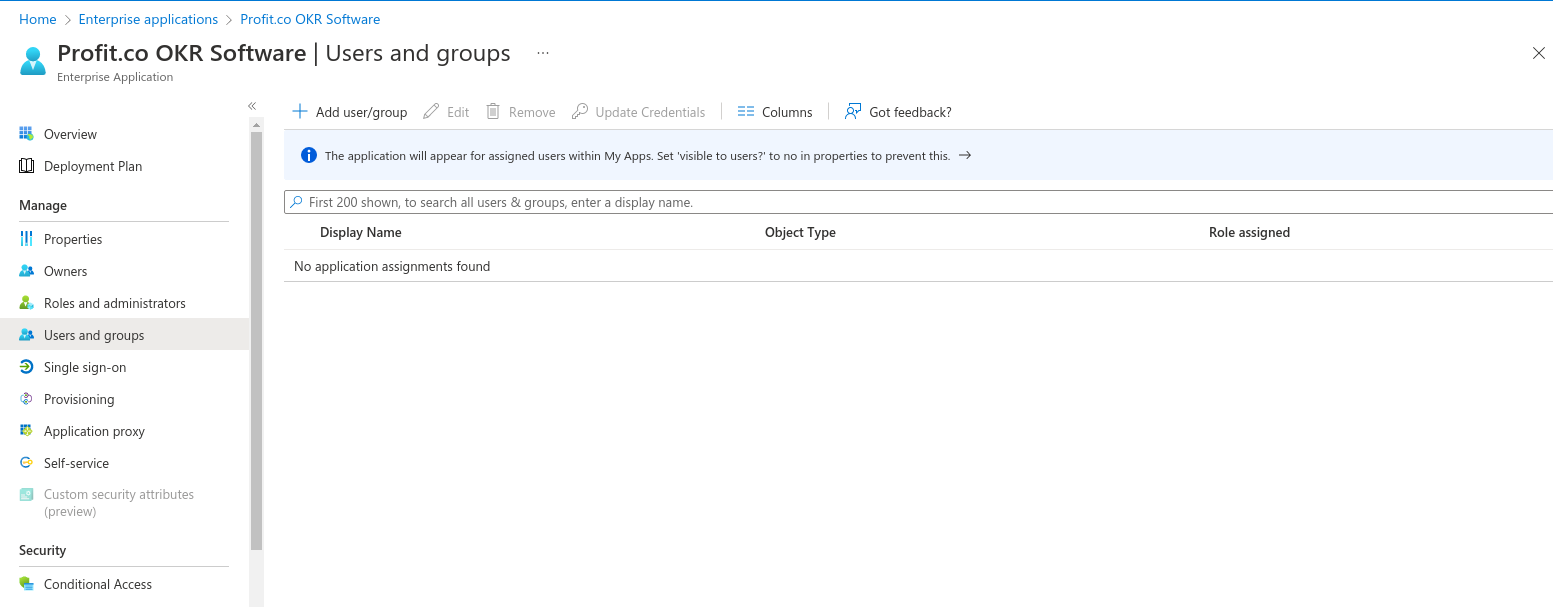
Navigate to the Users and groups option in the left menu and click on Add user/group to add the required users and groups to the app.
Note : Nested Groups are not supported.
Step 7
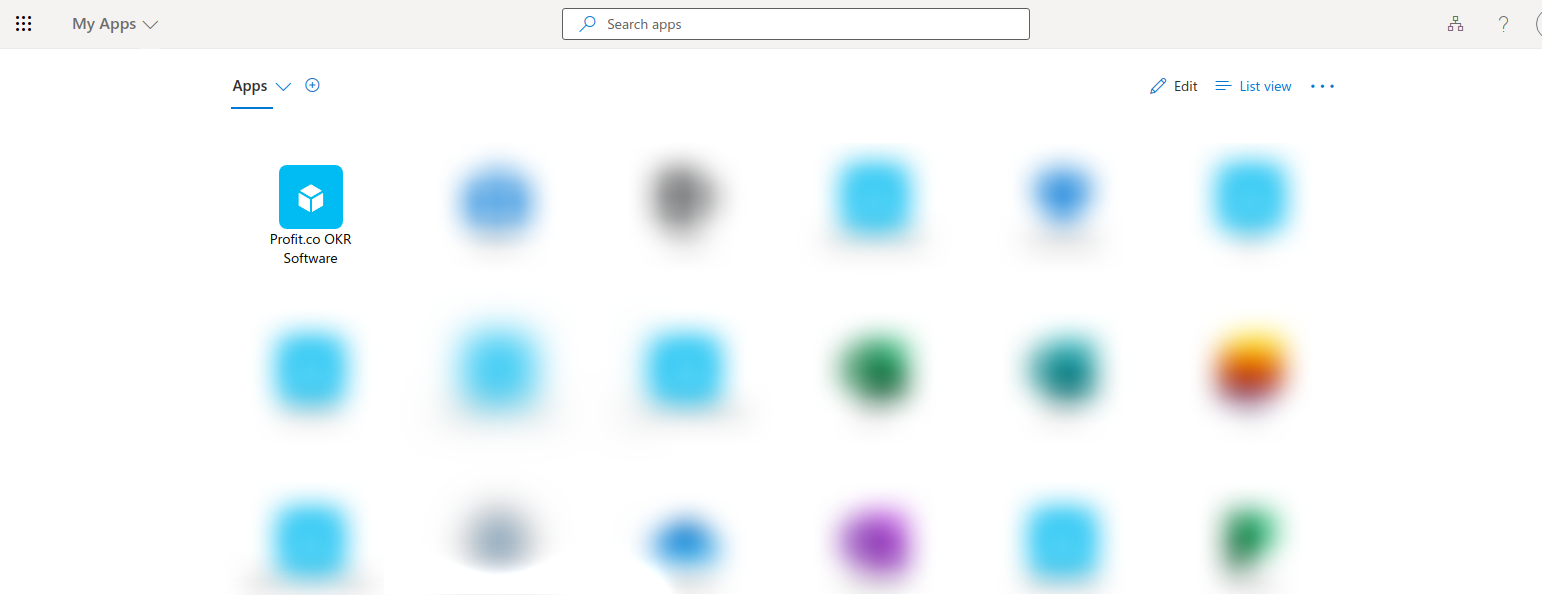
Go to https://myapplications.microsoft.com/. The assigned app (Profit.co OKR Software) will be listed here. Clicking on the App will redirect to the user's Profit.co Account.
Note: This confirms that the SSO setup is completed successfully
Step 8
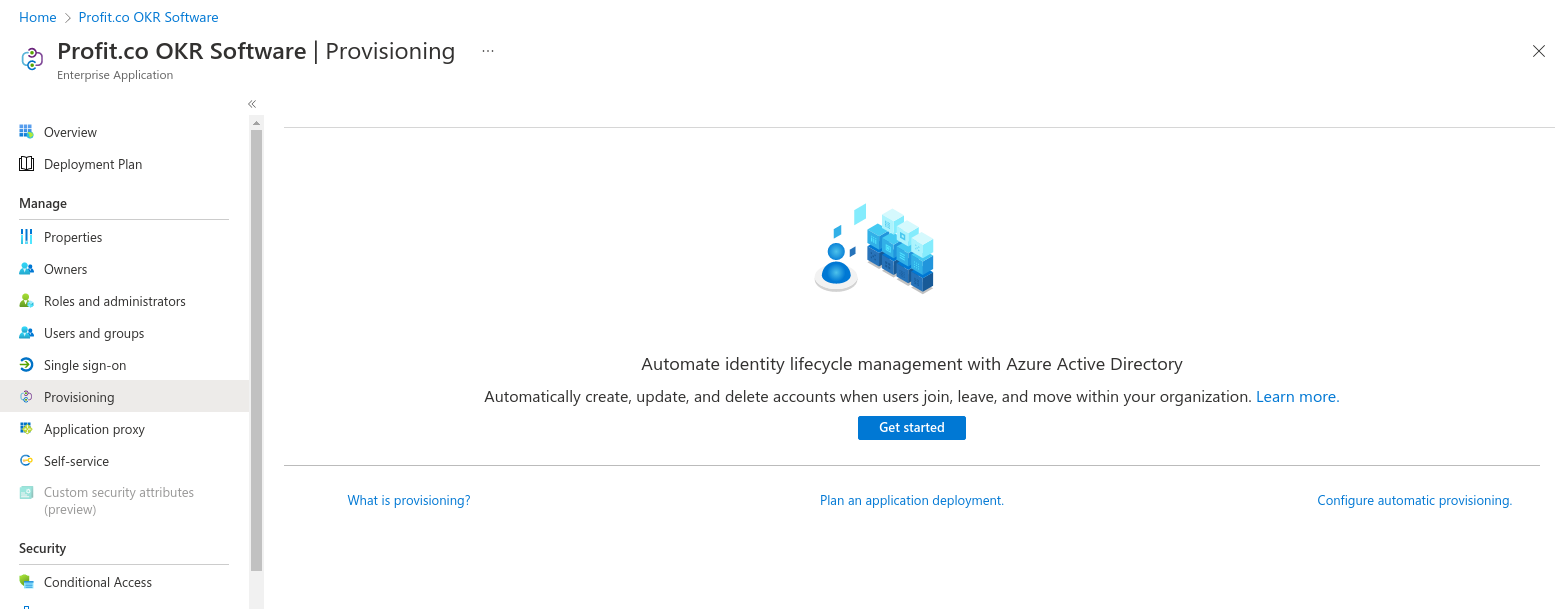
Navigate to the Provisioning option in the left menu and click on the Get started button to start the SCIM provisioning setup
Step 9
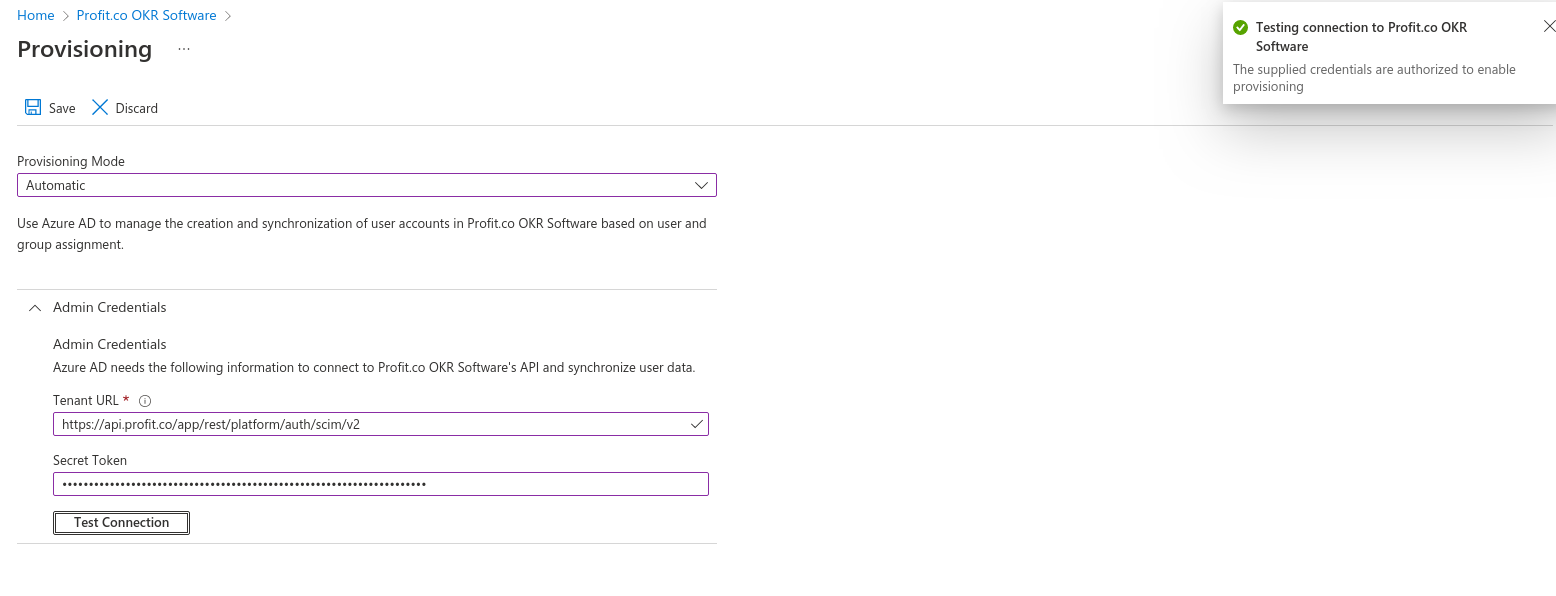
Choose Automatic under Provisioning Mode and enter the following information.
Tenant URL
Either
https://app.profit.co/app/rest/platform/auth/scim/v2or
https://eu2-app.profit.co/app/rest/platform/auth/scim/v2or
https://me1-app.profit.co/app/rest/platform/auth/scim/v2based on the region of your Profit.co Application.
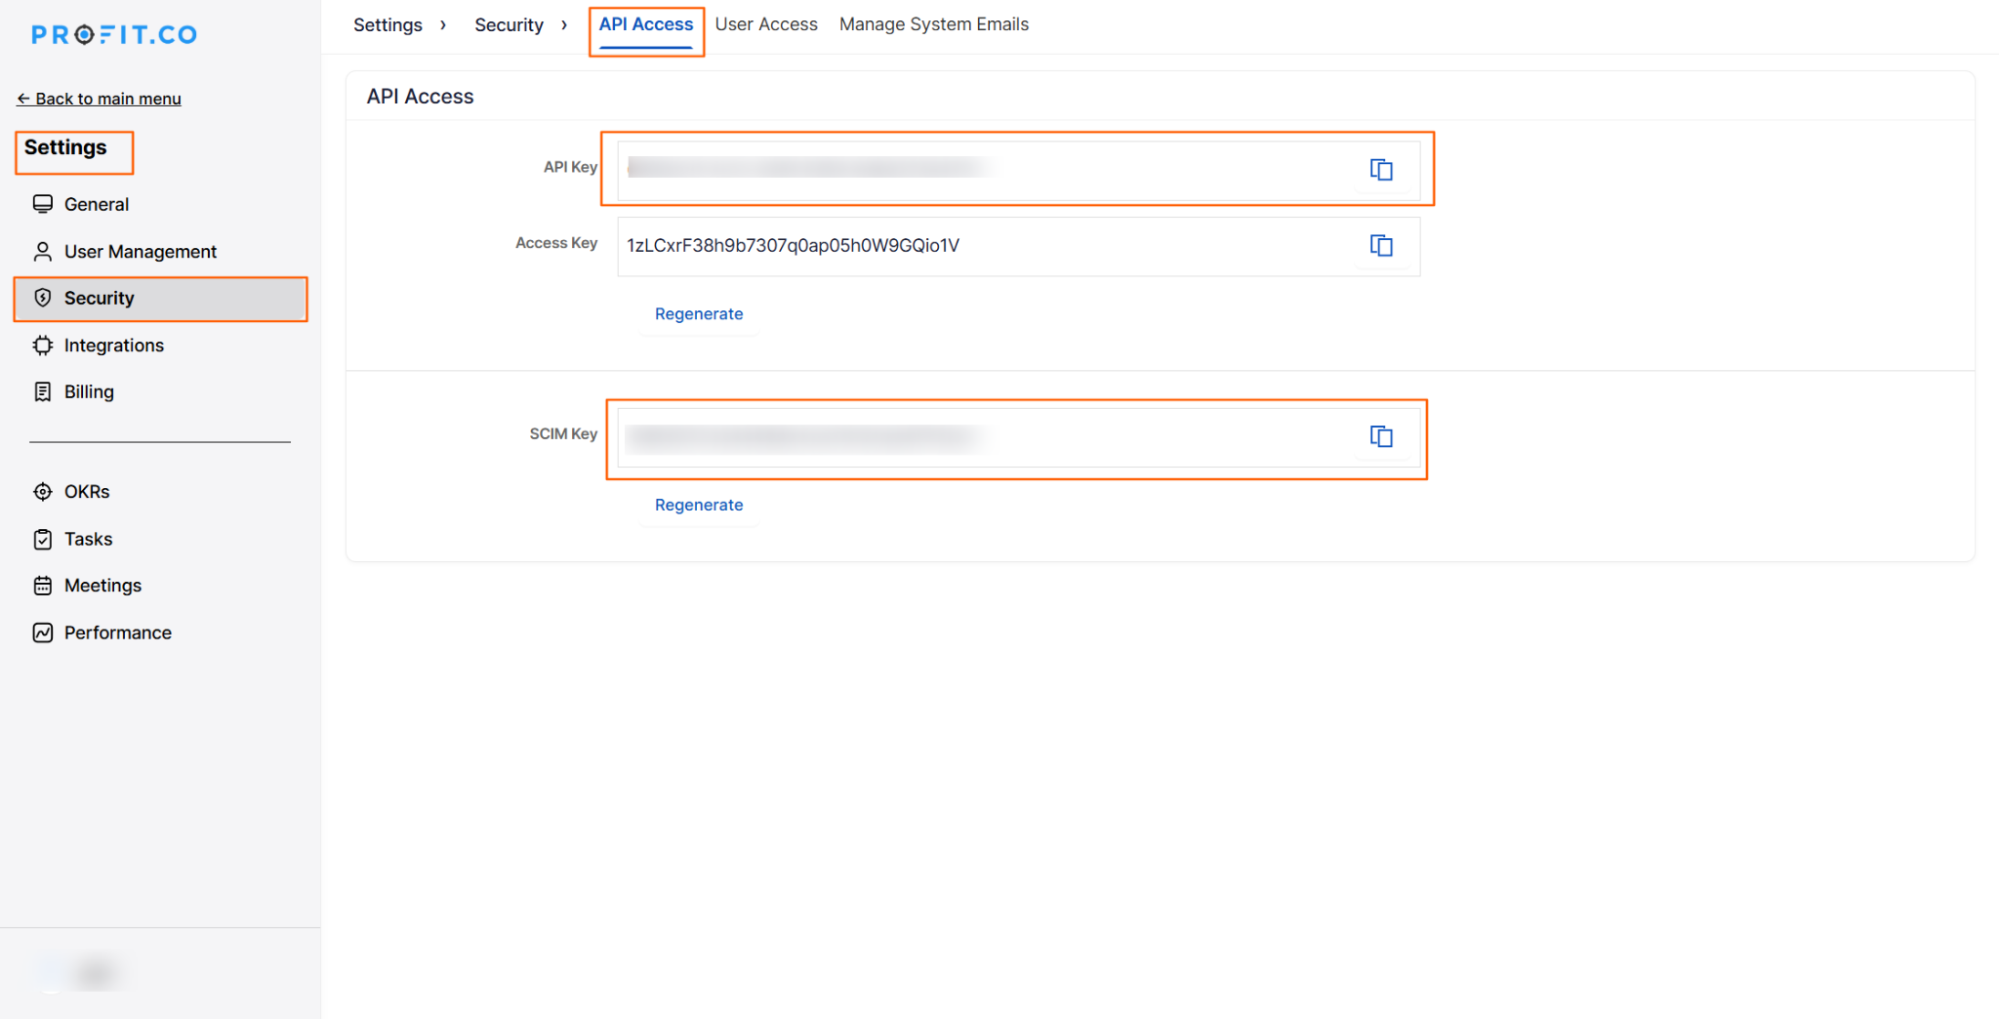
Secret Token To generate the secret token in Profit.co, go to Settings → Security → API Access and get the values of API Key and SCIM Key.
Form the Secret Token in the following format and provide it in the Secret Token field.
[API_KEY]:[SCIM_KEY]
To verify the SCIM connection, click the Test Connection button. When the validation is successful, click the Save button in the top left corner.
Step 10
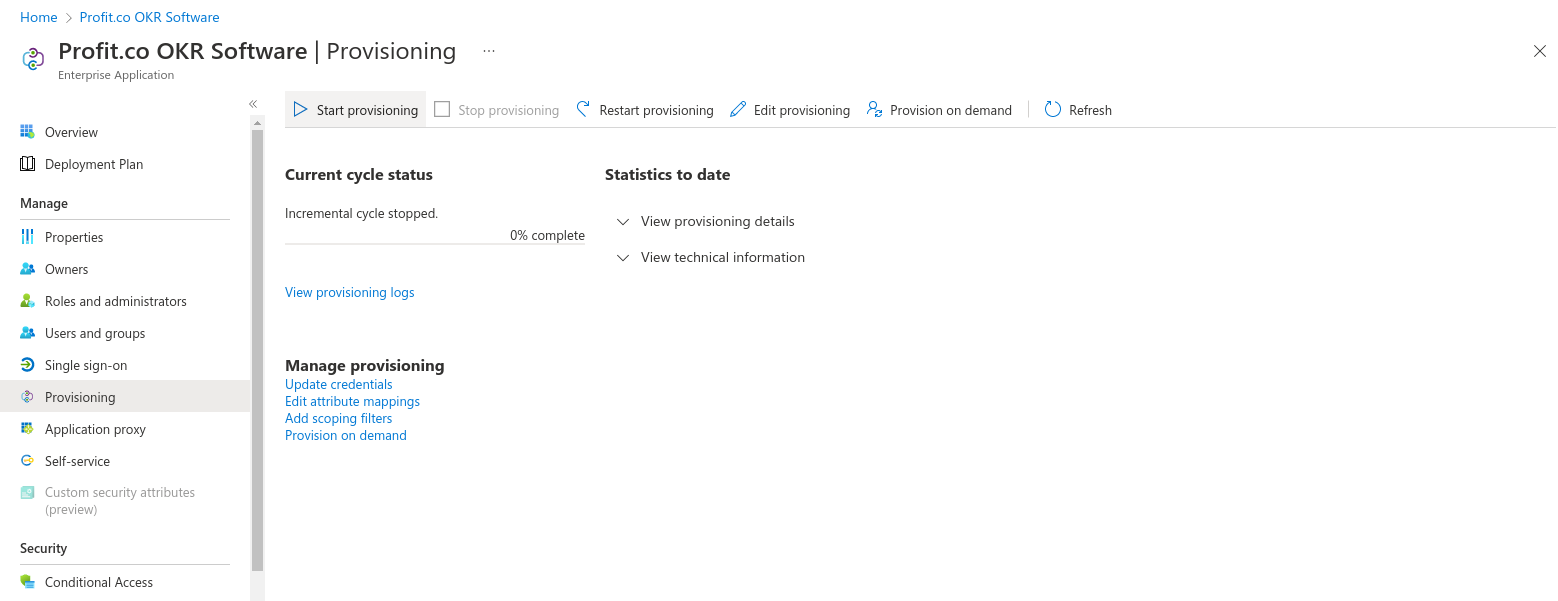
Navigate to the Provisioning option again and click on the Start Provisioning button.
Step 11
Profit.co will create a user each time a user is assigned to this application. A user's access to profit.co will be suspended if they are uninstalled from the App.
Note: Profit.co will update every 45 minutes with the latest information.
The supported attributes are as follows,
- First name
- Last name
- Email address
- Active status
- JobTitle
- Department
- Sub Department
- Roles
- Cross-Functional
- External ID
Department Sync
- Existing Departments: If the department already exists in Profit.co, the user will be assigned to it unless the department is disabled, and no duplicate departments will be created.
- New Departments: If the department does not exist in Profit.co, it will be automatically created and the user will be assigned to it during provisioning.
- Department and Sub-Department Sync: When a user is synced with both Department and Sub-Department attributes, the system first checks if the Department exists; if it does, the Sub-Department is created under it and the user is assigned to it, and if the Department does not exist, the system checks the user's already associated Department and creates the Sub-Department under it if available, then assigns the user to that Sub-Department.
- Only Sub-Department Sync: If a user is synced with only the Sub-Department attribute, the system checks whether the corresponding associated Department exists; if it does not exist, the user will still be created, but the Department and Sub-Department fields will not be synced.
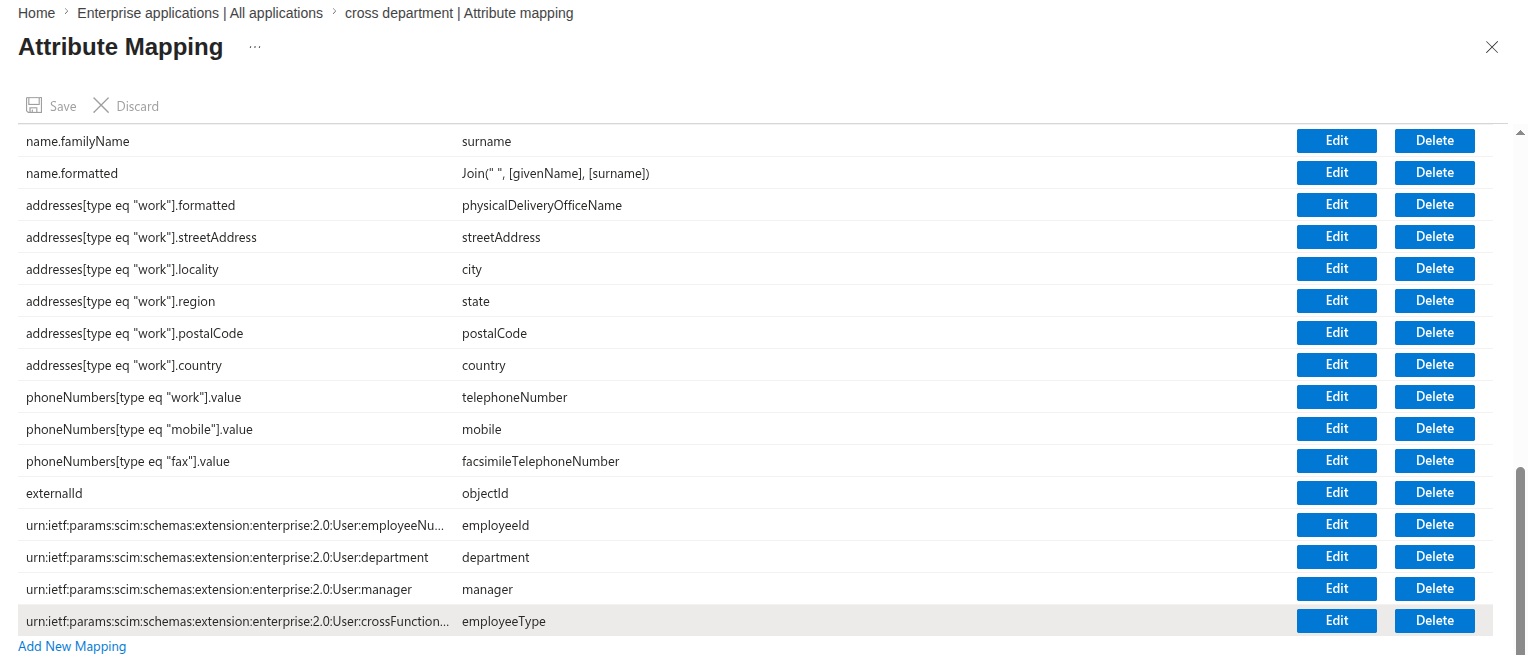
- Cross-Functional Department Mapping: To assign users to multiple departments, map the department field with comma-separated values. Profit.co automatically associates the user with all specified departments during SCIM provisioning.
SCIM Object Identifier
External ID (Object Reference ID) Mapping: By default, Profit.co matches users using their email address during SCIM provisioning. To use Microsoft Entra ID's unique identifier instead, map the External ID field to the Object Reference ID (Object ID). Once configured, Profit.co will identify and synchronize users based on the Object Reference ID rather than the email address.
Role Sync
Custom Attribute Role Sync
When a custom role attribute is configured in SCIM, the selected role is automatically synced to the corresponding role in Profit.co.
SCIM Role Profit.co Role manager Profit Manager
user Profit User
read Only Profit Read Only
department Access Only Department Access Only
Default Role Sync Based on Configuration in Profit.co
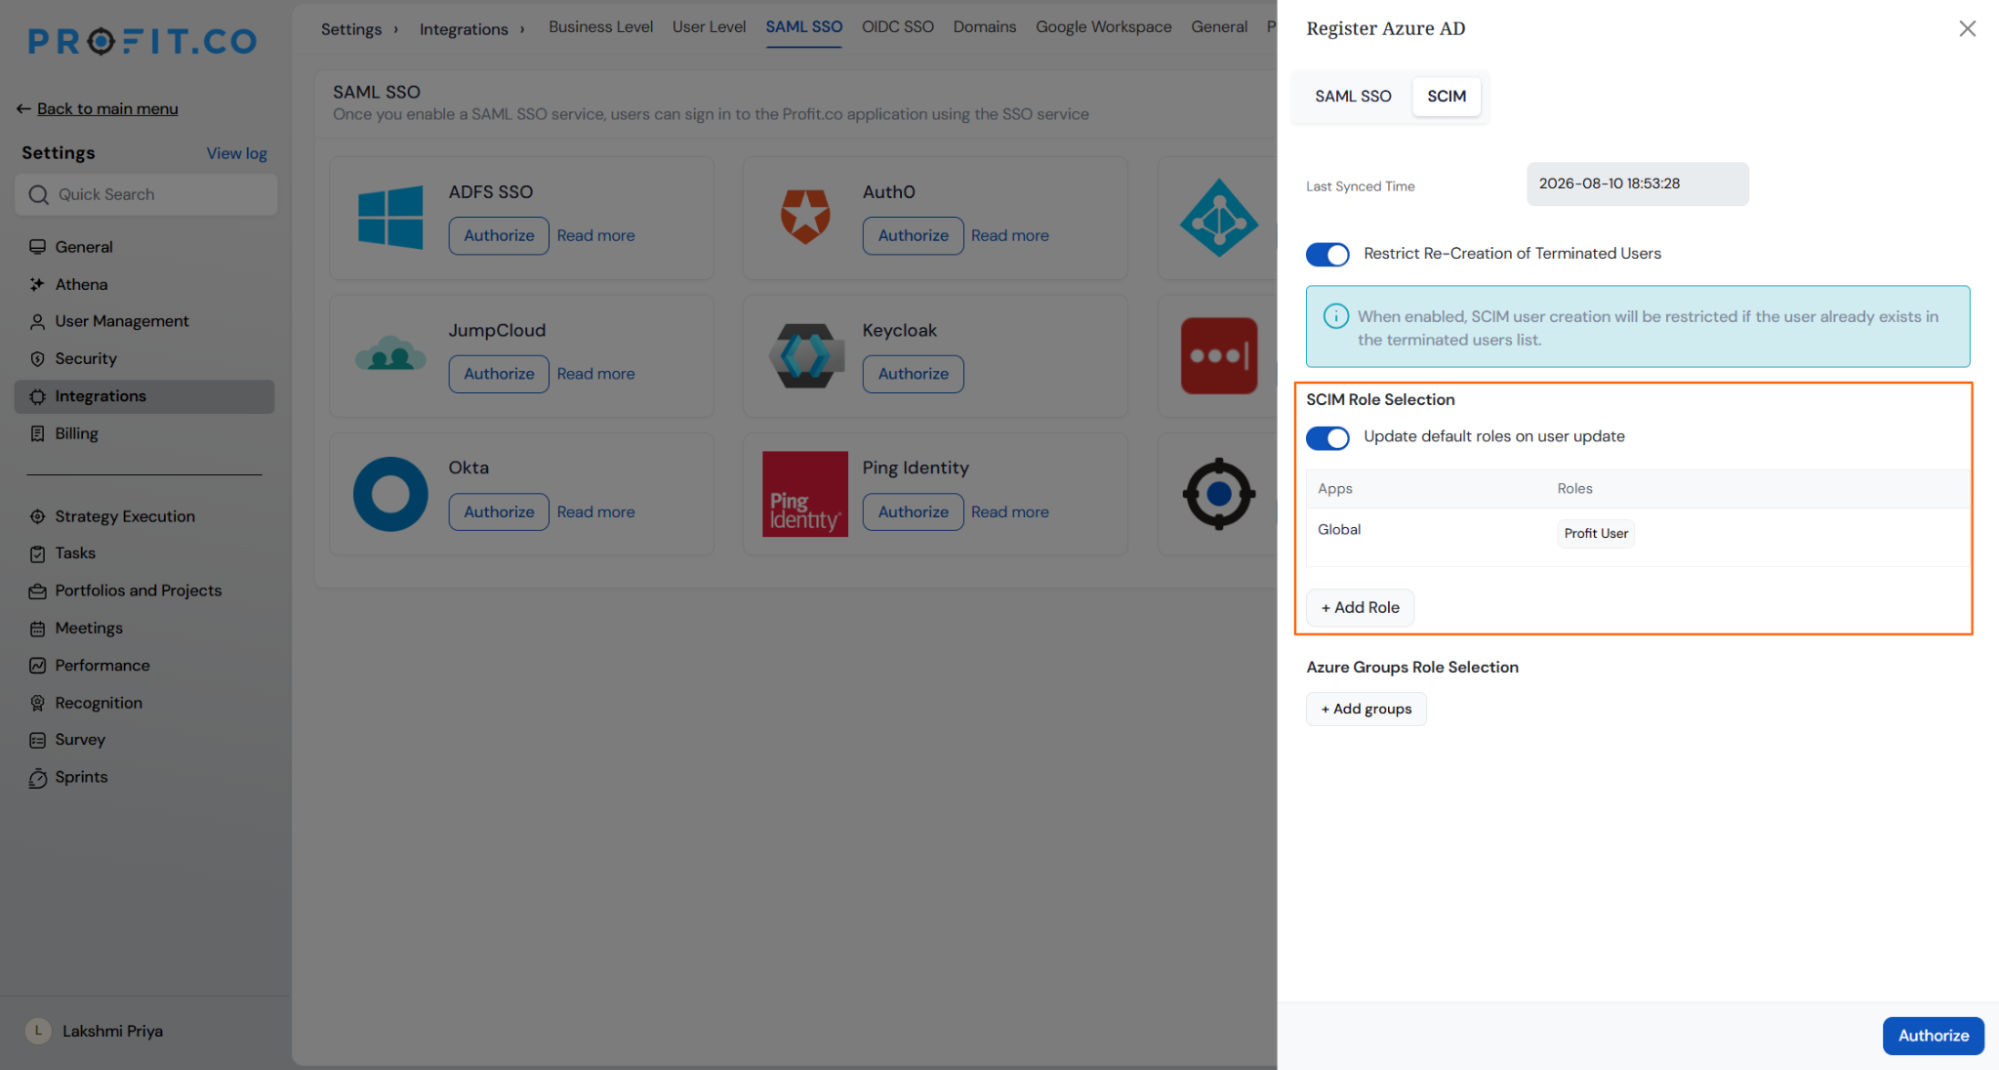
When Update default roles on user update is enabled, a user's existing role in Profit.co is preserved when their record is updated through SCIM.
When this option is disabled, SCIM updates will assign the user the default role configured in Profit.co.
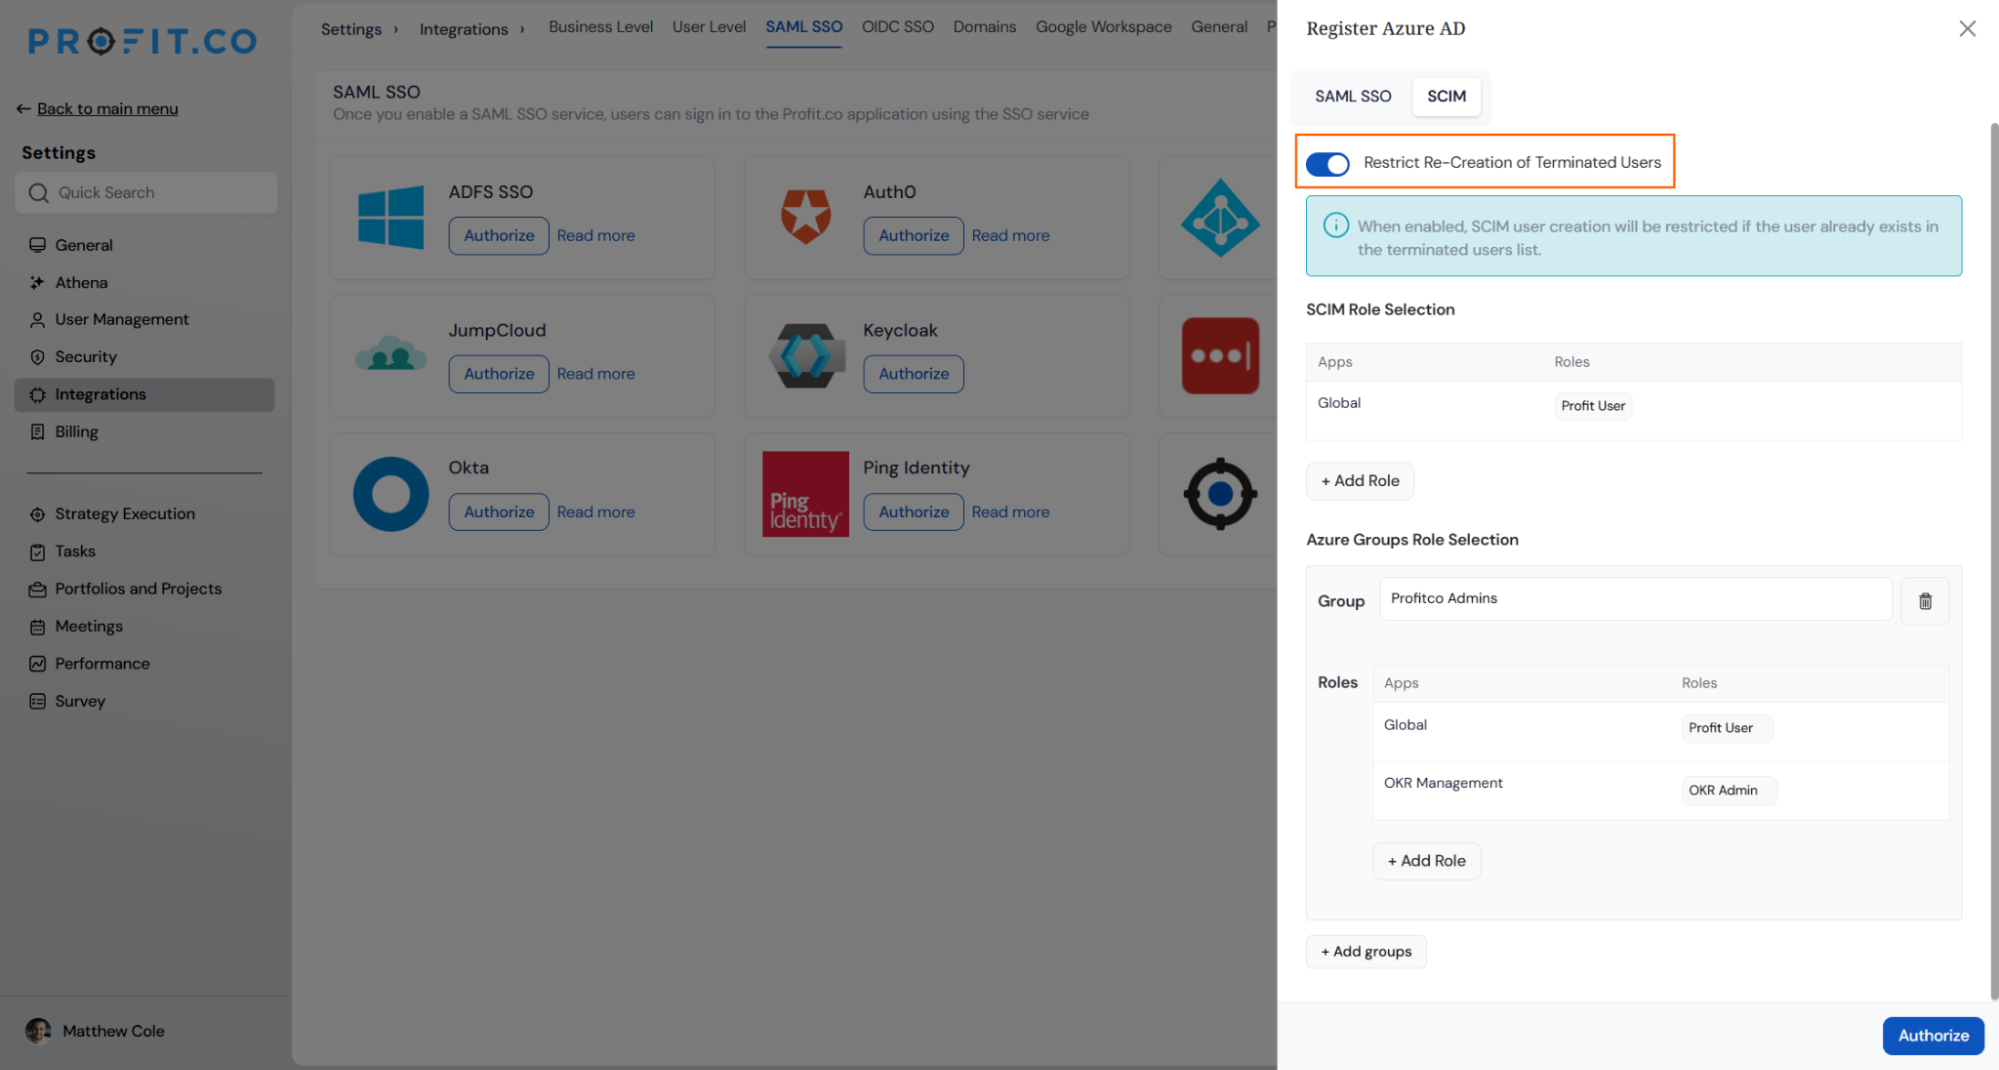
Group-Based Role Assignment
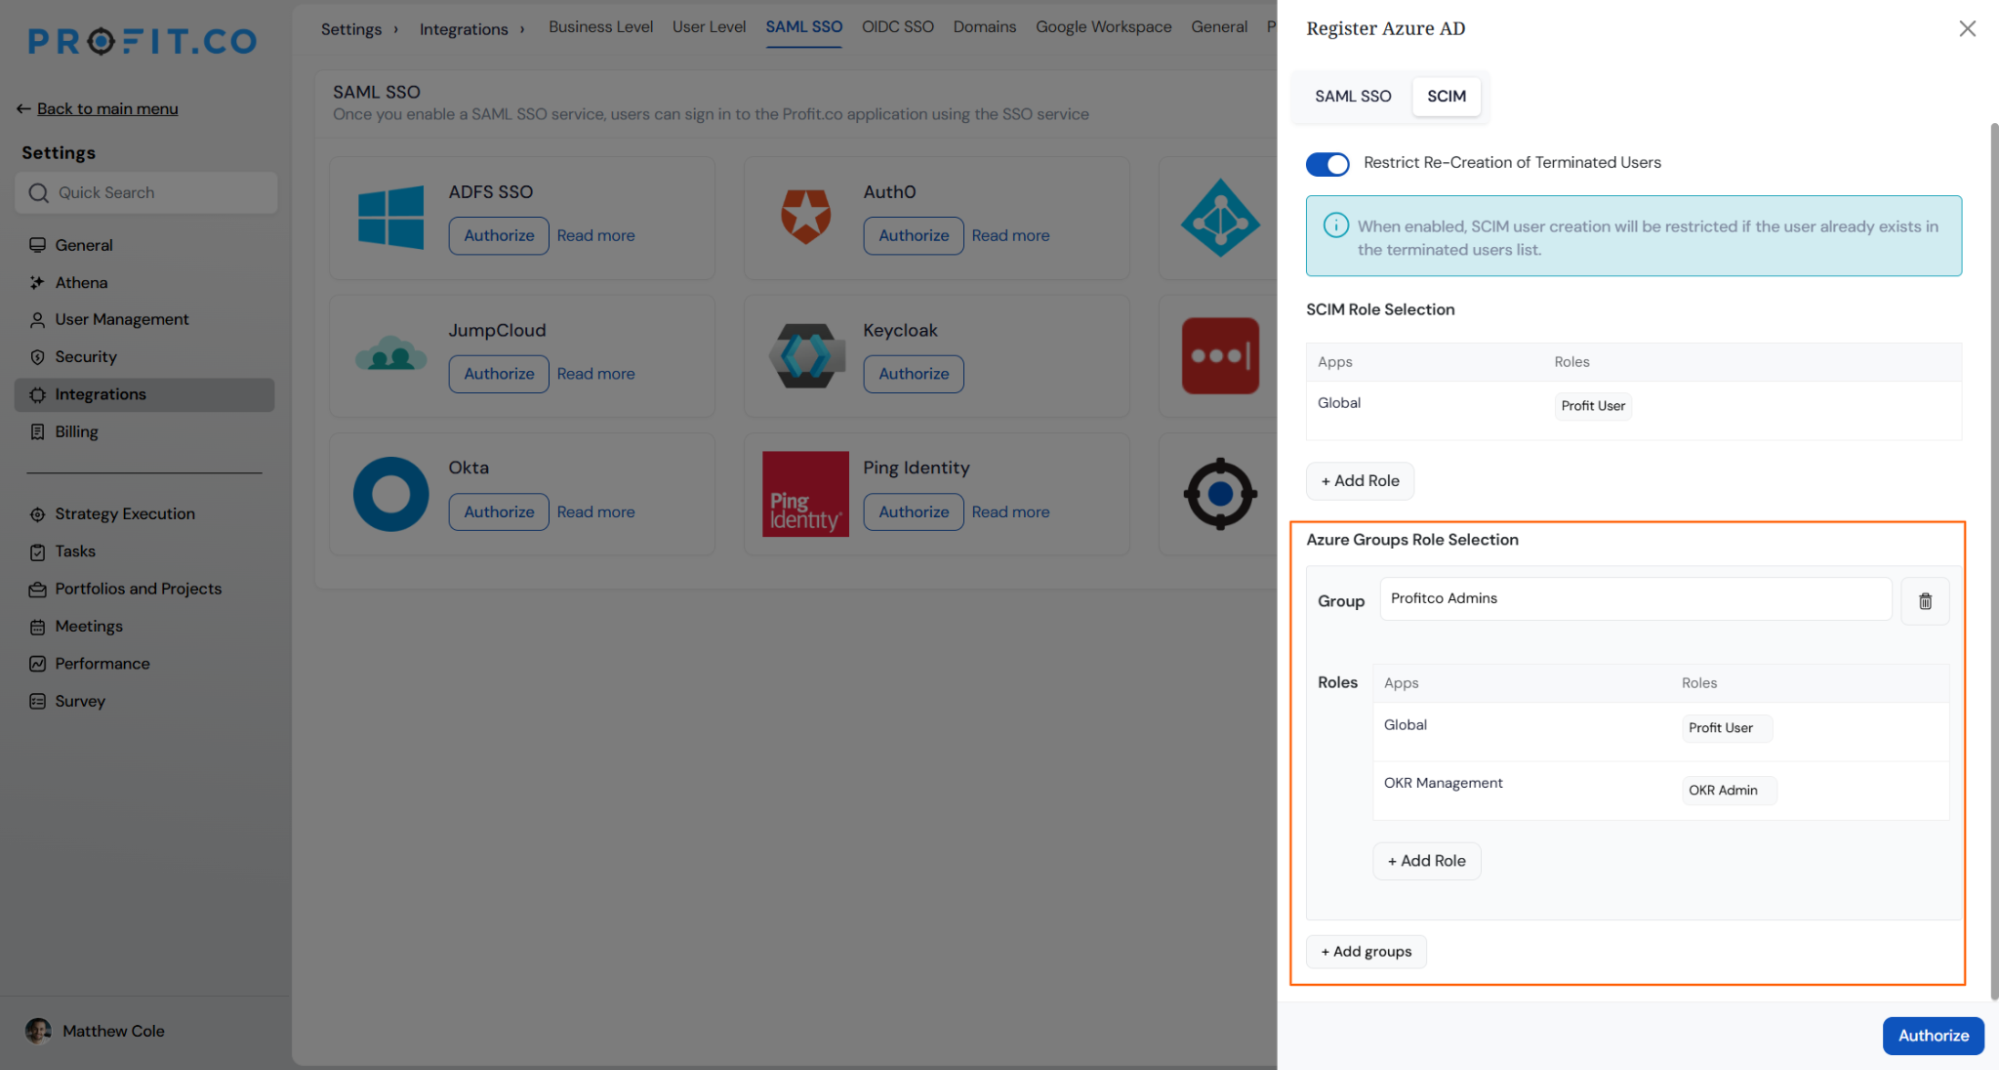
- Once a group is created in Azure AD and users are added to it, the same group name can be configured in Profit.co for role mapping.
- After this mapping is configured, whenever a user is added to the corresponding Azure AD group, Profit.co automatically assigns the predefined roles associated with that group.
Note: The group name must be the same as the group name in Azure AD SCIM for the role mapping to work.
Restrict Re-Creation of Terminated Users
Profit.co provides a Restrict Re-Creation of Terminated Users option within the SCIM configuration.
When this toggle is enabled, users who have been terminated in Profit.co through SCIM provisioning cannot be automatically recreated, even if their account information is updated in Microsoft Entra ID.
When this toggle is disabled, any subsequent update to a terminated user's account in Microsoft Entra ID may result in the user being recreated as a new user in Profit.co.
How to Configure Attribute Mapping in Microsoft Entra ID Provisioning
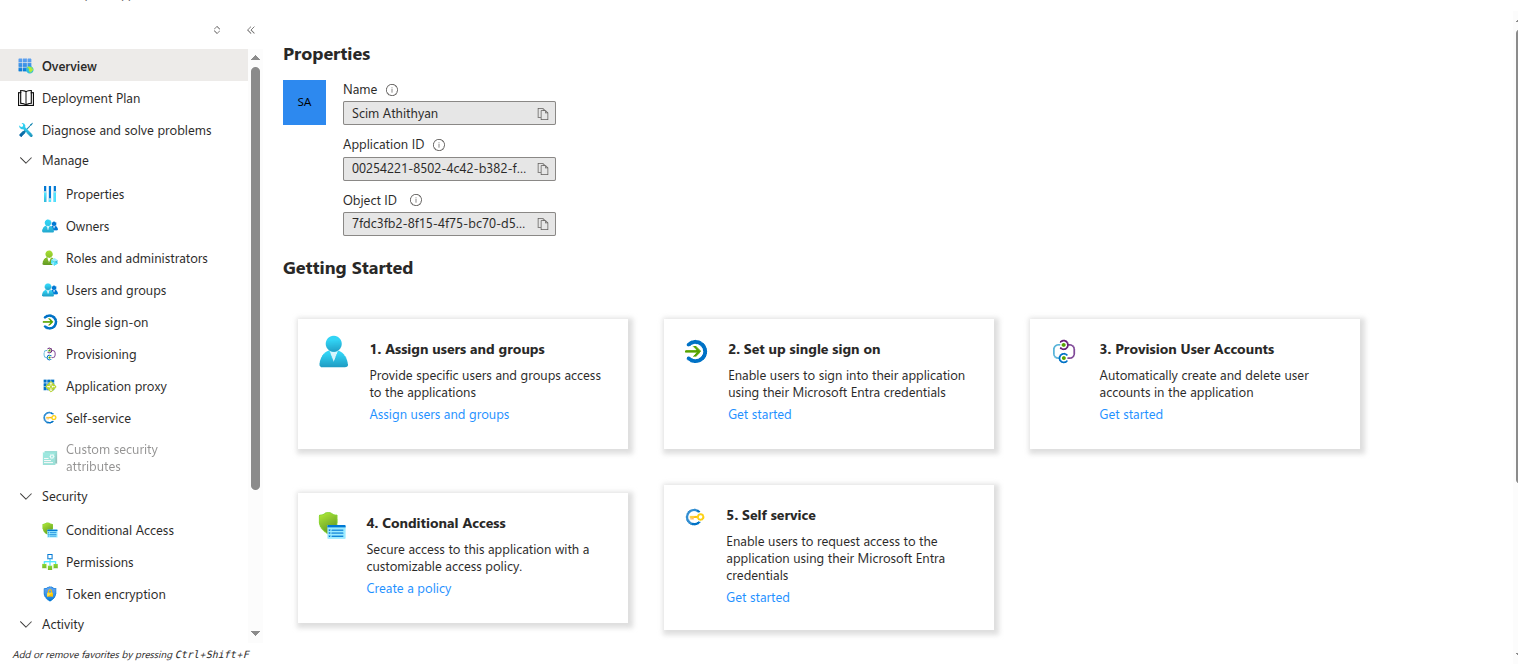
Step 1
Go to Provisioning from the left navigation menu.
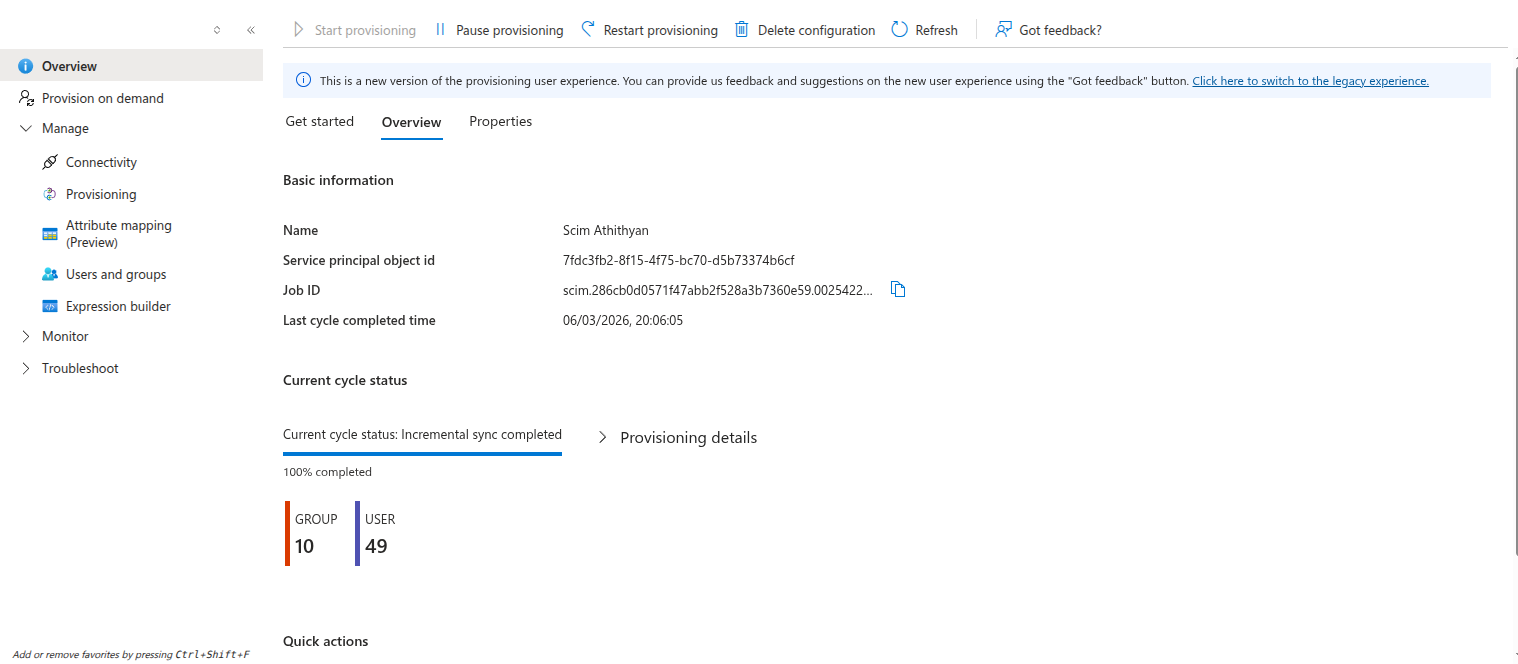
Step 2
Click Attribute Mapping (Preview).
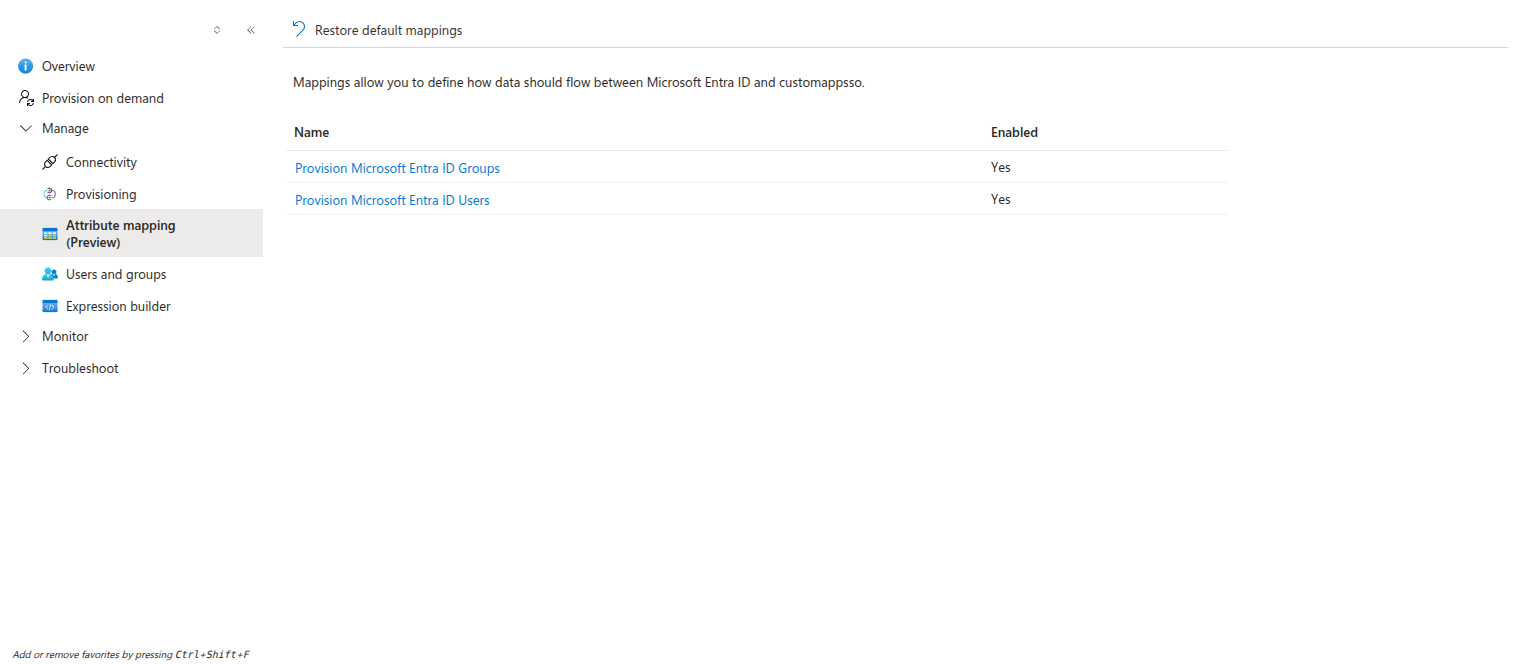
Step 3
Select Provision Microsoft Entra ID Users.
Step 4
Click Show advanced options, then select Edit attribute list for customappsso.
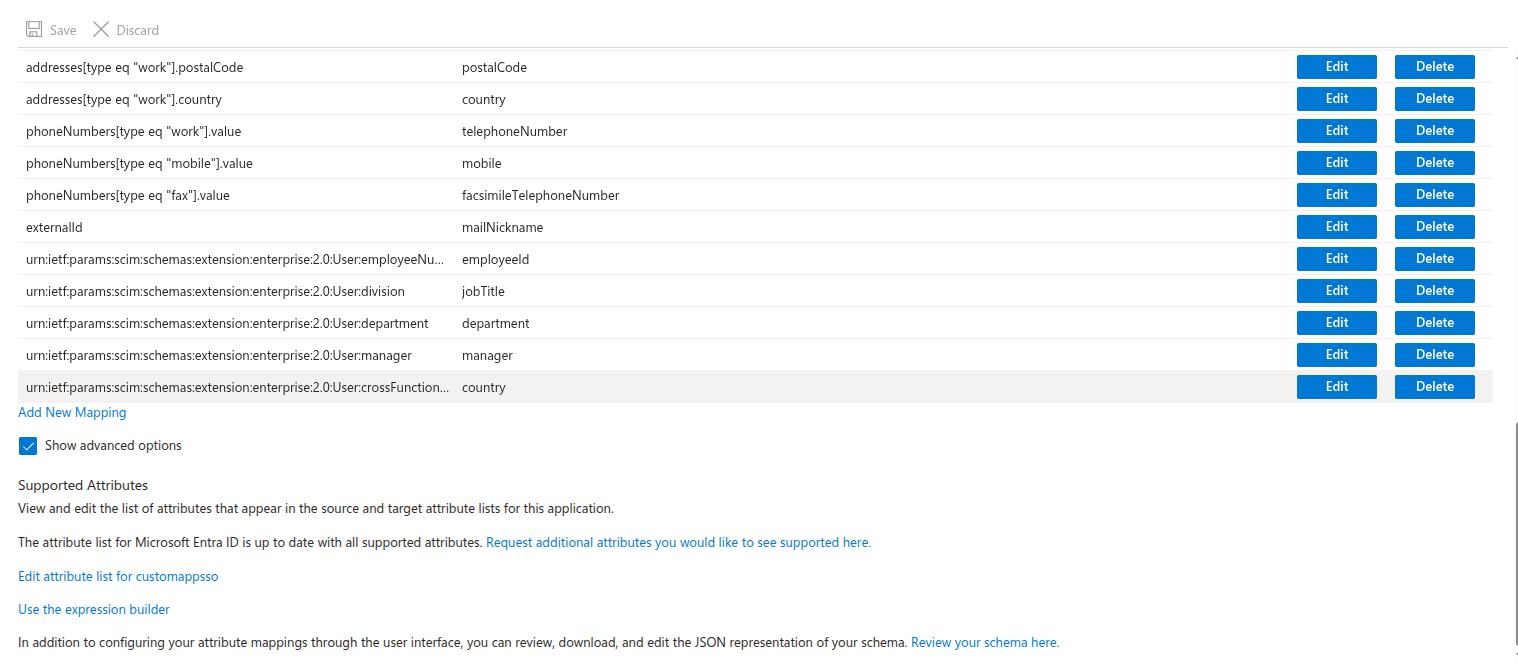
Step 5
Add the following attribute name for Sub-Department mapping:
Eg: sub-department urn:ietf:params:scim:schemas:extension:enterprise:2.0:User:division
Then click Save.
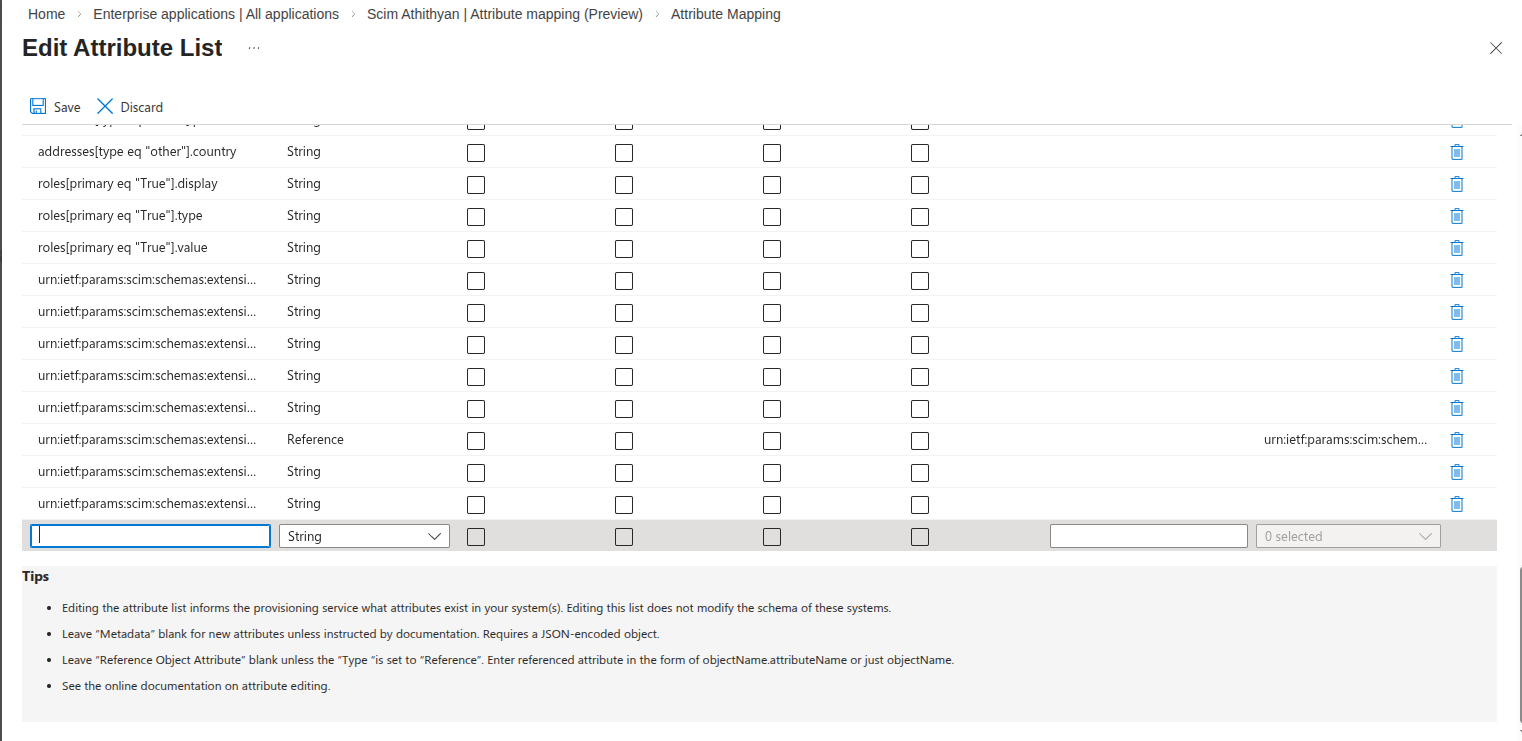
Step 6
Click Add New Mapping.
Enter the Source Attribute and the corresponding Target Attribute, then click OK and Save the changes.
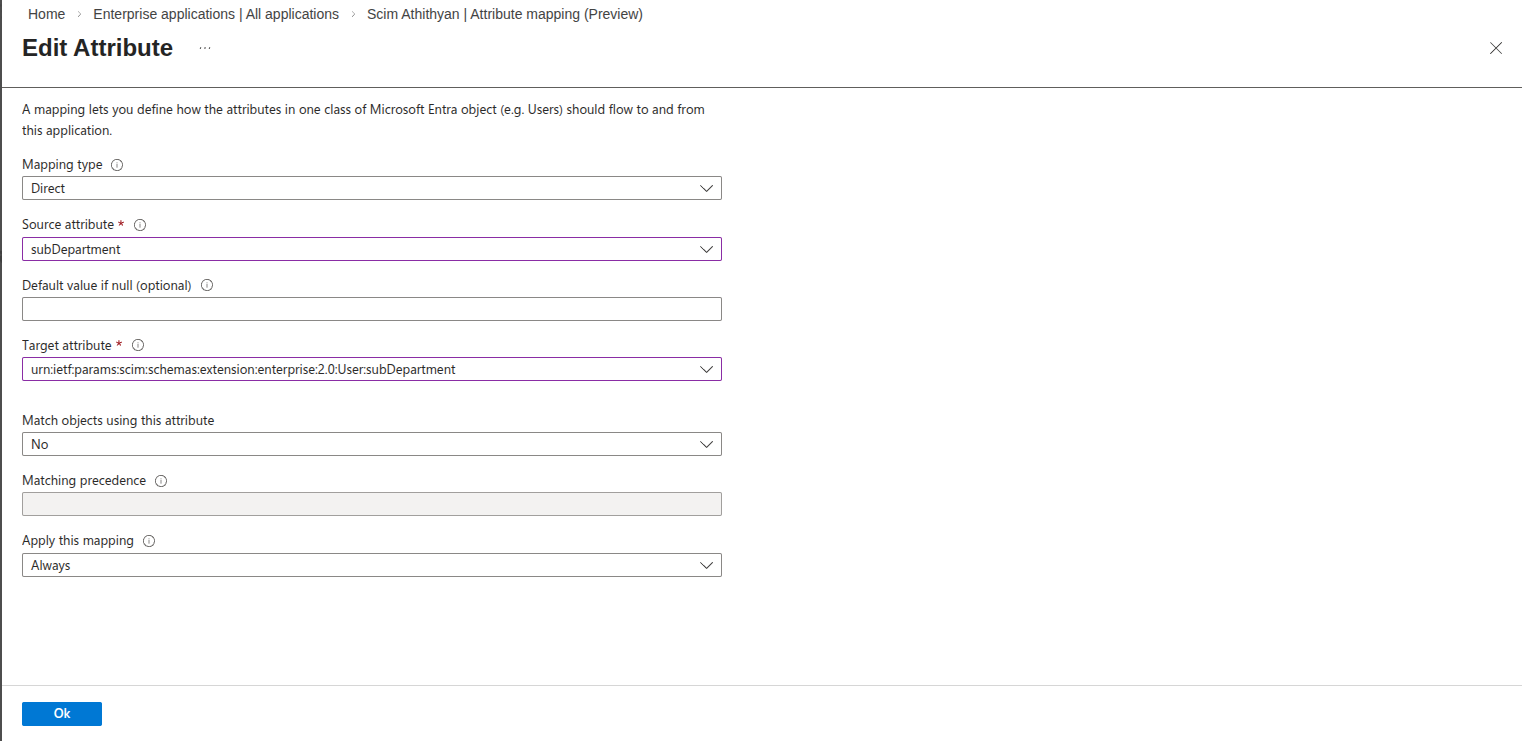
After completing these steps, the new attribute mapping will be created and will be used during SCIM provisioning to synchronize the attribute from the identity provider to the Profit.co application.
Improved User Identification for Terminated Users
If a user already exists in Microsoft Entra ID and is newly added to a group, Azure AD sends a PATCH request to Profit.co. In this scenario, the user exists in Azure AD but is new to Profit.co, and the PATCH request does not include the user's first name or last name.
During user creation, Profit.co checks its database for an existing terminated user record. If a matching record is found, the first name and last name from that record are used to complete the user profile. If no matching record exists, Profit.co uses the user's email address as the last name, as the last name field is mandatory.