
Xero is a cloud-based accounting platform that helps businesses manage their finances, including Profit and Loss reporting, Balance Sheet data, and real-time financial performance tracking. It is widely used by small and mid-sized organizations to monitor revenue, expenses, and overall financial health.
The Xero integration with Profit.co allows you to connect your Xero financial reports directly to Key Results, enabling automatic progress tracking based on live financial data. Check-ins update automatically, so your OKR progress stays aligned with your actual financial performance without any manual input.
What This Integration Supports
With the Xero integration, you can:
- Connect your Xero account to Profit.co using a secure OAuth sign-in flow
- Link Xero financial report data to Key Results for automated progress tracking
- Support Increase KPI, Decrease KPI, and Control KPI Key Result types
- Pull data from Profit and Loss reports and Balance Sheet reports
- Configure sync frequency – daily or based on your Key Result check-in cadence
- Automate check-ins so Key Result progress updates without manual entry
Prerequisites
Before starting, ensure the following requirements are met:
- You have a valid Xero account with access to financial reports
- You are logged in as a Super User in Profit.co
- The Key Results you want to integrate are of type Increase KPI, Decrease KPI, or Control KPI
Note: Only Super Users can configure the Xero integration in Profit.co.
Configure Xero in Profit.co
The following steps walk through connecting Xero to Profit.co and linking your financial data to Key Results.
Step 1
Navigate to the Xero connector in Profit.co to begin the setup.
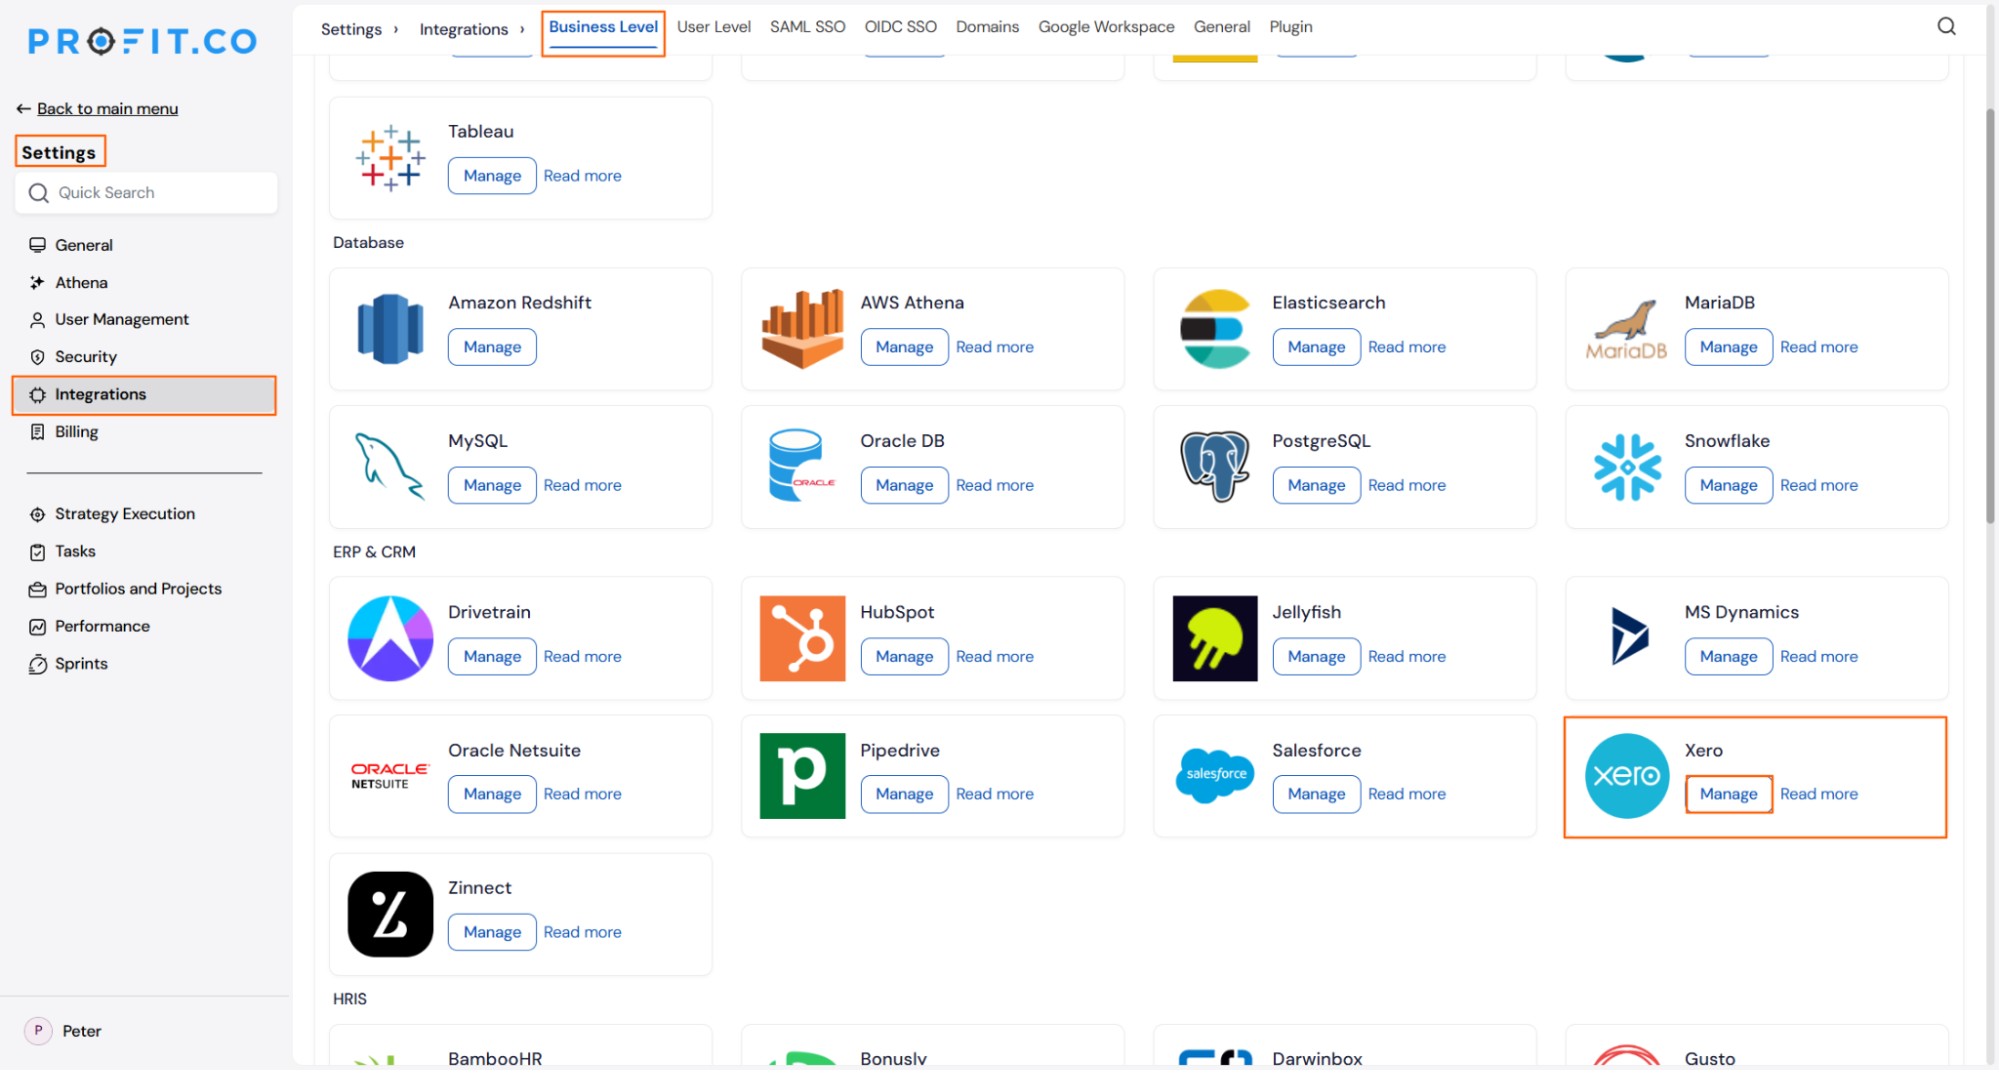
- Navigate to Settings from the left navigation panel.
- Click Integrations and select the Business Level tab.
- Locate Xero and click the Manage button.
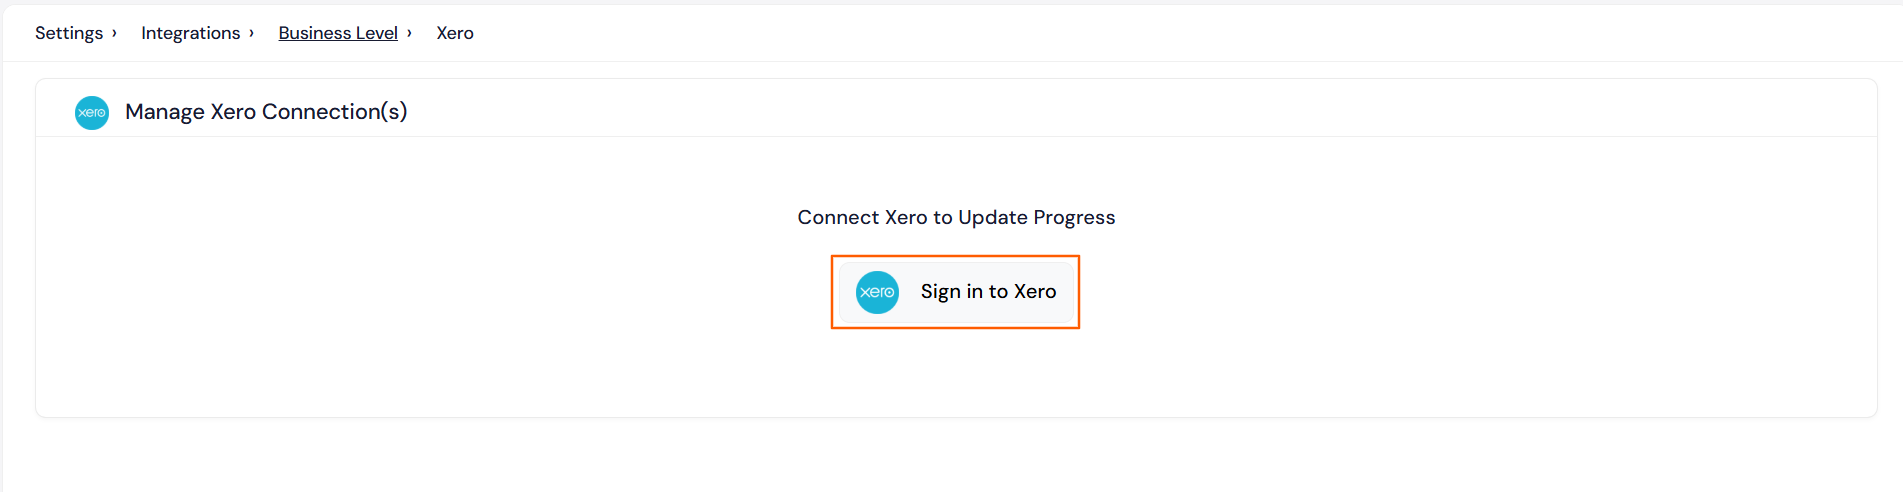
- Click the Sign in to Xero button.
Step 2
Enter your connection details and authenticate with your Xero account.
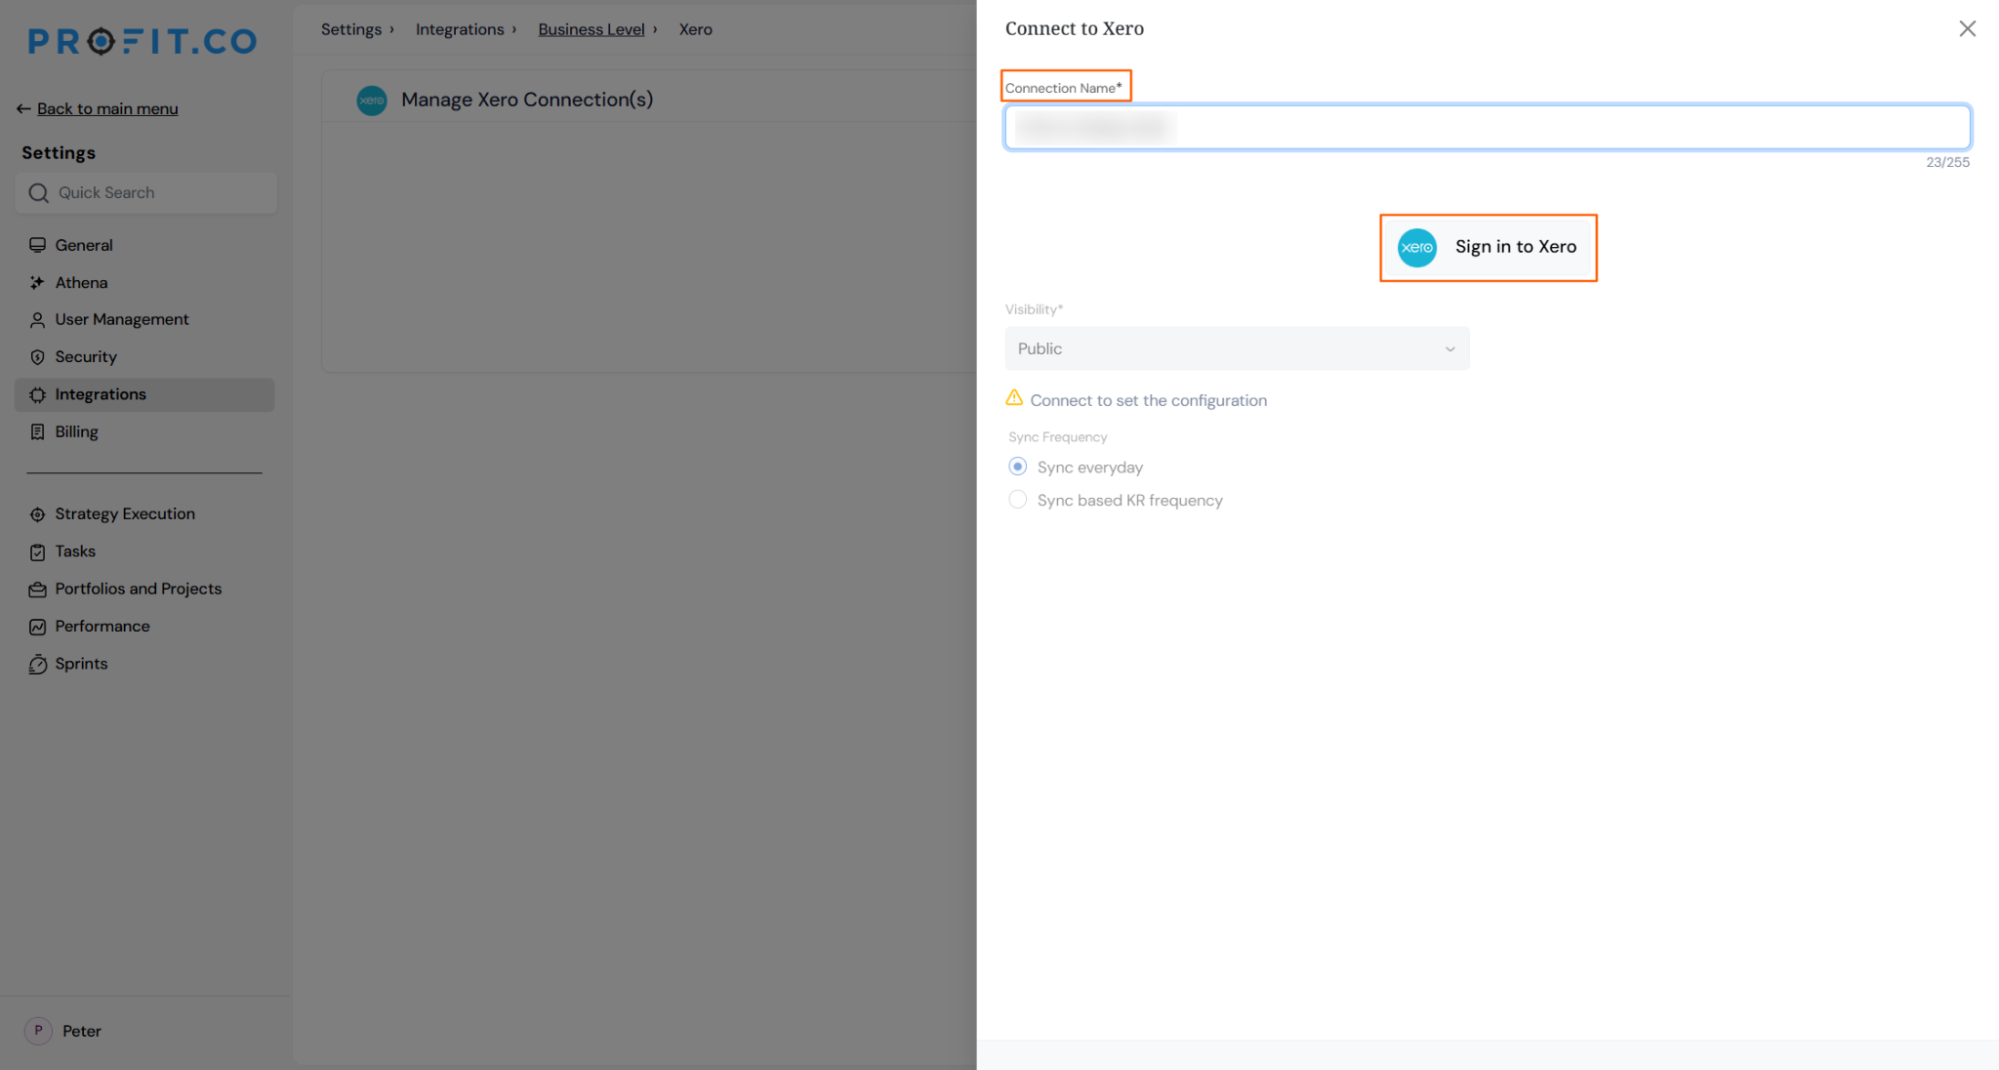
- In the popup, enter your Connection Name.
- Click Sign in to Xero – you will be automatically redirected to the Xero login page.
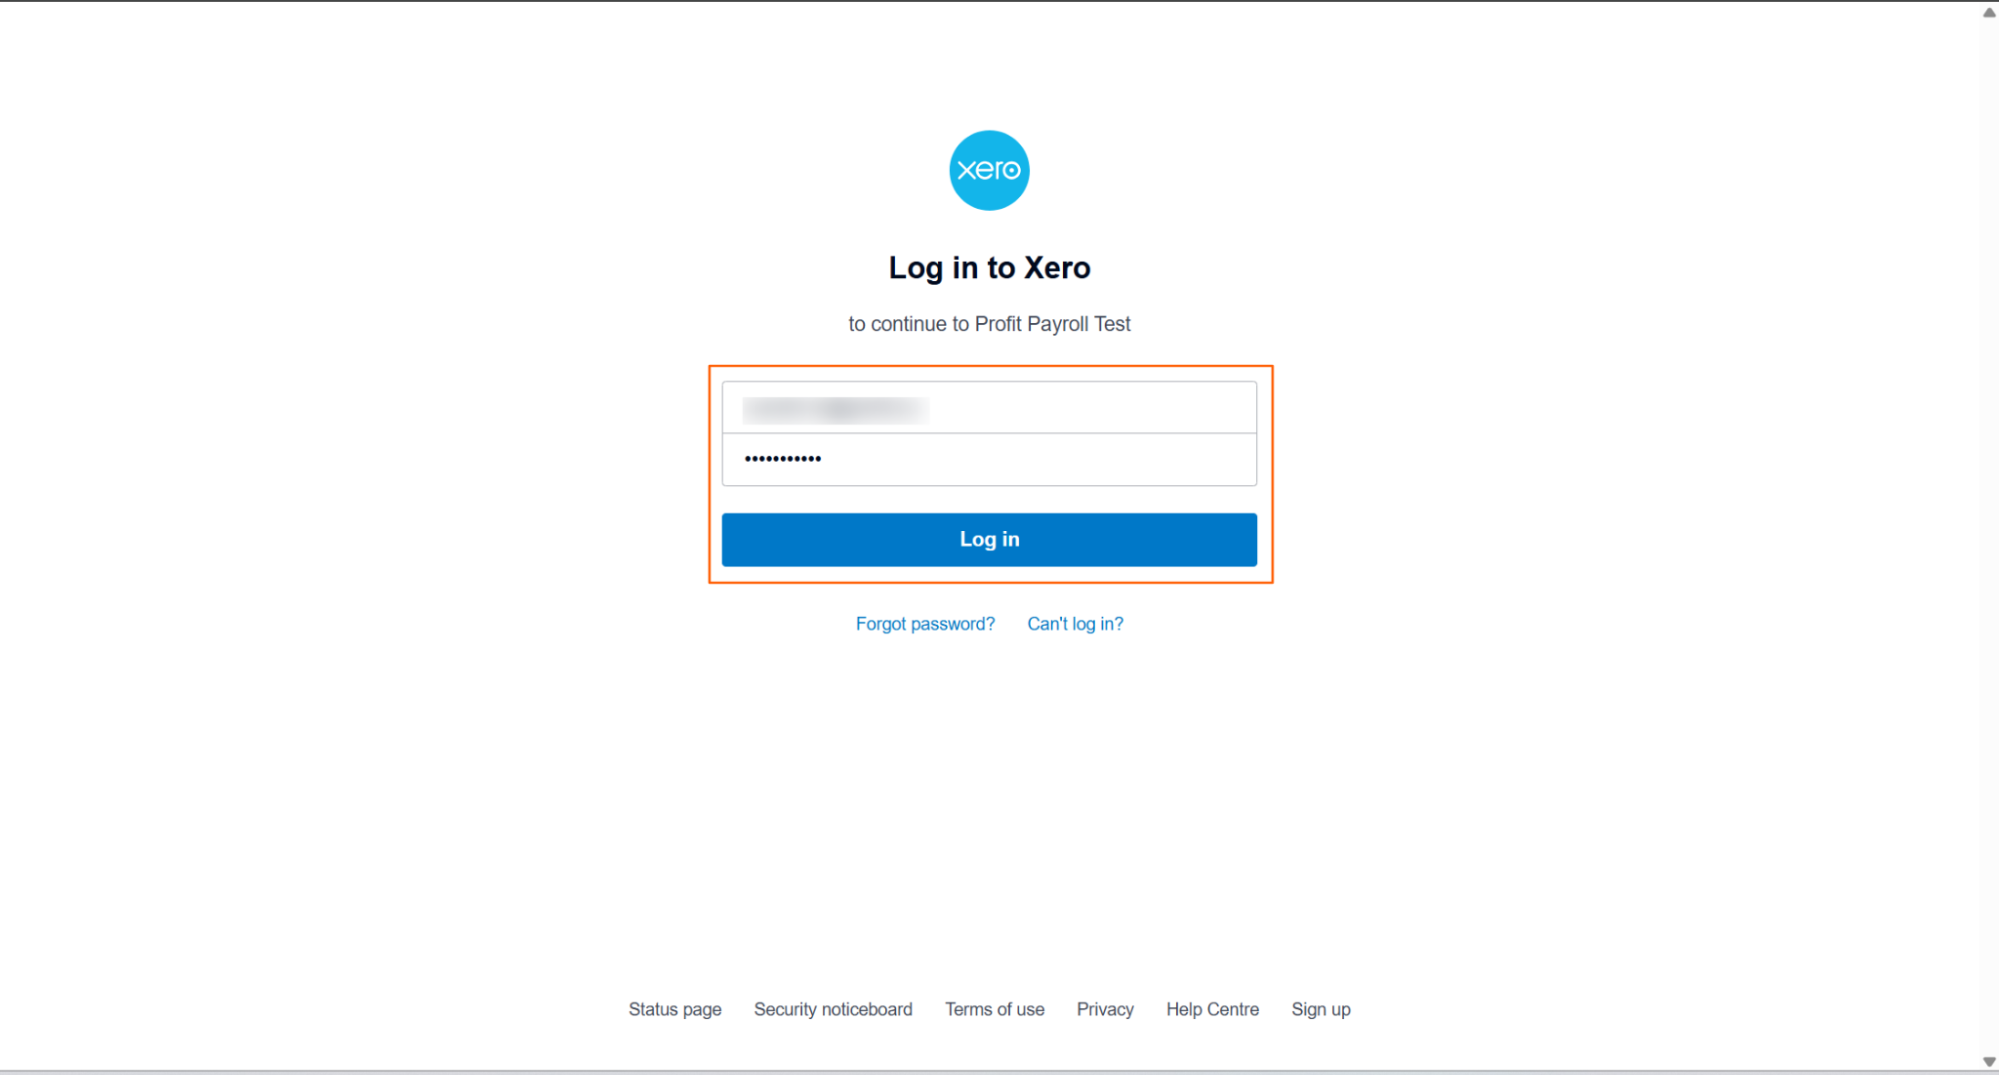
- Enter your Xero Email and Password.
- Grant Profit.co access to your Xero account. The connection will be established automatically.
Step 3
Configure how often Profit.co fetches data from Xero and who can see the connection.
- Once connected, click the Edit button on the connection.
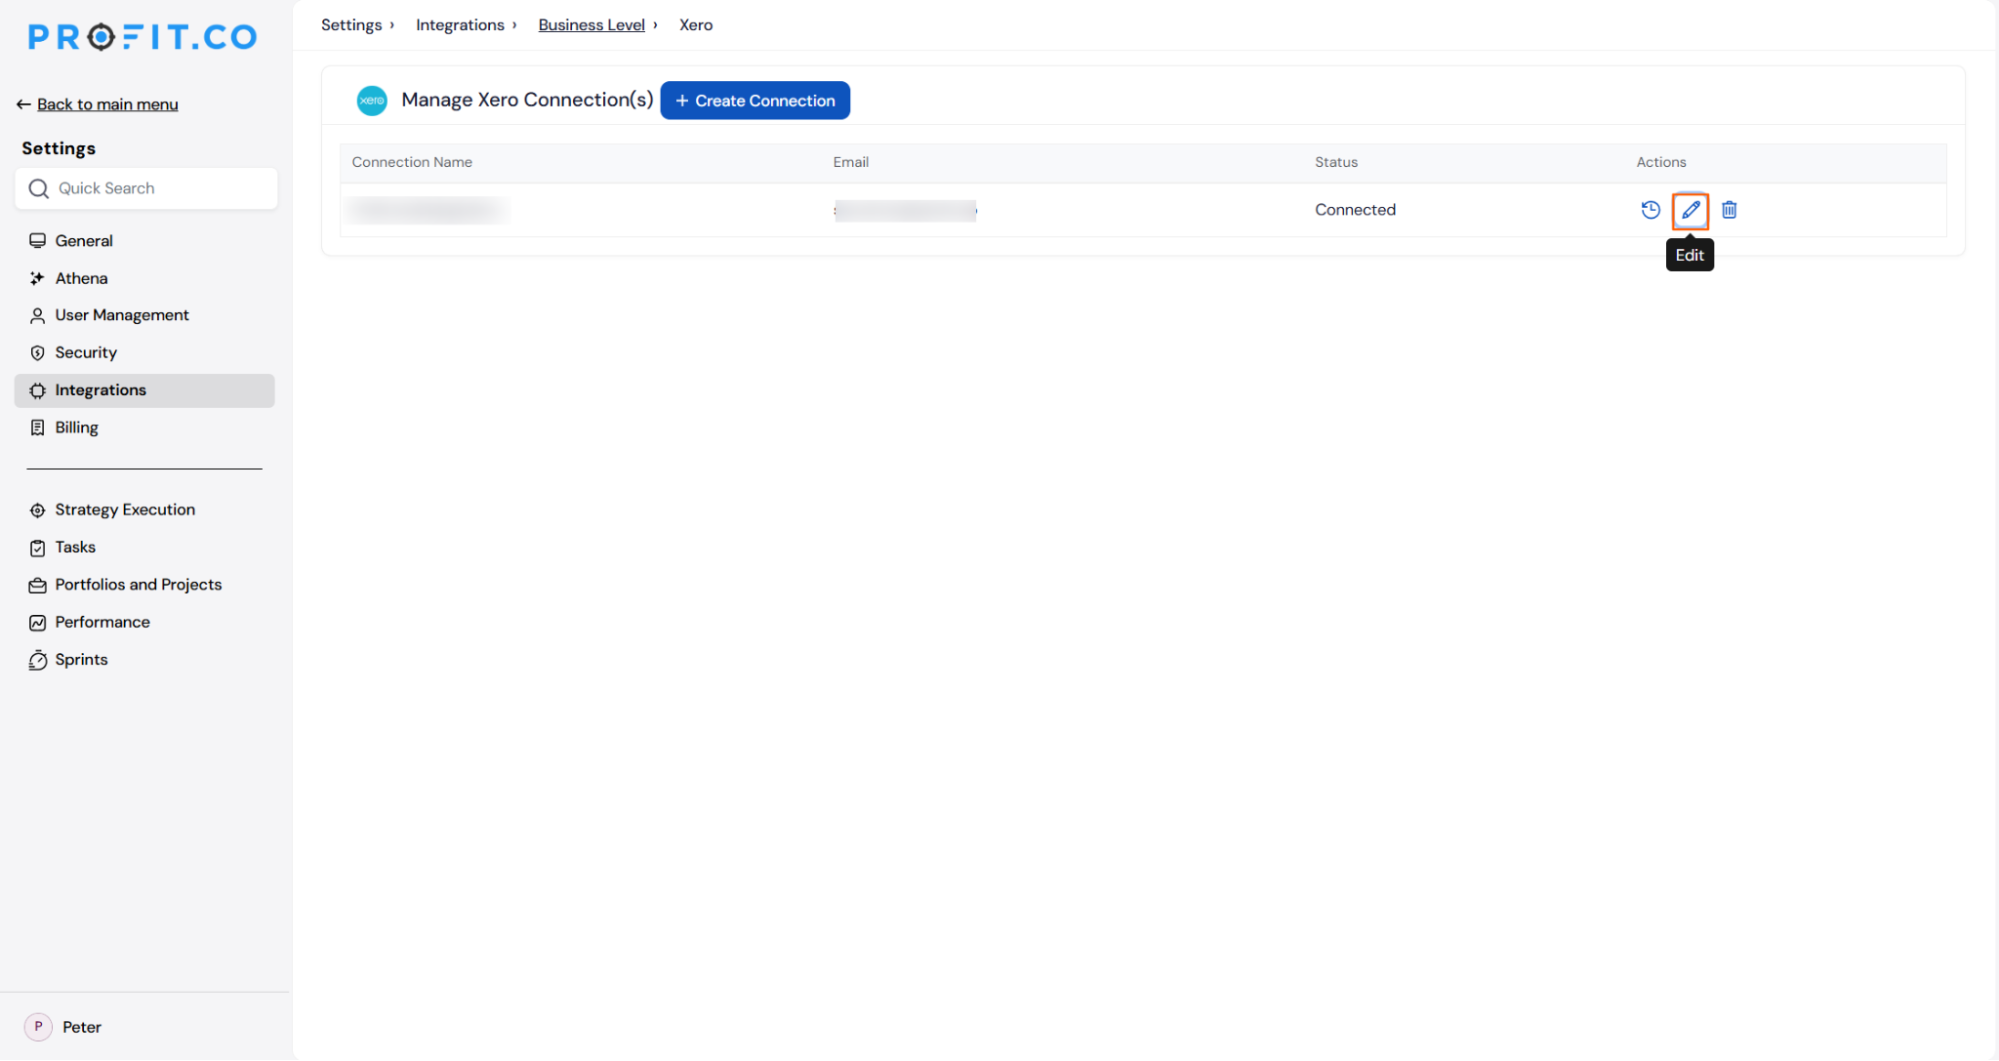
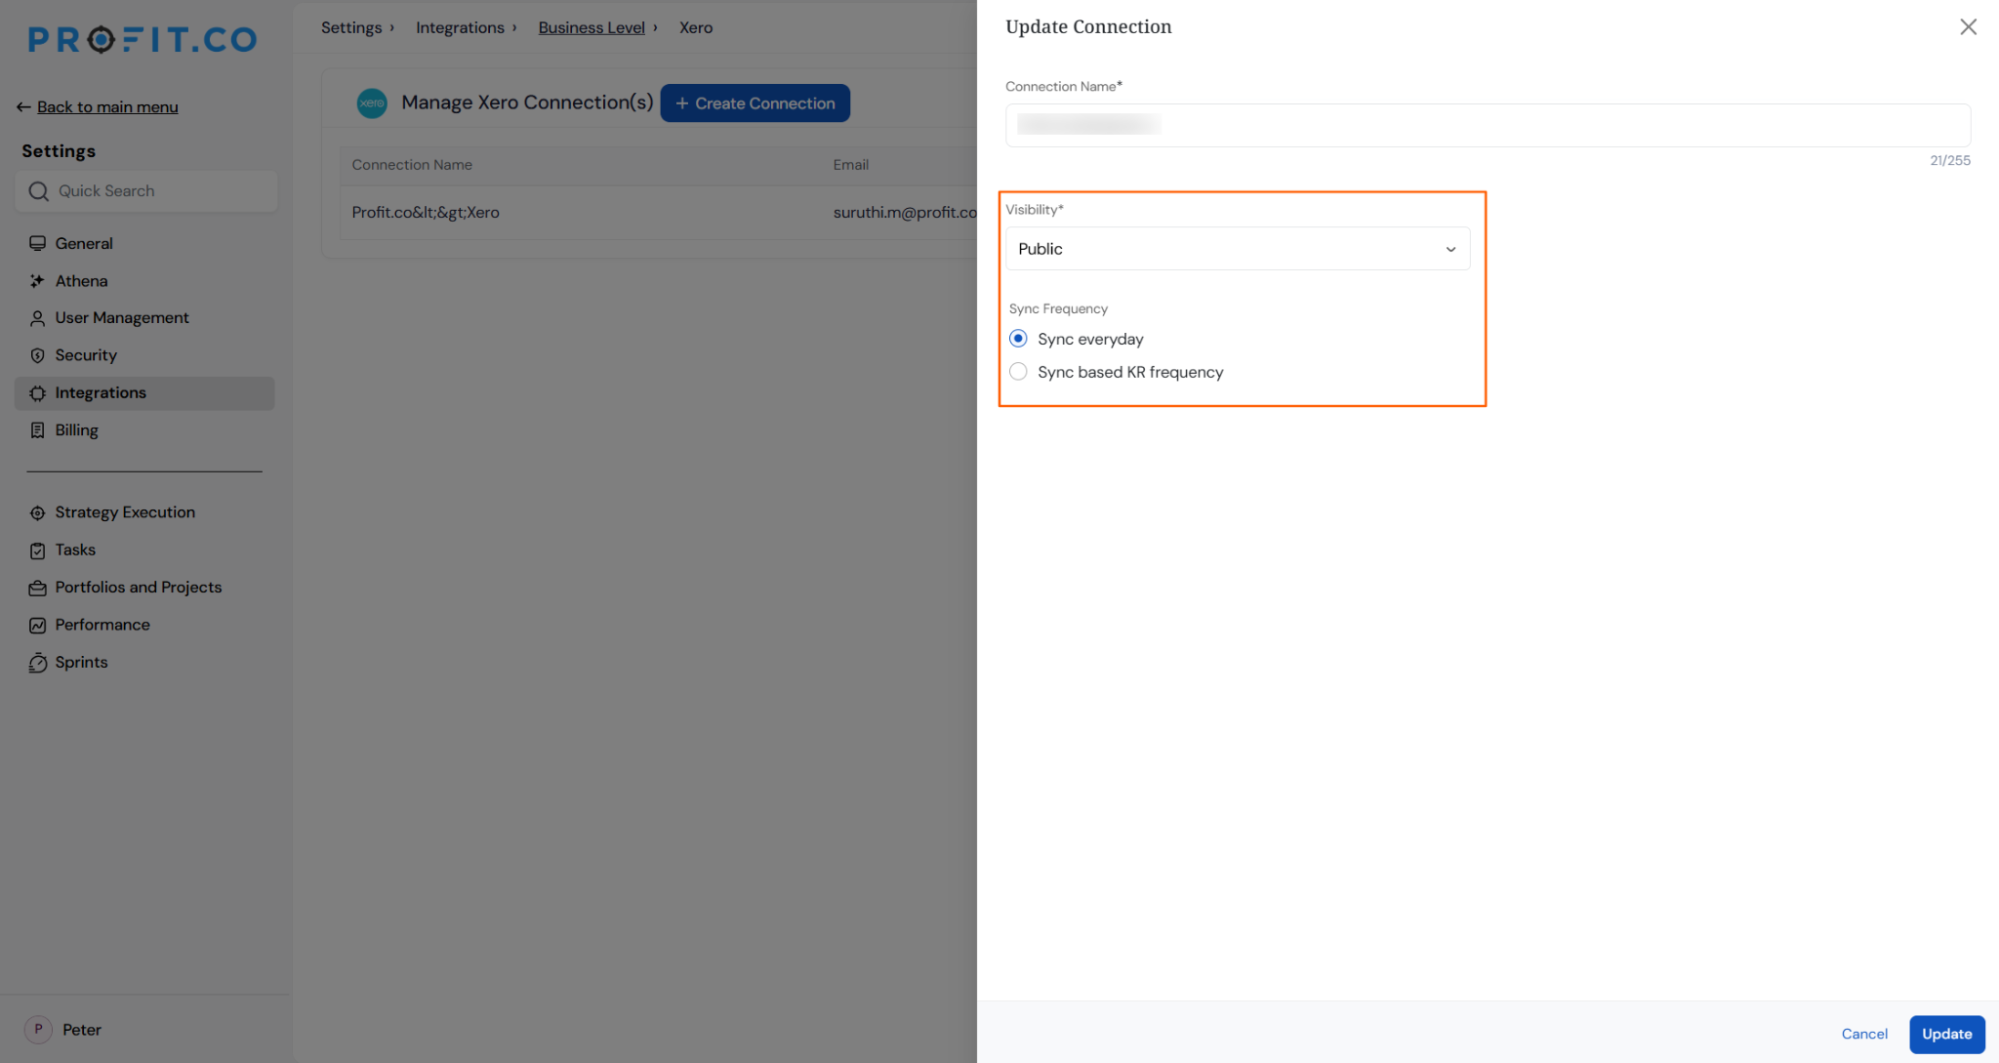
- Set the Visibility to control which users can access this connection.
- Set the Sync Frequency based on how often you want progress to update:
- Sync Every Day – Profit.co fetches data from Xero and updates Key Result progress daily.
- Sync based on KR Frequency – Progress updates according to your Key Result check-in frequency. For example, if your check-in frequency is set to Every Friday, the system will update progress every Friday.
- Click Save to apply the settings.
Step 4
Connect your Xero financial data to a Key Result to enable automated progress tracking.
- Navigate to the OKR page in Profit.co.
- Create a new Key Result using the form method.
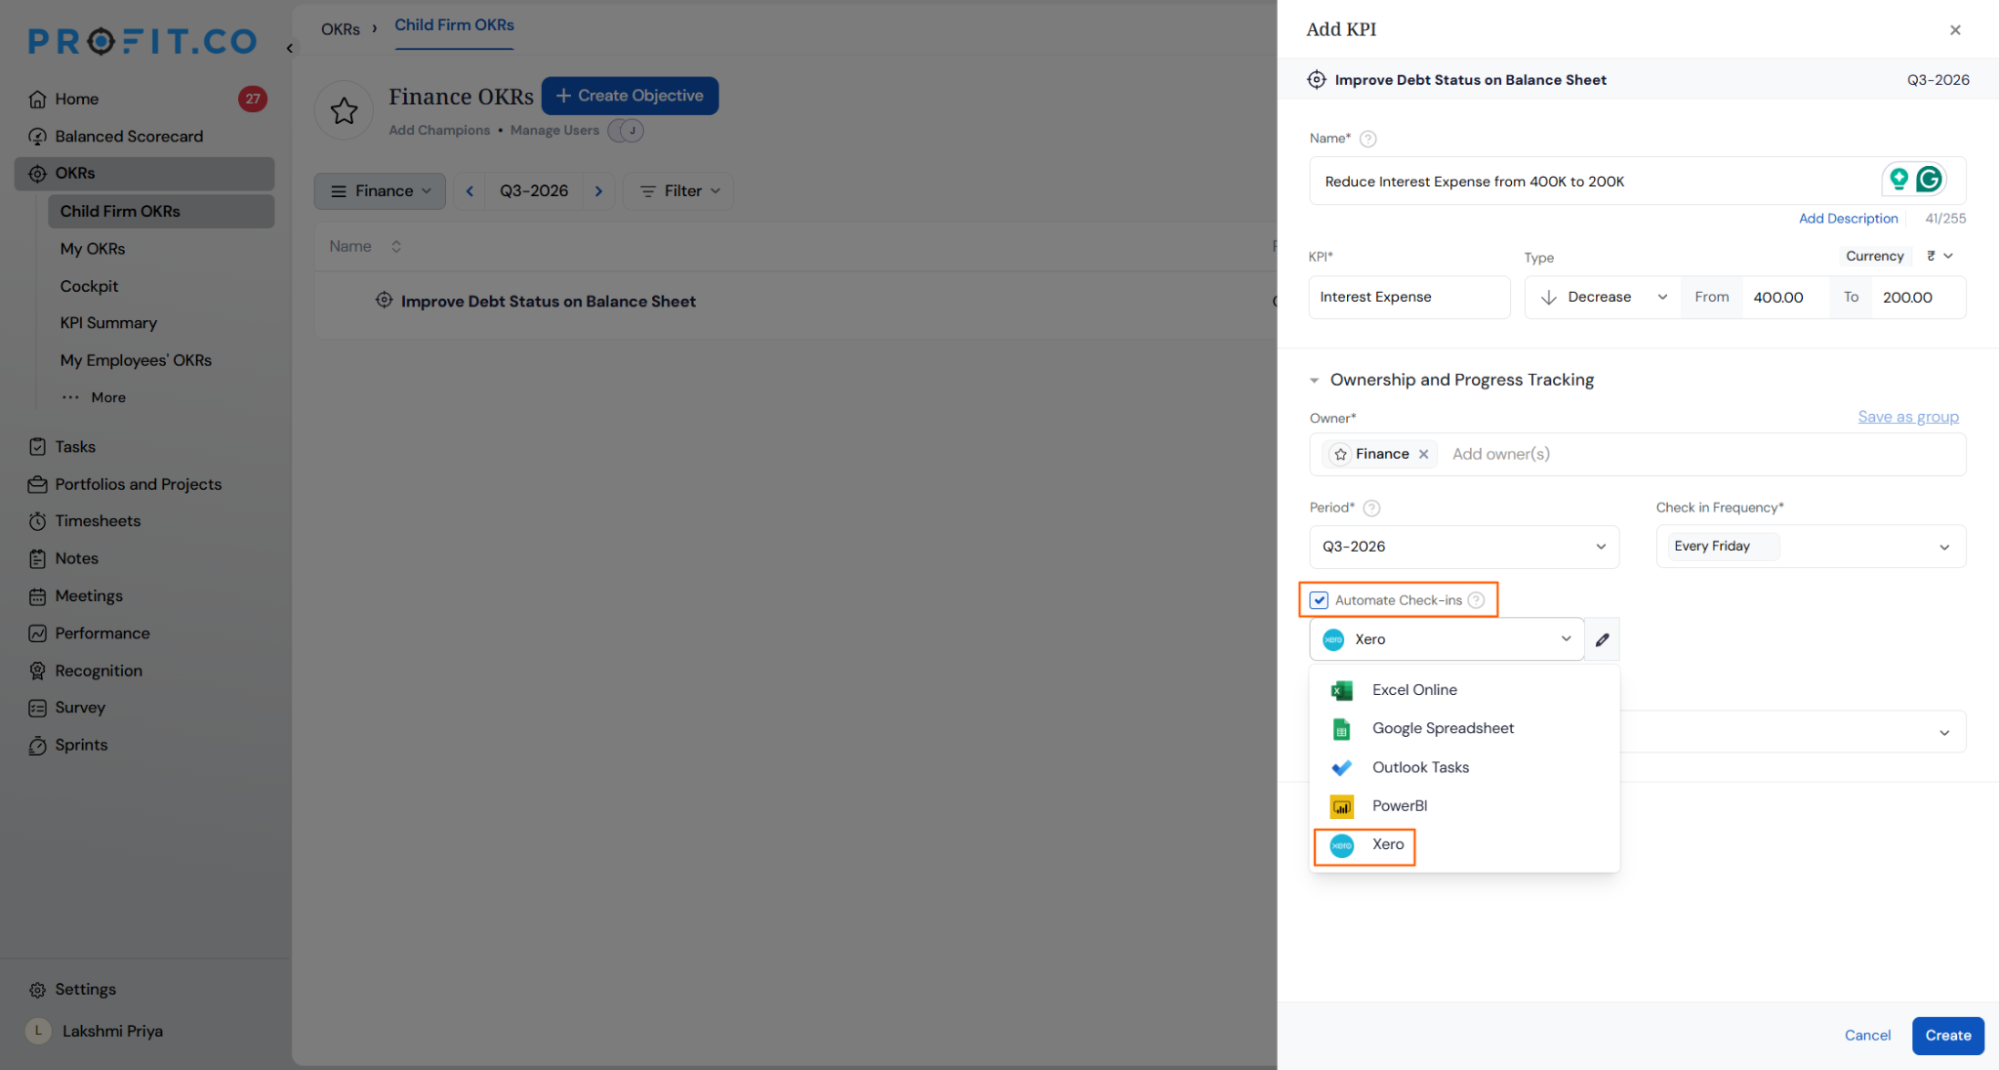
- Enter the Key Result Name and select one of the supported types: Increase KPI, Decrease KPI, or Control KPI.
- Select Automate Check-ins and choose Xero from the Connection dropdown.
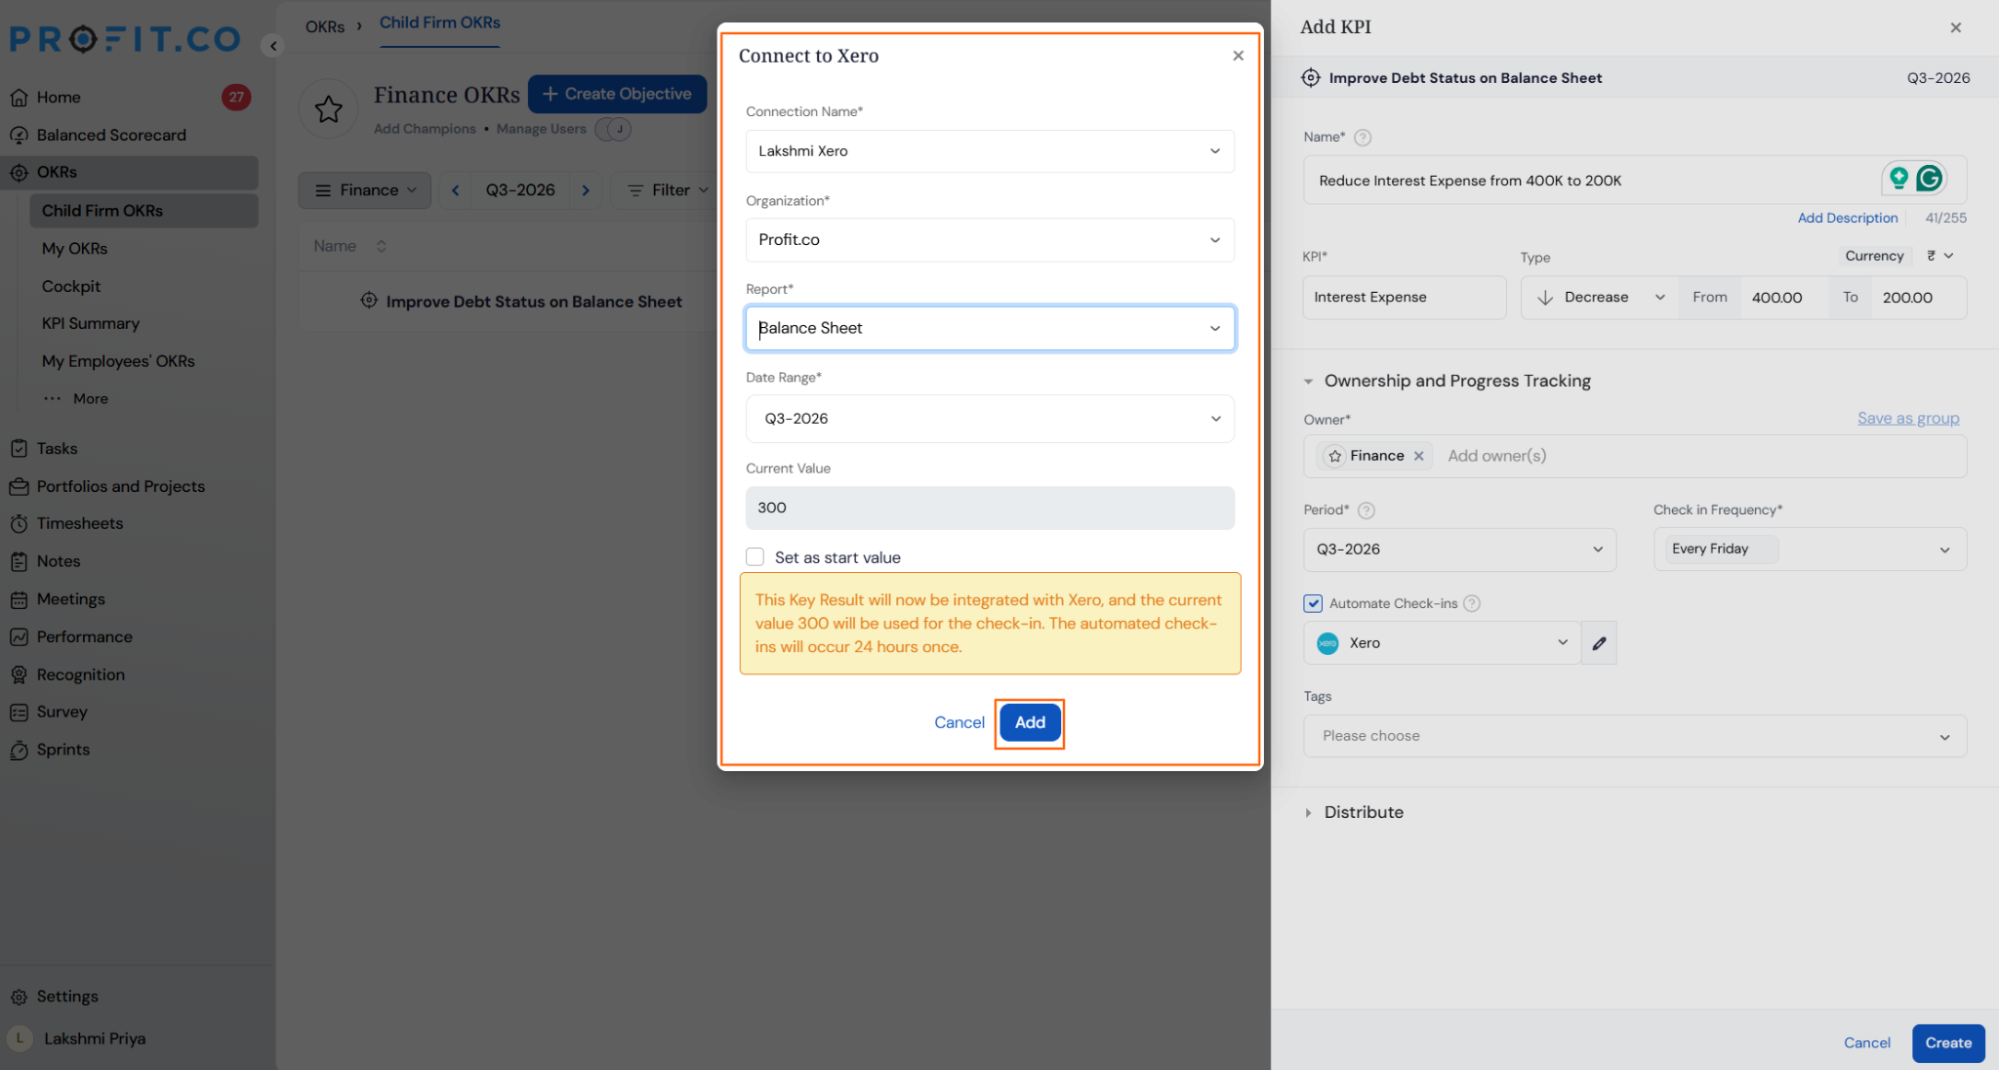
- Fill in the Xero configuration details:
- Connection Name – Select the Xero connection you created.
- Organisation Name – Select the Xero organisation to pull data from.
- Report – Choose either Profit and Loss or Balance Sheet (these are the only supported report types).
- Date Range – Select the reporting period for the data.
Note: Profit.co displays Xero values in the same format as they appear in the Xero interface. If a loss in the Profit and Loss report is displayed without the negative (−) sign in Xero, Profit.co will also display it without the negative sign.
- Optionally, enable the Set as start value checkbox to use the current Xero value as the Key Result start value.
- Click Add to save the configuration.
Note: Xero only supports Increase KPI, Decrease KPI, and Control KPI Key Result types.
Step 5
Once the Key Result is created, complete the first check-in to activate progress tracking.
- Locate the Key Result and click the Check-in button.
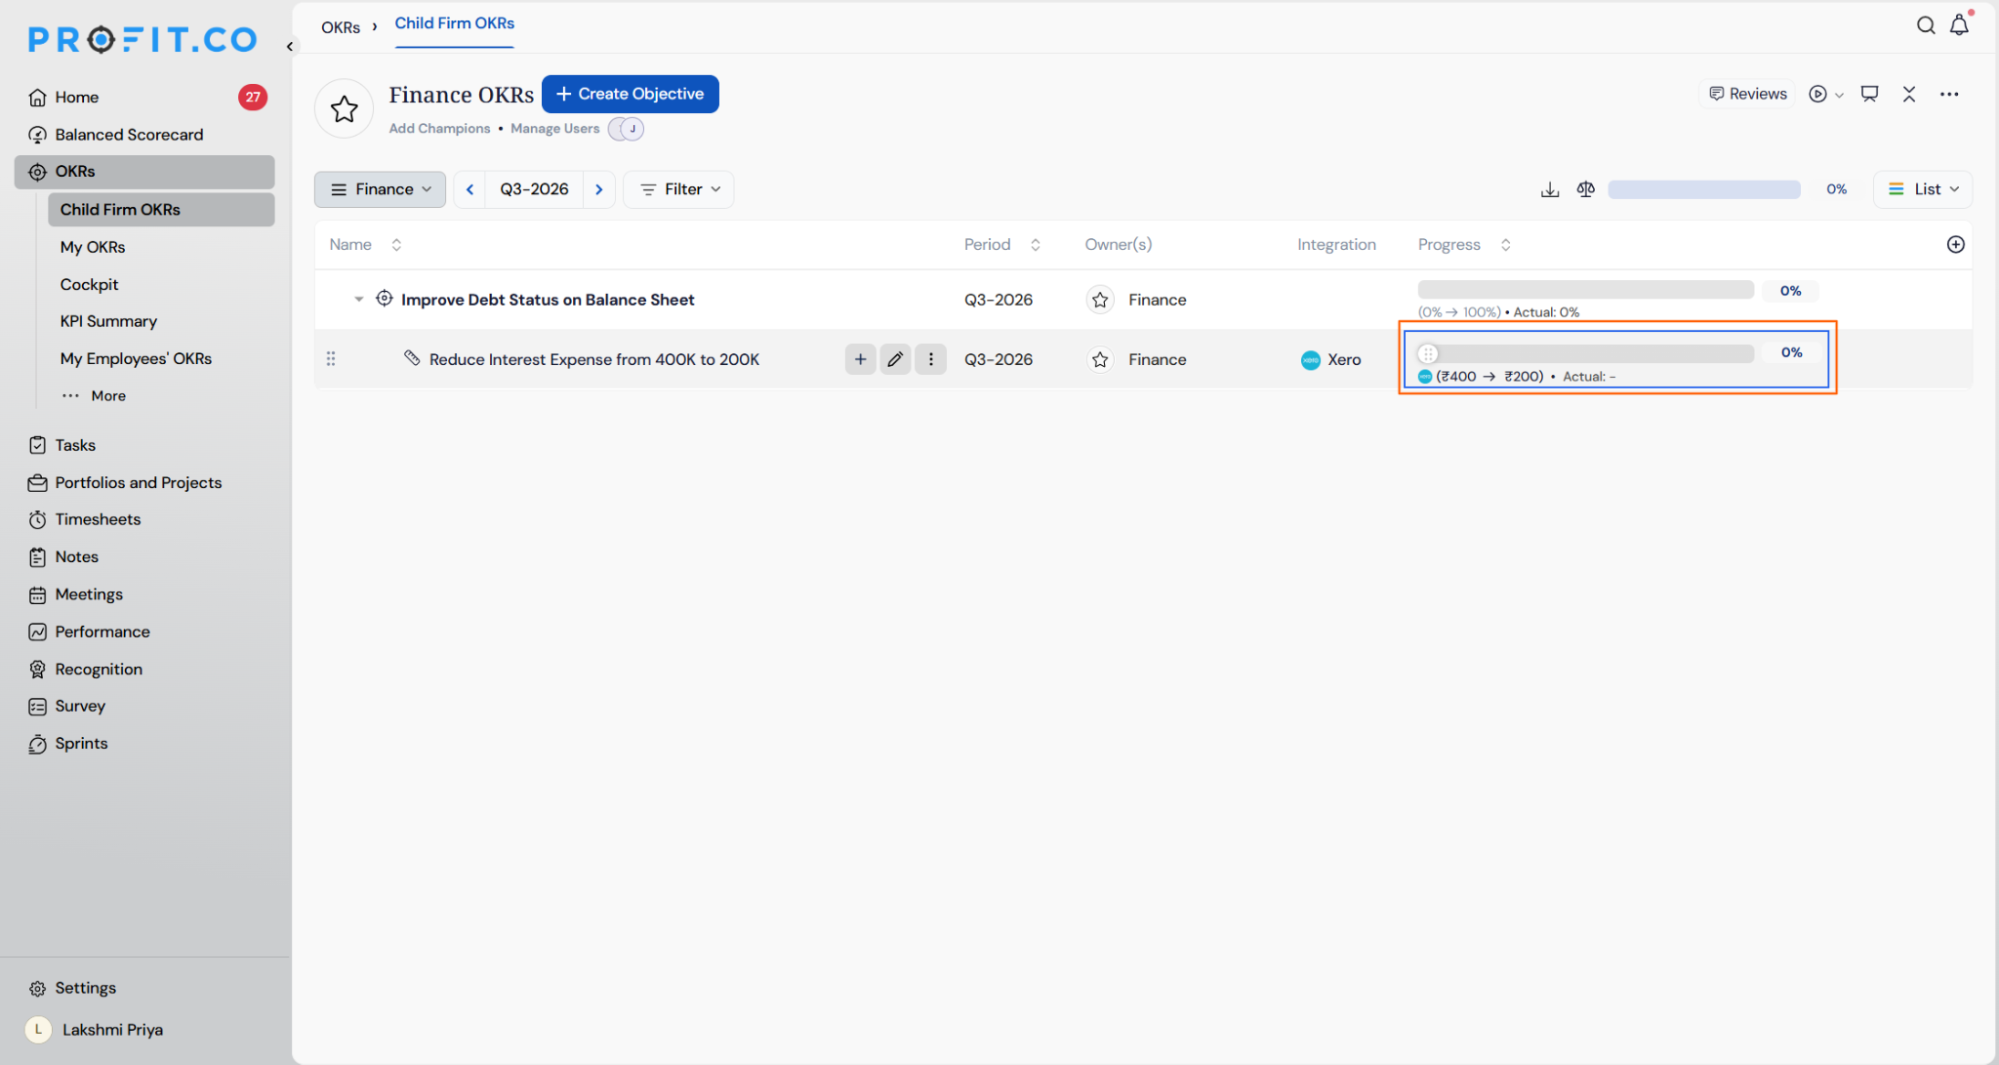
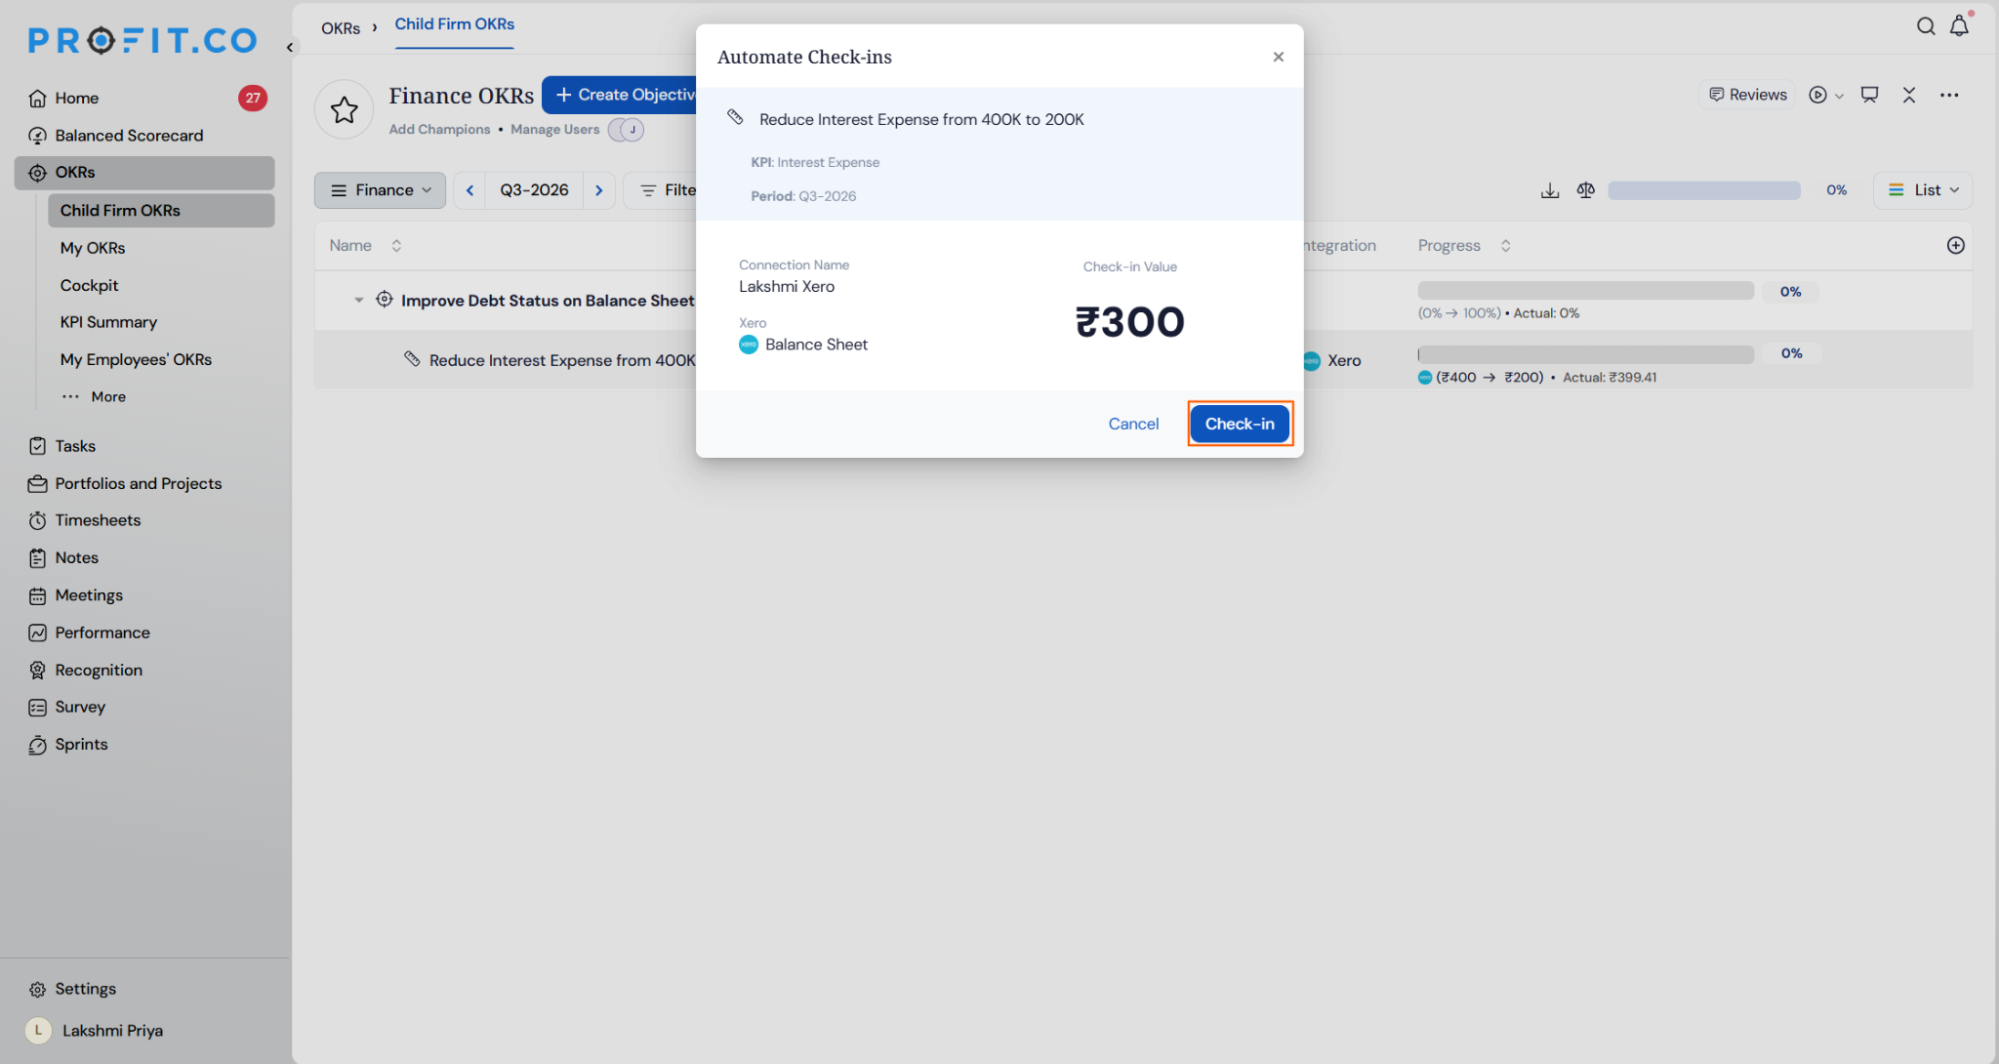
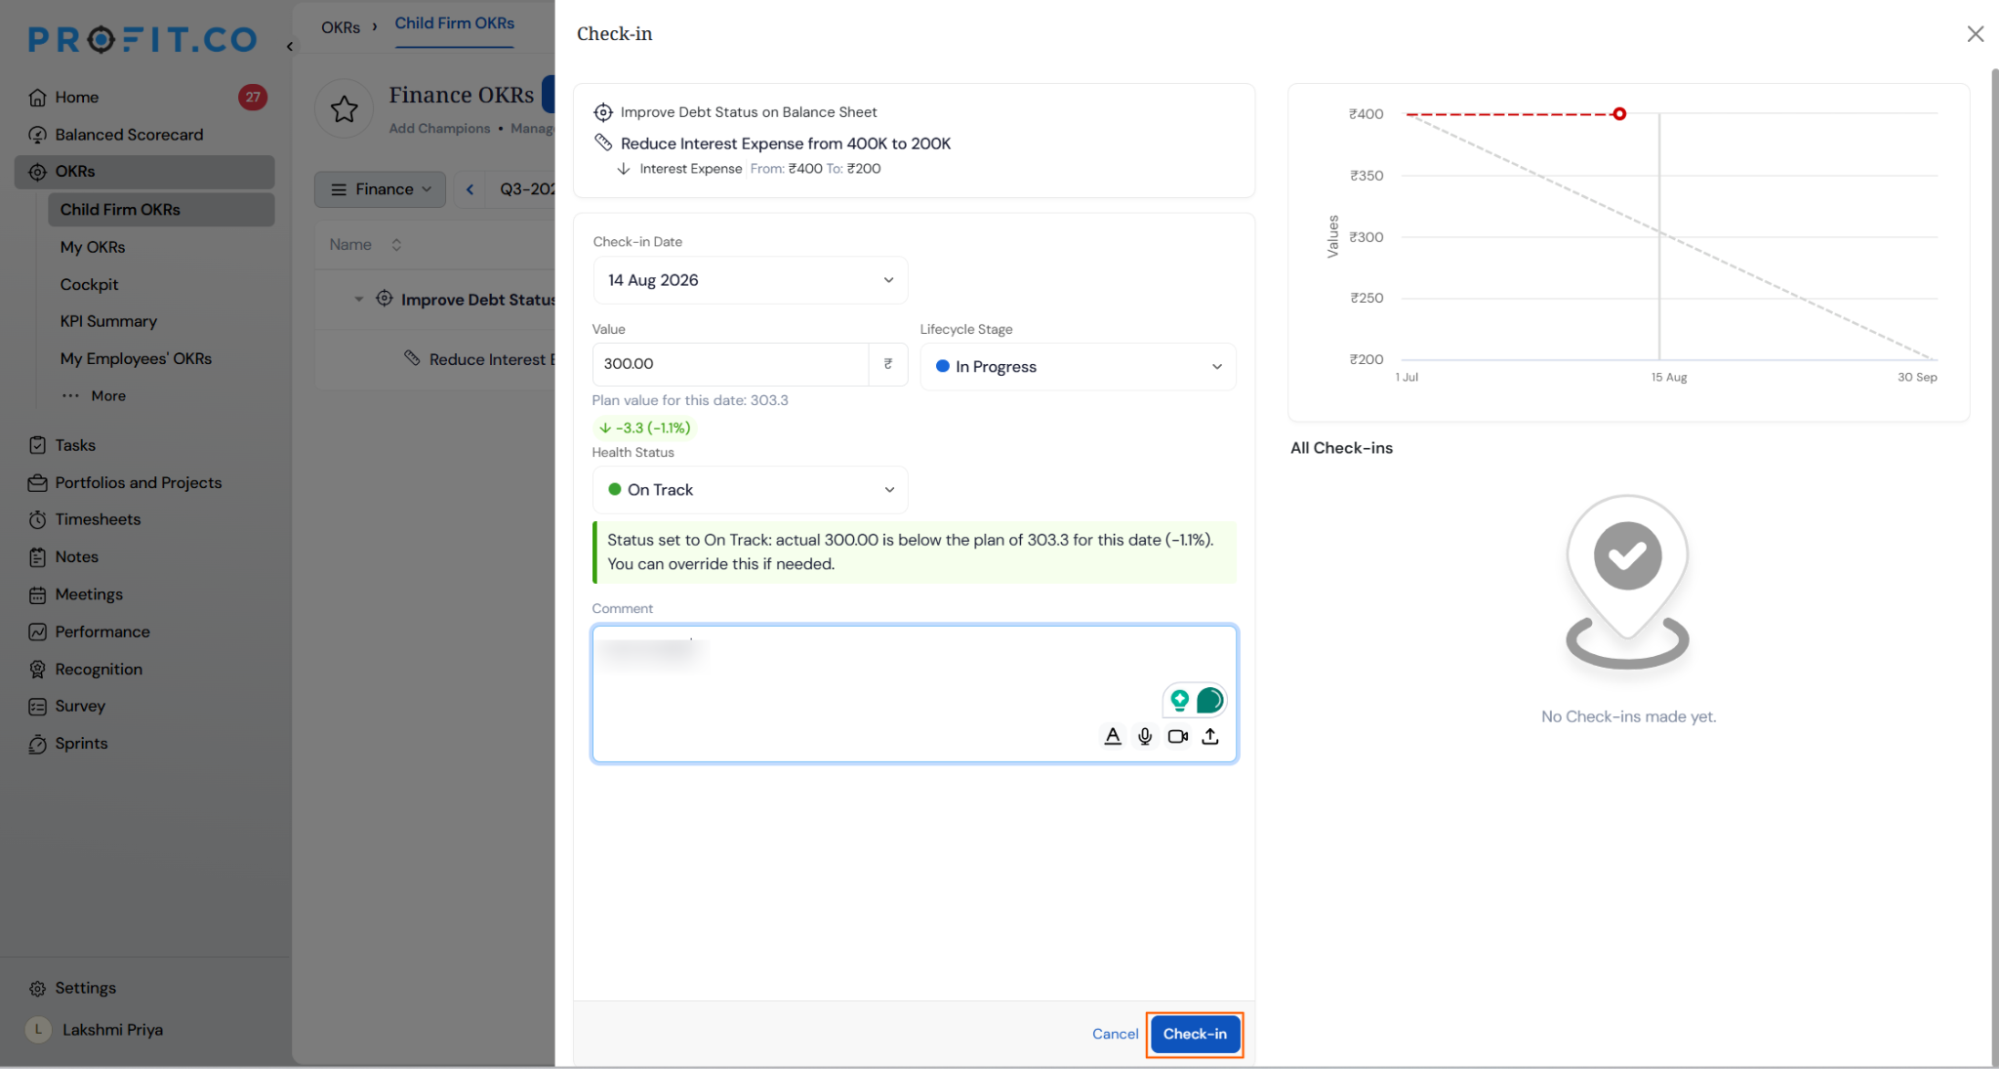
- You will be redirected to the check-in review page with the Xero value pre-filled.
- Click Checkin to record the progress and update the Key Result status.
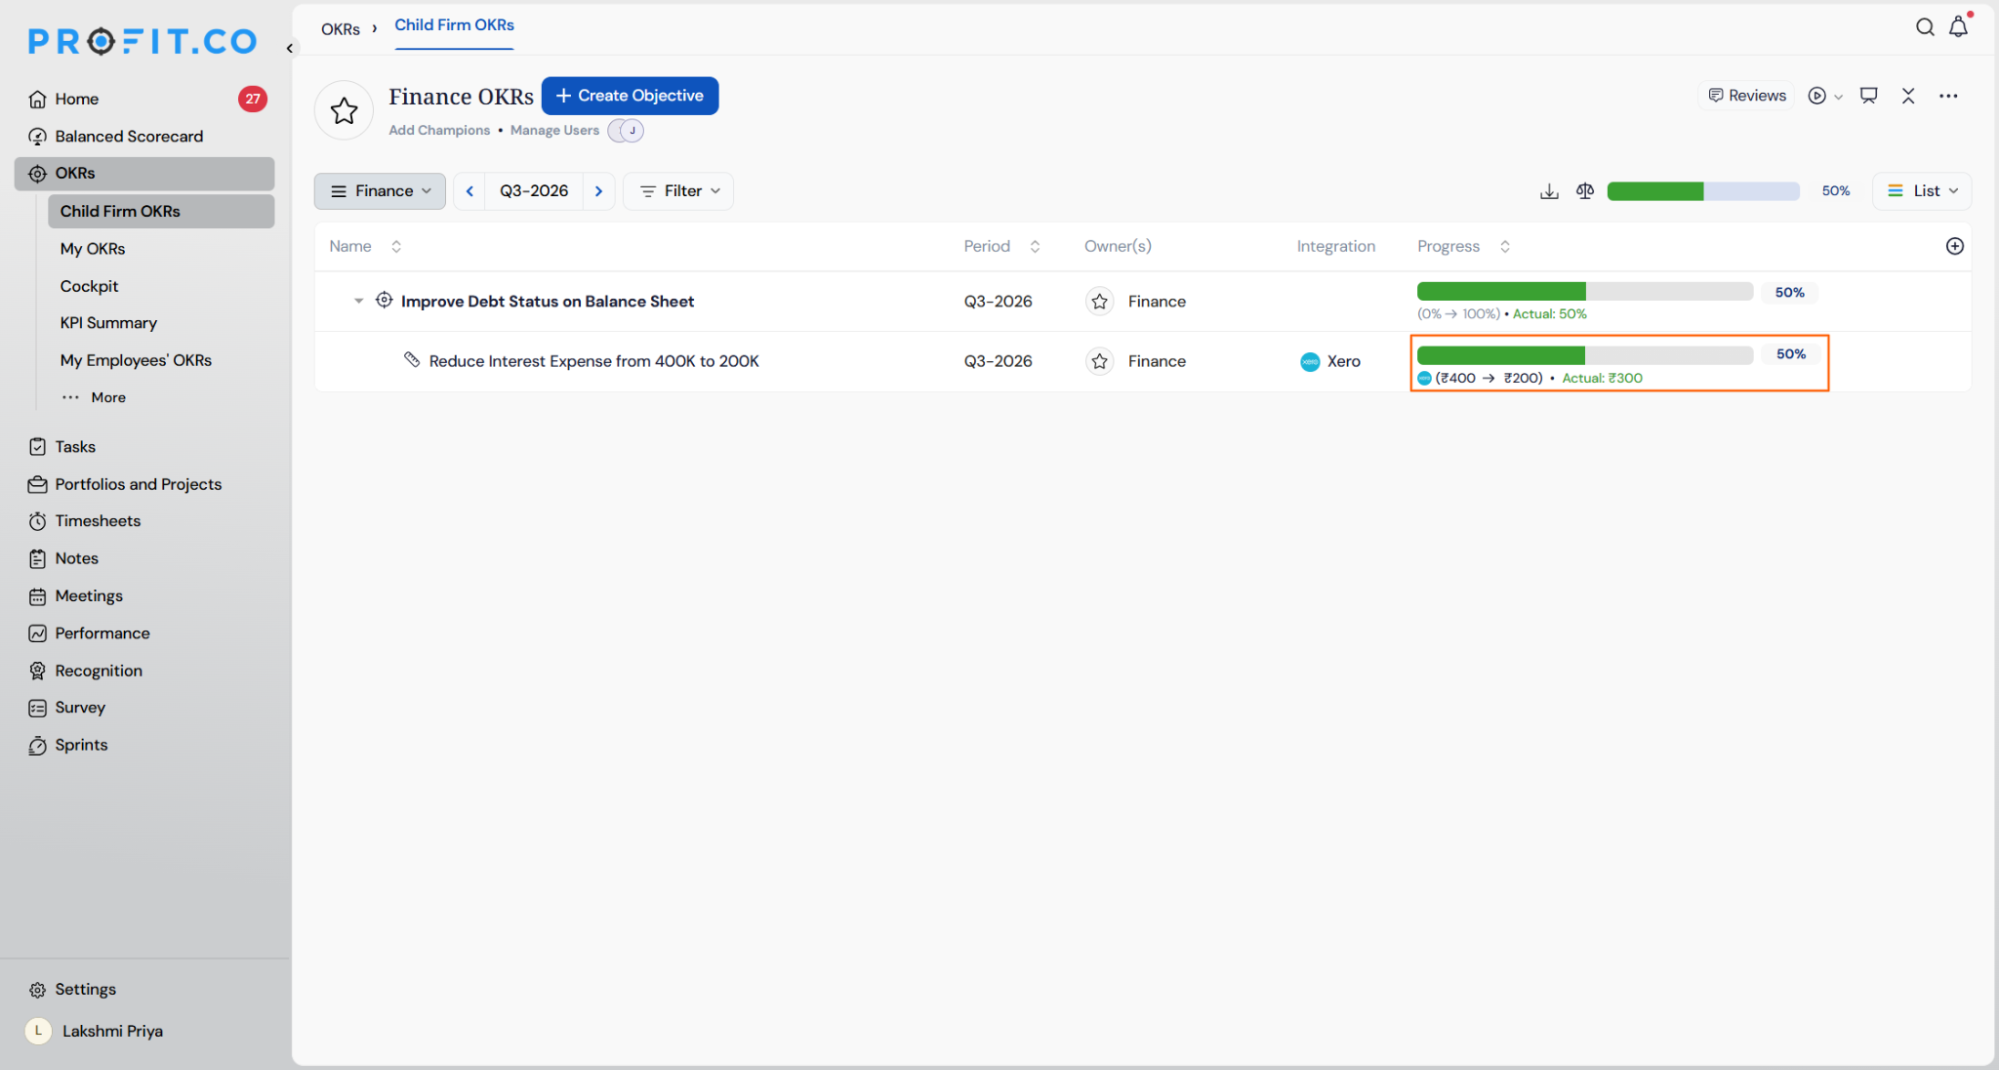
Note: After creating a Key Result with Xero, the first automatic check-in will run within approximately 5 minutes. Subsequent check-ins continue according to the regular schedule every day at 9:00 AM based on the user’s region.
Summary
By connecting Xero to Profit.co, your financial performance data flows directly into your OKRs, keeping Key Result progress automatically aligned with live Profit and Loss and Balance Sheet data. With configurable sync frequency and automated daily check-ins, your team always has an accurate, up-to-date view of financial goals without manual reporting.
